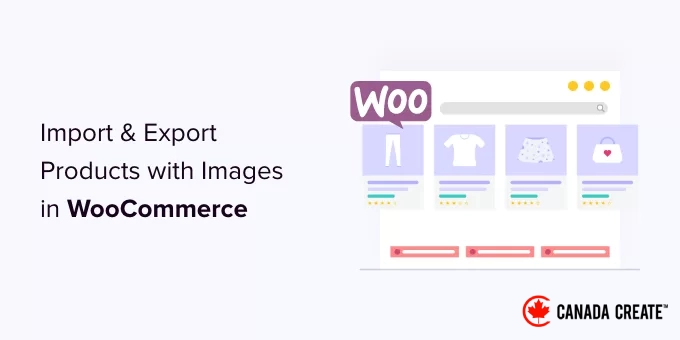
Managing a large product catalog in WooCommerce can quickly become overwhelming, especially when handling frequent updates, bulk modifications, or launching new products.
This is where the built-in import and export tools of WooCommerce come into play. By following the right workflow, you can save hours of manual labor and ensure your store operates efficiently as it expands.
At Canada Create™, we have utilized these tools to successfully launch high-volume stores and simplify product management for clients with thousands of SKUs. Over time, we have honed the process into a straightforward and dependable system that anyone can implement.
In this guide, we will guide you through the process of importing and exporting products in WooCommerce using both the native tools and a powerful plugin for enhanced flexibility.
Why Import and Export Products in WooCommerce?
Many users need to import and export WooCommerce products for various reasons.
- You might want to transfer products from one WooCommerce store to another.
- You may wish to launch an online store on a new WordPress website while retaining the same WooCommerce products.
- If you’re relocating your website to a new server, you might need a more efficient way to transfer products.
- You could be looking for a quicker method to add your products to multiple stores that you manage.
- If you need to update product details such as prices, images, and descriptions.
- You may need to refresh your inventory management systems.
- If you want to export products as a backup solution to prevent data loss.
- And more.
Typically, when transferring your website to a new server, you can clone your entire site and configure it on your new hosting provider.
We provide a comprehensive step-by-step guide for this process. Check out our guide on how to seamlessly migrate WordPress to a new host or server.
However, if your goal is to transfer only the products, this tutorial will teach you how to effectively export and import WooCommerce products along with images and other related data.
We will demonstrate two methods; you can select the one that suits you best.
- Method 1: Import and Export WooCommerce Products Without a Plugin
- Method 2: Import and Export WooCommerce Products Using a Plugin
- Enhance Your WooCommerce Store with Automation Features
Method 1: Import and Export WooCommerce Products Without a Plugin
WooCommerce includes built-in features that allow you to easily import and export products with images without the need for additional plugins.
First, navigate to theProducts » All ProductsNavigate to the corresponding page in your WordPress dashboard. At the top, you’ll find two buttons labeled ‘Import’ and ‘Export’ for managing your products.
Let’s begin by exploring how the export feature functions.
Exporting WooCommerce Products Without a Plugin
Simply click the ‘Export’ button at the top to proceed.
On the following screen, you’ll encounter various options to select the data you wish to export.
For example, you can opt to export only specific columns from the product data. Additionally, you can filter by product types or categories.
To export all variable products along with their images and complete data, you can leave these options unchecked.
You can optionally select ‘Export custom meta.’ If you’re uncertain, it’s advisable to check this option to ensure you capture all necessary data.
Click the ‘Generate CSV’ button to proceed.
WooCommerce will now create a CSV file and download it directly to your computer.
What is a CSV File?
CSV stands for Comma Separated Values, which is a plain text file format that separates different columns or fields of data using commas.
You can open a CSV file with any spreadsheet software, such as Google Sheets or Microsoft Excel. Here’s an example of how it would appear:
Import WooCommerce Products Without a Plugin
Navigate to theProducts » All Productssection.
Next, click on the Import button located at the top.
If your WooCommerce store is currently empty, you will see buttons in the center of the page instead of at the top.
Click the ‘Start Import’ button to initiate the import process.
This action will open the import wizard.
First, click the ‘Choose File’ button to select the WooCommerce export CSV file you previously downloaded.
Then, click the continue button to upload the CSV file.
WooCommerce will check if your CSV file is in a compatible format. After this, it will prompt you to map the data to the existing WooCommerce product data.
The default settings should work for most WooCommerce stores.
However, be sure to check for any missing columns. If you find one, click the drop-down menu next to it and select a corresponding field if available.
If you are using product variation attributes, make sure to scroll down to the attributes columns and match the relevant fields.
This ensures that the fields in your CSV file align with the corresponding WooCommerce fields.
Click the ‘Run’ Importer button to get started.
WooCommerce will begin importing data from your CSV files and downloading any associated product images.
Once the process is complete, you can navigate to the Products » All Products page to view the imported items.
Be sure to check your shop and product pages to ensure everything is functioning correctly.
Method 2: Import and Export WooCommerce Products Using a Plugin
In this method, we will utilize a plugin to import and export WooCommerce products.
This approach provides greater flexibility and allows you to export and import product reviews as well.
Additionally, it enables you to import and export WooCommerce products in batches, which is particularly useful for larger stores with numerous products and images.
Exporting WooCommerce Products Using a Plugin
First, install and activate the Product Import Export for WooCommerce plugin. For detailed instructions, refer to our step-by-step guide on installing a WordPress plugin.
The plugin consists of three separate add-ons, all of which need to be downloaded and installed.
After activation, visit the Webtoffee Import Export (Pro) » Export page.
First, choose ‘Product’ as the type of post you want to export.
On the following screen, select your preferred export method.
The default Quick Export method automatically selects all products for export.
Alternatively, you can opt for ‘Advanced Export,’ which allows you to filter products by category, tag, and status.
You also have the option to manually exclude specific products.
If desired, you can filter the data to select which products to export. For instance, the ‘Total number of products to export’ indicates how many products you intend to export.
The ‘Skip first n products’ option allows you to specify how many products to skip.
For example, entering 10 will skip the first 10 products during the export. The Products category lets you filter by specific product names, while the ‘Stock Status’ allows you to select based on inventory levels.
As you scroll down the page, you’ll find additional options, including:
- Products you want to exclude
- Products in selected categories
- Products with certain tags
- And more options
Click the ‘Export’ button to proceed, and the plugin will begin preparing your product data.
Once the process is complete, you’ll be prompted to download the export file to your computer.
Importing WooCommerce Products Using a Plugin
With your export file ready, you can now import products from another WooCommerce store.
Install and activate the Product Import Export for WooCommerce plugin on the store where you want to import the products.
After that, navigate to theWebtoffee Import Export (Pro) » Importpage and select ‘Product’ as the post type you wish to import.
Click on the ‘Step 2: Select Import Method’ button to proceed.
Next, choose an import method and upload the exported file you previously downloaded to your computer.
Click on the ‘Step 3: Map and Import Columns’ button to continue.
On the next screen, you’ll see a list of fields alongside the corresponding fields from your import file. If any fields are empty, you can select a corresponding field from the next column.
If you are using product variations such as sizes and colors, be sure to click on the Attributes tab to match the attribute fields.
However, if you are not using products with variations or custom attributes, you can proceed with the default settings.
Proceed by clicking the ‘Step 4: Advanced Options / Batch Import’ button.
On the last screen, you’ll encounter advanced options where you can match products by ID or SKU, decide how to handle existing products, and more.
If you’re importing products into a new WooCommerce store, the default settings will suffice.
To initiate the product import process, click on the ‘Import’ button.
You will see the import progress displayed on the screen. Once completed, click on ‘View Products’ to verify that all products have been imported successfully.
The plugin also supports the import and export of Product Reviews.
To import or export product reviews, select the ‘Product Reviews’ post type on the import or export page.
Related:For more information about this plugin, check out our comprehensive review of Product Import Export for WooCommerce.
Enhance Your WooCommerce Store with Automation
If you find yourself performing repetitive tasks in your eCommerce store and wish to save time, we recommend using Uncanny Automator for workflow automation.
Easily integrate over 185 plugins and applications using a user-friendly, no-code visual builder. Automate your routine tasks without any coding skills.
After extensive testing, we found this tool to be user-friendly and dependable. For more insights, check out our review of Uncanny Automator.
In addition to workflow automation, we recommend FunnelKit Automations as a marketing automation solution for WooCommerce. It can help you boost sales and enhance conversions without breaking the bank.
For comprehensive guidance, explore our top WooCommerce automation strategies to boost your sales.
We hope this guide has assisted you in seamlessly importing and exporting WooCommerce products with images in WordPress. You might also want to check out our selection of essential WooCommerce plugins or these useful tips for recovering abandoned cart sales.
If you enjoyed this article, consider subscribing to our YouTube Channel for WordPress video tutorials. You can also connect with us on Twitter and Facebook.