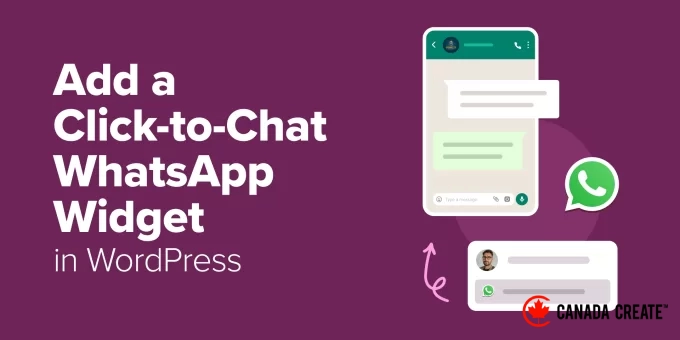
Many of your website visitors use WhatsApp daily to communicate with friends and family. Providing them with an easy way to contact your business through WhatsApp is a smart choice. When reaching out feels as simple as sending a quick message, visitors are much more inclined to engage.
From my experience with WordPress sites, I’ve noticed that visitors often hesitate to fill out forms or make phone calls. They may need a moment to reflect, compare their options, or feel more at ease before making a decision.
This is where WhatsApp comes into play. A chat widget offers a friendly, low-pressure way for visitors to initiate a conversation, which typically results in increased engagement.
In this guide, I will walk you through the process of adding a WhatsApp click-to-chat widget to your WordPress site in just five easy steps. This is a simple method to initiate more conversations and maintain engagement even after visitors leave your site. 📲
Summary:The simplest way to integrate a click-to-chat WhatsApp widget into your WordPress site is by using WPChat. This plugin effortlessly connects your WordPress website to your WhatsApp account, as well as other messaging platforms like Telegram and Facebook Messenger.
Reasons to Add a Click-to-Chat WhatsApp Widget to Your WordPress Site
Integrating a WhatsApp click-to-chat widget on your WordPress site allows visitors to contact you effortlessly. With just a single click or tap, users can connect with you directly on WhatsApp, one of the most widely used messaging apps globally.
This quick and familiar communication method can foster trust and encourage connections. Since many users rely on WhatsApp daily, offering this option feels intuitive and convenient.
Here are some advantages of linking WhatsApp with WordPress for user communication:
- ⚡Quicker responses– Visitors can chat instantly instead of waiting hours or days for email responses.
- 🧑💻 Personalized interaction– Direct messaging is more engaging than completing contact forms or sending formal emails.
- 📈 Enhanced engagement– When visitors know they can receive prompt assistance, they are more inclined to reach out and maintain a connection with your brand.
Additionally, I’ve observed that real-time chat significantly boosts user engagement across various websites.
Depending on your website’s nature, a WhatsApp widget can provide unique benefits. Let’s explore a few examples:
| Website Type | How a Click-to-Chat WhatsApp Button Benefits You |
|---|---|
| Online Store | Provide immediate answers to product inquiries, enabling customers to make quicker purchasing decisions. |
| Service Industry | Allow customers to schedule consultations or appointments instantly. |
| Event Planners | Address last-minute inquiries regarding registrations, schedules, or event logistics. |
| Customer Support Teams | Resolve issues in real time instead of relying on lengthy email exchanges. |
This functions similarly to a live chat feature, but WhatsApp offers the advantage of being an app that your visitors already use daily.
Now, let’s guide you through the process of adding a click-to-chat WhatsApp widget to your WordPress site.
Here’s a brief summary of the topics I will discuss in this guide:
- Step 1: Installing and Activating the WPChat Plugin
- Step 2: Configuring the WPChat Plugin
- Step 3: Personalizing Your Click-to-Chat WhatsApp Button
- Step 4: Adjusting the Visibility Settings for the WhatsApp Button
- Step 5: Adding Chat Agents to Assist Customers
- Step 6: Incorporating FAQs into the Chat Widget (Optional)
- Bonus Tip: Integrating WhatsApp Share Buttons on Your WordPress Site
- FAQs: How to Add a Click-to-Chat Button in WordPress
- Next Steps for Leveraging Social Media and Chat Features in WordPress
Step 1: Install and Activate the WPChat Plugin
In this tutorial, I will demonstrate how to use WPChat, the most user-friendly chat plugin for WordPress.
This plugin connects your WordPress site directly to your customers’ preferred messaging apps, including WhatsApp, allowing you to maintain communication even after they leave your website.
For detailed information about the plugin, check out our comprehensive WPChat review.
First, create your WPChat account.
Visit the WPChat website and click the ‘Get WPChat Now’ button to begin the signup process. Choose your plan and complete the checkout.
📝 Important Note: I am using WPChat Pro because it offers all color palettes, FAQ features, and support for multiple agents. However, there is also a free version of WPChat that you can install and activate on your WordPress site.
Once you register, you’ll gain access to your WPChat dashboard, where you can find your license key, which you will need later to upgrade the free WPChat plugin in WordPress.
With your account set up, navigate to Plugins » Add New Plugin in your WordPress admin dashboard.
Next, enter “WPChat” in the search bar and hit ‘Enter’ to locate it quickly.
To get started with the WPChat plugin, simply click the ‘Install Now’ button next to it. Once the installation is complete, click the ‘Activate’ button to enable the plugin on your website.
For comprehensive guidance, refer to our beginner’s guide on installing a WordPress plugin.
Step 2: Configuring the WPChat Plugin
After activating WPChat, you will be directed to the main configuration page where you can set up your WhatsApp integration.
Start by entering your business phone number in the designated field.
Ensure you use the phone number linked to your WhatsApp account so that visitors can contact you directly. Don’t forget to include the correct country code for your WhatsApp number.
Next, choose a theme for your chat button.
WPChat provides three themes to suit various website designs:
- Basic – A minimalist design that pairs well with most WordPress themes.
- Night – A dark theme ideal for contemporary websites.
- Pastel – Gentle colors that create a welcoming vibe.
I suggest selecting a theme that aligns with your current brand aesthetic. For instance, if your website features darker tones or has a sleek, modern design, the Night theme would be a natural choice.
You can always modify the style later to suit your preferences or align with seasonal design changes, similar to adding a dark mode feature for enhanced user experience on your website.
Next, select the location for the click-to-chat button on your WordPress site.
WPChat provides two primary options for button placement:
- Show on all pages– Activate the click-to-chat button immediately after setup and display it throughout your entire website.
- Do not show on any pages– Keep the chat assistant hidden while you finalize your setup.
I suggest displaying the button on every page to enhance visibility. However, if you prefer not to go live right away, you can select the other option and adjust it later after customizing your click-to-chat button.
Following that, you will encounter a page with additional features.
You can skip this step for now, as you have the option to upgrade your plan later if necessary.
Now, you’ll reach the final setup stage, where you can review all the configurations you’ve made throughout the process.
Scroll down to find a field where you can enter and verify your license key. If you registered for WPChat Pro, please enter your key here.
Make sure to click the ‘Complete Setup’ button to save your changes.
Step 3: Personalizing Your Click-to-Chat WhatsApp Button
Once you’ve adjusted your visibility settings, you will be taken to the WPChat dashboard within your WordPress admin panel.
Click on the ‘Customize’ button to open the live editor, where you can tailor the look of your WhatsApp chat widget to fit your website’s style.
In the customization panel, you can change the color scheme, header options, and more.
Here’s a glimpse of the visual editor along with all the customization features available:
Let’s review them from top to bottom.
WPChat provides five color presets to choose from. You can also create a custom color palette that aligns perfectly with your website’s theme.
Next, set a friendly welcome message that appears when visitors engage with the widget. Consider using phrases like “We’re here to help!” or “Chat with us now!”
You can also use this area to manage expectations, such as “We typically respond within an hour.” This simple message reassures visitors that you are available to assist and indicates when they can expect a reply.
This header message serves as your initial impression, much like a well-crafted call-to-action button. It should make visitors feel at ease reaching out and convey your readiness to help.
🧑💻Expert Tip:A well-crafted header message can inspire more visitors to engage in conversation. Keep it concise, clear, and action-oriented so that visitors understand what to expect when they click.
Next, you can choose an icon for your click-to-chat button that complements your website’s design.
Additionally, WPChat allows you to select an assistant avatar from six built-in options.
Alternatively, you can upload your own photo to create a more personal chat experience that aligns with your brand.
Simply click the ‘Add Your Own’ button to access the file uploader.
Once you’re finished, go ahead and click ‘Save.’
Step 4: Setting Up WhatsApp Button Visibility Options
For greater control, WPChat offers built-in filters that allow you to include or exclude the button from specific pages, categories, or tags. This feature is useful if you want the chat button to appear only on product pages or blog posts, for instance.
It’s most effective to display the chat button on pages where visitors are likely to have questions. For example, on a sales page, customers may need quick answers before making a purchase decision.
To get started, navigate to WPChat » Visibility in your WordPress admin dashboard.
On the following screen, you will see two options: show the button on all pages or only on selected pages.
First, let’s explore the ‘Display only on specific pages’ option.
Then, you can click the ‘+ Add Page’ button.
In this example, I’ve set it up for my Shop page.
Alternatively, you can choose the ‘Display on all pages’ option.
This option is ideal if you want the chat button to be accessible on every page, allowing visitors to contact you from anywhere.
Even with this option selected, you can still choose to hide the widget on certain pages. For instance, you might want to remove it from your privacy policy or terms and conditions page to maintain focus on essential legal information.
Simply click the ‘+’ button and select the pages, categories, tags, or custom post types where you want to disable the WhatsApp click-to-chat button.
After setting your visibility preferences, click the ‘Save Changes’ button to apply your configuration.
Step 5: Adding Chat Agents
To manage who can respond to WhatsApp messages, go toWPChat » Agentsin your WordPress dashboard. This section allows you to set up individual team members responsible for handling customer conversations.
From here, click the ‘Edit’ button next to an existing agent to customize their profile.
On the next screen, you’ll see an option to upload your profile picture.
I’ve noticed that displaying real team members with photos enhances the chat experience, making it feel more personal and trustworthy. Visitors are more inclined to reach out when they see a real person instead of a generic icon or gravatar.
Simply click the button to upload a profile picture, then use the file uploader to select an existing image or add a new one.
Next, enter the agent’s name so visitors know who they are chatting with.
For example, I included the agent’s name along with my company name.
Under ‘Agent Name,’ you’ll find fields to link to other messaging apps, such as Telegram, Facebook Messenger, and Instagram.
If you also use these platforms for customer communication, you can enter your contact details here. If not, simply leave them blank and click ‘Save’ to apply your changes.
You can add new agents as your team expands.
Click the ‘New Agent’ button to add another agent and fill in their information just like you did for the first one.
👨💻Expert Tip:If different team members manage specific types of inquiries from their own devices, you can input each agent’s WhatsApp number. This ensures that sales questions reach your sales team, while support issues are directed to your customer service representatives.
Feel free to add as many agents as necessary. Once completed, you’ll see all agents listed on the Agents page, as shown here:
After configuring your agents, you can set individual availability times so that chats are automatically directed to the right person when they are online.
To do this, edit an agent’s details by clicking the ‘Edit’ button.
On the next screen, you can specify their working hours, including the exact days and times they are available.
Remember to click ‘Save Changes’ when you’re done.
When an agent is offline, you can choose how the chat widget should respond. You can either:
- Display your regular business hours, or
- Direct new inquiries to another available agent so customers can still receive assistance.
To set this up, click on ‘Agent Settings’ located at the top of the ‘Agents’ page.
On the following screen, the first step is to activate ‘Timings.’
Next, you will find options for displaying business hours and redirecting chats. For this guide, I will choose ‘Redirect to an off-hours agent.’
Simply select the appropriate agent from the dropdown menu who will handle chats when no one is available.
After configuring all your agents and their schedules, be sure to click ‘Save Changes.’
Step 6: Integrating FAQs into the Chat Widget (Optional)
At this stage, your WhatsApp click-to-chat button is ready to use. However, if you want to provide visitors with quick answers before they reach out, you can include an FAQ section in the widget.
For instance, an online store might include FAQs regarding shipping or delivery times, while a service-oriented business, like a salon or repair service, could share its operating hours, pricing, or typical response times.
This is an effective way to minimize repetitive inquiries and assist visitors in obtaining the information they need more quickly.
To configure this, navigate to WPChat » Frequently Asked Questions in your WordPress dashboard. Then, click ‘Add Question’ to create a new FAQ entry.
On the next screen, you will find the visual editor.
Simply enter your question in the ‘Question’ field and provide a concise, helpful answer in the ‘Answer’ field. The live preview on the right will display how it will appear on your website as you type.
If you’d like to include a screenshot or image for better clarity, click the ‘Image’ icon.
This will open the file uploader, allowing you to attach a photo or diagram to your FAQ.
Once everything looks good, click ‘Save Changes’ to finalize.
After publishing your first FAQ, adding more is a breeze.
Just click ‘New Question’ and follow the same steps to expand your FAQ library. All your questions will be listed in a table on the ‘Frequent Questions’ page.
📝 Important Note: The Frequent Questions feature utilizes AI Smart Search to help users find answers even if they do not use the exact keywords. Keep in mind that this feature consumes AI credits (tokens), and once you run out, the search will revert to basic keyword matching.
From this point, you can:
- Edit – Modify the text or swap out images.
- Clone – Create a duplicate of a similar question to avoid starting from scratch.
- Delete – Eliminate FAQs that are no longer necessary.
Your FAQ widget is now live, empowering visitors to find answers independently and reducing the volume of support inquiries. Feel free to return anytime to add new questions or reorganize content as your business evolves.
When you access your WordPress site, your WhatsApp widget is fully set up to receive messages.Additionally,it will showcase useful FAQs for your visitors.
Pro Tip: Incorporate WhatsApp Share Buttons on Your WordPress Site
While the click-to-chat button allows visitors to contact you directly, adding a WhatsApp share button enables them to easily share your blog posts, products, or pages with their friends and family.
This can significantly enhance your content’s visibility and drive more traffic to your website.
To integrate WhatsApp share buttons into your site, consider using the free Sassy Social Share plugin. After setup, you can display it automatically on all posts and pages or selectively add it to specific content using a shortcode.
I suggest positioning WhatsApp share buttons in high-traffic areas.
For instance, place them at the end of blog posts where readers have just engaged with your content, in your sidebar for easy access from any page, or on product pages to motivate customers to share items with their friends.
For more information, please check our comprehensive guide on how to integrate WhatsApp share buttons into your WordPress site.
Frequently Asked Questions: How to Add a Click-to-Chat Button in WordPress
To assist you further, here are some common questions regarding the process of adding a click-to-chat button in WordPress:
What is the process for adding a WhatsApp chat button to my WordPress site?
You can easily add a WhatsApp chat button to your WordPress site by installing the WPChat plugin, entering your WhatsApp phone number in the settings, and customizing the button’s design and location on your website.
What steps do I need to take to add a chat box to my website?
To incorporate a chat box into your website, you can utilize a chat plugin such as WPChat or a live chat service like LiveChat. Simply configure it with your contact information, personalize its appearance, and select where you want the chat box to be displayed on your pages.
How can I add a chat box using HTML code?
To add a chat box using HTML, you need to insert WhatsApp’s click-to-chat link code directly into your theme files or use a custom HTML widget. However, using a plugin like WPChat is much simpler and does not require any coding skills.
Is a click-to-chat button more effective than a click-to-chat link?
A click-to-chat button is more effective than a simple link because it remains visible as users navigate your site. This accessibility allows visitors to connect with you effortlessly, without needing to search for contact details.
Will adding a WhatsApp chat widget impact my site’s privacy policy?
When a visitor interacts with the chat widget, they will share their phone number with you through WhatsApp. It’s essential to be transparent about your data handling practices. Consider updating your website’s privacy policy to inform users that you provide support via third-party applications like WhatsApp and that conversations occur on their platform.
Next Steps for Integrating Social Media and Chat Features in WordPress
You may also want to discover additional strategies to enhance engagement and connect with your audience through social media and communication tools.
Here are some useful tutorials to improve your WordPress site’s social media features:
- How to Add Social Share Buttons in WordPress
- How to Incorporate a Facebook Like Button in WordPress
- How to Add Twitter Share and Retweet Buttons in WordPress
- How to Display Google, Facebook, and Yelp Reviews in WordPress
- The Simple Method to Embed TripAdvisor Reviews in WordPress
- A Guide to Creating Chat Rooms in WordPress for Enhanced User Interaction
- Top Live Chat Software Options for Small Businesses Reviewed
Enjoyed this article? Subscribe to our YouTube Channel for WordPress video tutorials, and connect with us on Twitter and Facebook!