I can’t tell you how many creators I’ve spoken with who feel trapped on Substack. It’s incredibly easy to get started, but that simplicity comes at a cost. As soon as you want to change a font, create a custom landing page, or add more advanced features, the platform’s limitations become frustrating fast.
And those limitations go beyond design. The deeper issue is control. On Substack, you don’t own your content, can’t control how you earn, and have limited access to your own subscribers.
That’s why so many creators are making the switch to WordPress. It gives you a lot more control over your design, monetization, and subscriber list.
After helping dozens of writers migrate from Substack to WordPress, I’ve developed a straightforward process that makes it manageable. The freedom and flexibility you’ll gain are well worth the effort.
In this guide, I’ll walk you through the entire process: moving your posts, importing your email list, setting up a powerful email system, and launching your new newsletter without losing momentum.
Why Should You Switch From Substack to WordPress?
Many creators switch from Substack to WordPress because it offers more control, flexibility, and monetization options. With WordPress, you can fully customize your site, own your email list, and add features like paid memberships, online courses, and digital product sales—all without platform fees.
Substack does a great job of marketing itself as the simple, all-in-one solution for newsletter creators. It lets you start publishing in minutes and handles the technical details for you.
That initial ease of use can become a significant constraint over time. As your newsletter expands, Substack’s limitations become more apparent.
The primary concern is the limited control, resulting in a generic newsletter appearance. Customizing signup forms, creating unique landing pages, or tailoring the layout to align with your brand is difficult.
Furthermore, monetization presents a challenge. Substack retains 10% of all paid subscriptions, which can accumulate rapidly.
Additionally, you are confined to their subscription structure, preventing you from directly selling courses, digital goods, or incorporating alternative revenue sources on your site.
Ultimately, Substack manages your audience relationships. While you can export your mailing list, the platform determines content delivery and available analytics. WordPress empowers you with complete control.
For full details, see our comparison of Substack vs. WordPress.
What to Expect When Migrating From Substack to WordPress
Transferring your newsletter may seem daunting initially, but the process is quite straightforward. The steps below will guide you.
Here’s a quick overview of what we’ll do together:
- Set Up Your WordPress Foundation: We’ll choose a reliable host, install WordPress, and create the new home for your newsletter.
- Export and Import Your Content: I’ll show you how to download your posts and subscriber data from Substack and move it safely into WordPress.
- Build Your New Email System: We’ll connect your site to a professional email marketing service, giving you full control over your campaigns and automations.
- Concluding the Migration:The final steps involve importing your subscriber list, implementing redirects to maintain traffic flow, and personalizing your WordPress site to reflect your brand identity.
Upon completion of this guide, you will have established a fully independent and professional newsletter platform.
Step 1: Set Up Your WordPress Website
The initial step involves configuring the WordPress site, which will serve as the new home for your newsletter content.
This requires a domain name and a WordPress hosting service. While WordPress itself is free, hosting provides the necessary online storage for your website’s files.
I frequently suggest Bluehost to those new to WordPress. They are an officially endorsed host with excellent support, and they streamline the setup process. Canada Create™ readers can also take advantage of a special offer that includes a complimentary domain name for the first year.
Alternatives:If you prefer to consider alternatives, both Hostinger and SiteGround are solid choices. I have used both for other projects and found them reliable.
Begin by navigating to the Bluehost website and selecting the ‘Get Started Now’ button.
The following screen will present you with hosting plan options.
The Starter plan is typically sufficient for most newsletter sites. You retain the option to upgrade as your requirements evolve.
Next, you will configure your domain name, a crucial step in the process.
If you’re starting with a brand new domain, you can claim your free domain now by typing it into the ‘Create a new domain’ box.
But if you already have a custom domain connected to your Substack site (like mynewsletter.com), select ‘I’ll create my domain later.’ This ensures uninterrupted service as you transition your content.
Why postpone domain setup?🤔 If you redirect your custom domain to WordPress prematurely, your Substack presence will disappear before the full transfer. I’ll explain the optimal timing and method for updating it.
Upon completing the registration, Bluehost automatically handles the WordPress installation.
Simply access your Bluehost account, locate your new website, and select ‘Edit Site.’ This action will redirect you directly to your WordPress admin panel.
For users on different hosting providers, or those seeking detailed instructions, consult our complete guide on how to install WordPress.
Step 2: Add the Required Importer Plugins
To bring your content over from Substack, you will need two free plugins. The primary one is the Substack Importer; it needs the WordPress Importer to function correctly.
While this may seem a bit complex, I’ll guide you through the quickest method for setting it up.
Prepare the WordPress Importer
From your WordPress admin area, navigate to Tools » Import. Look for ‘WordPress’ toward the end of the list and select the ‘Install Now’ button.
After installation, the button text changes to ‘Run Importer.’
Crucially, select ‘Run Importer’ at this point, even without an immediate upload. This step is necessary to activate the tool for the Substack Importer. Skipping this results in an error.
You will then arrive at the importer’s upload interface, but you can disregard it temporarily. The next plugin installation is our focus.
Install the Substack Importer
Next, you need to install the Substack Importer plugin, which will handle the specific format of your Substack export. For detailed instructions, you can see our guide on how to install a WordPress plugin.
Since the primary WordPress Importer is already active, this plugin will install without any problems. Your website is now completely ready to receive your Substack content, which I’ll demonstrate in Step 4.
Step 3: Export Your Content From Substack
Now, return to Substack to retrieve all of your content, including posts, drafts, and subscriber lists.
Log into your Substack account and access your publication dashboard. From there, select ‘Settings’ in the upper menu and scroll to the ‘Export’ area.
You will see an option to ‘Export your data’. Go ahead and click the ‘New export’ button.
Substack will generate a downloadable .zip archive containing all of your posts and images. This archive will also include a CSV file containing subscriber email addresses and related details. The process may require a few moments if you have substantial content.
Once the export file is prepared, you’ll receive an email notification, and you can download it to your computer. Because this file represents a valuable asset, store it securely.
Step 4: Import Your Posts into WordPress
Here’s where the migration gets interesting! We will now transfer your content to your WordPress site. The plugin you installed largely automates this.
Return to your WordPress dashboard, then go toTools » Import. You should now see ‘Substack’ in the list of available importers.
Click the ‘Run Importer’ link below it.
The plugin will ask you to upload the file you got from Substack. Click ‘Choose File’ and select the .zip file containing your post export.
The plugin offers an optional field for your Substack URL. This assists in importing comments and author information, but you can skip it.
Then, click ‘Upload file and import’.
On the next screen, you’ll be asked to assign an author for the imported posts. You can create a new author or assign them to your existing WordPress user account.
Before you continue, make sure to check the box next to ‘Download and import file attachments.’
This directs WordPress to save all images from your Substack posts to your new site, ensuring nothing is omitted. This is an important step.
Click ‘Submit’ to start. The importer will begin, creating WordPress posts from each Substack article. This process may require a few minutes.
When complete, go toPosts » All Posts. All your Substack articles should be in WordPress! Review a few to verify that the content and formatting are correct.
Step 5: Set Up Your Email Newsletter System
WordPress doesn’t send email newsletters by default, which is a major difference from Substack.
Instead, you need a dedicated email marketing service to manage your subscribers and send your newsletters. This gives you far more power and flexibility.
I recommend using Constant Contact. It’s incredibly beginner-friendly, integrates perfectly with WordPress, and offers powerful features like automation and analytics that go way beyond Substack.
With Constant Contact, you can segment your audience, A/B test your subject lines, create beautiful landing pages, and see detailed reports on who opens and clicks your emails.
First, you’ll need to sign up for a Constant Contact account. Once you’re in, you need to create a new email list for your subscribers.
Then, you can easily connect your WordPress website to Constant Contact using the WPForms plugin. It’s the best form builder for WordPress and lets you create beautiful newsletter signup forms that automatically add new subscribers to your Constant Contact list.
We have a complete, step-by-step guide on how to add email subscriptions to your WordPress blog. This tutorial will walk you through setting up Constant Contact, creating a signup form with WPForms, and placing it on your new website.
Step 6: Migrate Your Subscriber List
It’s time to move your most important asset: your subscribers. This step requires care to ensure a smooth transition for your readers.
Important:Prior to importing contacts, sending a final email from Substack is highly advisable. Inform your audience about the transition, highlighting the advantages and asking them to anticipate emails from the new system. This is crucial for maintaining audience trust and preventing your emails from being flagged as spam.
Access your Constant Contact account and navigate to the ‘Contacts’ area. Locate and click the ‘Add Contacts’ button.
You will find an option to upload a file, as demonstrated in the image provided.
Begin by extracting the contents of the Substack export file you downloaded. Inside, locate the CSV file that holds your subscriber data. The file is typically named similarly toemail_list.your-publication-name.csv.
Constant Contact provides a guided process for mapping data columns, such as linking the ’email’ column to the appropriate email field. Add these subscribers to the newly created list.
It’s vital to only send emails to individuals who have granted you permission. The final email from Substack serves as a courteous way to acknowledge your audience and remind them of their signup.
Post-import, setting up a basic welcome email series in Constant Contact is a good way to re-engage subscribers on the new platform.
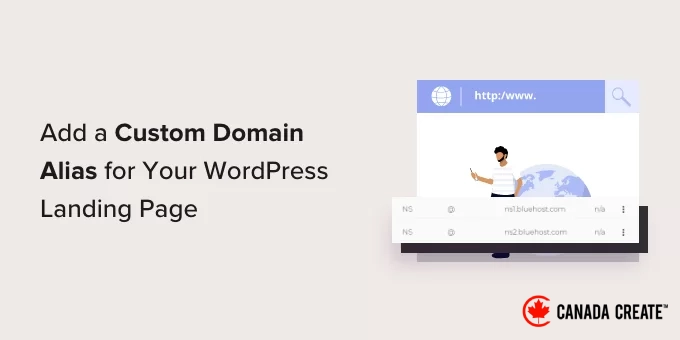
Step 7: Point Your Domain to WordPress
With your content and subscriber base transferred, you’re now prepared to launch your WordPress site on your primary domain. The specific steps will vary based on your domain setup in Step 1.
If You Registered a New Domain With Bluehost
You’re all set!
Since Bluehost automatically directs the domain to your WordPress site, no further action is required on your part.
If You Have a Custom Domain From Substack
Now, direct your custom domain to your new hosting provider by updating the domain’s nameserver settings.
Locate the nameservers provided by your new host (for example, Bluehost uses nameservers that resemblens1.bluehost.com and ns2.bluehost.com).
Access your domain registrar account (where you purchased the domain, such as Namecheap or GoDaddy) and navigate to the DNS or nameserver configuration. Replace the existing nameservers with those provided by your web hosting company.
Refer to our guide on how to change domain nameservers, which provides step-by-step instructions with visuals.
After saving the updated nameserver information, allow several hours for the changes to propagate across the internet. This delay, known as DNS propagation, is expected.
Step 8: Set Up Permalinks and Redirects
This final technical step is crucial for preserving your SEO and preventing visitors from hitting ‘404 Not Found‘ errors.
Setting Up SEO-Friendly Permalinks
First, you should ensure that your new WordPress URLs are clear and optimized for search engines.
In your WordPress dashboard, go to Settings » Permalinks. Select the ‘Post name’ option and click ‘Save Changes’.
This generates straightforward URLs such asyoursite.com/post-title, which are good for WordPress SEO.
WordPress’s ‘Post name’ permalink structure closely mirrors Substack’s post URLs, simplifying the redirection process.
Configuring Redirects from Your Previous Substack Posts
To ensure a smooth transition, redirect visitors from your old Substack posts to their corresponding pages on your new WordPress site. This redirection is vital for both SEO and maintaining a positive user experience.
Fortunately, Substack employs a uniform URL structure for its posts, such asyourdomain.com/p/post-name. Because your new WordPress posts will have a similar URL (yourdomain.com/post-name), a single rule can redirect all your old posts efficiently.
The Redirection plugin, available for free, provides the simplest method. Install and activate it, then navigate toTools » Redirectionwithin your WordPress admin area.
You will now create a new redirection rule.
In the ‘Add new redirection’ area, complete the fields as follows:
- Source URL:
^/p/(.*)$ - Target URL:
/$1
Ensure you select the ‘Regex’ option after inputting the URLs. This crucial step instructs the plugin to utilize the specific rule.
Then, just click the ‘Add Redirect’ button.
This single rule automatically detects any URL beginning with/p/ and redirects it to the same URL without the /p/.
For instance, a link pointing toyourdomain.com/p/my-first-post will now automatically go to yourdomain.com/my-first-postThis eliminates the need for manual redirects for each individual post.
Pro Tip:If you utilize the All in One SEO (AIOSEO) plugin to improve your search engine optimization, it includes a robust Redirection Manager. This simplifies the process and is an essential tool for website owners.
Finding and Fixing Any Missed Redirects
Although this regex rule handles the majority of post redirects, it’s wise to verify that none were missed. Occasionally, WordPress may alter a post’s URL slug during import to prevent duplication.
For example, if you had two Substack posts with similar titles, then WordPress might change one of the new URLs to something like /my-post-title-2The regex rule wouldn’t cover this particular scenario.
Fortunately, the Redirection plugin simplifies the identification of these broken links.
From your WordPress admin area, navigate toTools » Redirectionand select the ‘404s’ tab. This page records instances where a visitor attempts to access a non-existent page on your site.
If you see an old Substack URL in this log, it means the redirect for that specific post didn’t work. You can simply hover over the 404 error in the list and click ‘Add redirect’ to create a manual redirect for it.
Refer to our comprehensive guide on tracking and redirecting 404 pages in WordPress for detailed instructions.
Step 9: Customize Your Site and Go Live
All the technical work is done. Now for the fun part: choosing a professional theme to give your new site its look and feel.
Choosing and Customizing Your Theme
Your WordPress theme controls the entire look and feel of your site. I recommend choosing a theme that is clean, readable, and fast so that it provides a great user experience for your readers.
For newsletter creators, themes like Sydney or GeneratePress are excellent choices because they are lightweight and highly customizable.
Then, just follow our guide on how to customize your WordPress theme to get the exact design you want.
You can also create a custom homepage to welcome new visitors and prominently feature your newsletter signup form.
To build trust with your readers, it’s also a good idea to add a few essential pages to your site. This makes your newsletter feel more professional and established.
I recommend creating:
- An About Page: This is where you can share your story and explain what your newsletter is about.
- A Contact Page: This gives your audience an easy way to get in touch with you, and you should include a contact form.
- A Privacy Policy: This page is legally required in many places and shows readers you respect their data. We have a full guide on how to create a privacy policy in WordPress.
Once these pages are in place and you’ve tested that your site is working correctly, it’s time for the final step: setting up your newsletter and announcing your move.
Step 10: Set Up Your Paid Newsletter in WordPress
One of the best things about moving to WordPress is that you have full control over your income. Instead of paying Substack’s 10% fee, you only pay standard payment processor fees, which means you keep more of your money.
To monetize your WordPress content, you’ll need a membership plugin. I recommend MemberPress because it’s the most powerful and easy-to-use option on the market. It lets you restrict access to your content so that only paying subscribers can view your premium newsletter posts.
Once you install MemberPress, you can create different subscription levels, just like on Substack. For instance, you could offer a monthly plan and a discounted yearly plan.
To get started, you can follow our step-by-step guide on how to create a paid newsletter in WordPress. It will walk you through everything from setting up MemberPress to creating your subscription plans.
But with WordPress and MemberPress, you can go far beyond a simple paid newsletter. You can also:
- Bundle your newsletter with other premium content like online courses, eBooks, or private community access.
- Sell digital downloads like guides or templates directly from your site.
- Create different membership tiers with unique perks for each level.
- Offer premium services like one-on-one coaching or consulting.
This flexibility allows you to build a true membership business around your content, not just a newsletter.
For more options, you can see our guide on how to make money in WordPress.
Once you are all set up, you can send an email to your subscribers welcoming them to the new website.
Be sure to highlight the benefits of the move, like a better reading experience or new features you’ve added. This is a great way to celebrate the transition and get your readers excited about the future of your newsletter.
Learning WordPress
Congratulations on moving your newsletter to WordPress! You now have a powerful platform that can grow right along with your business.
While WordPress is powerful, you don’t need to learn everything at once. We have plenty of free resources to help you master the basics and get comfortable.
Here are the best free resources our team has created for beginners:
- Canada Create™ Blog: Our complete library of WordPress tutorials and how-to articles.
- Canada Create™ Videos: Free WordPress video training courses that cover all the basics.
- Canada Create™ YouTube Channel: Videos with practical tips for growing your website.
- Canada Create™ Solution Center: Our expert recommendations for the best WordPress plugins and tools.
The more you use WordPress, the more comfortable you’ll become. Before you know it, you’ll be wondering how you ever managed with Substack’s limitations.
Alternative: Let an Expert Migrate Your Newsletter
I’ve walked you through all the steps to move from Substack to WordPress. But I know this process can feel like a lot, especially when you’d rather focus on creating content.
If you want to save time and avoid the technical details, then letting an expert handle the migration is a great option.
I recommend Seahawk Media Services to do all the heavy lifting for you. Their expert team will handle the entire migration, from transferring your content and subscribers to setting up your new design. This way, you can focus on writing while they take care of the rest.
Using a professional service ensures everything is moved over correctly, giving you peace of mind and a new WordPress site that’s ready to go.
Frequently Asked Questions About Migrating From Substack to WordPress (FAQs)
I know that making a move like this can bring up a lot of questions. To help you out, I’ve compiled answers to some of the most common questions I hear from creators who are making the switch from Substack to WordPress.
Will I lose my subscribers when I migrate from Substack?
No, you will not lose your subscribers. Substack allows you to export your entire subscriber list as a CSV file, which you can then import into an email marketing service like Constant Contact. It’s important to email your list before you move to let them know about the change.
Can I keep my custom domain name when moving to WordPress?
Yes, absolutely. If you have a custom domain connected to Substack, you can point it to your new WordPress hosting provider. Step 7 in this guide shows you exactly how to do that without any downtime.
Is migrating to WordPress expensive?
The initial cost involves web hosting, which can start at just a few dollars per month.
While Substack is free to start, its 10% cut of your revenue becomes far more expensive than WordPress hosting as soon as you start making money. With WordPress, you control your costs and keep 100% of your revenue.
Do I need to be a technical expert to use WordPress?
Not at all. While WordPress is more powerful than Substack, it’s designed to be user-friendly. If you can write a post in Substack, you can write a post in WordPress.
For everything else, there are tons of free resources, including our free Canada Create™ videos and our blog tutorials, to guide you.
I hope this tutorial helped you successfully migrate from Substack to WordPress. You now have complete control over your newsletter, from design and functionality to subscriber relationships and monetization options.
We also have an ultimate WordPress migration guide, and you can get inspired by browsing our expert list of popular sites using WordPress as a CMS.
If you liked this article, then please subscribe to our YouTube Channel for WordPress video tutorials. You can also find us on Twitter and Facebook.