 Skip to content
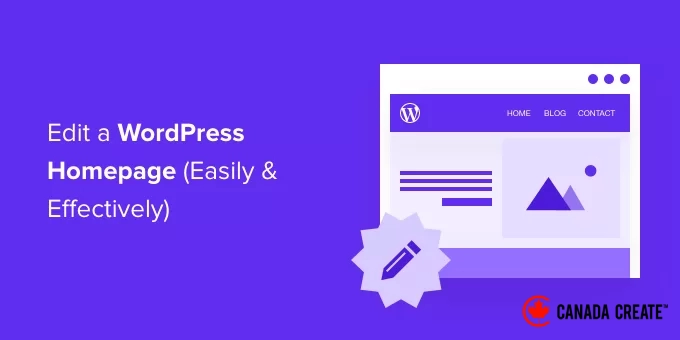
Your homepage serves as the initial point of contact for most visitors to your site, making it essential to create a positive first impression.
However, the standard WordPress homepage configuration may not accurately represent your brand or convey the message you wish to communicate.
At Canada Create™, we recognize your desire to showcase key elements on your homepage that align with your objectives. For instance, we prominently display a sign-up form for our free WordPress training and our latest articles.
Fortunately, WordPress provides straightforward methods for editing your homepage, even if you lack technical expertise.
In this article, we will walk you through the steps to customize your homepage, ensuring it is both effective and visually attractive.
What Is the WordPress Homepage?
Your homepage is the main page of your WordPress website. It is the first page that appears when a user visits your domain.
For example, if you enter www.CanadaCreate.com in your browser, the page you arrive at is our website’s homepage, where you can find our latest blog posts:
Why Edit the WordPress Homepage?
If you have chosen to start a blog, it is logical to display your blog posts on the homepage.
If you’re using WordPress to create a small business website or an online store, you might want to showcase your products or special offers prominently on your homepage.
Check out this example of a business website homepage from OptinMonster, which is renowned for being the top WordPress popup plugin. While they have an excellent blog, their homepage focuses on a strong call to action.
Perhaps you’ve attempted to set a custom page as your homepage in WordPress but are finding it challenging to get the desired look.
If so, you’re in the perfect spot.
We’ll guide you through the process of setting up and customizing your homepage to suit your needs. This will help you create a positive first impression and motivate your visitors to engage with your site’s key objectives.
This could involve purchasing a digital product, signing up for your membership site, or contributing to your fundraising efforts.
We’ll explore several different methods for creating your personalized WordPress homepage.
Use these quick links to navigate directly to various sections of the tutorial:
- Customizing Your Homepage Using the Theme Customizer (For Classic Themes Only)
- How to Edit Your Homepage Using the Block Editor
- How to Edit Your Homepage Using a Theme Builder Plugin
- How to Edit Your Homepage Using a Page Builder Plugin
- How to Set Your Homepage in WordPress
- Watch Our Video Tutorial
Let’s Get Started!
How to Edit Your Homepage Using the Theme Customizer (For Classic Themes Only)
Many top WordPress themes come with pre-designed homepage layouts and options for easy customization. However, keep in mind that the Theme Customizer is mainly intended for classic themes.
Classic themes are older WordPress themes that typically use pre-built sections and settings. They allow you to modify aspects of your site such as the header, footer, and sidebar, but they offer limited flexibility for changing the overall layout.
To access these customization options, navigate to Appearance » Customize in the admin sidebar. This will launch the WordPress theme customizer, where you can view a live preview of your theme while making adjustments.
The Theme Customizer provides different options depending on the theme you are using. Your preview and available settings may vary based on the theme selected. In this example, we are using the free Hestia theme.
To modify any section of your homepage, click the blue pencil icon located next to it. In this example, we will be editing the image, text, and button at the top of the homepage.
Important Note:Any edits you make will appear in the preview of your site immediately. However, these changes will not be live on your site until you click the publish button.
To remove a section from the homepage, click the blue eye icon in the top left corner of that section.
You can also manage sections by removing them or adding them back through the ‘Frontpage Sections’ tab.
Once you are satisfied with your homepage, click the ‘Publish’ button to make your changes live.
WordPress will then implement the updates.
If you’re interested, here’s a glimpse of how our updated homepage appears live on the website:
Utilizing the built-in options of your theme is the fastest way to set up your homepage. However, some themes may offer limited options, or you might not be completely happy with the appearance of your homepage.
No need to worry. There are numerous alternative methods to customize your homepage and achieve the desired look.
Customizing Your Homepage Using the Block Editor
The WordPress block editor provides a straightforward way to design a personalized homepage, although its capabilities depend on your theme’s design.
To start using the block editor, simply navigate to the Pages » All PagesYou can view and edit the ‘Home’ page that you previously created.
Once the block editor is open, you can begin adding content to your page.
In this section of the tutorial, we will use a few simple blocks to design a basic homepage.
First, let’s add a welcome message to the page. Simply click on the page to start typing, and WordPress will automatically generate a paragraph block for you.
To increase the text size, easily adjust the settings on the right side. You can select from preset sizes or click on the ‘Set custom size’ icon to enter your preferred size.
You can also change the text color using the ‘Color’ options for either the text or the background.
Next, let’s insert an image into the page. Click the (+) symbol and choose the ‘Image’ block.
You can find it in the ‘Media’ section, or use the search bar to locate it.
Select an image from your media library or upload a new one.
Expert Tip: You can also create a cover image for your homepage.
Next, we’ve added another paragraph block with the text ‘View Our Latest Posts’.
We have included a ‘Latest Posts’ block that displays post excerpts, featured images, and titles. For detailed instructions on using the Latest Posts block, refer to our tutorial on showcasing recent posts in WordPress.
Feel free to add as many blocks as you like to your homepage. If your theme supports it, consider using a ‘full width’ or ‘no sidebars’ template for a cleaner look.
For instance, if you’re using the Neve theme, you can adjust the page layout from the ‘Neve Options’ panel. Other themes may have similar options in the Document settings panel.
When you’re satisfied with your homepage design, click the ‘Update’ or ‘Publish’ button located at the top right of the screen to make your changes live.
Here’s a preview of our completed homepage:
If you want to enhance your homepage further, consider exploring some of the best block plugins for WordPress. These can add new features like contact forms, testimonials, reviews, and more.
Another excellent option is to utilize a more advanced theme builder or page builder for WordPress to create a stunning and professional-looking site.
How to Edit Your Homepage Using a Theme Builder Plugin
The simplest way to edit your homepage is by using SeedProd, the top WordPress theme builder plugin that allows you to create stunning website layouts and templates without any coding skills.
We have successfully utilized SeedProd to design landing pages and complete custom themes for our eCommerce websites, all of which turned out remarkably well. For more insights, check out our comprehensive SeedProd review.
This plugin enables you to develop a fully customized WordPress theme, including a tailored homepage template.
If you prefer an even more user-friendly option, SeedProd features an AI-powered website builder that can automatically generate a complete website for you. The AI handles everything from creating the site layout and images to generating and editing content.
For more information, refer to our guide on how to build a website using AI.
To get started, you must install and activate the SeedProd plugin. For detailed instructions, refer to our step-by-step guide on installing a WordPress plugin.
Important Note:There is a free version of SeedProd available, but to access the theme builder and customize the homepage template, you will need the Pro version.
After activation, you will need to enter your license key, which can be found in your account on the SeedProd website.
Next, you can utilize SeedProd to effortlessly design a WordPress theme, including a fully customized homepage from the ground up.
How to Create a Custom WordPress Theme
To create a new theme in SeedProd, go to the SeedProd » Theme Builder page. Here, you can choose one of SeedProd’s pre-designed themes as a foundation, which will replace your current WordPress theme with a unique design.
You can do this by clicking the ‘Themes’ button.
You will see a selection of professionally crafted themes tailored for various website types. For instance, there are templates like ‘Modern Business’, ‘Marketing Agency’, and ‘Mortgage Broker Theme’.
Browse through the available options and select the one that best fits your requirements by clicking the checkmark icon. For this tutorial, we’ll select the ‘Digital Strategy’ theme.
After selecting a theme, SeedProd will create all the necessary theme templates for you. This includes a template for your static homepage and another for your blog’s index page.
Customizing the Homepage Template
SeedProd simplifies the process of editing any of these templates with its intuitive drag-and-drop page builder.
To begin editing your homepage, simply click the ‘Edit Design’ link located under the ‘Homepage’ template. This will launch SeedProd’s visual editor for your template.
This user-friendly drag-and-drop builder provides a live preview of your page on the right side, with a toolbar on the left. You can easily add new blocks by dragging them onto the page, rearrange them by moving them up and down, and customize any block by clicking on it.
The template already features an appealing layout and includes a wealth of relevant content. Now, you just need to modify it to align with your website’s goals.
When you hover over a block, a toolbar will appear to assist you.
Clicking on the block allows you to adjust its settings in the left sidebar.
For instance, by clicking on the headline, you can modify the text, change the alignment, adjust the font size, and more.
Any changes you make will be instantly reflected in the live preview on the right.
As an example, let’s change the text to ‘All About WordPress.’
After making your changes, click the ‘Blocks’ icon at the top of the settings page to return to the ‘Blocks’ view.
Next, we will update the button text. Click on the button labeled ‘What we do’ and change the text to ‘See the courses.’
Scroll down your homepage until you reach the section that lists the products and services you provide.
You can modify these items by clicking on a block and editing the text directly.
Your homepage should resemble the screenshot shown below.
To add more information, you can insert an additional row of bullet points by clicking the blue ‘+’ icon at the bottom.
The SeedProd template may include extra sections that you may not need. You can easily remove any unnecessary blocks or sections by clicking the trash icon.
For instance, hover your mouse over the ‘Trusted By’ section on the homepage. When the toolbar appears, click the ‘Trash’ icon to remove that section.
At the bottom of the homepage, there is an FAQ section created with an ‘Accordion’ block, allowing you to easily customize the questions and answers displayed.
Clicking on the block enables you to edit the text for each question and answer.
After customizing your homepage, remember to click the ‘Save’ button at the top of the screen. You can then return to the template list by clicking the ‘X’ icon.
SeedProd offers user-friendly templates, a drag-and-drop interface, and essential blocks, making it perfect for customizing your website’s homepage. For additional inspiration, check out our guide on creating a landing page with WordPress.
How to Edit the Blog Index Template
You can modify your blog index template in a similar manner. To learn how, refer to our guide on creating a dedicated page for your blog posts in WordPress.
In Method 2, scroll down to the section on customizing your blog page. Here, you will discover how to add new blocks using drag and drop, as well as how to adjust the settings for each block on your page.
We will guide you through editing the Posts block to display your posts in multiple columns and manage the visibility of the featured image for each post.
You can configure the number of posts to display and decide whether to show a post excerpt. Additionally, you can filter the index by post type, category, tag, or author, and adjust the sorting order.
Activating the SeedProd Theme
After customizing the theme templates, you need to publish your new custom theme. Simply switch the ‘Enable SeedProd Theme’ setting to ‘YES’.
If you haven’t updated your WordPress Home and Blog page settings yet, you’ll see a notification message. Clicking the ‘OK’ button will apply these changes for you.
You can now visit your website to see your updated home page.
Alternative:The Thrive Theme Builder is an excellent alternative to SeedProd. It allows you to easily create custom pages using a drag-and-drop interface, offers pre-made themes for various industries, and includes ready-to-use page templates. Additionally, it ensures that your site looks fantastic on any device. For more information, check out our comprehensive Thrive Themes Suite review.
Editing Your Homepage Using a Page Builder Plugin
Divi is a widely used WordPress page builder plugin that includes both a WordPress theme and a page builder with numerous stunning templates.
For further details, you can read our complete Divi review.
You can use the Divi page builder with any theme. For this tutorial, we will be using it with the Divi theme.
First, download, install, and activate the Divi theme from Elegant Themes. This package includes the Divi builder, so there’s no need for a separate installation. You will need to enter your username and API key under Divi » Theme Options » Updatesto gain access to the layout packs.
For assistance with theme installation, check out our comprehensive guide on how to install a WordPress theme.
After successfully setting up the Divi theme and page builder, you can proceed to configure your homepage. Start by navigating to the Pages menu in your WordPress dashboard, then select and edit the homepage you created previously.
Before editing your homepage, it’s advisable to switch to the ‘Blank Page’ template found in the ‘Template’ panel on the right. This ensures that your homepage will not display a sidebar, title, menu, or any other default elements.
Next, click the ‘Use The Divi Builder’ button located at the top of the screen.
Now, click the ‘Edit With The Divi Builder’ button in the center of the screen.
You should now see the Divi Welcome Screen, which features a video tutorial on using Divi, a brief introduction on how to get started, and options to either begin building your page or explore Divi’s features.
Click the ‘Start Building’ button at the bottom of the page.
Next, you will be presented with a variety of options to create your page.
We recommend starting with a premade layout for your homepage, as this will make the setup process quick and easy.
Divi offers a wide variety of layouts to choose from, featuring hundreds of layout packs, each containing multiple page layouts, including options for homepages.
You can easily find layouts by entering a search term or selecting filters to display only those that match specific categories.
We will utilize the ‘Travel Blog’ layout pack to design our homepage.
First, click on the layout pack you wish to use:
Next, you will see a description of the layout pack along with the various page layouts it includes. For your homepage, you will likely want to select the ‘Home’ or ‘Landing’ page. We will choose the ‘Home’ option.
After selecting your layout, simply click the ‘Use This Layout’ button located at the bottom of the page.
Divi will automatically import your chosen layout. You will then see it displayed live on your page, exactly as it will appear on your website. To modify any section, just click on it.
Divi employs a system of rows (divided into columns) and modules to construct your page. With text modules, you can click on the text and type directly onto the screen.
In this example, we have updated the header and the text that follows it:
To edit other modules, hover your mouse over them and click the ‘Module Settings’ icon.
In this section, we are modifying one of the number counters:
You can remove modules and rows in the same manner by clicking the trash can icon.
You will probably want to use your own images on your homepage. You can update these by accessing the module settings.
Keep in mind that the image at the top is designated as the Background for a Fullwidth Header Module, so you’ll need to change it underContent » Backgroundfor that specific module:
Once you are satisfied with the changes made to your page, it’s time to save your settings.
Click ‘Save’ at the bottom of the screen to proceed.
At times, the bottom row of buttons may be hidden.
If they are not visible, click the purple “…” button to reveal them.
This action will expand the section to display the counter.
Here’s how our page appears live on the website:
Configuring Your Homepage in WordPress
By default, WordPress shows your blog posts on the homepage.
This means that after creating and customizing your homepage, you must instruct your WordPress site to display that page when visitors access your domain.
Let’s explore how to set up a distinct homepage and a blog page in WordPress.
Expert Tip:If your site already has visitors, consider putting it in maintenance mode while you configure your homepage. Alternatively, you can create a staging site to design your homepage before making it live.
First, navigate to Pages » Add New and title your new page as Blog.
Next, you can publish the blank page.
Once your homepage and blog page are set up, you need to instruct WordPress to utilize these pages.
You can do this by going to Settings » Reading in your WordPress admin dashboard. Select the ‘A static page’ option under the ‘Your homepage displays’ section, then choose your homepage and blog pages.
Remember to click the ‘Save Changes’ button to apply your settings.
WordPress will automatically showcase your latest posts on the blog page. For further information, check out our guide on creating a separate blog page in WordPress.
Congratulations! You’ve successfully designed an attractive homepage in WordPress. For detailed guidance on editing various sections of your website, check out our comprehensive guide on modifying a WordPress site.
We trust this tutorial has helped you understand how to edit your WordPress homepage. Additionally, consider exploring our guide on essential WordPress plugins and our recommendations for enhancing WordPress SEO.
If you enjoyed this article, please subscribe to our YouTube Channel for WordPress video tutorials. You can also connect with us on Twitter and Facebook.


