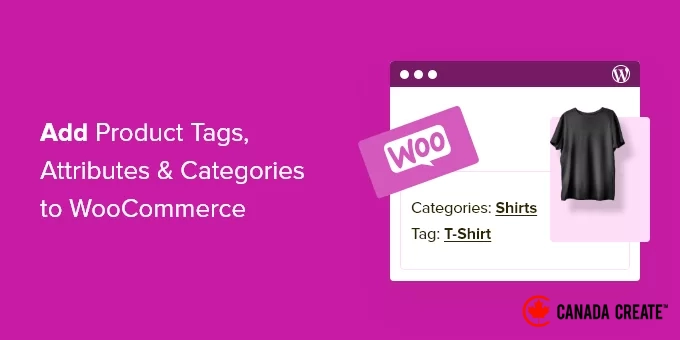
Just as categorizing blog posts helps readers discover your content, online stores require an effective system to organize their products. In WooCommerce, this involves mastering the use of tags, attributes, and categories.
When implemented correctly, these product organization tools do more than just streamline your store. They direct shoppers to exactly what they are searching for, enhance your visibility in search results, and can greatly influence your sales.
In this guide, we will demonstrate how to effectively set up product tags, attributes, and categories in WooCommerce.
You will learn how to organize your store like leading eCommerce websites, making it both user-friendly and optimized for search engines.
Understanding the Differences Between Categories, Tags, and Attributes in WooCommerce
WooCommerce categories, tags, and attributes serve more than just an organizational purpose. They can be powerful tools for increasing sales and enhancing the user experience of your online store.
Let’s explore the function of each one:
- Categoriesare designed for broad product classifications, such as men’s, women’s, or children’s clothing. They form the foundational structure of your store and assist customers in navigating easily. Effective categorization enhances both user experience and search engine optimization for WordPress.
- TagsTags act as keywords for specific products. For instance, a women’s shirt might have tags like summer, discount, casual, and soft. These tags enhance searchability and help highlight related or popular items.
- AttributesAttributes describe specific characteristics of a product, such as weight, material, and color. They are crucial for filtering products and effectively managing inventory.
This feature is commonly found in online clothing stores, where customers can filter products by size, color, or fabric.
For example, a WooCommerce product may belong to the ‘Accessories’ category and feature an attribute indicating the color red on the product page.
Now that you have a grasp of categories, tags, and attributes, we will guide you through the process of creating product attributes, tags, and categories for your WooCommerce products in the upcoming sections.
Are you ready? Let’s dive in. You can use the quick links below to jump to your preferred section:
- How to Add and Edit Product Categories in WooCommerce
- How to Add and Edit Product Tags in WooCommerce
- How to Add and Edit Product Attributes in WooCommerce
- How to Optimize Product Listings for WooCommerce SEO
- Common Questions About WooCommerce Tags, Attributes, and Categories
A Complete Guide to Adding and Editing Product Categories in WooCommerce
WooCommerce provides built-in options for adding product categories, tags, and attributes directly from the start.
To create new categories, go to Products » Categories in your WordPress admin dashboard. Here, you can enter a name for your category, create a slug, and decide if it should have a parent category.
You can also optionally include a description for your category.
Next, you may want to open the ‘Default’ dropdown and select the ‘Display type’ to customize the appearance of your category landing page. Options include ‘Default’ theme settings, ‘Products,’ ‘Subcategories,’ or ‘Both.’
The ‘Default’ option utilizes the standard layout from your WordPress theme for the category page, which is typically the best choice for most online stores.
Choosing ‘Products’ will show all products within that category and any subcategories on the main category page, such as CanadaCreate.com/shop/jackets.
On the other hand, selecting ‘Subcategories’ will only display the subcategories, requiring visitors to click on a subcategory to see the associated products.
To upload a category thumbnail, click the ‘Upload/Add image’ button.
Ensure you click the ‘Add new category’ button to save your changes.
To create additional categories or subcategories, just repeat the previous steps.
After finishing, assign a product to a category by navigating to your product page and checking the category box in the ‘Product categories’ section.
You can also click the ‘Add new category’ link.
This will open a section that allows you to quickly create new categories.
Once you’ve assigned your categories, remember to click the ‘Publish’ or ‘Update’ button.
How to Add and Edit Product Tags in WooCommerce
A WooCommerce product tag functions similarly to a tag in your blog posts, helping visitors easily find specific products.
To create new WooCommerce tags, navigate to Products » Tags and enter the tag name, slug, and description. Then, click the ‘Add new tag’ button.
To add more tags, simply follow the same steps.
You can then add individual tags to your product pages.
To begin, open the product page you wish to edit. Next, enter your tags in the ‘Product tags’ field and click the ‘Add’ button.
Once you have completed your changes, be sure to click ‘Publish’ or ‘Update’ to save your modifications.
How to Add and Edit Product Attributes in WooCommerce
After setting up your tags, you can start adding product attributes. These attributes help customers filter products to find exactly what they need.
First, navigate to Products » Attributes and provide a name for your attribute, along with its URL slug.
Next, consider enabling archives by checking the ‘Enable Archives’ box. This will create a dedicated page for each attribute term, such as a page showcasing all ‘red’ products.
These archive pages are beneficial for your site’s navigation and can improve SEO, as they have the potential to rank in search results.
Following that, select the ‘Default sort order,’ which determines how products will be displayed on the shop page for that attribute.
We will select the ‘Custom ordering’ option, allowing you to arrange sizes in a logical sequence like Small, Medium, and Large, rather than in alphabetical order.
You also have the option to order by name and term ID.
To begin, click the ‘Add attribute’ button to include it in the attribute table.
After that, click the ‘Configure terms’ link to add specific terms to the attribute.
For instance, if you created an attribute named ‘Color,’ you can add individual colors as terms.
This will open a screen similar to the main attribute interface, where you need to input the name, slug, and an optional description.
Don’t forget to click the ‘Add New Color’ button to save your attribute terms. You can repeat this process to add as many attribute terms as needed.
Once you have completed this, you can assign your attributes to specific products.
Simply navigate to the product page you wish to edit and select the ‘Attributes’ option in the ‘Product data’ section located under the text editor.
Next, choose your attribute from the ‘Custom product attribute’ drop-down menu.
Then, click the ‘Add’ button.
This action will add the attribute to your product.
Now, you can select your attribute terms from the ‘Value(s)’ box.
After adding your attributes, click the ‘Save attributes’ button. Also, ensure you click ‘Publish’ or ‘Update’ to save your product changes.
How to Enhance Product Listings for WooCommerce SEO
Having created tags, attributes, and categories, you can further enhance your product pages using an SEO plugin.
We highly recommend All in One SEO as it is the leading WordPress SEO plugin available, trusted by over 3 million website owners. This is also the plugin we utilize to optimize our blog posts at Canada Create™ and our WordPress business sites.
The plugin is user-friendly, allowing you to optimize your website for SEO without any technical expertise.
This will lead to increased traffic from search engines and social media, bringing more visibility to your products.
Important Note:There is a free version of the plugin available, but we will be using the Pro version, which includes essential WooCommerce SEO features.
The first step is to install, activate, and configure the plugin. For detailed instructions, refer to our guide on setting up All in One SEO for WordPress properly.
Next, you can enhance your product titles by navigating to the product page and locating the ‘AIOSEO Settings’ box below the product editor.
In this section, you can modify the product’s SEO title and description. You have the option to use smart tags for automatic description generation based on your product details or to manually enter a custom title and description.
Ensure that your primary product keyword is included in both the ‘Title’ and ‘Meta Description’ sections.
Next, navigate to the ‘Social’ tab to enhance how your product appears on social media platforms.
You have full control over the product image you select, which can increase engagement with your audience.
Then, click on the ‘Schema’ tab. Schema markup helps search engines display your content more effectively in search results.
If you’ve noticed product listings featuring prices, star ratings, and other details, you’ve encountered product schema in action.
All in One SEO will automatically select the appropriate schema type for your products and populate details like pricing and availability.
You can also include additional schema markup, such as brand information, identifier types, and identifier fields. Identifiers can be unique IDs like ISBNs, GTIN codes, or UUIDs.
Once you’ve finished optimizing your product listing for SEO, be sure to click the ‘Update’ button to save your changes. For further information, check out our comprehensive WooCommerce SEO guide to improve your Google search rankings.
Common Questions About WooCommerce Tags, Attributes, and Categories
Here are some common questions our readers have about adding product tags, attributes, and categories in WooCommerce.
What is an easy way to differentiate between categories, tags, and attributes?
Consider categories as the main sections of a store, such as ‘Clothing.’ Tags serve as descriptive labels that can apply to products across any section, like ‘On Sale.’ Attributes specify the unique options for an individual product, such as ‘Color’ or ‘Size.’
How many categories or tags should I assign to a single product?
It is recommended to categorize a product under one primary category. You can also include it in a relevant subcategory if necessary.
While there is no strict limit for tags, it’s advisable to use 5 to 10 highly relevant tags. Using too many can create a cluttered appearance and confuse both users and search engines.
Do product categories and tags contribute to SEO?
Yes, definitely. They generate new archive pages on your site that organize related products. Search engines can crawl and index these pages, enhancing their understanding of your site’s structure and potentially improving your overall search rankings.
We trust that this guide has equipped you with the knowledge to effectively add product tags, attributes, and categories in WooCommerce. Additionally, explore our curated selection of the top WooCommerce plugins for your online store and check out our comprehensive guide on setting up WooCommerce conversion tracking.
If you enjoyed this article, consider subscribing to our YouTube Channel for insightful WordPress video tutorials. Stay connected with us on Twitter and Facebook for more updates.