At CanadaCreate, our goal has always been to simplify processes for both our team and our users. Implementing SAML Single Sign-On (SSO) quickly demonstrated its benefits.
Our team can now access all their tools with a single login, providing us with the reassurance that our security measures are enhanced.
SAML SSO is an excellent solution for businesses prioritizing efficiency and security.
It allows your team to log in once to access everything while you maintain control over user permissions. Companies that implement SSO experience fewer support requests and improved overall productivity.
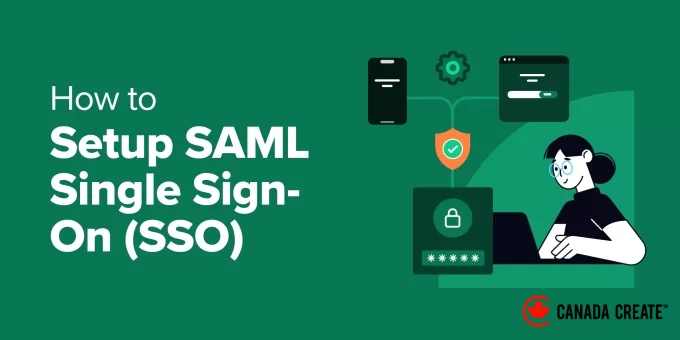
In this guide, we will provide a step-by-step process for setting up SAML Single Sign-On, transforming how your site manages logins.
💡Quick Answer: How to Set Up SAML Single Sign-On in WordPress
In a rush? Here’s a brief overview of the steps required to set up SAML Single Sign-On in WordPress.
- Install Plugin:Begin by setting up the miniOrange SAML Single Sign-On plugin.
- Connect IdP:Configure Google Workspace to function as your Identity Provider.
- Map Data:Sync user attributes and assign default user roles, such as Subscriber.
What Is SAML Single Sign-On?
SAML, or Security Assertion Markup Language, is a secure protocol that allows your WordPress site to communicate with other services, such as Google and Office 365.
SSO, or single sign-on, allows users to access multiple services using a single password.
With SAML SSO, users can log into your site using their existing credentials from various services, eliminating the need to remember multiple usernames and passwords – just one login for everything.
This is particularly beneficial for organizations and enterprises that utilize many different online platforms. For instance, at CanadaCreate, we implement SSO to enable our team members to access their tools with a single login.
Now, let’s explore how to easily set up SAML SSO in WordPress. You can use the following quick links to navigate through the tutorial:
- Step 1: Install the miniOrange SAML Single Sign-On Plugin
- Step 2: Connect Your Site to an Identity Provider
- Step 3: Configure SAML SSO Settings in WordPress
- Frequently Asked Questions about WordPress SAML Single Sign-On
- Essential WordPress Security Tips to Enhance Login Protection
Step 1: Install the miniOrange SAML Single Sign-On Plugin
The simplest method to enable SAML SSO on your WordPress website is by using the miniOrange SAML Single Sign-On plugin.
This free plugin enables your website to integrate with various identity providers, including Google Apps, Okta, OneLogin, Salesforce, Azure B2C, Keycloak, ADFS, Shibboleth 2, Auth0, and SharePoint.
Additionally, this plugin allows users to access multiple websites and applications with a single login. You can follow the same steps outlined below for any other sites your team needs to access.
If you are operating a WordPress multisite network, you only need to complete these steps once on your main network site, and the Single Sign-On (SSO) will automatically function across all your sites.
To begin, you’ll need to install the plugin. If you are unfamiliar with WordPress plugins, we have a comprehensive guide that will assist you in installing a WordPress plugin step-by-step.
After installing the plugin, go to your WordPress dashboard and navigate to miniOrange SAML 2.0 SSO » Plugin Configuration.
Next, switch to the ‘Service Provider Metadata’ tab. Keep this page open, as we will need the information from here in the following step.
Step 2: Connect Your Website with an Identity Provider
Now that the plugin is successfully installed in WordPress, it’s time to link your website with a SAML identity provider (SAML IdP).
A SAML Identity Provider (IdP) is a service that handles user accounts and authenticates users. It acts as a central hub where users can log in once, granting them access to multiple applications, including your WordPress site.
In this example, we will use Google Apps as our SAML IdP. To utilize Google Apps as an SAML IdP, you will need a Google Admin account, which is distinct from a standard Gmail account.
A Google Admin account oversees user management and settings for your organization’s Google Workspace. Typically, it does not end with the @gmail.com domain.
Alternative Option: If you want to set up Google Single Sign-On (SSO) but lack a Google Admin account, check out our guide on how to implement a one-click Google login instead.
First, navigate to the Google Admin Console page.
In the sidebar menu, go to the ‘Apps’ section and select ‘Web and mobile apps.’
Next, open the ‘Add app’ dropdown menu.
Then, choose ‘Add custom SAML app.’
Now, provide a name for your custom SAML app (like ‘miniOrange Custom SAML’) and a short description (such as ‘A SAML SSO application for WordPress’).
Once you are satisfied, click ‘Continue.’
Here, you will find two options to configure WordPress SSO.
We will choose the simpler method (option 1), which involves downloading the IdP metadata. This approach is quicker since you won’t need to manually enter your IdP metadata or copy and paste your x509 certificate later.
Click on ‘Download Metadata’ to begin the process.
Next, scroll all the way down the page.
Click ‘Continue’ to proceed.
On the following page, you will find a form for entering your service provider details.
In this instance, our service provider is our WordPress website, facilitated by the miniOrange plugin.
Now, return to your WordPress dashboard, where you have the miniOrange plugin page open on the ‘Service Provider Metadata’ tab.
Scroll down to locate your service provider information, including the ACS URL and Entity ID. Keep this page open, as you will need to toggle between this page and the Google Admin Console.
Now, return to the Google Admin Console and copy and paste this information into the appropriate fields.
Ensure that you check the ‘Signed response’ box as well.
As you move down the page, select ‘EMAIL’ for the Name ID format and choose ‘Basic Information > Primary email’ for the Name ID.
Then, click ‘Continue’ to move forward.
The next step involves adding user fields and mapping them between Google Directory and your WordPress site using the miniOrange plugin.
This process involves selecting which information from Google accounts will be transferred to your WordPress site.
Click on ‘Add Mapping’ to begin. Next, let’s add the ‘First Name’ field from Google and link it to the ‘firstname’ attribute.
After mapping the desired fields, scroll down to continue.
Then, click ‘Finish’ to complete this step.
You will now be directed to the custom SAML app page in your Google Admin Console.
The final step is to enable the app for your users. Click on ‘OFF for everyone’ to proceed.
Now, change it to ‘ON for everyone’ to activate the app.
Finally, click ‘Save’ to complete the configuration.
Step 3: Set Up SAML SSO Settings in WordPress
Return to the miniOrange SSO plugin page in your WordPress admin area to configure your SSO settings.
Next, switch to the ‘Service Provider Setup’ tab and choose ‘Google Apps.’
Scroll down and find the ‘Upload IDP Metadata’ tab.
Here, enter the identity provider name (likely ‘GoogleApps’) and upload the XML file you previously downloaded from the Google Admin Console.
Once all fields are filled out, click ‘Upload’ to proceed.
Congratulations! You have successfully linked your WordPress blog with your Google Apps SAML Identity Provider. Now, let’s proceed to configure some additional settings.
First, navigate to the ‘Attribute/Role Mapping’ tab.
In this section, you can specify how user data from Google Apps is mapped to user accounts in WordPress.
Scroll down to the ‘Role Mapping’ area and choose the default user role you wish to assign to new users who log in using SAML SSO.
In this example, we have selected ‘Editor.’ Please click ‘Update’ after making your selection.
Next, go to the ‘Redirection & SSO Links’ tab.
Here, you can add a convenient single sign-on button to your WordPress login page for enhanced user experience.
Ensure that the option labeled ‘Add a Single Sign-On button on the WordPress login page’ is activated.
This simple adjustment will introduce a ‘Login With [identity provider name]’ button on your WordPress login screen, simplifying the login process for users with their existing Google Apps credentials.
Here’s how ours appears:
WordPress SAML Single Sign-On: Frequently Asked Questions
We have outlined the steps to set up WordPress SAML SSO, but you may still have some questions. Let’s explore some frequently asked ones:
Is SAML the same as Single Sign-On (SSO)?
No, SAML and SSO are distinct concepts. SAML (Security Assertion Markup Language) is a protocol specifically designed to facilitate SSO.
There are alternative methods to achieve SSO beyond SAML. However, SAML is widely recognized as a secure and effective choice for implementing SSO across various applications, including WordPress.
What distinguishes SAML SSO from a one-click login using a plugin?
Yes, certain WordPress login plugins provide one-click login capabilities, which are a simpler alternative to SAML SSO.
The primary distinction is in their functionality. SAML SSO necessitates the creation of a custom application in your Google Admin console for secure communication. While it requires more setup, it provides enhanced security and centralized user management.
Conversely, one-click login plugins utilize existing protocols such as OAuth to connect with services like Google. This method does not require Google Admin access, but it may not deliver the same level of security as SAML SSO.
Are SSO and social login equivalent?
Social login is a form of Single Sign-On (SSO) that enables users to access your WordPress site using their existing social media accounts, such as Facebook. In contrast, SAML SSO offers a more secure and versatile solution that works with a broader range of identity providers beyond just social media.
For detailed instructions on integrating social login options into your WordPress site, please check our comprehensive guide on adding social login functionality in WordPress.
Essential WordPress Security Tips for a Safer Login Experience
Although SAML SSO provides a high level of security, here are some additional strategies you can implement to enhance the security of your WordPress site:
- Enforce strong password policies for all WordPress users.
- Implement two-factor authentication (2FA) to add an extra layer of security.
- Limit the number of login attempts to safeguard against brute-force attacks.
- Monitor your login logs for any suspicious login activity.
- Restrict access to your WordPress admin area based on IP address.
- Regularly back up your WordPress site to protect against potential security breaches.
- Keep your WordPress core, plugins, and themes up to date to fix any security vulnerabilities.
- Periodically force all users to log out and require them to change their passwords in WordPress.
We trust this guide has assisted you in configuring SAML Single Sign-On (SSO) in WordPress. Additionally, consider exploring our tutorial on obtaining a free SSL certificate for your site, as well as our curated list of essential WordPress plugins to enhance your website’s growth.
If you found this article helpful, please subscribe to our YouTube Channel for more WordPress video tutorials. You can also connect with us on Twitter and Facebook.