Have you ever felt overwhelmed by the category names you selected when you first set up your website? Many WordPress users experience this, fearing that changing them now might result in broken links and negatively impact their SEO.
This concern is completely understandable, and we have certainly encountered the 404 errors that can arise from improper handling of this process. However, reorganizing your content doesn’t have to be a daunting task.
At Canada Create™, we have developed a simple and secure method for renaming categories on our own websites and have successfully guided thousands of readers through the process. We will provide you with clear instructions on how to update your categories without any technical difficulties.
First, let’s discuss some reasons why you may want to consider renaming your categories.
Reasons to Rename Categories in WordPress
Throughout our years of operating Canada Create™, we have observed how effective category names can significantly enhance a website’s user experience and SEO effectiveness.
There are numerous reasons to rename your categories. As your website evolves, you may require more precise or broader category names to accurately represent your content.
Well-chosen category names not only assist visitors in finding relevant content quickly but also enhance search engines’ understanding of your site’s structure. If your business focus changes, updating category names is essential for maintaining a professional image.
WordPress facilitates this through its content organization system, which features two primary taxonomies: categories and tags. If you’re unfamiliar with these concepts, be sure to explore our comprehensive guide on best practices for managing WordPress categories and tags.
Although renaming categories may appear simple, it’s important to approach it correctly. An improper method can result in broken internal links, diminished search engine rankings, confused users, and frustrating 404 error pages.
In this detailed guide, we will demonstrate how to rename categories safely without sacrificing SEO value, provide best practices for naming categories, and help you steer clear of common pitfalls.
- How to Effectively Rename Categories in WordPress
- Adjusting the Category Prefix
- Combining and Bulk Editing Categories
- Redirecting Users to the Updated Category URL
- Video Tutorial
- Common Questions About Renaming Categories in WordPress
- Further Resources on WordPress Categories
A Comprehensive Guide to Renaming Categories in WordPress
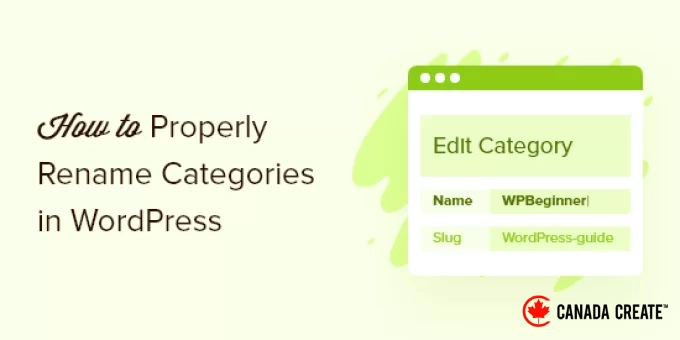
Access the category management section in WordPress by navigating toPosts » Categories. Here, you can manage your WordPress categories, modify existing ones, and remove any categories you no longer need.
You can rename categories in two different ways.
The first method is to hover over the category you want to rename and click on the ‘Quick Edit’ link.
The Quick Edit box will appear, allowing you to easily change the category name.
You can also modify the category’s slug, which defines the URL for the category page. For instance, if the slug is ‘books’, the category page URL will be:
https://example.com/category/books
Important Note: You don’t need to change the slug for a minor name adjustment. However, if you do change it, you must set up a 301 redirect. We will explain how to do this later in the article.
Remember to click the ‘Update Category’ button once you are done.
The second method for renaming a category also lets you add a description. To do this, click the ‘Edit’ link beneath the category you want to rename.
This will direct you to the category editing page.
In this section, you can modify the category name, slug, and description.
The category editing page also allows you to select a parent category. For more information, check out our guide on adding subcategories in WordPress.
After making your changes to the category, remember to click the ‘Update’ button to save your settings.
Modifying the Category Prefix
WordPress provides the option to change the /category/ prefix in your category URLs, known as the category base.
To modify it, navigate to Settings » Permalinks and scroll down to the ‘Optional’ section. Here, you will find a field to change both the category base and tag base.
The default category base is ‘category’. You can change it to any term you prefer, such as ‘topics’.
This adjustment will alter the URL from
https://www.example.com/category/your-category-slug/
to
https://www.example.com/topics/your-category-slug/
Combining and Bulk Editing Categories
As your website expands, you might want to streamline your organizational structure by merging multiple categories into one.
This is beneficial if you have several categories that are quite similar. By merging them into a single category, you will simplify your WordPress site and enhance its navigation.
For detailed instructions, refer to our guide on merging and bulk editing your categories and tags.
Redirecting Users to the Updated Category URL
If you have modified the category slug, the URL for the category page will also change, rendering the old URL ineffective.
Fortunately, if you included that category in your WordPress menu, WordPress will automatically update the menu to reflect your changes.
However, when users or search engines attempt to access the old category URL, it will no longer function, resulting in a ‘404 Page Not Found’ error message.
These 404 errors can negatively impact user experience, potentially leading to a decline in search engine rankings and reduced eCommerce sales.
To prevent this, you need to establish a redirection from the old URL to the new one. The simplest method to do this is by using All in One SEO (AIOSEO), which is the top SEO plugin for WordPress.
While AIOSEO offers a free version, you will need the AIOSEO Pro version for access to the Redirection Manager necessary for setting up a redirect.
Begin by installing and activating the All in One SEO (AIOSEO) plugin. If you need assistance, refer to our guide on how to install a WordPress plugin.
Once activated, AIOSEO will automatically open the setup wizard. Click on ‘Let’s Get Started’ and follow the on-screen instructions to enhance your site’s search engine visibility.
For detailed instructions, please refer to our comprehensive guide on how to properly set up All in One SEO for WordPress.
To access the premium features of the plugin, you will need to enter a license key when prompted. You can find this key in your account on the AIOSEO website.
After entering the license key, click on the ‘Finish Setup’ button to save your settings and exit the setup wizard.
Now, navigate to All in One SEO » Redirects in your WordPress dashboard. Then, click on the ‘Activate Redirects’ button.
With the Redirection Manager now active, you can create your new redirect.
Start by entering the path of your old category in the ‘Source URL’ field. You only need the portion that follows your domain name (for example, /category/old-slug/).
Next, in the ‘Target URL’ field, enter the new path for your category (for instance,/category/new-slug/This informs AIOSEO where to direct users who attempt to access the old URL.
In the next example, users will be redirected from /category/search-engine-optimization to /category/seo.
Next, select the ‘Redirect Type’ from the dropdown menu. The options are labeled with numbers such as 301, 302, and 307.
Since you are permanently changing the category name, opt for a ‘301 Moved Permanently’ redirect. This option is ideal for SEO as it transfers all ranking authority and traffic from the old URL to the new one.
Simply open the ‘Redirect Type’ dropdown and select ‘301 Moved Permanently.’
If you are only temporarily relocating the category archive page to a new URL, you should select ‘307 Temporary Redirect’ instead.
Once you have completed that, click on the ‘Add Redirect’ button.
Now, if you attempt to access the original category archive page, AIOSEO will automatically redirect you to the new target URL.
Common Questions About Renaming Categories in WordPress
Over the years, we have received numerous inquiries about this topic. Below are answers to some of the most frequently asked questions from our readers.
1. What happens to the posts in a category when I rename it?
The posts will remain unchanged, but the category label will be automatically updated. WordPress manages this process in the background, ensuring that all your articles reflect the new category name without requiring manual edits.
2. Will renaming a category negatively impact my website’s SEO?
Renaming a category can affect your SEO if you change the category’s slug (the URL) and fail to implement a 301 redirect. Without a redirect, both visitors and search engines may encounter a 404 error page.
However, if you follow the steps outlined in this guide and use a tool like All in One SEO, you can safely rename categories without harming your SEO.
3. Do I always need to set up a redirect after renaming a category?
A redirect is only necessary if you change the category’s URL slug. If you simply update the display name while keeping the slug unchanged, the category page’s URL will remain the same, and no redirect is needed.
4. Can I rename the default ‘Uncategorized’ category in WordPress?
Yes, you can certainly do that. You can go to Posts » CategoriesYou can easily edit the ‘Uncategorized’ category just like any other category. Many users choose to rename it to something more relevant for their site, such as ‘General News,’ ‘Blog,’ or ‘Announcements.’
Further Reading on WordPress Categories
We hope this guide has helped you understand how to effectively rename categories in WordPress. You might also be interested in exploring additional WordPress tutorials focused on organizing your content:
- Categories vs Tags – Best SEO Practices for Organizing Your Content
- How to Create Categories and Subcategories in WordPress
- How to Add Categories and Tags to WordPress Pages
- How to Change, Move, and Delete WordPress Categories Correctly
- How to Combine and Bulk Edit Categories and Tags in WordPress
- How to Show Category Descriptions in WordPress
- How to Search by Category in WordPress (Most Effective Method)
- How to Rename the Uncategorized Category in WordPress
- How to Style Individual Categories Differently in WordPress
If you enjoyed this article, please subscribe to our YouTube Channel for WordPress video tutorials. You can also connect with us on Twitter and Facebook.