Skip to content
As the online reselling market expands rapidly, you may want to consider launching your own thrift store website. Online thrift stores are not only becoming increasingly popular, but they are also simple to operate.
At Canada Create™, we’ve heard from many readers who are eager to start their own online store, yet they feel uncertain about the potential challenges of developing a new product or making significant investments in inventory.
This is why sourcing second-hand items and selling them through an online thrift store is an excellent alternative.
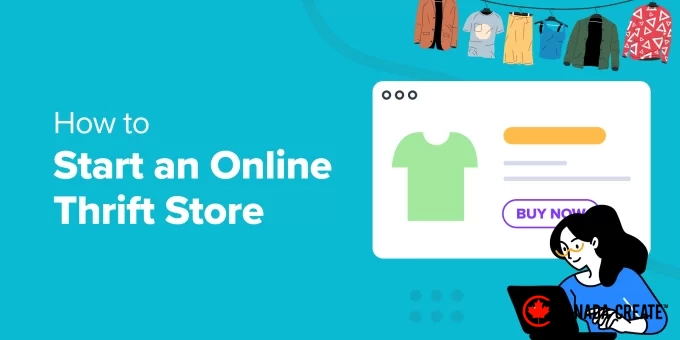
In this article, we will guide you through the process of creating an online thrift store website using WordPress.
What is an Online Thrift Store?
An online thrift store is a type of eCommerce business where you can sell used or pre-loved items. This can include a wide variety of products such as clothing, vehicles, electronics, toys, books, furniture, and more, all offered at affordable prices.
One of the key advantages of starting an online thrift store is the low startup cost. You don’t need a significant amount of money to purchase or manage inventory. Additionally, the expense of creating an eCommerce website is also quite low.
For instance, if you have a beautiful dress that no longer fits, instead of discarding it, you can have it cleaned and sell it online.
Additionally, launching an online thrift store is an excellent way to earn extra income from home. You can begin with a small inventory and gradually grow your business.
Essential Requirements for Starting Your Online Thrift Store
Many people believe that launching an online store is overly complicated. In reality, it’s much easier than you might expect.
To get started, you will need three key components:
- Domain Name – This is the unique name of your thrift store that customers will type into their web browsers (for example, CanadaCreate.com). Consider it the address of your online business.
- Web Hosting Service – This is the service that hosts your website on the internet and stores all your website files. Think of it as the physical location of your online thrift store.
- SSL Certificate – This certificate provides an added layer of security for your online store, allowing you to safely process payments from customers.
It’s truly that simple!
You can create an online thrift store without any technical expertise, coding knowledge, or complex configurations.
We will guide you through the process step-by-step. Click the links below to navigate to any section:
- Selecting an eCommerce Platform for Your Online Thrift Store
- Choosing a Web Hosting Service and Installing WordPress
- Configuring WooCommerce on Your Website
- Personalize Your WordPress Thrift Store Theme
- How to Add Products to Your Online Thrift Store
- Finding Products for Your Thrift Store
- Install Plugins to Increase Traffic and Boost Sales
Selecting the Right eCommerce Platform for Your Online Thrift Store
The first and most crucial step is to select the ideal platform for your online thrift store.
Choosing an inappropriate eCommerce platform can lead to significant expenses for new store owners. Transitioning to a different service later means you’ll have to redo all your work and incur additional costs.
To help you avoid this pitfall, we are here to assist.
We recommend two popular eCommerce platforms for your online thrift store: Shopify and WooCommerce (which operates on WordPress).
Shopify is a comprehensive hosted eCommerce solution that allows you to set up an online store quickly.
However, the main downside is its pricing. You’ll need to pay $25 per month, which can be quite steep for individuals and small business owners. Additionally, payment options are limited unless you pay extra fees.
This is why many users prefer WordPress with WooCommerce. It offers greater flexibility and is more budget-friendly compared to Shopify. While WooCommerce requires some initial setup, it pays off in the long run.
For more information, check out our detailed comparison of Shopify and WooCommerce.
In this tutorial, we will guide you through the process of launching your online thrift store using WooCommerce and WordPress.
Choose a Web Hosting Provider and Set Up WordPress
As previously mentioned, you’ll need a domain name, a web hosting provider, and an SSL certificate to establish your online thrift store.
If bought separately, a domain name typically costs around $14.99 per year, web hosting is approximately $7.99 per year, and an SSL certificate is about $69.99 per year.
These costs can increase if you opt for additional features and add-ons in your hosting plan.
Fortunately, our partners at Bluehost have a special offer for Canada Create™ readers. You can save up to 61% on hosting plans and start for as low as $2.99 per month.
Bluehost is officially recommended by WordPress and WooCommerce as a hosting provider. Plus, each hosting plan includes a free domain name and SSL certificate.
Important Note:At Canada Create™, we prioritize transparency. If you sign up for Bluehost using our referral link, we will earn a small commission at no additional cost to you (in fact, you’ll save money and receive a free domain).
We earn a commission for recommending various WordPress hosting companies, but we only endorse products that we personally use and believe will benefit our readers.
If you’re seeking a Bluehost alternative, we recommend SiteGround WooCommerce hosting. It is another officially endorsed WordPress hosting provider.
To begin, simply visit the Bluehost website and click the ‘Get Started Now’ button.
Next, you’ll need to choose a pricing plan.
You can start for just $2.99 per month. Additionally, Bluehost offers an eCommerce Essentials plan for $13.99 per month, which includes an exclusive store theme, store analytics, and $450 worth of eCommerce plugins.
For this tutorial, we will select the ‘eCommerce Essentials’ plan.
Next, Bluehost will prompt you to enter a name for your online thrift store.
If you don’t already have a domain, simply type a website name in the provided field, choose a domain extension, and click the ‘Search for Domain’ button.
Ensure that your domain name is relevant to your business, easy to pronounce and spell, and memorable. Aim to secure a domain with a ‘.com’ extension.
If you’re uncertain about which domain name to select, check out our guide on choosing the perfect domain name.
Next, you’ll need to provide information such as your name, address, email, and more to set up a new account.
Finally, you’ll need to input your payment details to finalize the purchase.
Once completed, Bluehost will direct you to the account dashboard where you can manage your websites.
The great news is that Bluehost provides a one-click installation for WordPress. If you’re using a different hosting service or missed the setup step, refer to our guide on how to install WordPress for further instructions.
For example, in Bluehost, log into your account and go to the ‘Websites’ tab. From there, simply click the ‘Add Site’ button located in the top corner.
This action will initiate the WordPress setup wizard in Bluehost.
You can select the ‘Install WordPress’ option and then click the ‘Continue’ button.
After that, you’ll be prompted to enter a name for your online thrift store website.
Once you’ve provided a title, click the ‘Continue’ button.
Bluehost will now install WordPress and set up your thrift store website.
Once the installation is complete, navigate to the ‘Websites’ tab to view your new website. Click the ‘Edit Site’ button to access the WordPress admin panel.
Alternatively, you can log in to your WordPress dashboard by entering ‘yourthriftstore.com/wp-admin’ directly into your browser.
This is how the WordPress admin area will appear:
Next, check your WordPress settings to ensure everything is configured correctly.
Begin by visiting the Settings » General page to enter a title and tagline for your WordPress site. If you are satisfied with the current site title, you can leave it as is.
A tagline serves as a brief description of your thrift store. This is optional and can be added later if desired.
Additionally, make sure that both your WordPress Address (URL) and Site Address (URL) are set to HTTPS instead of HTTP.
Next, navigate to the Settings » Discussions page in the admin panel and scroll down to the ‘Before a comment appears’ section.
Here, check the ‘Comment must be manually approved’ option. This will put your comments into moderation, helping to reduce spam.
For detailed instructions, please refer to our guide on moderating comments in WordPress.
Configuring WooCommerce on Your Website
The next step is to install WooCommerce on your website, the leading eCommerce platform designed for WordPress.
First, you need to install and activate the WooCommerce plugin. If you require assistance, please check our guide on installing a WordPress plugin.
After activation, the WooCommerce setup wizard will appear. Click the ‘Set up my store’ button to proceed.
Follow the on-screen instructions to finish the WooCommerce setup. If you need further assistance, please refer to our guide on launching an online store.
Once the setup is finalized, you can configure payment options for your thrift store.
WooCommerce supports a variety of popular payment gateways, allowing you to accept credit cards, cash on delivery, bank transfers, Stripe, PayPal, and more.
Simply navigate to WooCommerce » Settings in your WordPress dashboard and select the ‘Payments’ tab.
You can click the ‘Set up’ button for the payment method you wish to add to your online thrift store.
For instance, if you want to set up Stripe for credit card payments, just connect your Stripe account or input the account keys to integrate this payment method into your store.
Another optional feature you can set up in WooCommerce is shipping zones, which allows you to specify different shipping methods and rates for various locations.
For further information, please refer to our guide on adding a shipping calculator to your WordPress website.
Personalize Your WordPress Thrift Store Theme
When you enroll in the Bluehost Online Store plan, a WordPress theme comes pre-installed for your convenience.
Simply navigate to Appearance » Themes and click the ‘Customize’ button to modify the theme.
This will open the WordPress Full Site Editor (FSE), introduced in WordPress 5.9, which utilizes blocks for theme editing, similar to how you edit content in the block editor.
The purpose of the full site editor is to streamline website editing and enhance user experience.
To discover more, you can check out our comprehensive guide on WordPress full site editing.
If the default theme doesn’t suit your taste, you can easily change it. There are thousands of WordPress themes available. Be sure to explore our list of the best WooCommerce WordPress themes to find one that fits your style.
Alternatively, you can design a unique theme for your online thrift store using a WordPress theme builder.
For example, SeedProd is an excellent theme and landing page builder that features a user-friendly drag-and-drop interface. It includes pre-designed templates that you can easily modify without needing to write any code.
You can refer to our guide on how to create a custom WordPress theme without coding.
Adding Products to Your Online Thrift Store
Now that your online thrift store is fully set up, it’s time to start adding products to WooCommerce.
Simply go to theProducts » Add Newpage in the admin panel. Here, you can enter a name for your product and provide a short description.
Next, scroll down to the ‘Product Data’ section.
In this section, you can set the price of your product in the ‘Regular price ($)’ field. You also have the option to enter a discounted price for the product.
Then, you can upload product images using the panel on the right.
Go to the Product Image section and upload your image. This will serve as the featured image for your product.
You can also create a product gallery by uploading additional images for your product.
When you’re finished, just click the ‘Publish’ button to make your changes live.
You can repeat this process to add more items to your online thrift store.
Visit your website to view all the products displayed on the store page.
Sourcing Products for Your Thrift Store
Regularly finding products for your online thrift store can be challenging for many entrepreneurs.
Fortunately, there are various sources for used or pre-loved items. For example, conducting a quick search on other thrift stores and platforms like eBay and Craigslist can reveal numerous products to list on your site.
Additionally, exploring flea markets, local shops, and garage sales can help you discover the right items for your store. This is especially beneficial if you sell clothing, books, and second-hand electronics.
Another option is to allow customers to upload their items for consideration in your online thrift store. This approach enables you to build your inventory without upfront investment, allowing you to share the profits from sales.
Create a vibrant online marketplace with WordPress, allowing users to sell their products through your eCommerce platform. For instance, individuals can list their pre-owned items on your website and pay you a commission or fee for the service.
Incorporate Plugins to Enhance Your Traffic and Boost Sales
WordPress provides a variety of plugins that function like applications for your website. These plugins enable you to add additional features and customize your online thrift store.
For instance, there are plugins available for integrating contact forms, product image galleries, product comparisons, gift cards, giveaways, popups, and much more.
You can select from over 59,000 free WordPress plugins, along with premium options available from third-party websites and developers.
If you’re uncertain about what to consider when choosing a plugin, check out our guide on selecting the best WordPress plugin for your needs.
In addition, we’ve curated a list of essential plugins that you should consider installing for your thrift store.
Incorporate Additional Features and Functionality
- WPForms – This is the top-rated form plugin for WordPress, allowing you to easily add a contact form to your site. You can also create various types of forms, including file upload forms, order/billing forms, online payment forms, and more.
- MonsterInsights – Easily connect Google Analytics to your website with MonsterInsights, no coding required. This plugin provides valuable insights into user behavior, including clicks, purchases, and visitor locations.
- SeedProd – The top drag-and-drop builder for designing custom landing pages, layouts, and website themes, all without needing any technical skills.
- Envira Gallery – Design beautiful image galleries to showcase products in your online thrift store.
Website Optimization for Enhanced SEO, Performance, and Conversion Rates
- All in One SEO (AIOSEO) – Effortlessly optimize your website for search engines, enhance your WordPress SEO, and increase your site traffic.
- OptinMonster – The leading software for lead generation and conversion optimization. Create engaging popups, modals, floating bars, and more, with personalization options to grow your email list and enhance conversions for your thrift store.
- PushEngage – Implement push notifications on your website to engage visitors, encourage return visits, and boost your site traffic.
- TrustPulse – Utilize real-time notifications to harness social proof and increase eCommerce conversions.
- WP Super Cache – Enhance your WordPress site’s speed and performance with this free caching plugin.
- Advanced Coupons – Design WooCommerce coupons to attract more customers and increase sales.
Boost Your Website Security
- Sucuri – The top WordPress security plugin that scans for malware, prevents cyberattacks, and monitors online threats.
- Duplicator – Automatically back up your online thrift store with this plugin and easily restore data in case of emergencies.
Additional WordPress Plugins to Explore
- RafflePress – Host viral giveaways and contests on your thrift store to increase sales, social media followers, and email subscribers.
- UserFeedback – Incorporate interactive surveys into your online store to gather user feedback and enhance the customer experience.
- Smash Balloon – Showcase social media content on your store to increase engagement.
- Uncanny Automator – Streamline your workflows and save time by automating tasks. Connect plugins, websites, and apps to optimize your thrift store operations.
- Constant Contact – The leading email marketing service for all your email needs. Easily create email campaigns, set up autoresponders, conduct A/B testing, integrate with WooCommerce, and more.
- WP Mail SMTP – Ensure your WordPress emails successfully reach your customers’ inboxes and avoid the spam folder. Resolve email delivery issues effectively.
- LiveChat – Provide immediate support to customers through live chat software. Address customer inquiries, enhance user experience, and increase sales.
Explore our curated list of the best WooCommerce plugins to discover additional options.
At Canada Create™, we aim to deliver practical and beginner-friendly WordPress tutorials tailored for non-technical users, small business owners, bloggers, and eCommerce entrepreneurs.
To deepen your understanding of WooCommerce and WordPress, consider following these informative guides:
- WooCommerce Made Simple: A Comprehensive Step-by-Step Tutorial [+ Resources]
- WooCommerce SEO Made Easy – A Detailed Guide to Achieving Top Rankings on Google
- The Complete WordPress Security Guide – Step by Step
- 50 Common WordPress Errors and How to Resolve Them
- How to Boost Your Blog Traffic – 27 Proven Tips for Success
- How to Launch an Online Boutique Shop that Maximizes Sales
- How to Create a Print on Demand Shop Using WordPress
- Dropshipping Made Simple: A Comprehensive Guide for WordPress
- How to Build an Email List in WordPress – A Beginner’s Guide to Email Marketing
We trust this guide has provided you with valuable insights on launching your online thrift store with WordPress. Additionally, check out our article on the key benefits of using WordPress and our recommendations for the best business phone services for small businesses.
If you enjoyed this article, consider subscribing to our YouTube Channel for WordPress video tutorials. You can also connect with us on Twitter and Facebook.