
Is your older content damaging your website’s credibility? When visitors come across a post that hasn’t been updated in years, they often assume the information is outdated and leave quickly.
At Canada Create™, we value transparency to build reader trust. We consistently display the ‘Last Updated’ date on our articles so our audience knows they are receiving the most up-to-date information.
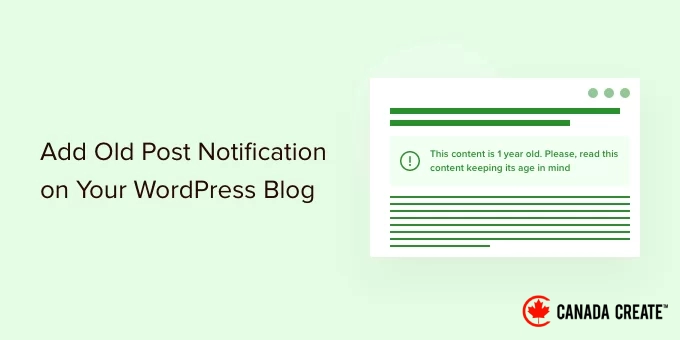
In this guide, we will demonstrate how to add an old post notification to your WordPress blog, helping to manage user expectations and enhance your site’s authority.
The Importance of Adding Old Post Notifications to WordPress Blog Posts
Here’s a reality check: some of your best content could be undermining your website’s credibility. When visitors find a three-year-old tutorial about software that has been updated multiple times since, they aren’t receiving the assistance they need.
Outdated content can frustrate users, increase bounce rates, and negatively impact search rankings. Google favors fresh, accurate content, and outdated information sends the wrong message.
The best approach? Update every old post with the latest information.
However, let’s be realistic. If you’ve been blogging for years, you likely have hundreds of posts. You may not be able to update them all due to time and resource constraints.
Old post notifications are an effective solution that informs your readers they are accessing older content, allowing them to make informed choices about the information presented. This practice fosters transparency and builds trust.
Many successful websites opt to show the ‘last updated’ date alongside the original publish date. This strategy is particularly beneficial for evergreen content that is regularly updated.
Let’s explore the practical steps. We will guide you on how to implement old post notifications on your WordPress site and how to display last updated dates to enhance credibility with both users and search engines.
- How to Display Old Post Notifications Using a Plugin
- How to Show the Last Modified Date for Your Posts
- How to Add Old Post Notifications Using Code
- Common Questions About Old Post Notifications
- Further Reading and Resources
Step 1: Display Old Post Notifications Using a Plugin
This method is straightforward and recommended for all users looking to add an old post notification.
Begin by installing and activating the DX Out of Date plugin. For detailed instructions, refer to our step-by-step guide on installing a WordPress plugin.
After activation, navigate to theSettings » Out of DateAccess the page to configure the plugin settings.
Here, you will select the time frame and duration. This determines how long after publication a post will be classified as old by the plugin.
Below that, you can enter a custom message to display on older posts and enable notifications for all old posts. Don’t worry; you can easily hide it for specific posts by editing them.
On the settings page, you can also select post types, customize the colors for the notification box, and add custom CSS if necessary.
Remember to click the Save Changes button to apply your settings.
You can now check an old post on your website to see the plugin working.
Hiding Old Post Notifications on Specific Posts
Suppose you have an older article that is still relevant, accurate, and ranks well in search results. You might want to hide the old post notification for that article.
Similarly, if you’ve updated an old post with new information, the plugin will continue to show old post notifications because it relies on the post’s publication date to assess its age.
To resolve this, edit the post and find the ‘Out of Date Notification’ box in the editor settings. Simply uncheck the notification option and save your changes.
The plugin will no longer display notifications for old posts on this specific article.
Method 2: Show the Last Modified Date for Your Posts
Many WordPress sites showcase the last modified date for their blog entries, with some opting to replace the original publish date with this updated date.
This approach allows users to see when a post was last updated without presenting an old post notification.
To get started, install and activate the WP Last Modified Info plugin. For detailed instructions, refer to our comprehensive guide on installing a WordPress plugin.
Once activated, navigate toSettings » WP Last Modified Infoto adjust the plugin settings.
On the settings page, enable the Global display of the last modified info option. You can then select how you wish to present the modified date.
You have the option to replace the published date, display it before or after the content, or insert it manually into a post.
Below this section, you’ll find several additional options. If you’re uncertain, you can keep them at their default settings.
Remember to click the Save Settings button to apply your changes.
You can now check your website to view the last updated information for all your blog posts.
By default, this plugin may display the last updated date on all posts, including newly published ones. If you prefer to show it only on older content, you can adjust the time gap settings.
In the plugin settings, you can specify a time interval of up to 30 days. This ensures that the ‘Last Updated’ date is only shown if the post has been modified after that time period.
The plugin also offers three blocks that you can manually insert into a post or page to showcase the last modified information.
You have the option to apply custom CSS to style your last updated date notification. The following custom CSS was used in the screenshots above.
p.post-modified-info { background: #fbffd8; padding: 10px; border: 1px solid orange; font-size: small; font-weight: bold;
}
Method 3. Add Old Post Notification Using Code
This method involves manually adding code to your WordPress theme files. If you’re unfamiliar with this process, check out our guide on how to add custom code snippets in WordPress.
Simply copy and paste the following code into your theme’s single.php template.
// Set the threshold for old posts to one year
$time_defined_as_old = 60*60*24*365; // Verify if a post is older than one year
if((date('U')-get_the_time('U')) > $time_defined_as_old) {
$lastmodified = get_the_modified_time('U');
$posted = get_the_time('U');
// Check if the post was updated after its initial publication if ($lastmodified > $posted) { // Show last updated notice echo 'This article was last updated ' . human_time_diff($lastmodified,current_time('U')) . ' ago
'; } else { // Show last published notice echo 'This article was published ' . human_time_diff($posted,current_time( 'U' )) . ' ago
';
}
}
This code identifies old posts as any articles published at least one year ago.
It then checks if a post is older than a year. If so, it verifies whether the post has been updated since its publication and displays a notice based on the results.
Here is how it appeared on our demo site for a post that is old and has not been updated.
Here is how it appeared for a post that is old but was updated after publication.
We enhanced the old post notification with the following custom CSS.
p.old-article-notice { background: #fbffd8; padding: 10px; border: 1px solid orange; font-size: small; font-weight: bold;
}
Common Questions About Old Post Notifications
We have assisted thousands of users in managing their content archives. Below are some of the frequently asked questions regarding the handling of old posts in WordPress.
1. Does displaying an old post notification negatively impact my SEO?
No, it typically has a positive effect. If a visitor arrives at an article from 2018 and believes it to be current, they may become frustrated and leave quickly upon discovering the information is outdated. This can increase your bounce rate, which is detrimental to SEO. A clear notification sets proper expectations and fosters trust.
2. Should I simply delete old blog posts instead?
We advise against deleting posts unless they are harmful or completely irrelevant. Old posts may still generate backlinks and traffic. Instead, consider updating the content. If deletion is necessary, ensure you redirect the URL to a relevant new post to prevent broken links.
3. Can I just update the published date to today’s date?
Only update the date if you have made significant improvements to the content that add real value. Changing the date without enhancing the article can lead to a poor user experience. Google can identify this practice, which may be considered spammy and could negatively impact your search rankings.
4. How frequently should I refresh my old content?
There are no strict guidelines, but we suggest reviewing your most popular posts every 6 to 12 months. If a post is attracting substantial traffic, it’s important to keep it updated to maintain your rankings against competitors with more current information.
Additional Resources
We hope this article has helped you learn how to easily add old post notifications to your WordPress blog. You may also find these additional resources helpful:
- Comprehensive WordPress SEO Guide for Beginners (Step-by-Step)
- How to Remove Dates from WordPress URLs
- How to Showcase New Posts for Returning Visitors in WordPress
- How to Identify and Fix Broken Links in WordPress (Step-by-Step)
- Should You Retain or Remove Old Content in WordPress? (Expert Insights)
If you enjoyed this article, please subscribe to our YouTube Channel for WordPress video tutorials. You can also connect with us on Twitter and Facebook.


