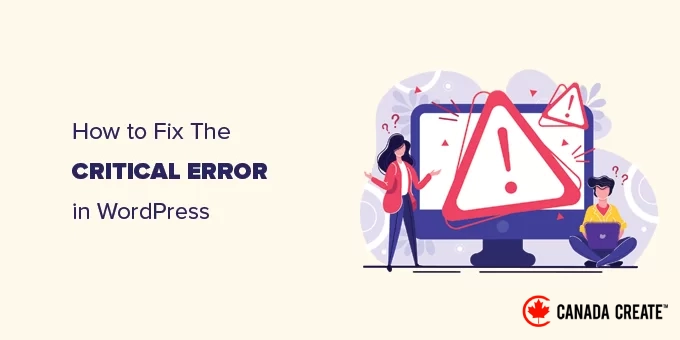
If you’re currently encountering a critical error message in WordPress, don’t worry — we have the solutions you need.
With over ten years of experience managing WordPress sites, we understand how daunting this can be for newcomers.
Through our work at CanadaCreate and assisting numerous users, we’ve found that this error often occurs after a plugin update or when changes are made to your site. Although it may seem serious, it’s usually a quick fix.
We’ve created this comprehensive step-by-step guide featuring proven solutions that have helped thousands of WordPress users. We apply these methods whenever we face this error on our own sites.
What Does the Critical Error in WordPress Mean?
We’ve encountered the WordPress critical error countless times, and many of our readers have as well.
This error occurs when WordPress is unable to load the necessary scripts for your site to function correctly. As a result, your site may crash and display an error screen.
Prior to WordPress 5.2, this type of error often resulted in a blank screen or a frightening message known as the ‘white screen of death,’ which was particularly confusing for beginners.
Fortunately, newer versions of WordPress provide clearer guidance. Now, you’ll see a message that states:A critical error has occurred on this website. Please check your admin email inbox for further instructions.
You will also find a link to the WordPress troubleshooting guide.
WordPress sends an email to your admin email address, which can be very useful as it typically indicates the cause of the error, often related to a plugin or theme conflict.
The email contains a special link that allows you to access your site in recovery mode, enabling you to log in and resolve the issue without the error disrupting your entire site.
In some cases, you may not receive that email. Instead, the error message will simply state that your site is facing a critical error, without any additional guidance.
Based on our experience, this often occurs when WordPress is unable to access the necessary files to initiate recovery mode. Server problems or misconfigurations can sometimes hinder this process.
What Triggers the Critical Error in WordPress?
Typically, the ‘critical error’ in WordPress arises from a faulty plugin, script, or code that prevents WordPress from loading correctly.
When the code fails to function as intended, WordPress cannot load the required files. We have observed this issue when custom code or untested scripts are added to a site.
If you recently copied code snippets from a tutorial, they could be causing the issue.
Most popular WordPress plugins undergo extensive testing, reducing the likelihood of critical errors. However, there are rare instances where plugin conflicts or custom code issues can still lead to errors.
Let’s guide you through the process of resolving the critical error in WordPress so you can get your website running smoothly again.
Resolving the Critical Error in WordPress: Two Effective Methods
The critical error message itself is not very helpful in identifying the root cause of the problem. Fortunately, WordPress also sends an email to the admin email address associated with your website.
Many WordPress sites are not set up to send emails via SMTP, which means users may not receive an email even if WordPress claims it has been sent.
In some cases, WordPress sites may only display the critical error message without any instructions to check the email. This happens when WordPress is unable to load the necessary files to send an email or activate recovery mode.
If you find yourself in this situation, don’t worry. We will guide you on how to resolve the critical error even without receiving the email.
If you received an email notification about a technical issue with WordPress, we will guide you on how to understand it and use the information to restore your website.
Click the links below to jump directly to the section you need:
- Resolving the Critical Error Using WordPress Debugging Email
- Manually Fixing the Critical Error in WordPress (Without Email)
- How to Prevent the ‘Critical Error’ in the Future
Resolving the Critical Error Using WordPress Debugging Email
First, check the inbox for the email address associated with your WordPress administration.
Not sure which email address you used for the admin account? It’s the email you provided during the WordPress installation process.
If your site is hosted on Bluehost or you used a WordPress auto-installer, your admin email address is likely the same as the one for your hosting account.
You should find an email in your inbox with the subject line, ‘Your Site is Experiencing a Technical Issue.’ This email contains valuable information about the cause of the critical error on your WordPress site.
For example, the screenshot below illustrates that the critical error was triggered by the WordPress theme on our test site.
The email contains a special link that allows you to access your WordPress website in recovery mode, enabling you to troubleshoot and resolve the issue.
At the bottom of the email, you will find more in-depth details about the error, including the exact file and line of code that caused it.
In the example provided, an error is triggered by some code located on line 614 of the functions.php file in our theme.
Here’s another example illustrating an error resulting from a faulty WordPress plugin.
The message clearly identifies the plugin name and the specific line of code responsible for the error.
Simply click on the link to enter WordPress recovery mode, which will direct you to your WordPress admin dashboard.
You will need to log in to proceed.
After logging in, you will see a notification regarding the critical error, including details about its cause and a link to address it.
For example, in the screenshot below, WordPress alerts us about the critical error caused by a plugin, along with a link to the Plugins page.
Clicking the link will reveal the problematic plugin and specify the exact line of code that triggered the error.
You can temporarily deactivate the plugin by clicking on ‘Deactivate’.
You can search for a different WordPress plugin or reach out to the plugin developers for assistance.
If the issue is related to your theme, you will find a link to the Themes page. It will indicate which theme is causing the problem at the bottom of the page.
You have the option to change your WordPress theme. Alternatively, you can remove the faulty theme and install a fresh version from the official source to see if that resolves the problem.
After resolving the issue, click the ‘Exit Recovery Mode’ button located at the top.
In most instances, your WordPress website should now function normally.
If you still encounter the critical error in WordPress, you can follow the troubleshooting steps outlined in the next section.
Manually Resolving the Critical Error in WordPress (Without Email)
If you did not receive the notification email about the WordPress critical issue, this method will guide you on how to troubleshoot and fix the critical error in WordPress.
If the error was triggered by a recent action you performed, you can reverse that action to resolve the issue.
For instance, if you installed a new plugin and its activation caused the critical error, simply deactivate it (we will guide you on how to do this in the first step below).
If you’re uncertain about the source of the error, you can follow these straightforward steps.
1. Disable All WordPress Plugins
A frequent reason for critical errors in WordPress is conflicts or incompatibilities between plugins. To resolve this, simply deactivate the problematic plugin.
However, due to the critical error, you may not have access to the admin area (WordPress dashboard) or know which plugin to disable.
To resolve this issue, we will deactivate all WordPress plugins. Don’t worry; you can easily reactivate them once you regain access to your WordPress admin area.
Connect to your WordPress site using an FTP client or the File Manager tool in your web hosting control panel.
After connecting, navigate to the wp-content directory.
Within the wp-content directory, you will find a folder named plugins. Right-click on this folder and select the ‘Rename’ option.
Next, change the name of the plugins folder to something of your choice. For this example, we will rename it to ‘plugins.deactivated’.
WordPress searches for the pluginsThe folder that contains the activated plugins for your website. If the system cannot locate the plugins folder, it will be unable to activate them and will automatically mark them as deactivated.
You can now check your website to see if the critical error message is no longer displayed.
Note:If the critical error has been fixed, be sure to rename thepluginsfolder. WordPress will then recognize the folder, allowing you to reactivate the plugins one at a time from the WordPress dashboard to determine which one caused the critical error.
For further information, refer to our guide on how to deactivate all WordPress plugins.
2. Switch to a Default Theme
The next step in resolving the critical error is to change your WordPress theme to a default one. If there is an issue with the code in your current theme, this will help eliminate the critical error.
Simply visit the WordPress.org theme directory and download a fresh copy of a default theme such as Twenty Twenty-Two or Twenty Twenty-Three.
After that, unzip the theme file on your computer by selecting ‘Extract All’.
This will create a folder with the name of the theme on your computer.
Begin by connecting to your WordPress site using an FTP client or the File Manager tool available in your hosting control panel.
Once connected, navigate to the /wp-content/themes directory, where you’ll find a list of all the themes installed on your website.
Download all of these theme folders to your computer as a backup.
Next, delete all the theme folders from your website.
At this point, your WordPress site will not have any theme installed.
To resolve this issue, upload the default theme folder that you downloaded earlier.
After the upload is complete, try visiting your website again.
If the critical error was caused by your WordPress theme, the error message should be gone, and you will regain access to your website.
3. Reinstall WordPress
A corrupted WordPress core file or malware can also lead to critical errors in WordPress. The simplest solution is to reinstall WordPress.
Visit WordPress.org to download a fresh copy of WordPress to your computer.
After downloading, unzip the file on your computer. This will create a folder named wordpress, which contains all the necessary files for the reinstallation.
Begin by connecting to your WordPress site using an FTP client or the File Manager tool available in your hosting account’s dashboard or cPanel.
After establishing the connection, go to the root directory of your website. This directory contains the essential folders.wp-admin, wp-content, wp-includes, and wp-admin directories.
Next, select the files from the wordpress folder on your computer and upload them to your website.
Your FTP client will prompt you to decide whether to overwrite these files or skip them. Choose ‘Overwrite’ and check the box for ‘Always use this action’.
Then, click the ‘OK’ button to proceed. Your FTP client will replace the core WordPress files with fresh copies from your computer.
Once the upload is complete, visit your website to check if the error has been resolved.
If the critical error was due to a corrupted WordPress core file or malware, the error message should now be gone.
4. Enable Debugging in WordPress
WordPress includes a built-in debugging feature that helps you identify errors, log them, and troubleshoot problems.
To activate it, you must enable debug mode by modifying the wp-config.php file. Simply find the following line:
define( 'WP_DEBUG', false );
Next, replace this line with the following code:
define( 'WP_DEBUG', true );
define( 'WP_DEBUG_DISPLAY', true );
define( 'WP_DEBUG_LOG', true );
define( 'SCRIPT_DEBUG', true );
If you now visit your WordPress site, it will display debugging information along with the critical error message.
Debug mode reveals not only PHP errors but also warnings and notices, assisting you in identifying the root cause of the issue for resolution.
Additionally, it will log errors in the debug.log file, which will be stored in the /wp-content/ directory.
5. Increase PHP Memory Limit
Your web hosting server functions like any other computer; it requires sufficient memory to effectively run multiple applications simultaneously.
If your server lacks the necessary resources to execute PHP, it may crash or become unresponsive, potentially resulting in a critical error in WordPress.
To resolve this issue, increase the PHP memory limit by configuring your hosting server to allocate more memory for PHP.
You can achieve this by adding the following line to your wp-config.php file:
define( 'WP_MEMORY_LIMIT', '512M' );
Remember to save and upload your changes to the server.
For further information, check out our tutorial on increasing the PHP memory limit in WordPress.
Now, visit your website to check if this has resolved the critical error.
6. Upgrade Your PHP Version
WordPress requires PHP version 7.4 or higher. If your hosting server is running an outdated PHP version, it may lead to performance issues and critical errors.
If you can access WordPress recovery mode, you can check your site’s PHP version by navigating to the Tools » Site Health page and selecting the Info tab.
Scroll down to the Server section and click to expand it.
Here, you will find the PHP version currently installed on your hosting server.
If it is below 7.4, you will need to upgrade your PHP version.
Most reliable WordPress hosting providers enable you to easily update your PHP version through your hosting account control panel. For more information, check out our guide on updating PHP versions with popular WordPress hosting services.
Tips to Prevent Future ‘Critical Errors’
WordPress is an open-source platform designed to meet high standards. However, code conflicts can occasionally lead to errors.
Here are several strategies to prevent downtime for your website and ensure a seamless experience for your visitors.
1. Always Maintain Automated Backups
Regular backups are your best defense against common WordPress issues. They are also essential if your site is compromised or affected by malware.
We recommend using Duplicator, which simplifies the process of setting up automated backups and securely storing them in the cloud. Most importantly, it allows you to restore your website from a backup with just one click.
Note: A free version called Duplicator Lite is available, offering fewer features.
At CanadaCreate, we utilize Duplicator on most of our websites. Check out our comprehensive Duplicator review for more information.
Before making significant changes to your website, such as installing a new plugin, changing themes, or adding custom code, remember to create a quick backup for safety.
2. Ensure Reliable Email Delivery from WordPress
Often, WordPress will attempt to send you an email with a link to enter recovery mode. Receiving this email allows you to resolve the critical error more swiftly and effectively.
Unfortunately, many WordPress websites have email functionality issues, and the site owners are often unaware of these problems.
Emails are essential not only for fixing critical errors but also for recovering passwords, registering new users, and receiving other important notifications from WordPress.
Fortunately, there’s a simple solution called WP Mail SMTP, which resolves WordPress email issues by ensuring proper email authentication.
Note:There is also a free version known as WP Mail SMTP Lite.
We utilize WP Mail SMTP across all our websites to guarantee that our users and team members never miss important emails. For more details, check out our WP Mail SMTP review.
We provide a comprehensive guide on setting up WP Mail SMTP on any WordPress hosting service.
3. Safely Manage Custom Code Snippets
You might come across tutorials that suggest adding custom code to your WordPress site. Many users typically insert these snippets into the functions.php file of their theme.
However, if there is an error in the code, your website could become immediately inaccessible, displaying a critical error message.
Fortunately, there is a safer method to add code using the WPCode plugin. This plugin serves as a code snippet manager for WordPress, simplifying the process of adding custom code to your site. Most importantly, it includes built-in checks that automatically deactivate any code that triggers errors.
Important Note:There is also a free version available known as WPCode Lite.
We utilize WPCode on our websites and have found its code library feature to be incredibly useful. It offers a wide range of code snippets for various functionalities. To learn more, check out our comprehensive WPCode review.
We hope this article has assisted you in troubleshooting and resolving the critical error in WordPress. You may also want to explore our guide on fixing WordPress stuck in maintenance mode or our guide on how to contact WordPress support.
If you enjoyed this article, please subscribe to our YouTube Channel for WordPress video tutorials. You can also connect with us on Twitter and Facebook.