Many websites neglect to disable directory browsing, which may seem trivial at first. However, this oversight can reveal sensitive information and jeopardize your site’s security.
When directory browsing is active, anyone can access the files and folders on your server. Cybercriminals can exploit this information to find vulnerabilities in your plugins, themes, or hosting setup.
Fortunately, resolving this issue is straightforward. Disabling directory browsing adds an important layer of security, making it significantly more difficult for attackers to compromise your site.
In this guide, I will provide you with easy-to-follow steps to disable directory browsing in WordPress, helping you protect your website and secure your data.
Here’s a brief overview of the topics I will discuss in this guide:
- What Happens When You Disable Directory Browsing in WordPress?
- How to Determine if Directory Browsing Is Enabled in WordPress
- Steps to Disable Directory Browsing in WordPress
- Method 1: Modify the .htaccess File via the File Manager in cPanel
- Method 2: Edit the .htaccess File Using an FTP Client
- Bonus Tip: Would You Prefer Using a Plugin?
- Common Questions About Disabling Directory Browsing
- Further Reading on WordPress Security
What is the Impact of Disabling Directory Browsing in WordPress?
Disabling directory browsing prevents visitors from viewing a list of files and folders on your website when an index file is missing. Instead of displaying the raw directory, the server will show a blank page or an error message.
When a user accesses your website, the server typically sends an index file (such as index.html or index.php) to their browser. If that file is absent, many servers default to showing all the files within that folder.
This feature is known as directory browsing and is often enabled by default on hosting servers.
The issue with this is that it can expose sensitive information about your site’s structure. Hackers may exploit this to identify vulnerabilities in plugins, themes, or even your hosting setup.
Additionally, directory browsing can inadvertently expose private or premium content, such as ebook downloads or online courses, which could be copied without authorization.
This is why we emphasize this risk when advising beginners. Disabling directory browsing is a simple adjustment that can safeguard your site and help prevent potential revenue loss.
How to Determine if Directory Browsing is Active in WordPress
To determine if directory browsing is active on your WordPress site, simply navigate to the /wp-includes/ directory directly.
For instance, type a URL like this: https://example.com/wp-includes/ into your browser.
Remember to substitute example.com with your actual domain name. This straightforward check is effective for most WordPress setups.
If you encounter a 403 Forbidden message or a similar error, it indicates that directory browsing is already disabled, which is a positive sign for your website’s security.
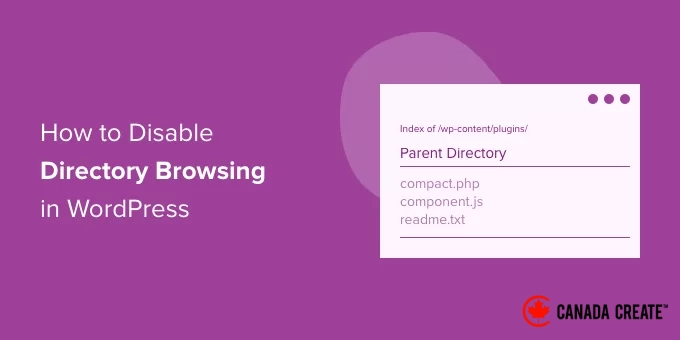
If you see a list of files and folders, it means directory browsing is currently enabled.
Keeping directory browsing enabled can expose your website to potential security threats.
Based on our experience, allowing directory browsing can reveal sensitive information and heighten security vulnerabilities. Therefore, it is advisable to disable directory browsing in WordPress to protect your site.
Steps to Disable Directory Browsing in WordPress
You can turn off directory browsing by adding a simple line of code to your WordPress .htaccess file.
The .htaccess file is a crucial server configuration file, so it’s essential to back it up before making any modifications. A mistake in editing could render your site inaccessible.
Helpful Tip: We recommend using Duplicator for automatic backups of all our WordPress sites. It enables you to schedule backups or create them on demand. Most importantly, restoring your website is just a one-click process. Check out our comprehensive Duplicator review for further information.
You can access the .htaccess file through two primary methods:
Method 1: Editing the .htaccess File via cPanel’s File Manager
For most users, the simplest way is to use the File Manager tool available in your WordPress hosting account’s control panel (cPanel).
First, log into your hosting account and open the File Manager.
Navigate to the root folder of your website, typically named public_html.
Next, find the .htaccess file.
If it’s not visible, ensure that you have enabled the ‘Show Hidden Files’ option in your File Manager settings.
Right-click on the file and choose ‘Edit’ or ‘Code Editor’.
Method 2: Editing the .htaccess File Using an FTP Client
Alternatively, you can connect to your website’s files using an FTP client.
If you’re new to this process, you can refer to our comprehensive guide on connecting to your website using FTP.
- After establishing an FTP connection, go to the root directory of your site (for example,
public_html). - Locate the
.htaccessfile. - Download this file to your computer and open it with a plain text editor such as Notepad or TextEdit.
Inserting Code into .htaccess
Once you have the .htaccess file open for editing, simply add the following line of code at the bottom of the file:
Options -Indexes
It should appear similar to this:
Now, save your changes. If you used an FTP client, you will need to re-upload the modified .htaccess file to your server, replacing the original version.
Important Note for Nginx Users 📝: This .htaccess method is specific to websites hosted on an Apache web server. If your site operates on an Nginx server, this setting is typically managed at the server level by your hosting provider, and directory browsing is generally disabled by default. For further details, check out our comparison of Apache, Nginx, and LiteSpeed web servers.
When you access the URL http://example.com/wp-includes/, you will see a 403 Forbidden message or something similar.
Bonus Tip: Consider Using a Plugin Instead?
If you’re not comfortable with coding, a reliable WordPress security plugin can manage this for you.
Many WordPress security plugins offer a simple one-click option to disable directory browsing as part of their website security features, eliminating the need to manually edit any files.
Common Questions About Disabling Directory Browsing
What is directory browsing, and why is it a security concern?
Directory browsing is a server feature that reveals all files and folders in a directory when an index file (like index.php) is absent. This poses a security risk as it exposes your site’s structure, including the themes and plugins you are using, to potential attackers.
Does turning off directory browsing impact my website’s SEO?
No, turning off directory browsing does not harm your SEO. Search engines focus on your content rather than your file structure. In fact, enhancing your website’s security sends a positive signal to search engines.
Is it preferable to use a plugin or modify the .htaccess file?
Both methods effectively prevent directory browsing. Editing the .htaccess file is a quick, one-time solution. For beginners, using a security plugin like Sucuri is ideal as it manages this and many other security settings with just one click, eliminating the need for code editing.
What should I do if my WordPress site is hosted on an Nginx server?
The .htaccess file is unique to Apache web servers. On Nginx servers, directory listing is usually disabled by default in the main server settings. If you think it might be enabled, reach out to your hosting provider to have it disabled.
Further Reading on WordPress Security
Looking to keep your WordPress site safe and running smoothly? You might find these articles helpful:
- Beginner’s Guide to WordPress File and Directory Structure
- Common WordPress Errors and Their Solutions
- How to Resolve File and Folder Permissions Issues in WordPress
- How to Secure Your WordPress Admin (wp-admin) Directory with a Password
We hope this article has helped you understand how to disable directory browsing in WordPress. You may also want to check out our comprehensive WordPress security guide or our expert recommendations for the best WordPress security plugins.
If you enjoyed this article, consider subscribing to our YouTube Channel for informative WordPress video tutorials. You can also connect with us on Twitter and Facebook.