Email updates used to be effective, but with declining open rates, overflowing inboxes, and important messages often ending up in spam, we realized there had to be a better solution for staying connected. That’s when we found out aboutTelegram integration. 🌟
Although linking WordPress to Telegram may seem daunting at first, it doesn’t have to be. We have dedicated significant time to testing various methods and plugins to identify the easiest and most dependable solution for busy website owners.
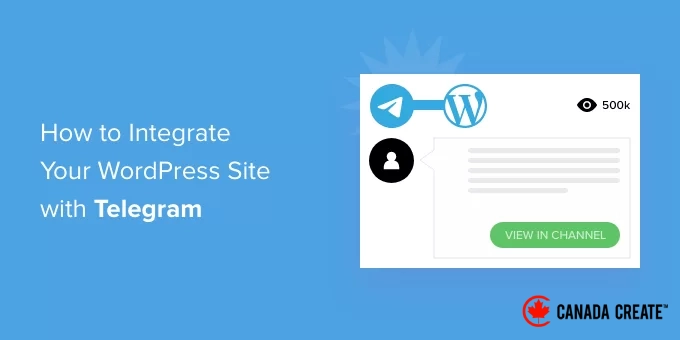
In this guide, we will demonstrate the simplest way to connect your WordPress site with Telegram using tools we have personally reviewed. No complicated coding is necessary—just straightforward, actionable steps to enhance your connection with your audience.
Why Should You Integrate Your WordPress Site with Telegram?
Telegram is a widely used cloud-based messaging application similar to WhatsApp, but with enhanced security. It offers features comparable to Slack, a well-known collaboration platform for teams.
Integrating Telegram into your WordPress website is straightforward with a plugin. This is an excellent way to keep your users and team informed about the latest updates on your site.
You can automatically share your blog posts on a Telegram channel and receive WordPress notifications on Telegram, ensuring you stay updated with everything that requires your attention on your site.
In this guide, we will explain how to connect your WordPress site with Telegram. Here’s a brief overview of the steps we will cover in this article:
- Setting Up the Connection Between WordPress and Telegram
- Integrating WordPress Posts with Telegram
- Sending WordPress Notifications to Telegram
- Bonus: How to Add a Click-to-Chat Telegram Button on Your WordPress Site
Are you ready? Let’s get started!
Setting Up the Connection Between WordPress and Telegram
First, you need to install and activate the WP Telegram (Auto Post and Notifications) plugin. For detailed instructions, refer to our step-by-step guide on how to install a WordPress plugin.
After activation, the plugin will introduce a new menu item called ‘WP Telegram’ in your WordPress admin dashboard. Clicking on it will direct you to the plugin’s settings page.
On the ‘Basics’ tab of the settings page, you will find a straightforward summary of how to set up Telegram for WordPress integration. We will guide you through these steps.
If you haven’t installed Telegram yet, start by downloading it on your mobile device and creating an account. This step is necessary because each Telegram account is associated with a phone number.
Visit the Telegram apps page to download and install the app for either Android or iOS devices.
Once you’ve signed up, you can also access Telegram on your computer. Versions are available for macOS, Windows, Linux, and through a web browser.
To connect WordPress with Telegram, you will need to create a bot. Begin by searching for @BotFather in Telegram and click on that user to initiate a chat.
You will see a list of commands available for use when interacting with this bot.
Type the command /newbot in the chat window.
A new bot will be created, and you’ll be prompted to give it a name. You can choose any name you prefer.
For example, you might name it ‘Bot for WP Telegram.’
Next, select a unique username for your bot, which must end with ‘bot.’
For this tutorial, we will use the username XYZ_wptelegram_bot.
Congratulations! You have successfully created a Telegram bot.
A token will appear in the chat window. Keep this token private, as it is essential for managing your bot.
Now, copy the token to your clipboard.
Next, return to your website and paste the token into the Bot Token field located under WP Telegram.
After that, click the ‘Test Token’ button.
The token is linked to this specific bot, so the ‘Bot Username’ field will automatically populate.
Remember to click the ‘Save Changes’ button to save your settings.
Congratulations! You have successfully completed the initial setup of Telegram and the WP Telegram plugin.
Now, you can configure the plugin to send your WordPress posts to Telegram or receive notifications from WordPress.
Integrating WordPress Posts with Telegram
Ensure you are on the ‘Post to Telegram’ tab in the plugin dashboard.
This section allows you to set up the plugin to automatically send your posts to Telegram upon publication.
First, toggle the ‘Active’ switch to the ‘On’ position.
You will now see instructions on how to send your WordPress posts to Telegram.
Creating a Channel on Telegram
If you don’t have a public Telegram channel yet, you’ll need to create one.
First, switch back to the Telegram app.
Next, tap the ‘New’ icon at the top of the screen and select ‘New Channel’ from the dropdown menu.
On the following screen, you will find an explanation of what a Telegram channel is.
Click the ‘Create Channel’ link located at the bottom of the page.
Now, provide a name and description for your channel.
Keep in mind that this will be a public channel, so choose an appropriate name.
After that, click ‘Next’ at the top right corner of the page.
Finally, ensure your channel is set to public so that users can subscribe.
You should also create a public link for easy access. Just type a unique ID after https://t.me/.
It’s a good idea to note down the ID, as you’ll need it later when configuring the plugin in WordPress.
Once you click ‘Done,’ your Telegram channel will be created, and you’ll need to add your bot as an administrator.
With your channel selected in Telegram, click the ‘…’ menu at the top right of the screen and choose ‘Info’ from the dropdown menu.
This screen provides details about your channel along with options to configure it through various buttons and menus.
Click on the ‘Administrators’ menu to expand it and access more options.
To add a new administrator, click on the ‘Add Admin’ link.
In the popup, enter the username of the bot you created earlier and select the bot’s name from the list below.
The next screen will display the permissions assigned to the bot.
You can keep the permissions as they are, but ensure that the ‘Post Messages’ option is enabled.
Click ‘Done’ at the bottom of the popup to add your bot as an administrator of your channel.
Here’s an example of how it may appear on Telegram:
Integrating Your Telegram Channel or Group with WordPress
Now, return to your WordPress website to complete the plugin setup, remaining on the ‘Post to Telegram’ tab.
In the ‘Destination’ section, click the ‘+ Add’ button.
Enter the channel or group ID you created earlier, which is the last part of the public link you noted.
You can then click the ‘Send Test’ button to send a test message to your group or channel to verify the connection.
A popup will appear displaying the default message: ‘This is a test message.’
Feel free to modify this message to your liking before clicking the ‘OK’ button.
If the plugin is set up correctly, you will see the test message appear in your Telegram channel or group.
Additional Settings for Sharing WordPress Posts on Telegram
You can now return to your website to complete the plugin setup.
In the ‘Rules’ section, ensure the box is checked to send new posts upon publication. You may also check the second box to post updates to Telegram when an existing post is modified.
Next, select the post types you want to share on Telegram by checking the corresponding boxes. The ‘Post’ option is selected by default, and you can also choose to include the ‘Page’ option.
If you have custom post types, additional checkboxes may appear. For instance, you might see options for WooCommerce product pages, BuddyBoss forums, or Envira Gallery’s image and video galleries.
You can create custom rules to specify which posts are shared on Telegram.
For instance, the screenshot below illustrates a rule that only sends posts to Telegram if they belong to the ‘Top Posts’ category.
The WP Telegram plugin offers various customization options for how your posts are shared. You can review and modify these settings as needed, but the default configurations are suitable for most websites.
Once you are satisfied with your settings, scroll to the bottom of the page and click the ‘Save Changes’ button to apply your modifications.
When creating or editing a post, you will notice a new ‘Send to Telegram’ option in the WordPress editor.
This option is enabled by default. You can disable it if you prefer not to send the post to Telegram.
The next time you publish a post that meets the criteria you specified, it will automatically be sent to your Telegram channel or group.
Sending WordPress Notifications to Telegram
Ensure you are on the ‘Private Notifications’ tab on the ‘WP Telegram’ settings page.
This section allows you to set up the plugin to automatically send WordPress notifications to a specific individual or a group on Telegram.
First, switch the ‘Active’ toggle to the ‘On’ position.
You will now find instructions for two different methods to send your WordPress posts to Telegram.
Sending Notifications From WordPress to an Individual on Telegram
This method is ideal for sending notifications from WordPress to a single recipient.
You will need to provide the WP Telegram plugin with your ‘User Chat ID’ from Telegram.
To find your ID, search for @MyChatInfoBot on Telegram and click on the first result listed under ‘Contacts and Chats.’
Then, click ‘Start’ at the bottom of the screen to initiate a chat with the bot.
In the bot’s initial message, your ‘Chat ID’ will be displayed in red.
Copy the Chat ID to your clipboard and return to your website.
In the ‘Notification Settings’ section, as illustrated in the screenshot below, you will see your admin email address. This is where WordPress will send admin notifications via email.
Every time a notification is sent to this email address, WordPress will also forward it to the Telegram user specified in the plugin settings.
If necessary, you can use a different email address. To receive notifications at all email addresses, simply enter ‘any’ in the ‘if email goes to’ field.
Next, paste the ‘User Chat ID’ you copied. Click the ‘Add’ button to proceed.
A new field will appear under ‘Send it to,’ where you should paste your ID.
Please do not click the ‘Send Test’ button just yet.
You must first initiate a conversation with the bot you created earlier, as bots cannot start chats on Telegram.
Switch back to Telegram and search for the name of your bot created during the setup process. Click on the bot and start a conversation by pressing ‘Start’ at the bottom of the screen.
Now, return to your WordPress site and click the ‘Send Test’ button. When a popup message appears, click ‘OK’ to proceed.
You will see a confirmation next to the ‘User Chat ID’ in WordPress, indicating whether the message was sent successfully. Also, check Telegram to verify that the message has been posted there.
Next, go back to your WordPress site, scroll down to the bottom of the page, and click the ‘Save Changes’ button to save your settings.
Congratulations! You will now receive a Telegram message every time an admin notification is sent from your site.
How to Send Notifications from WordPress to a Telegram Group
This approach is ideal for teams working on a WordPress website who want to share admin notifications via Telegram.
The process for this method closely resembles the previous steps for sending notifications to an individual user on Telegram. However, instead of entering a ‘User Chat ID’ into WordPress, you will need to input the ‘Group Chat ID.’
If you haven’t created a Telegram group for your team yet, it’s time to set one up.
A Telegram channel serves the purpose of broadcasting information, whereas group members can interact with each other. You also have the ability to manage group membership.
To create a new group, click the ‘New’ icon at the top of the Telegram interface and select ‘New Group’ from the dropdown menu. By default, the group will be set to private.
Next, you will need to add any additional members you want to include in the group.
You will automatically be included in the group, and it’s necessary to add at least one more member.
Once you’ve added your team members, click ‘Next’ at the top of the screen.
Finally, by clicking ‘Create’ at the top of the screen, you will finalize the creation of the group.
Now that your group is established and your team members are added, you will need to include two bots.
First, add @MyChatInfoBot to retrieve the Group ID, which you will then paste into the plugin settings in WordPress.
First, you need to create your own bot so the plugin can send notifications from your WordPress site.
To open the group’s information page, click on the group name at the top of the screen. From there, click the ‘Add’ button to invite new members.
Next, enter @MyChatInfoBot in the ‘Add Members’ field and select it from the search results.
Then, repeat this process with the bot you created during the initial setup on Telegram.
Make sure to click ‘OK’ to add both bots as members of the group.
You will see that the @MyChatInfoBot bot has automatically added your Group ID to the chat.
Now, copy this ID and paste it into the ‘Send it to’ section on your WordPress site.
Click the ‘Send Test’ button to verify that everything is configured correctly.
The plugin will display a default message that you can modify if desired. After that, click the ‘OK’ button.
Now, switch to the Telegram app to confirm that the test message has been posted.
Congratulations! Your WordPress notifications are now successfully sent to your Telegram group.
Bonus: Learn how to add a Click-to-Chat Telegram button to your WordPress site.
If you want your website visitors to easily chat with you on Telegram, you can add a click-to-chat button in WordPress. This Telegram button allows users to start a chat with you instantly, eliminating the need to search for your username or phone number.
This feature is ideal for customer support, sales inquiries, or general questions—especially if your audience prefers using Telegram for quick communication. It establishes a direct line of contact, enhancing trust and increasing response rates.
The easiest way to set this up is by using the WPChat plugin. It offers built-in support for Telegram and enables visitors to initiate a conversation through a live chat widget on your site before connecting directly to Telegram.
Additionally, there is a free version of WPChat available to help you get started. To find out more about the plugin, check out our comprehensive WPChat review.
Frequently Asked Questions About Integrating Your WordPress Site With Telegram
In this section, we will address some common questions regarding the integration of WordPress with Telegram.
How can you add a Telegram button to WordPress?
You can utilize a social media plugin, such as Social Snap, to incorporate a Telegram button on your WordPress site. The general steps involve installing the plugin, linking it to your Telegram account, and customizing the button settings.
For comprehensive guidance, explore our tutorial on adding social share buttons to your WordPress site.
Is Telegram beneficial for a business website?
Definitely! Telegram is an excellent tool for business websites as it enables direct and secure communication with customers. You can share updates, respond to inquiries, and even establish channels for announcements, enhancing your engagement with your audience.
What are some effective website builders for integrating chatbots?
WordPress is an ideal choice for chatbot integration due to its extensive selection of plugins. For customer support chatbots, consider using Heroic KB. For handling sales inquiries, we suggest ChatBot. If you’re looking for a free option, HubSpot is a great choice.
For additional details, check out our guide on how to add a chatbot to your WordPress site.
We hope this tutorial has helped you connect your WordPress site with Telegram. Next, you might want to learn how to showcase your social media follower count in WordPress or explore our expert recommendations for the best online community platforms.
If you enjoyed this article, please subscribe to our YouTube Channel for WordPress video tutorials. You can also connect with us on Twitter and Facebook.