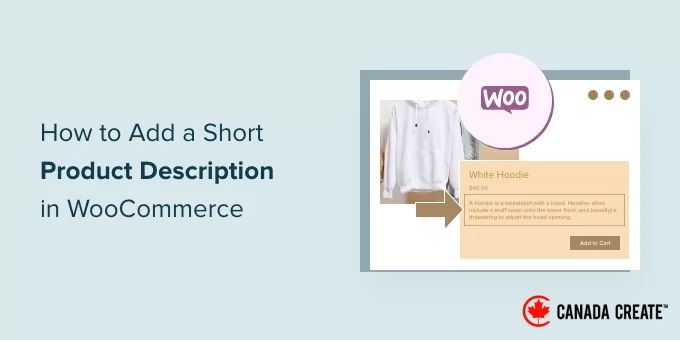
In a WooCommerce store, even the smallest details can significantly impact a customer’s purchasing decision. One crucial element is the product description, which plays a vital role in helping shoppers quickly grasp what you are offering.
Many store owners find it challenging to utilize short descriptions effectively because WooCommerce does not highlight their importance right away. However, these brief summaries are prominently displayed in essential areas like category pages, product grids, and search results, where visitors often skim before making a choice.
Our experience with numerous WooCommerce stores has shown that clearer and more concise descriptions can greatly enhance customer engagement and expedite their decision-making process.
In this guide, we will walk you through the process of adding and optimizing short product descriptions in WooCommerce, ensuring your products capture attention and your store provides a seamless shopping experience.
The Importance of Adding Short Product Descriptions in WooCommerce
Similar to a blog post excerpt, short product descriptions can entice shoppers to explore a product further.
Most WooCommerce WordPress themes display the short description directly below the price on individual product pages.
As one of the first elements shoppers encounter, this description is ideal for conveying essential product information, such as size and material.
This feature allows customers to quickly determine if they want to explore more about the product by viewing the full description or browsing the product image gallery. Essentially, a captivating short description serves as a compelling sales pitch for the entire product page.
With this in mind, let’s explore how to add a short product description in WooCommerce.
- How to Add a Short Product Description in WooCommerce
- How to Display Short Product Descriptions on Your Main Store Page
- How to Display Short Descriptions in a Custom WooCommerce Theme (Advanced)
- Bonus: How to Customize Additional WooCommerce Pages
- Frequently Asked Questions About Adding Product Descriptions
How to Add a Short Product Description in WooCommerce
To create a short description, navigate to Products » All Products in your WordPress dashboard.
Next, locate the product you wish to add a short description to and click on its ‘Edit’ link.
After that, scroll down to the ‘Product short description’ box.
You can now enter your description in the text area.
Once you are satisfied with the information you’ve provided, simply update or publish the product page as you normally would.
When you access the product page on your online store, the short description will be prominently displayed at the top of the page.
In most themes, this description appears directly below the product price and the ‘Add to Cart’ button. Depending on your WordPress theme, the layout may vary, but it is generally located near the top of the page.
🎁 Helpful Tip:Manually typing each description is manageable for a few products, but it can become quite tedious for stores with a large inventory.
To streamline this process, consider using an AI-powered plugin like StoreAgent. It automatically creates unique short descriptions based on your product information, saving you significant time and enhancing your copywriting.
For more information, check out our guide on using AI to automatically generate WooCommerce product descriptions.
How to Display Short Product Descriptions on Your Main Store Page
By default, most WooCommerce themes only show short descriptions on individual product pages.
Typically, these descriptions are not displayed on product category pages or the main store page, as illustrated in the image below.
Sometimes, you may want to display this information on the main store and category pages. This feature helps customers easily identify products they are interested in by visiting the detailed product page.
To display the short description on the main store page and product category pages, you will need to add some code to your website.
The most effective way to add custom code in WordPress is by using WPCode. This top-rated code snippets plugin lets you incorporate custom CSS, PHP, and more into your online store.
We have rigorously tested this tool and found it to be the safest method for adding code. For more details, check out our WPCode review.
Step 1: Install and Activate WPCode
First, install and activate the free WPCode plugin. For detailed instructions, refer to our step-by-step guide on how to install a WordPress plugin.
Once the plugin is activated, navigate toCode Snippets » Add Snippet.
Step 2: Create a New Custom Snippet
Here, you will find all the pre-made snippets available for your site. This includes a snippet that allows you to completely disable comments, upload unsupported file types, disable attachment pages, and much more.
On the next screen, hover over the ‘Add Your Custom Code (New Snippet)’ option and click the ‘Use Snippet’ button when it appears.
Step 3: Insert the PHP Code Snippet
Enter a title for the code snippet. This title is for your reference, so feel free to choose any name you like.
Next, open the ‘Code Type’ dropdown menu and select ‘PHP Snippet.’
Once that’s done, simply paste the following code into the code editor:
add_action( 'woocommerce_after_shop_loop_item', 'woo_show_excerpt_shop_page', 5 );
function woo_show_excerpt_shop_page() { global $product; echo $product->post->post_excerpt;
}
Step 4: Activate and Save the Snippet
Next, toggle the ‘Inactive’ slider to ‘Active.’
Then, click the ‘Save Snippet’ or ‘Update’ button to activate the code snippet.
Now, the main store and product category pages will display the short descriptions for your various products.
Most WooCommerce themes will show this information between the product price and the ‘Add to Cart’ button, as illustrated in the image below.
Be mindful that excessive text on your store and product category pages can lead to a cluttered and confusing appearance.
If you’re not satisfied with the appearance of a specific short product description, you can easily modify it by following the same steps outlined earlier.
How to Display Short Descriptions in a Custom WooCommerce Theme (Advanced)
If you’re not pleased with how the description appears on your product page, consider using a page builder plugin to create a tailored WordPress theme for your online store.
SeedProd is the leading landing page and theme builder for WordPress, enabling you to create your own WooCommerce theme without any coding knowledge. This allows you to precisely control the placement of short product descriptions on your product pages.
Many of our partner brands have utilized it to design their entire websites, and they have been very satisfied. To find out more, check out our SeedProd review.
In this section, we will guide you through creating a fully customized Single Product layout for your WooCommerce store.
You will need to repeat this process to design a unique layout for each page of your online store. For instance, you can use SeedProd to craft designs for your store’s homepage and archive page.
This feature provides you with complete control over the layout of your entire store, making it a powerful and flexible solution for anyone looking to create a fully customized WooCommerce store.
Step 1: Install and Activate SeedProd
Once you install the WordPress plugin and activate it, SeedProd will prompt you to enter your license key.
Note:The free version of SeedProd is available on WordPress.org; however, we will be using the Pro version of the plugin as it includes the theme builder and pre-designed WooCommerce blocks, including a ‘Short Description’ block.
You can find your license key in your account on the SeedProd website or in the purchase confirmation email you received when you bought SeedProd.
Step 2: Create a New Single Product Template
After entering your key, navigate toSeedProd » Theme Builder. Here, click on the ‘Add New Theme Template’ button.
In the popup that appears, enter a name for your product page design in the ‘Name’ field, select ‘Single Product’ from the ‘Type’ dropdown menu.
After that, click on the ‘Save’ button.
Step 3: Design Your Custom Product Page
You will now see the SeedProd drag-and-drop page builder interface. On the right side, there is a live preview of the product page, which starts off empty.
On the left, you will find a menu displaying various blocks and sections that can be added to your custom WooCommerce product page.
SeedProd offers a variety of pre-designed blocks, including specific WooCommerce blocks. For instance, you can utilize the ‘Related Products’ block to showcase the most popular items in your WooCommerce store.
You can create a fully customized product page in just minutes by using these pre-designed WooCommerce blocks.
Since we are starting with a blank template, you will need to manually add all the necessary elements for the WooCommerce product page. This includes components like the ‘Product Featured Image,’ ‘Product Title,’ and ‘Short Description.’
You can also incorporate SeedProd blocks such as spacers, columns, and dividers to enhance the structure and layout of your WooCommerce page.
To begin, locate theWooCommerce Template Tagsin the left-hand menu and select a block to add. You can then drag the block into the page layout.
To modify a block, simply click on it in the SeedProd preview. The left-hand menu will display all the settings available for customizing that block.
For instance, clicking on a ‘Product Title’ block allows you to adjust the font size, text alignment, and more.
To include a short description in your design, locate the ‘Short Description’ block in the left-hand menu.
Next, drag and drop this block into your design.
While designing the product page, you can rearrange blocks in your layout by dragging and dropping them. This feature simplifies the creation of a fully customized WooCommerce product page using SeedProd.
Step 4: Save and Publish Your Template
Once you are satisfied with the design of your WooCommerce product page, click the ‘Save’ button located in the upper-right corner.
Finally, click the ‘Publish’ button to apply your changes.
You have successfully created a fully customized product page for your online store.
You can now create templates for various WooCommerce pages by following the same steps outlined above. If you’re uncertain about what design to create next, simply click the Add New Theme Template button.
Then, select the ‘Type’ dropdown menu.
You will now see a list of all the different templates you need to create, including header, footer, and single post.
Once you’ve finished editing all your WooCommerce pages, it’s time to publish your custom theme.
Simply navigate to SeedProd » Theme Builder, and toggle the ‘Enable SeedProd’ switch from ‘no’ (grey) to ‘yes’ (green).
Bonus: How to Further Customize Your WooCommerce Pages
If you’re satisfied with the appearance of your product pages, consider redesigning other essential WooCommerce shop pages. Enhancing these pages can lead to a better shopping experience, lower cart abandonment rates, and ultimately, increased sales.
Studies indicate that nearly 70% of customers abandon their carts and do not return. Therefore, your cart page should be optimized to secure sales, as the default WooCommerce cart page may not effectively encourage conversions.
For detailed instructions on creating a high-converting cart page using SeedProd, check out our guide on building a custom WooCommerce cart page.
Next, consider optimizing the final stage of the checkout process by designing a custom WooCommerce checkout page that features social media links, customer testimonials, unique branding, and more.
Common Questions About Adding Product Descriptions
Here are some common questions our readers have about adding short product descriptions to their WooCommerce stores:
What makes a product description effective?
To create an effective short product description, emphasize the primary benefit for the customer. Use bullet points to showcase key features, keep sentences concise, and incorporate persuasive language that motivates shoppers to explore further.
What is a short product description?
A short product description in WooCommerce is a concise summary that appears near the top of a product page, typically alongside the product image and the ‘Add to Cart’ button. Its purpose is to quickly convey essential information and engage potential buyers.
How do I add a product in WooCommerce?
To add a new product, navigate toProducts » Add Newin your WordPress dashboard. Next, enter the product title, add the main description, set the price in the ‘Product data’ section, and complete the ‘Product short description’ field.
We hope this article has helped you understand how to add a short product description in WooCommerce. You may also want to check out our beginner’s guide to the best WooCommerce plugins for your store and our comprehensive guide on improving WooCommerce performance.
If you found this article helpful, consider subscribing to our YouTube Channel for insightful WordPress video tutorials. You can also connect with us on Twitter and Facebook.