Cart abandonment is a significant issue for WooCommerce store owners.
Customers often browse products, add items to their carts, and then leave when redirected to the cart page, which occurs more frequently than expected.
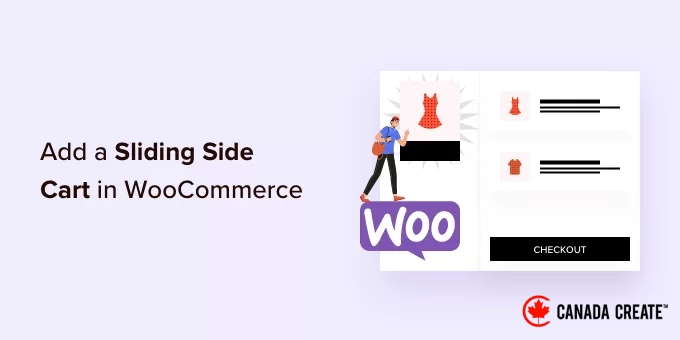
A great solution to enhance this experience is by implementing a sliding side cart.
This feature allows customers to stay on the same page while reviewing their cart in a compact panel that slides out, making the process faster, less disruptive, and more seamless.
Many store owners have successfully utilized this feature to enhance their checkout process and boost sales.
In this guide, we will demonstrate how to add a sliding side cart to your WooCommerce store using simple methods that require no technical expertise.
💡Quick Answer: Steps to Add a Sliding Side Cart
The simplest way to add a sliding side cart to your WooCommerce store is by using a free plugin. The setup is easy and does not involve any coding.
- Begin by installing and activating the free Sliding WooCommerce Cart By FunnelKit plugin.
- From your WordPress dashboard, go to FunnelKit » Cart.
- You can customize the cart’s look and functionality using the provided settings.
- Click on the ‘Enable Cart’ button.Activate the toggle at the top of the page to launch your new sliding cart.
Benefits of Adding a Sliding Side Cart in WooCommerce
Incorporating a sliding side cart is an effective strategy to minimize cart abandonment and enhance the shopping experience on your WooCommerce store.
By enabling customers to view their cart without navigating away from the current page, you streamline the purchasing process and facilitate easier checkout.
A sliding side cart is a panel that typically slides in from the right side of the screen when a customer adds an item to their cart. Customers can also access it anytime by clicking on the cart icon.
From this panel, customers can easily add or remove items, apply discount codes, and see their subtotal update instantly.
This feature keeps customers on the product or shop page, encouraging them to continue browsing or proceed directly to checkout.
With this in mind, let’s explore how to implement a sliding side cart in WooCommerce. Use the quick links below to jump directly to your preferred method.
- Method 1: How to Add a Sliding Side Cart in WooCommerce Using a Free Plugin
- Method 2: Create an Advanced Sliding Side Cart (Including Upsells, Cross-Sells, and Rewards)
- Video Tutorial
- Common Questions About Adding a Sliding Cart in WooCommerce
Let’s get started!
Method 1: Adding a Sliding Side Cart in WooCommerce with a Free Plugin
The fastest and simplest way to implement a sliding side cart is by using the Sliding WooCommerce Cart by FunnelKit. This free plugin enables you to add a cart icon to your online store.
Customers can click the button to open the sliding side cart.
You can customize the cart’s colors, borders, buttons, messages, and more.
With numerous options available, you can design a cart that seamlessly matches any WordPress theme.
Additionally, our tests showed that you can display the cart button sitewide, restrict it to WooCommerce pages only, or place the button on specific pages and posts using a shortcode.
Step 1: Install and Activate the FunnelKit Plugin
First, install and activate the Sliding WooCommerce Cart by FunnelKit plugin. If you need assistance, please refer to our guide on how to install a WordPress plugin.
Step 2: Set Up Basic Cart Settings
After activation, navigate to FunnelKit » Cart. You’ll see a preview of the sliding side cart on the right side of the screen.
Now you can customize the cart to better meet your requirements.
Begin by choosing whether to display the cart icon throughout your entire website or exclusively on WooCommerce pages.
Opting for ‘Entire Website’ allows customers to access the sliding cart from any page, making it ideal for online marketplaces and stores.
If your site features a lot of non-eCommerce content, such as a popular WordPress blog alongside your WooCommerce store, displaying the cart button on every blog post might be overwhelming for visitors.
In such cases, you can select the ‘WooCommerce Pages’ option to limit the cart button’s visibility.
Alternatively, you can choose ‘None’ to completely hide the cart icon.
If you select ‘None,’ you can still add the cart icon to any page, post, or widget-ready area using a shortcode, or include it in your navigation menu.
We will guide you through this process later in the article, but feel free to choose ‘None’ if you intend to manually add the cart icon.
Once you’ve made your choice, select either ‘Bottom Left’ or ‘Bottom Right’ to determine the cart button’s position. You can preview how the button will appear on your online store by clicking ‘Preview on Page.’
By default, the plugin displays ‘Review Your Cart’ at the top of the sliding side cart.
Customize the message by entering your text in the ‘Cart Heading’ field.
To hide the heading, simply leave the field blank.
By default, FunnelKit displays the cart icon before items are added to the shopping cart.
If you prefer to keep the icon hidden until items are added, click the ‘Hide Cart Icon’ toggle until it turns blue.
This setup creates a basic sliding side cart, but there are additional settings that can help boost your sales. Let’s explore FunnelKit’s advanced features.
Step 3: Activate Coupons in the Sliding Cart
Coupons are an effective way to increase sales and enhance customer loyalty.
The sliding cart allows customers to enter coupon codes directly, working seamlessly with standard WooCommerce coupons and compatible plugins like Advanced Coupons for more complex offers.
When customers click ‘Apply,’ the sliding cart will display their savings.
By immediately showing customers their discounts, you can decrease cart abandonment and encourage them to add more items to their cart.
You can generate these codes using the built-in coupon feature in WooCommerce or by utilizing a coupon code plugin.
To add the coupon field, click on the ‘Enable Coupon Box’ toggle, which will change its color from grey (disabled) to blue (enabled).
After that, you can choose between ‘Minimized’ and ‘Expanded’ layouts.
Simply check the box next to ‘Display’ to enable it.
The Minimized layout occupies less space, making it less distracting, but customers will need to expand the coupon section to enter any codes.
The following image illustrates the minimized layout:
Once you’ve selected a layout, you can customize the text used for the coupon box heading, the discount placeholder text, and the button label.
Step 4: Personalize the Cart Summary
The cart summary displays the total cost of the customer’s purchase, helping to minimize cart abandonment by avoiding unexpected charges at checkout.
For this reason, we recommend enabling the ‘Show Subtotal’ option.
However, if you prefer a simpler side cart, you can disable the ‘Show Subtotal’ option.
You can also display any savings the customer has earned, including discounts from applied coupons.
Utilize the fear of missing out (FOMO) to boost your sales, particularly when the discounts are available for a limited time.
For instance, you can set up time-limited coupons in WooCommerce, allowing customers to redeem them only within a specified period.
If you wish to remove the savings information from the sliding side cart, simply turn off the ‘Display Savings’ option.
You can also customize the ‘Saving Text’ and ‘Shipping Text’ to reflect your own unique messaging.
Step 5: Personalize the Cart’s Call to Action
The sliding side cart features a standard checkout button, but you can enhance this call-to-action button to drive more conversions. Start by adding a checkout icon with the ‘Enable Button Icon’ option.
This feature is especially beneficial if you are building a multilingual WordPress website.
You can also include the cart total on the checkout button by activating the ‘Enable Cart Price’ option.
This will assist customers in keeping track of their cart’s total, especially if you have removed the subtotal from the cart summary.
By default, FunnelKit includes a ‘Continue Shopping’ link at the bottom of the sliding side cart. You can customize this text by entering your preferred message in the ‘Continue Shopping Text’ field.
Next, decide if this link will close the side cart panel or take the customer to your WooCommerce store page.
Most customers will expect to close the sliding cart, so we suggest choosing the ‘Close Side Cart’ option.
If you opt for ‘Redirect to Shop,’ consider updating the ‘Continue Shopping Text’ to clearly indicate what will happen when customers click the link.
Step 6: Design a Custom Empty Cart Screen
You can choose to hide the cart button until the customer adds at least one item to their cart, as explained earlier. However, if you decide not to hide the button, customers may occasionally see an empty cart screen.
You can customize the title, description, and button text in the ‘Empty Cart’ section. Generally, you’ll want to motivate customers to start shopping. For instance, you could highlight offerings like free shipping or a money-back guarantee.
You might also provide the customer with a coupon code, such as a buy one get one free offer.
Additionally, you can choose whether clicking the ‘Shop Now’ button will direct the customer to the WooCommerce store page or simply close the side panel.
We suggest choosing ‘Redirect To Shop’ to simplify the process for customers when they start adding products to their carts.
Step 7: Place the Cart Icon Anywhere on Your Website
For greater flexibility in positioning the cart icon, you can insert it on any page, post, or widget-ready area using a shortcode, which is a brief code snippet in square brackets that adds dynamic content to your website.
You can also include it in your site’s menu, which is an excellent option if you chose ‘None’ in the ‘Icon Visibility’ settings as explained earlier.
If you opted for ‘WooCommerce Pages’, you can also add the cart icon to other key areas of your website, such as your custom homepage or contact form.
To begin, select ‘Cart Menu’ and enable the ‘Enable Cart Menu’ toggle.
You can customize the appearance of the icon by selecting one of the icon templates and deciding whether to display the product count and cart total as part of the icon. This information can assist visitors in monitoring their carts.
You can also adjust the sizes of the icon and text. As you make these adjustments, the small preview will update in real-time, allowing you to experiment with different settings to find the best look.
Once you are satisfied with the appearance of the sliding side cart icon, click the ‘Save’ button to keep your changes.
You can now place the icon on any page, post, or widget-ready area by using the code provided next to ‘Embed Shortcode.’
For detailed instructions on how to insert the shortcode, please refer to our guide on adding a shortcode in WordPress.
Alternatively, you can add the icon to your site’s navigation menu, ensuring the sliding side cart is always accessible without interfering with the main content.
To do this, open the ‘Add to Menu’ dropdown and select the menu you wish to modify.
Then, simply click the ‘Save’ button to apply your changes.
Now, when you visit your WordPress website, you will see the cart icon displayed in the navigation menu.
Step 8: Customize Your Colors and Branding
You may want to adjust the colors of the sliding side cart to better align with your WooCommerce theme or brand identity.
To modify the text color, button color, link color, and more, click on ‘Styling.’
To change any of the default colors, simply click on them. This will open a popup where you can experiment with different color options.
For instance, in the image below, we are customizing the border color.
An alternative method is to enter a hex code in the ‘Hex’ field, which is ideal if you already have a specific color in mind.
If you’re unsure about which hex code to use, consider visiting a site like HTML Color Codes. This resource allows you to explore various colors and obtain a code that you can easily paste into the FunnelKit plugin.
If you still need guidance on color selection, check out our comprehensive guide on choosing the perfect color scheme for your WordPress site.
Remember that the final look may differ depending on your WordPress theme, but these styling options will help you achieve an ideal fit.
Step 9: Set Up a Responsive Sliding Side Cart
Our internet usage report indicates that over 90% of global internet users access the web via mobile devices. Therefore, it’s essential to ensure that the sliding side cart appears just as appealing on smartphones and tablets as it does on desktop computers.
To optimize the cart’s appearance on smaller screens, consider adjusting its width so it doesn’t completely occupy the mobile device’s display. To do this, navigate to the ‘Styling’ tab and adjust the ‘Cart Preview Mobile Width.’
Consider experimenting with different inputs in this field. If you modify the default settings, it’s advisable to preview the mobile version of your WordPress site from your desktop to ensure you are satisfied with the outcome.
While on this screen, you can adjust the width of the sliding side cart for desktop view. Simply enter a new value in the ‘Cart Preview Desktop Width’ field.
Step 10: Publish Your Sliding Side Cart
Once you are satisfied with the configuration of your sliding side cart, it’s time to activate it. Click on the ‘Enable Cart’ slider until it turns blue.
Now, when you visit your online store, the sliding cart will be visible and functional.
If you wish to remove the sliding side cart at any time, simply navigate back to FunnelKit » Cart in the WordPress dashboard. Then, click to turn off the ‘Enable Cart’ slider.
Method 2: Implement an Advanced Sliding Side Cart (Featuring Upsells, Cross-Sells, and Rewards)
To boost the average order value in your store, consider integrating powerful upsell, cross-selling, and reward features into the sliding cart. These advanced functionalities are offered in the premium version of FunnelKit Cart.
This plugin allows you to suggest related products whenever a customer adds an item to their shopping cart.
You can create special rewards like coupon codes and free gifts, and promote them within the sliding cart.
FunnelKit can track how much more a customer needs to spend to unlock the next reward.
Step 1: Install and Activate the FunnelKit Pro Plugins
To access these advanced features, you will need the FunnelKit Funnel Builder Pro package (the Plus plan or higher). This package includes three plugins that work together, and you must install all of them:
- FunnelKit Funnel Builder:This is the main plugin.
- FunnelKit Funnel Builder Pro:This premium add-on unlocks upsells, rewards, and additional features.
- FunnelKit Cart:This module powers the sliding side cart.
After purchasing a plan, log in to your FunnelKit account to download the three plugins. Then, you can install and activate them. For assistance, please refer to our guide on how to install a WordPress plugin.
Step 2: Activate Your License Key
Once activated, navigate to FunnelKit » SettingsEnter your license key in the ‘FunnelKit Funnel Builder Pro’ field.
You can retrieve this information by logging into your account on the FunnelKit website. Once logged in, click on ‘Activate.’
Next, navigate to FunnelKit » Cart.
You can now set up and personalize the side cart by following the same steps outlined in method 1. Once you are satisfied with the configuration of the sliding side cart, you can proceed to add upsells, cross-sells, and rewards.
Step 3: Activate Upsells and Cross-Sells
When customers access the sliding side cart, you can display tailored upsell and cross-sell offers based on the items they have in their shopping cart.
Upselling involves encouraging customers to purchase a higher-priced item instead of the one they currently have in their cart.
For instance, if a customer adds a waterproof jacket to their cart, you might recommend a more premium jacket that is more durable, versatile, and comes in various colors.
Cross-selling involves suggesting related products to customers based on their current purchases. For example, if they add a greeting card to their cart, you could recommend chocolates or flowers as well.
WooCommerce provides a feature for linked products, enabling you to create effective upselling and cross-selling opportunities. For detailed guidance, refer to our comprehensive tutorial on upselling products in WooCommerce.
Additionally, you can create upsells and cross-sells directly from the FunnelKit dashboard. This method is the fastest, and it will be the focus of this guide.
To begin, click on the ‘Upsells’ option and then select ‘Enable Cart Upsells’ to activate this feature.
Step 4: Assign Upsells and Cross-Sells to Your Products
Next, scroll down to the ‘Upsells and Cross-Sells’ section to manage your product promotions.
Here, you will find a list of all the products available in your online store.
Click on the product to which you want to add one or more linked products.
Then, choose either ‘Add Upsell’ or ‘Add Cross Sell’ based on the type of promotion you wish to implement.
In the popup window, start typing the name of the product you wish to use as an upsell or cross-sell. Click on the correct product when it appears in the suggestions.
To add multiple products, simply repeat the process outlined above.
Once you have made your selections, click the ‘Add’ button to finalize your choices.
Now, you can easily create tailored cross-sell and upsell campaigns for each product in your store by following the same steps mentioned earlier.
Step 5: Personalize the Display for Upsell and Cross-Sell Offers
You are now prepared to tailor the appearance of upsell and cross-sell offers in your sliding side cart.
Begin by experimenting with various styles using the radio buttons labeled ‘Display.’
The live preview will refresh automatically, allowing you to explore different styles to find your favorite.
By default, FunnelKit displays both upsell and cross-sell offers in the sliding side cart. If you prefer, you can choose to show only upsells or only cross-sells by selecting the appropriate radio buttons under ‘Product Recommendation Type.’
Next, you can modify the title that FunnelKit displays above the upsell or cross-sell offer by entering it in the ‘Heading’ field.
Keep in mind that FunnelKit will apply the same title for both types of offers.
Following that, you can determine the maximum number of recommended products that FunnelKit will display by entering a number in the ‘Show Maximum Upsells’ field.
Whenever possible, it’s advisable to create distinct upsell and cross-sell offers for each product. However, if your online store features a large inventory, this may not always be feasible.
You can designate a default upsell product that FunnelKit will showcase when there are no linked products available. Just enter the product name in the ‘Default Upsells’ field, and click on the correct product when it appears.
Once you are satisfied with the upsell and cross-sell promotions you’ve designed, remember to click ‘Save’ to ensure your changes are recorded.
Step 6: Create and Set Up Unlockable Rewards
Encouraging customers to spend more can significantly boost the average order value. FunnelKit enables you to create various rewards that customers can unlock once their cart subtotal reaches a specified threshold.
For instance, you might provide free shipping when a customer spends above a certain amount. FunnelKit will also inform customers of how much more they need to spend to earn their reward.
This is a simple strategy to increase sales and foster customer loyalty through gamification.
FunnelKit allows you to provide three types of rewards: free shipping, discounts, and complimentary gifts.
To implement free shipping, you must have already configured shipping settings in your WooCommerce store. For detailed guidance, please refer to our WooCommerce made simple guide.
The ‘discount’ reward automatically applies a coupon when the customer meets the minimum spending requirement. To offer this reward, create a percentage discount coupon using either the built-in WooCommerce coupon feature or a WordPress coupon plugin.
For detailed instructions, please refer to our guide on creating smart coupons.
Next, you can create a reward by selecting ‘Rewards’ in the FunnelKit settings and clicking on ‘Create Reward.’
Now, open the ‘Type’ dropdown menu and select the type of reward you wish to create: Free Shipping, a Discount, or a Free Gift.
Regardless of your choice, you can customize the text displayed to customers by entering your message in the ‘Message’ field.
If you make any modifications, be cautious not to alter {{remaining_amount}} as this allows FunnelKit to indicate how much more the customer needs to spend.
If you are providing a discount, ensure that you update the message to reflect the amount the customer will save.
Once that’s complete, enter a figure in the ‘Amount to Get Reward’ field. This represents the minimum amount shoppers must spend to unlock the reward.
If you are providing a percentage discount, make sure to specify the coupon that FunnelKit should automatically apply.
In the ‘Coupon’ field, begin typing the coupon code you wish to use. Click on the correct code when it appears.
Now, FunnelKit will automatically apply the coupon when a customer meets the minimum spending requirement.
If you are offering a free gift instead, start typing the name of the gift in the ‘Product’ field.
Click on the correct product when it appears in the suggestions.
FunnelKit will then add this item to the customer’s shopping cart as soon as they meet the minimum spending requirement.
To add additional rewards, simply click on ‘Create Another Reward.’
You can configure the discount, free gift, or free shipping reward by following the same steps outlined above.
By default, FunnelKit will display the following message when a customer qualifies for all rewards: ‘Congratulations! You have unlocked all the rewards.’
To customize this message, type your desired text in the ‘When All Rewards Unlocked’ field. You could even provide a special bonus for unlocking all rewards, such as an exclusive coupon code for their next purchase.
Once you are satisfied with your reward setup, click the ‘Save’ button.
Step 7: Activate Your Advanced Sliding Side Cart
To make the sliding side cart live, simply toggle the ‘Enable Cart’ switch to activate it.
If you wish to remove the sliding side cart at any time, return to FunnelKit » Cart in your WordPress dashboard and toggle the ‘Enable Cart’ switch to deactivate it.
Common Questions About Adding a Sliding Cart in WooCommerce
Here are some common inquiries from our readers regarding the addition of a sliding cart to their WooCommerce stores:
Does the sliding side cart replace the default WooCommerce cart page?
No, it does not replace the default cart page. The sliding side cart offers a more convenient way for customers to view and manage their cart from any page.
The main cart page (yourwebsite.com/cart) will still be available, and most sliding carts include a button that links to it for users who prefer to view it.
Will adding a sliding side cart plugin affect my website’s speed?
A well-designed plugin like FunnelKit is optimized for performance and should not significantly slow down your website. These plugins are engineered to load their scripts efficiently.
As a best practice, it’s advisable to test your website’s speed before and after installing any new plugin to ensure optimal performance.
Is it worthwhile to upgrade to FunnelKit Pro solely for the sliding cart features?
The value of the upgrade depends on your business objectives. If your main goal is to enhance the average order value (AOV), then the Pro features can be extremely beneficial.
The capability to display targeted upsells, cross-sells, and gamified incentives (such as ‘You’re just $10 away from free shipping!’) directly in the cart can significantly increase sales.
What should I do if the sliding side cart has compatibility issues with my WordPress theme?
Conflicts with modern, well-coded themes are uncommon, but they can occur. If you experience any display issues, start by checking the plugin’s ‘Styling’ settings, as you may be able to fix minor problems there.
If the issue continues, the best approach is to reach out to the plugin’s support team for help.
We trust that this article has guided you in adding a sliding side cart to your WooCommerce store. Additionally, consider exploring our comprehensive guide on creating a WooCommerce popup to boost sales, as well as our curated selection of the top WooCommerce plugins for your online shop.
If you enjoyed this article, please subscribe to our YouTube Channel for insightful WordPress video tutorials. You can also connect with us on Twitter and Facebook.