Are you an experienced professional eager to share your knowledge? Are you ready to escape the 9-to-5 routine and make a genuine difference in people’s lives? Launching an online coaching business could be your pathway to earning money online.
However, starting your own coaching business can seem daunting. From creating a professional website to managing clients and differentiating yourself in a competitive market, there’s a lot to navigate.
We understand the challenges, but after successfully building our own video-based membership site, we have the insights you need.
In this detailed guide, we’ll provide you with the precise steps to establish your online coaching business using WordPress, the leading website platform available.
Essential Requirements for Launching a Thriving Online Coaching Business
Before you can begin assisting others, you need to determine the type of coaching services you wish to provide.
There are numerous coaching niches available, including wellness, health, fitness, life, and career coaching. It’s advisable to select a coaching specialty that aligns with your skills and expertise.
You will also need to identify a target audience for your business. We suggest conducting market research to identify those who would be most interested in your coaching offerings.
First, you need to choose the type of coaching business model that suits you best. Many coaches offer personalized one-on-one sessions, while others prefer group coaching or a mix of both.
Now, let’s explore how to establish your online coaching business and build a WordPress website for it. Use the quick links below to easily navigate this comprehensive step-by-step guide:
- Step 1: Obtain a Hosting Plan and Domain Name
- Step 2: Set Up a New WordPress Website
- Step 3: Select a Coaching Theme for WordPress
- Step 4: Configure Your Web Pages
- Step 5: Install and Configure the MemberPress Plugin
- Step 6: Set Up the CoachKit™ Add-On
- Step 7: Develop Your Coaching Program(s)
- Step 8: Choose a Video Conferencing Platform
- Step 9: Establish Professional Social Media Profiles
- Step 10: Market Your Online Coaching Services
- Frequently Asked Questions About Starting an Online Coaching Business
Step 1: Obtain a Hosting Plan and Domain Name
A successful online coaching business begins with a reliable hosting plan and a memorable domain name.
Web hosting is the service that stores your website files and makes them accessible on the internet. A domain name is the address users type into their browsers to visit your site.
If you are launching an online coaching program, it’s essential to choose a hosting service that ensures your website remains online, even during peak traffic periods.
We recommend Bluehost, a leading provider in the web hosting industry known for its reliability.
With Bluehost, you receive a web hosting service that is optimized for WordPress, the world’s most popular website builder.
We will use WordPress.org to create your coaching website because it is user-friendly and offers numerous customization options for your site.
Fortunately, Bluehost has provided an exclusive discount link for Canada Create™ readers. Click the button below to take advantage of this offer:
As you are just starting out, we suggest opting for the Starter plan. This plan provides sufficient resources for a small business, including 10 GB NVMe storage and a free CDN to enhance your site’s speed.
You can easily upgrade to a higher-tier plan with just a few clicks if you find that this plan no longer meets your needs.
After selecting a hosting plan, you can choose a domain name. Many online coaches opt for their own name, such as tonyrobbins.com, or they may include a coaching-related keyword, like andyallencoaching.com.
For ideas on domain names, check out our article on selecting the perfect domain and try our free business name generator.
Once you have your domain name, complete your Bluehost account setup by providing your information and payment details.
If you decide not to use Bluehost, explore our recommendations for the best WordPress hosting options to build your website.
Step 2: Set Up Your New WordPress Website
If you opt for a Bluehost WordPress hosting plan, WordPress will be installed automatically, allowing you to skip this step.
However, if you choose to handle the installation yourself or already have a Bluehost plan and need guidance on creating a new website, follow this tutorial to set up your WordPress site.
Important Note: If you’re using other hosting providers like SiteGround, Hostinger, or WP Engine, refer to our comprehensive guide on installing WordPress.
Begin by logging into your Bluehost account to access the control panel.
Next, go to the ‘Websites’ menu and select ‘Add Site.’
From this point, simply choose ‘Install WordPress.’
Then, click on ‘Continue.’
Once completed, fill in the Site Title field, which will serve as your website name. This can be the brand name of your coaching business or something like ‘Coaching With [Your Name].’
After filling in that field, click ‘Continue.’
Next, you will need to link an existing domain to your website.
Alternatively, you can opt for a temporary subdomain until you are ready to purchase a new domain for your website. Then, click ‘Continue.’
Once the installation is finished, return to the Websites menu to see your new site listed there.
To access the WordPress admin area, simply select ‘Edit Site.’ Alternatively, you can use your website’s login URL to reach the admin panel.
With WordPress set up, let’s proceed to the next steps.
Step 3: Select a WordPress Coaching Theme
A WordPress theme consists of a collection of template files that dictate the look of your website and simplify the design of your pages.
Choosing a theme eliminates the need to code or design your website from the ground up. Select a theme that fits your vision and customize the colors, fonts, and other options to align with your brand identity.
For theme suggestions, explore our curated list of the top WordPress themes tailored for life coaches.
After selecting a theme, refer to our detailed guide on how to install a WordPress theme step by step.
To customize the theme, you can utilize either the WordPress Full Site Editor (FSE) or the Theme Customizer. Both tools are built into WordPress and are user-friendly for beginners.
However, many users have found these tools to be somewhat restrictive, particularly regarding customization capabilities. Therefore, we suggest using a page builder plugin like SeedProd for greater flexibility.
Among the page builder plugins we’ve tested, SeedProd stands out for its ease of use and robust features that allow you to personalize your site. You can effortlessly drag and drop elements on your webpage and adjust each block or section.
Additionally, SeedProd offers premium WordPress theme template kits specifically designed for coaching services, including this one for life coaching:
Guide to Installing a SeedProd Theme Template
To utilize a SeedProd theme, you must first install the SeedProd plugin. For detailed instructions, refer to our article on how to install a WordPress plugin.
Important Note: The free version of SeedProd is available in the WordPress plugin directory. However, we highly recommend upgrading to the Pro version for complete access to all templates and theme builder features.
After installation, be sure to activate your SeedProd license key. Simply copy the license key from your SeedProd account page and click ‘Verify key.’
Once you’ve done that, navigate to SeedProd » Theme Builder in your dashboard.
Next, click on ‘Theme Template Kits.’
Now, search for the theme template that aligns with your preferences. By entering the term ‘coach’ in the search bar, you will discover a variety of coaching website themes to choose from.
If you’ve selected a specific theme, simply hover over it and click the orange checkmark button.
At this stage, you will be directed to the SeedProd page builder.
Here, you can customize various elements of the theme, add new sections, and easily drag and drop content onto the page.
For detailed guidance, we suggest exploring our Canada Create™ course on getting started with SeedProd, along with our beginner’s guide on customizing your WordPress theme.
Step 4: Create Your Web Pages
The next step involves setting up the pages for your website. For more details, you can refer to our article on creating custom pages in WordPress.
For your online coaching business, we recommend including at least the following essential pages:
- Homepage– This is the first page most visitors will see, so it’s crucial to make a positive impression here. Check out our guide on how to design a custom homepage for more insights.
- About Page– This page should provide information about your background and qualifications as an online coach in your area of expertise.
- Contact Page– This page allows potential clients to reach out to you and learn more about your coaching services before they sign up. Be sure to include a contact form using a user-friendly form builder like WPForms.
- Free Consultation Booking PageWhile optional, offering a free consultation can enhance your chances of attracting clients. Consider adding a booking form here to simplify the appointment scheduling process for your visitors.
- Coaching Services PageUse this space to provide detailed information about your coaching services, including client membership tiers and benefits. You can also create subpages for each program and link them on a main page showcasing all your offerings.
To discover essential pages for your website, check out our guide on the crucial pages every WordPress site should include.
Step 5: Install and Configure the MemberPress Plugin
Now that your pages are ready, let’s proceed to install a membership plugin for your coaching services on your WordPress site.
A membership plugin enables you to establish and oversee your paid services and client membership levels. Additionally, it allows you to restrict access to specific content exclusively for coaching clients.
After testing various membership plugins, we recommend MemberPress as the most user-friendly choice for beginners. It is straightforward to set up and includes a CoachKit™ add-on to help you build the online coaching platform you require.
With this MemberPress add-on, you can create unlimited coaching programs, establish milestones to encourage client learning, and integrate your website with Calendly to schedule calls or offline coaching sessions with clients.
Important Note:If you’re seeking an alternative, we recommend AccessAlly, which offers robust group coaching features.
First, you need to install MemberPress. If you require assistance, you can follow our tutorial on how to install a WordPress plugin. For this guide, we’ll be using the Elite MemberPress plan, as it includes the CoachKit add-on.
After installing and activating the plugin, remember to activate your MemberPress license. Simply navigate to MemberPress » Settings and enter the license key in the designated field. Then, click ‘Activate License Key.’
We have a comprehensive guide on how to create a membership site, which covers essential steps such as setting up payment methods and adding sign-up forms.
For demonstration purposes, we will show you how to create a membership plan and restrict its content to members. You can repeat this process to create as many plans as you need.
Creating a Membership Plan
To create a membership plan, go to MemberPressMembership OptionsNext, click on ‘Add New.’
You will be directed to the membership plan editor page, which resembles the WordPress classic editor. Here, you can provide a name for your membership plan along with a brief description to attract potential members.
In the ‘Membership Terms’ section, you can set a price, change the billing type from one-time to recurring, and adjust the access duration from Lifetime to Expire or Fixed Expire.
Now, scroll down to the Membership Options section.
In the ‘Registration’ tab, you can modify the text on the registration button, enable a custom thank you message, activate a welcome email for new users, customize payment methods, and edit the user information fields in the registration form.
In the ‘Permissions’ tab, you can choose the user type eligible to purchase the plan and create a custom message for users without access rights.
Since you plan to offer this membership to new users, you can keep the ‘Who can purchase this Membership’ setting as ‘Everyone.’
Let’s go to the ‘Price Box’ tab, where you can personalize the appearance of the membership plan price box that will be displayed on your pricing page.
Enhance your membership plan with an appealing heading, compelling benefits, a concise footer, and an inviting call-to-action button.
Once you are satisfied with your membership plan, click ‘Publish’ to make it live and accessible to your audience.
Content Restriction by Membership Level
Next, let’s establish guidelines to restrict access to content based on membership tiers. Start by navigating to MemberPress »Rules and select the ‘Add New’ button.
On the rules editor page, you can specify which coaching materials are available to different membership levels.
For instance, we have designated that all content labeled as ‘Premium’ will be accessible to members with the Silver Coaching Plan. You can add multiple access conditions as needed.
Next, you can activate either Drip or Expiration features.
Drip content allows members to access materials gradually, rather than all at once, while Expiration means that content will no longer be accessible after a specified period.
These features can enhance your membership program’s appeal and motivate users to engage with all of your content before it becomes inaccessible.
After configuring the rule settings, scroll up and click ‘Save Rule’ to apply your changes.
For additional guidance on building a membership site, explore the following articles:
- Creating a Client Portal in WordPress
- Adding Free Trial Subscriptions in WordPress
- Selling Group Memberships in WordPress for Corporate Coaching Services
Step 6: Configure the CoachKit™ Add-On
Next, let’s set up the CoachKit™. Simply navigate to MemberPress » Add-onsand find the CoachKit™ add-on, then click the ‘Install Add-on’ button.
Once installed, go to MemberPress » Settingsand select the ‘Pages’ tab.By default, MemberPress will create a Coaching page where you can manage your clients and monitor their progress. If you prefer to use an existing page, you have that option.
Alternatively, you can select ‘Auto Create New Page’ to allow the plugin to generate a new page automatically.
Now, switch to the ‘CoachKit™’ tab. Here, you can activate the live chat feature to communicate directly with your clients on your membership site.
Now, let’s switch to the ‘CoachKit™’ tab. Here, you can choose to enable the live chat feature to talk directly with your clients right on your membership site.
We suggest enabling this feature so your clients can manage all aspects of your coaching program in one convenient location.
Another section worth exploring is ‘ReadyLaunch™.’
Here, you can upload your business logo, select a brand color, and ensure that the Coaching Pro Mode template is activated.
By default, MemberPress will apply the Pro Mode template to all your membership pages.
Here’s a preview of how the Coaching page appears:
You can also utilize the messaging feature directly from the Coaching page.
This is how the messaging feature looks when initiating a new conversation. You can also attach files if necessary.
Once you are satisfied with all the settings, simply scroll down the page.
After that, click ‘Update Options’ to save your changes.
Step 7: Develop Your Coaching Program(s)
At this point, you can establish a coaching program for your membership plans. Navigate to CoachKit™ » Programs.
Then, click ‘Add New Post’ to create your new coaching program.
First, let’s assign a title to your new program.
Next, you can define some Milestones and/or Habits for the program.
A Milestone is a specific, time-sensitive goal that helps track your client’s progress. You can create multiple Milestones and assign due dates for when clients should complete them.
To add a new Milestone, simply click on ‘+ New Milestone.’
Next, enter a name for the goal and set a due date that falls after the program begins.
You can also check the ‘Check In’ box to include a question for client check-ins.
Pro Tip: We recommend adding the Downloads and Courses add-ons to provide downloadable files and courses for your Milestones. For detailed setup instructions, refer to these guides:
- How to Manage, Track, and Control File Downloads in WordPress
- How to Create and Sell Online Courses With WordPress
In contrast, Habits are recurring tasks that can encourage clients to establish new routines.
To create a new habit, navigate to the ‘Habits’ tab and click on ‘+ New Habit.’
Now, assign a name to your new habit and specify how frequently it should be performed.
Like Milestones, you can also enable a check-in question for Habits.
You can create as many Milestones and Habits as necessary for your coaching program.
Once you are satisfied with the Milestones and Habits, go to the ‘Cohorts’ section and click on ‘New Cohort.’
A Cohort is essentially a group of students participating in your coaching program, much like a classroom setting.
Organizing your clients into cohorts helps to control the number of participants in a single program, preventing you or your coaching team from becoming overwhelmed.
For more comprehensive guidance, refer to our detailed instructions on offering cohort-based online courses.
In the Cohort popup, you can name your cohort, set a limit on the number of students allowed to enroll, and assign a coach.
Additionally, you can choose if students can start the program immediately upon enrollment (Dynamic) or if there will be a fixed start and end date (Fixed).
You also have the option to set the program’s enrollment status to either open or closed.
If you select the Dynamic option, we recommend setting the Status to ‘Closed’ until you are fully prepared to launch the program, as changes cannot be made once it is in progress.
After configuring all the settings for the Cohort, simply click ‘Save.’
Once this is completed, you can make the new coaching program accessible to participants.
To proceed, simply click the ‘Publish’ button.
Next, add your coaching program to a membership plan.
Navigate to MemberPress » Memberships from your dashboard and select the plan you just created by clicking the ‘Edit’ link beneath it.
Once you’re on the new membership page, scroll down to the ‘Membership Options’ section and switch to the ‘CoachKit™’ tab.
In the dropdown menu, select the coaching programs you want to include in this membership plan. You can also enable the messaging feature to allow clients to contact you directly.
That’s it! You can now create as many coaching programs and membership plans as you need.
Step 8: Choose a Video Conferencing Platform
Unlike traditional teaching, coaching requires a direct line of communication for clients to reach you. Therefore, you will need video chat software to connect with your members.
We recommend Nextiva, which is among the best business phone services available. Their video chat software is entirely cloud-based, ensuring excellent audio and video quality with minimal glitches.
Alternatively, you can consider popular options like Zoom and Google Meet.
For a detailed comparison of the two software options, read our article on Google Meet versus Zoom: which is the best choice for your business.
Step 9: Establish Professional Social Media Profiles
To maximize your reach to potential clients, it’s essential to establish professional social media profiles for your coaching business. Start with accounts on Facebook, Instagram, and X/Twitter.
If your focus is on corporate coaching, having a presence on LinkedIn is also advisable to attract business clients.
Depending on your target audience and niche, you might also consider creating a TikTok account.
Numerous lifestyle, wellness, and health coaches utilize this platform to share tips and engage with their audience.
After setting up your social media profiles, you can:
- Incorporate social media icons and sharing buttons on your website.
- Produce video content for TikTok, Instagram Reels, and/or YouTube Shorts to attract new clients.
- Create Facebook groups to foster community engagement and connection.
Step 10: Market Your Online Coaching Services
Ultimately, you will need effective strategies to drive traffic to your website and encourage visitors to enroll in your online coaching services.
Explore effective marketing strategies to enhance the growth of your online coaching business.
- Enhance your website’s visibility by optimizing it for search engines. We suggest using an SEO plugin like All in One SEO to make your site more search engine friendly and attract more visitors.
- Implement a referral program that encourages clients to recommend your services, offering them discounts as a reward.
- Join a consumer review platform such as Trustpilot and showcase client testimonials prominently on your website.
- Build an email list to provide users with exclusive offers and valuable content. Consider using OptinMonster to boost your subscriber sign-up rates.
- Launch a podcast featuring industry leaders to broaden your network and reach. Alternatively, consider being a guest on existing podcasts to increase your visibility.
- Organize a giveaway where users can win a complimentary coaching program. Use RafflePress to facilitate this promotion on your website.
- Develop eBooks as lead magnets to attract potential clients and generate interest in your services.
With a well-crafted marketing strategy, you can build a thriving coaching business that resonates with clients and leaves a lasting impression.
Frequently Asked Questions About Starting an Online Coaching Business
Let’s explore some common questions regarding the operation of an online coaching business.
Is online coaching a profitable venture?
Yes, online coaching can be highly profitable. Many well-known figures, such as Tony Robbins, have successfully built online coaching businesses that generate significant income. However, the potential for profit varies based on factors like your area of expertise and chosen niche.
What are some lucrative online coaching business ideas?
From our analysis, business coaching—especially focused on specific industries or skills such as digital marketing—and transformation coaching, including weight loss or life transitions, often offer the greatest earning potential.
The essential factor is to select a niche that aligns with your expertise and passion, while also ensuring that your target audience is motivated and financially able to invest in your coaching services.
What are the initial costs to start an online coaching business?
Startup costs can range significantly. At a minimum, you will likely need a website, a membership platform, and marketing expenses, which can amount to between $200 and $1000 annually. For more details, you can refer to our article discussing the costs associated with starting a membership site.
How should I set the pricing for my online coaching services?
Begin by exploring the pricing strategies of others in your niche, but avoid simply mirroring their rates. Take into account your unique expertise, the value you bring to your clients, and the time commitment needed for each individual.
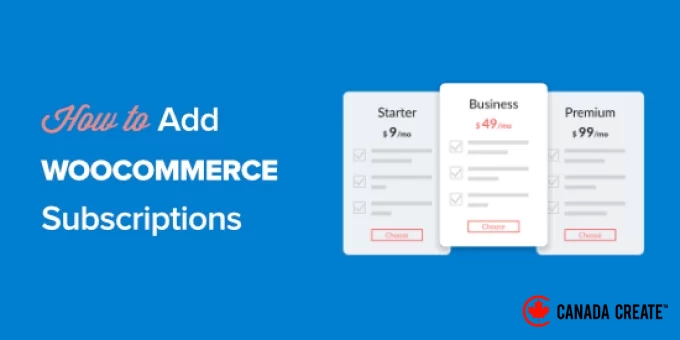
We suggest offering 2-3 distinct pricing options, such as group coaching, one-on-one sessions, and premium packages, to cater to various budgets while maximizing your revenue potential.
What are the advantages of online coaching?
Online coaching provides flexibility for both coaches and clients, enabling sessions to be conducted from any location and lowering operational costs. Additionally, it allows you to reach clients worldwide, broadening your audience beyond your local area.
We hope this guide has equipped you with the knowledge to launch your online coaching business. You might also find our guide on starting personal training services with WordPress and our tips for growing your online business helpful.
If you enjoyed this article, please subscribe to our YouTube Channel for WordPress video tutorials. You can also connect with us on Twitter and Facebook.