Many users are looking to transition from Webflow due to its high costs and limited flexibility for website management.
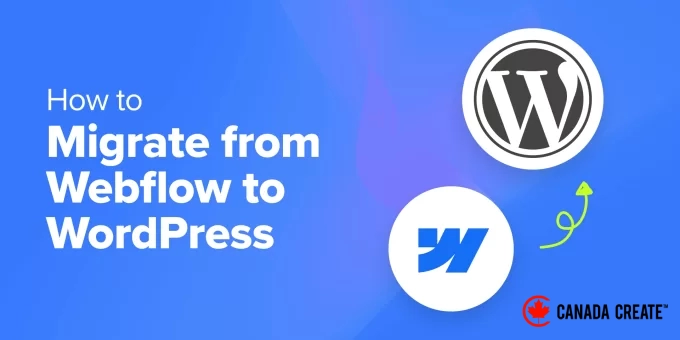
While migrating from Webflow to WordPress may appear challenging, the benefits are significant. WordPress is more flexible, cost-effective, and provides extensive customization options through plugins and themes, all without the need for coding. Additionally, WordPress grants you full control over your website.
The transition from Webflow to WordPress can be complex, which is why we’ve outlined the entire process to assist you. This guide will walk you through the migration step by step.
You will learn how to set up your WordPress site and transfer your content from Webflow. Our aim is to ensure that the migration is as straightforward and seamless as possible.
Here’s a brief overview of the steps you will take to migrate your site from Webflow to WordPress:
- Reasons to Migrate from Webflow to WordPress
- Step 1: Register for WordPress Hosting
- Step 2: Select a WordPress Theme
- Step 3: Export Your Webflow Website
- Step 4: Export Your Blog Posts
- Step 5: Recreate Webflow Pages in WordPress
- Step 6: Import Blog Posts into WordPress
- Step 7: Import Images
- Step 8: Update Domain Name Settings
- Step 9: Configure Permalinks
- Step 10: Install Essential Plugins for WordPress
- Explore Free Resources to Learn WordPress
- Option: Hire Professionals for Your Webflow Migration
Reasons to Switch from Webflow to WordPress
Many users initially choose Webflow for its user-friendly design tools and straightforward website creation process.
However, they soon encounter Webflow’s limitations, including its closed platform, restricted customization options, limited integrations, and high pricing.
For this reason, we advise users to consider switching from Webflow to WordPress.
We have evaluated and tested all major website builders, and none compare to WordPress, which powers over 43% of all websites, including numerous well-known brands.
Here are several reasons why WordPress is a superior choice compared to Webflow:
- Cost-Effective Options: WordPress offers a variety of affordable hosting solutions. As a free and open-source platform, it allows you to manage your expenses effectively.
- Extensive Customization: With outstanding no-code page builders, thousands of themes (design templates), and over 59,000 plugins, WordPress provides limitless customization possibilities.
- Wide Range of Integrations: As the leading website builder, WordPress supports a wide range of third-party integrations. This means you can effectively utilize any marketing, eCommerce, or growth tools for your website.
- Scalability: Easily upgrade your hosting plans as your website expands, ensuring you only pay for the resources you actually need.
Transitioning to WordPress provides you with greater control and enhanced options. You’ll find it easier to manage your site and save money over time.
Now, let’s explore the steps to ensure a smooth and successful migration.
Step 1: Sign Up for WordPress Hosting
To begin the migration process, you’ll need to choose a WordPress hosting provider. A reliable hosting provider is essential for ensuring your website operates efficiently and can accommodate traffic.
We recommend Bluehost, an officially endorsed WordPress hosting provider. Currently, Bluehost is offering our users a free domain name along with significant discounts on web hosting.
You can get started for just $2.99/month, making it a cost-effective and dependable option.
Alternatives: If you’re looking for other choices, consider Hostinger or SiteGround. Both are highly regarded and provide excellent performance.
In this tutorial, we will use Bluehost as an example, but the process is similar across all leading WordPress hosting providers.
Visit the Bluehost website and click the ‘Get Started Now’ button.
You will be directed to the pricing page where you can select a plan.
The Starter plan is ideal for most websites.
Click ‘Choose Plan’ to select your preferred plan and proceed.
Next, Bluehost will prompt you to select your domain.
If you have a custom domain from your Webflow site, check the box for ‘I want to use a domain I already own’ and enter your domain name.
Alternatively, you can select a free domain name here or choose ‘Choose domain later’ to skip this step.
Next, enter your personal details and payment information to finalize your purchase.
Bluehost will send you an email containing your login credentials, which you can use to access your hosting account dashboard.
Upon your first login, Bluehost will automatically install WordPress for you. Click the ‘Edit Site’ button to access the WordPress dashboard.
Need assistance with WordPress installation? Check out our comprehensive WordPress installation tutorial for detailed, step-by-step guidance.
After successfully installing WordPress, the next step is to select a theme, which serves as the design template for your website.
Step 2: Select a WordPress Theme
Once WordPress is installed, the next task is to pick a theme for your website, as it will define the overall appearance and style of your site.
There are countless free and premium WordPress themes available for you to choose from.
New users might feel overwhelmed by the vast selection. To assist you in finding the ideal theme, we have put together a list of the most popular WordPress themes.
We suggest opting for a simple design with ample white space. From our experience in creating websites for our businesses, we have discovered that clean, minimalistic layouts appear more professional and are easier for users to navigate.
Don’t stress too much about your selection. You can always switch your WordPress theme later if you discover a better option.
Later in this guide, we will explore how to design pages in WordPress using no-code page builders, providing you with even greater flexibility in your site’s design.
For now, let’s begin the process of exporting data from Webflow so that you can import it into your new WordPress site.
Step 3: Export Your Webflow Website
While Webflow allows you to export certain content, not all of it can be exported.
Here’s what you are able to export:
- The site export includes HTML, CSS, JavaScript, and media files, but this feature is only available with Workspace plans.
- You can export CMS elements, including blog posts.
Exporting Your Webflow Website
Directly importing Webflow pages into your WordPress site is not possible. It is advisable to back up your website before transferring your content to WordPress.
If you have a Webflow Workspace plan, you can utilize the Code Export feature to download your website files to your computer.
Sign in to your Webflow account and open the Designer tool.
You will now be in the Webflow Designer interface.
Move your cursor to the top-right corner of the screen and click the ‘Export code’ button.
This action will bring up the Export Code popup.
At the bottom of the popup, click on the ‘Prepare ZIP’ button to proceed.
Webflow will prepare your files, which you can then download to your computer.
Note:If you are not subscribed to a Workspace plan, you will need to manually save your pages to your computer. Alternatively, you can use the HTTrack website copier to crawl your site and download all your pages.
Step 4: Export Your Blog Posts
Webflow enables you to export CMS components, such as blog posts, which can then be imported into WordPress.
In the Webflow designer, navigate to the ‘CMS’ tab found in the left toolbar and select ‘Blog Posts’.
Then, click the ‘Export’ button at the top to download your blog posts in CSV format.
Step 5: Rebuilding Webflow Pages in WordPress
Now that you have downloaded your Webflow content, you can begin transferring it to your new WordPress site.
Although you cannot directly import individual pages from Webflow to WordPress, you can easily recreate them.
To achieve this, you will need a no-code page builder like SeedProd, which is a drag-and-drop design tool that enables you to create beautiful web pages without any coding skills.
First, install and activate the SeedProd plugin. For guidance, refer to our tutorial on how to install a WordPress plugin.
After activating the plugin, navigate to the SeedProd » Landing Pages section in the WordPress admin dashboard and click the ‘Add New Landing Page’ button.
Next, you will be prompted to select a template.
SeedProd offers a variety of attractive templates. Choose one that closely matches the pages you wish to recreate.
Then, enter a name for your page and select a URL slug.
We suggest keeping the same URL slug as your previous Webflow page to preserve your search traffic and maintain your SEO rankings.
Click ‘Save and Start Editing the Page’ to proceed.
This will take you to the SeedProd page builder interface, where you can navigate using your mouse, click on items, and begin editing them.
You can also add new elements from the left column by dragging and dropping them to your desired location.
SeedProd simplifies the process of designing any page, allowing you to modify layouts, choose custom colors, incorporate your logo, and more.
For further information, check out our tutorial on creating a landing page in WordPress.
Interested in exploring another page builder? Give Thrive Architect a try, which is another outstanding no-code page builder for WordPress.
Step 6: Import Blog Posts into WordPress
Fortunately, transferring blog posts from Webflow to WordPress is relatively straightforward.
You will need to install and activate the WP All Import plugin. Once activated, navigate to the All Import » New Import section in the WordPress admin dashboard.
Click the “Upload a file” option and select the CSV file you downloaded earlier.
The plugin will automatically identify the content type as posts and select it for you.
Click the ‘Continue to Step 2’ button to move on to the next step.
The plugin will display a preview of the data in the file. Click ‘Continue’ to advance to the next step.
You will now need to map fields to the corresponding WordPress post fields. For example, you can drag the name field into the WordPress post title area.
After mapping the fields to their respective areas in WordPress, simply click the ‘Continue to Step 4’ button.
Next, you must define a unique identifier for your posts. Use the ‘Auto-detect’ button to create an ID, which is used internally by WordPress and will not be visible on your website.
Finally, click “Confirm & Run Import” to finalize the process.
The plugin will inform you once the import process is complete.
Step 7: Import Images
WP All Import will not automatically transfer your images from Webflow to WordPress.
Your website will continue to show images hosted on your Webflow site, which could become problematic if your Webflow site is deleted.
Fortunately, there is a straightforward method to import external images into the WordPress media library using a plugin.
Begin by installing and activating the Auto Upload Images plugin.
Once activated, navigate to the Posts » All Posts section. Select all your blog posts and choose ‘Edit’ from the ‘Bulk Actions’ dropdown menu.
Click the ‘Apply’ button to proceed.
WordPress will display a Quick Update option for all posts. Simply click the ‘Update’ button, and WordPress will refresh all your blog posts without altering their content.
This action will initiate the upload function, allowing the plugin to import any external images found in your blog posts into the media library.
For further information, check out our tutorial on how to easily import external images into WordPress.
Step 8: Update Domain Name Settings
If you previously used a custom domain name for your Webflow site, you can now redirect it to your new WordPress site.
To accomplish this, you need to modify your domain’s nameserver settings. DNS or domain nameserver settings direct your domain name to your hosting provider.
Your WordPress hosting provider will supply you with the necessary nameserver information, which typically appears as follows:
- ns1.bluehost.com
- ns2.bluehost.com
- ns3.bluehost.com
For detailed instructions, check out our guide on changing domain nameservers.
Step 9: Configure Permalinks
WordPress enables you to select an SEO-friendly URL format for your site by adjusting permalinks.
Ensure your WordPress permalinks align with the URL structure of your previous Webflow site.
To do this, navigate to the Settings » Permalinks section in the WordPress admin dashboard.
Select the Post name option to ensure your URLs match the structure from Webflow.
Remember to click the ‘Save Changes’ button to apply your permalink settings.
Step 10: Install Key WordPress Plugins
After importing your content, the next step is to install essential WordPress plugins.
Plugins function like applications for your WordPress site, enhancing it with new features and capabilities.
Here are some of the most popular WordPress plugins that provide crucial functionalities for a new website:
- WPForms – Enables you to add contact forms to your WordPress site.
- All in One SEO for WordPressThe ultimate SEO toolkit for WordPress designed to help you increase organic traffic from search engines.
- DuplicatorThis tool enables you to create automated backups for your WordPress site. You can also upload these backups to the cloud and restore them with a single click when necessary.
- MonsterInsightsThis plugin simplifies the installation of Google Analytics on your WordPress site and provides easy-to-read website traffic reports directly in your dashboard.
- PushEngageLooking to send real-time notifications to users on both mobile and desktop? PushEngage is the leading push notification service available, helping you re-engage website visitors, increase page views, and enhance conversions.
Are you in need of additional tools and strategies to enhance your new WordPress website? Check out our complete list of essential WordPress plugins suitable for all website types.
Learn WordPress (Free Resources)
WordPress is user-friendly, but you might occasionally require assistance to navigate it effectively.
Here are some valuable resources to help you quickly become proficient in WordPress:
- WordPress Training CoursesAccess free video training courses for WordPress tailored for beginners. We suggest starting with WordPress 101This resource includes 33 lessons that teach the fundamentals of WordPress for beginners.
- CanadaCreate YouTube ChannelOur YouTube channel features over 931 videos and has 972,000 subscribers. It provides in-depth video tutorials, helpful tips, and practical advice for growing your business using WordPress.
- CanadaCreate Solution CenterIf you’re unsure about which plugin or tool to choose, our Solution Center offers a carefully curated selection of the best WordPress tools and plugins, all rigorously tested and reviewed by our experts.
- WordPress GlossaryThis glossary provides clear definitions of common WordPress terms, making it an excellent starting point for beginners to learn the WordPress vocabulary.
If you need assistance with a specific WordPress topic, just type your question into Google and add ‘CanadaCreate’ at the end.
For over 15 years, we have been providing WordPress resources, tutorials, and how-to guides. There’s a good chance we already have a detailed tutorial available on the topic you’re interested in.
Alternative: Seek Professional Assistance for Webflow Migration
Webflow is a proprietary platform, making the process of migrating your website to WordPress quite challenging.
Migrating your website can be a challenging and time-consuming process, especially for beginners. Even after following our tutorial, you might still encounter difficulties transferring all your data to WordPress.
A simpler option is to seek professional assistance for your WordPress migration.
You can hire experienced WordPress developers to discuss your specific needs and pay them hourly to resolve any migration challenges you face.
For instance, you might consider our Premium WordPress Support Services, where you can reach out to our developers for immediate migration help.
Additionally, we provide a rapid site launch service that creates a fully customized and visually appealing WordPress website tailored to your requirements. You can also purchase additional development hours, allowing our team to manage your Webflow migration seamlessly.
If you have any inquiries regarding these services, feel free to chat with our support agent on the Website Design Services page.
We hope this article has assisted you in migrating from Webflow to WordPress. You might also find our tutorial on increasing traffic to your WordPress site helpful, or explore various ways to earn money online with WordPress.
If you enjoyed this article, consider subscribing to our YouTube Channel for informative WordPress video tutorials. You can also connect with us on Twitter and Facebook.