
Organizing events can be challenging, especially when it comes to ensuring they are easily discoverable online. Many WordPress event pages struggle to attract visitors, despite having excellent content and planning. The key to increasing visibility is implementing event schema markup.
At CanadaCreate, we recognize the effectiveness of schema markup and frequently utilize it as a powerful SEO tactic to feature in rich snippets, Google knowledge panels, and other prominent sections of search engine results pages (SERPs).
This straightforward enhancement informs search engines precisely what your event entails, when it will occur, and where it can be found.
We will guide you through the process of adding event schema to your WordPress site using easy, reliable techniques. No coding skills are necessary. Just follow these instructions and see your events start to appear in those eye-catching rich snippets that drive more clicks.
What Are the Benefits of Adding Event Schema in WordPress?
Event schema markup is a specific type of code that aids search engines in comprehending the details of your event. Consider it as providing Google with a comprehensive event flyer that includes all the essential information—date, time, location, and ticketing details—in a format that it can easily interpret.
Event schema is incredibly effective because it does not alter the appearance of your website for visitors, yet it significantly enhances how search engines interpret and showcase your content.
By incorporating structured data into your WordPress site, you are essentially informing Google that your webpage is not just any ordinary page, but an event with specific details that users are actively searching for.
Here are some tangible benefits you can expect:
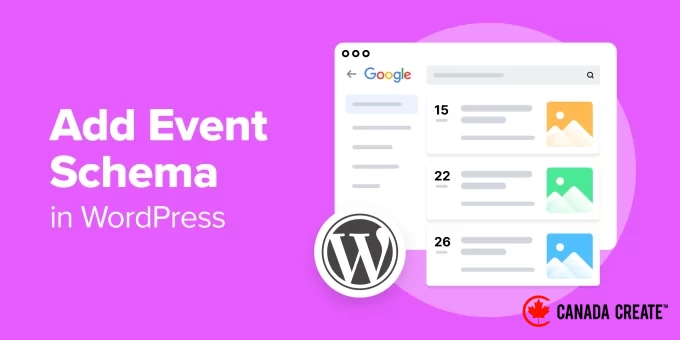
Increased Search Visibility: Your events can be featured in Google’s specialized event listings, rich snippets, and Google knowledge panels. These visually appealing formats appear above standard search results and provide essential information such as dates, locations, and pricing directly in the search results.
More Targeted Traffic: When users search for events in your locality or field, schema markup assists Google in aligning your content with their specific interests. This enhances your SEO and attracts individuals who are truly interested in attending, rather than just casual visitors.
Higher Click-Through Rates: Rich snippets that include event information are far more attractive than plain text links. When potential attendees can quickly view your event date, location, and other vital details, they are much more likely to click through for more information.
Our experience shows that events featuring proper schema markup consistently achieve better results than those lacking it. This structured data instills confidence in search engines, leading to enhanced visibility and increased attendance for your events.
Now, let’s explore the process of adding event schema in WordPress. Here are the steps we will discuss:
- Steps to Implement Event Schema in WordPress
- How to Verify Your Event Schema in WordPress
- Bonus: Implementing Schema Markup for Local SEO
Steps to Implement Event Schema in WordPress
The simplest method to add event schema markup in WordPress is by using All in One SEO (AIOSEO). It is the leading WordPress SEO plugin available, supporting a wide range of schema types to enhance search engines’ understanding of your content.
First, install and activate the AIOSEO plugin on your website. If you need assistance, refer to our guide on how to install a WordPress plugin.
Important Note:You will need the AIOSEO Pro version, which includes the Schema Generator along with other essential SEO features like sitemaps and the redirection manager. A free version of AIOSEO is also available for you to try.
After activation, the plugin will automatically initiate its setup wizard.
Click the ‘Let’s Get Started’ button to follow our comprehensive guide on setting up All in One SEO for WordPress effectively.
How to Add Event Schema to a WordPress Post or Page
After configuring All in One SEO, navigate to the post or page where you want to implement the event schema.
According to Google’s event schema guidelines, this page should promote a single event, as each event must have a unique URL.
In the WordPress content editor, scroll to the bottom of the page to find the ‘AIOSEO Settings’ section.
Click on the ‘Schema’ tab to view any schema types that have already been activated, such as the Article schema type.
Now, you can add the event schema to your post by clicking the ‘Generate Schema’ button.
You can select from a variety of schema types in AIOSEO’s Schema Catalogue. Locate the ‘Event’ option and click the ‘+ Add Schema’ button.
A form will appear where you can enter the details of your event.
Completing the Event Schema Form
First, provide a name for your event.
By default, AIOSEO uses the post title by incorporating the ‘Post Title’ smart tag. You can replace it with a custom title by removing the ‘Post Title’ smart tag and entering your own.
Next, you can add a description of the event, which is usually shown on search engine results pages (SERPs). The default setting uses the post excerpt, but it’s advisable to remove this smart tag and provide a more informative description.
Next, select the type of event you are organizing from a drop-down menu.
After that, you will need to choose the status of the event.
Initially, select the ‘Scheduled’ status. You can update this later if the event is canceled, postponed, or rescheduled.
Next, specify the mode of attendance for the event.
You can choose from options for online, offline, or hybrid attendance.
Next, select the date of the event.
When you click on the ‘Event Date’ field, a pop-up calendar will appear.
Here, you can select the start date and then the end date of the event, followed by clicking the OK button. For events lasting only one day, just click the same date twice.
Now, you can enter the location details for the event. If your event is online, you can leave this section empty.
Begin by entering the venue name along with its website URL.
Next, complete the address fields to assist attendees in finding the event location.
Then, proceed to the Offer section where you can specify the event price. For free events, simply input 0.
If tickets are available for purchase, provide the sale start date and the URL for the ticket purchase page.
The final two sections allow you to input details about the event organizer and the performer.
In the Organizer section, indicate whether the organizer is an individual or an organization. You can also provide their name and a link to their website.
If the event features a performance, you can enter similar information about the performer.
You can upload an image for your event or choose one from the WordPress media library, with a maximum size of 112×112 pixels.
After completing the event schema form, remember to click the ‘Add Schema’ button at the bottom to include it in your post or page.
Tip:If you plan to host more events in the future with similar details, save time by clicking the ‘Save Schema as Template’ button.
How to Test Your Event Schema in WordPress
You can validate your schema using the AIOSEO Settings » Schema section located at the bottom of the WordPress content editor.
Begin by clicking the ‘Validate Schema’ button.
This action will open a pop-up window displaying your schema markup code.
You can check the schema by selecting the ‘Test with Google’ button.
This will launch Google’s Rich Results Test tool in a new tab.
Simply click the ‘Test Code’ button to proceed.
Google will evaluate your page for various types of schema markup, which may include multiple schema types like Articles, Breadcrumbs, FAQs, and more.
Now, click on the ‘Events’ section to view the testing details of your Event schema.
You should see all the event details you have entered for this page or post.
You may also encounter a list of critical or non-critical issues.
If any information is incorrect, incomplete, or improperly formatted, you will need to address those issues.
Simply go back to the tab where you were editing the post or page, and click the pencil icon next to the Event schema.
Now you can modify the information in the Event schema form to resolve those issues. After updating the schema, you may want to test it again.
Bonus: Implementing Schema Markup for Enhanced Local SEO
If your event takes place at your business location, optimizing your website for local SEO can improve your search rankings.
Begin by going to the All in One SEO » Local SEO page and click on the ‘Activate Local SEO’ button.
After activating this module, you can input essential details about your business in the Locations tab.
This information will assist Google and other search engines in accurately displaying your business details in local search results.
For comprehensive guidance, refer to our ultimate guide on WordPress local SEO.
Expert Tip: Prefer to let professionals handle your SEO? Our team offers services to optimize your website for search engines, including technical SEO audits, keyword optimization, local SEO strategies, and more. Explore our CanadaCreate WordPress SEO Services today!
Expert Guides for Implementing Schema Markup in WordPress
We hope this tutorial has helped you understand how to incorporate event schema in WordPress. You might also be interested in learning how to add various types of schema markup to your WordPress site:
- How to Effectively Add SEO-Friendly ‘How to’ Schema in WordPress
- How to Easily Add SEO-Friendly Recipe Schema in WordPress
- A Comprehensive Guide to Implementing Video Schema Markup in WordPress
- Step-by-Step Instructions for Adding FAQ Schema in WordPress
- How to Effectively Implement Schema Markup in WordPress and WooCommerce
- Top Recommended Schema Markup Plugins for WordPress
Enjoyed this article? Subscribe to our YouTube Channel for insightful WordPress video tutorials. Connect with us on Twitter and Facebook for more updates.


