When visitors begin filling out your contact form but leave it incomplete, it can be incredibly frustrating for website owners, especially knowing that those potential leads could significantly benefit your business.
The reality is that long forms can overwhelm users and create unnecessary barriers in your conversion process.
Through years of assisting WordPress site owners in enhancing their forms, we have found that incorporating dropdown fields can significantly boost your form completion rates.
Additionally, these straightforward elements not only conserve valuable screen space but also help direct users to provide the specific information you need from them.
In this guide, we will demonstrate the simplest method to create WordPress forms with dropdown fields that encourage visitors to complete them.
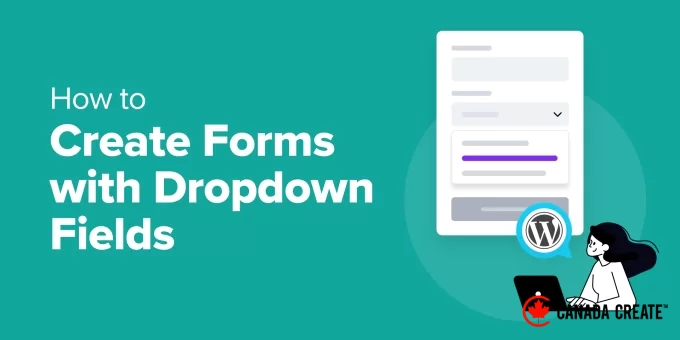
What Are Dropdown Fields and Why Should You Use Them?
A dropdown field allows users to select one option from a predefined list of choices. Users can easily click on the field to view all available options.
As a website owner, you can utilize dropdown fields to design various web forms, including contact forms, event registration forms, email newsletter subscriptions, or product order forms.
Dropdown fields can enhance the effectiveness of your forms. Here are some key benefits:
- Uniformity.Using a predefined list of options ensures that the data collected is consistent and prevents invalid entries, leading to more accurate data analysis.
- Dynamic fields allow for more flexible form interactions.Dropdown fields simplify the implementation of conditional logic. By providing a set list of options, you can display additional fields based on user selections without complicating the process.
- Shortened form length enhances user engagement.By consolidating multiple choices into a streamlined dropdown menu, your form appears less daunting, which can improve the overall user experience.
Now, let’s explore how to create forms with dropdown fields in WordPress. Here’s a brief overview of the steps we’ll cover in this tutorial:
- Step 1: Install the Best Contact Form Plugin
- Step 2: Create a New Form Using WPForms
- Step 3: Add the Dropdown Field to Your Form
- Step 4: Configure Dropdowns with Options and Conditional Logic
- Step 5: Customize Your Form Notifications and Confirmations
- Step 6: Embed Your Form in WordPress
- Step 7: Publish the New Form on Your WordPress Site
- Bonus Tip: Innovative Ways to Utilize Dropdown Fields
- Frequently Asked Questions: Using Dropdown Fields in WordPress Forms
- Additional Resources: Master Your WordPress Forms
Let’s get started!
Step 1: Install the Top Contact Form Plugin
WPForms is the leading contact form plugin for WordPress, featuring AI tools and over 2,000 customizable templates that allow you to create forms in just a few clicks.
At Canada Create™, we utilize WPForms for our contact forms, annual user surveys, and migration requests, and we are extremely pleased with its performance!
Feel free to explore all its features in our comprehensive WPForms review.
📢 Important Notes: WPForms Lite includes the dropdown field feature, but we recommend upgrading to the premium version to access conditional logic and enhance the user experience on your forms.
The great news is that Canada Create™ readers can enjoy an exclusive 50% discount by using the WPForms coupon code: SAVE50.
Now, let’s install and activate the WPForms plugin. Navigate to Plugins » Add New Plugin in your WordPress dashboard.
On the following screen, use the search bar to locate the WPForms plugin. Once you find it, click ‘Install Plugin’ and then ‘Activate.’
For step-by-step instructions, check out our guide on how to install a WordPress plugin.
Step 2: Create a New Form with WPForms
After activation, you will find a WPForms menu in your WordPress admin dashboard.
You can now access the WPForms builder interface to create forms that include dropdown fields.
To begin creating a new form, navigate to WPForms»Add New.
You will see the ‘Setup’ panel in the WPForms form builder. The first step is to give your form a name.
For instance, you can enter ‘Simple Contact Form’ or simply ‘Contact Form’ in the ‘Name Your Form’ field.
Once that is complete, it’s time to decide how you want to build your WordPress form.
With WPForms, you can start from scratch, select a pre-made template, or utilize the AI-driven form builder.
If you opt for the AI form builder, just provide a simple prompt, and the AI will create the form for you in seconds.
For this tutorial, we will be using ‘Simple Contact Form’.
To use a template, simply hover over your desired option and click ‘Use Template’.
For detailed, step-by-step instructions, refer to our comprehensive guide on creating a contact form in WordPress.
Step 3: Adding the Dropdown Field to Your Form
Once you finish the setup, you will be taken to the form builder, featuring a list of fields on the left and a live preview on the right.
Next, we will add a dropdown field to our contact form.
Just drag the ‘Dropdown’ option and drop it onto the right side of the form.
📢 Important Notes:All fields in the ‘Standard Fields’ category are accessible in WPForms Lite, allowing you to create forms with multiple-choice options or include CAPTCHA in your login and registration forms at no cost.
On the right side of the panel, you will see the dropdown field added to your contact form. Hover over the field to access its settings, which include:
- A copy button
- A delete button
- An instruction to ‘Click to Edit’
- An instruction to ‘Drag to Reorder’
Using the drag-and-drop feature, let’s reposition the dropdown field above the ‘Comment or Message’ section.
Placing the ‘Comment or Message’ field just before the submit button enhances the form’s flow, making it easier for users to complete the form and ensuring the dropdown field is more noticeable.
Step 4: Setting Up Dropdown Options and Conditional Logic
In this step, you will define the label, options, and description for your dropdown field. Ensure that your options correspond to the type of form you are creating. For our contact form, we will include an option for newsletter subscription.
Select your dropdown field and navigate to ‘Field Options’.
In the ‘General’ tab, provide the required information:
- Label.For dropdown fields, labels typically pose a question. For instance, we will use ‘Would you like to subscribe to our newsletter?’
- Choices.Let’s include ‘Yes, please.’ and ‘No, thank you.’ as options.
- Description.You may keep ‘You can unsubscribe at any time.’ in this section.
- Required.Enable this option to make it mandatory for visitors to fill out this field.
🧑💻 Pro Tip:AI-generated choices can streamline your process by quickly providing relevant options for dropdowns, multiple-choice, or checkbox fields. Instead of manually entering each option, select a pre-existing prompt or create your own, and let AI handle the rest.
Next, we will configure conditional logic.
Conditional logic involves making decisions based on ‘if’ and ‘then’ statements. When applied to forms, it determines the subsequent actions based on the user’s responses.
Implementing conditional logic simplifies form completion. By displaying only relevant options based on prior selections, your form prevents overwhelming users with unnecessary choices.
For instance, let’s add an extra field when users select the ‘Yes, please’ option. This will allow subscribers to specify how often they wish to receive promotional emails.
First, you need to create a new field. Return to the ‘Add Fields’ tab and select ‘Dropdown’ or any other field type. Then, fill in the details for the new field.
Here’s an illustrative example:
With the new field prepared, click on it and go to the ‘Smart Logic’ tab.
Here, you can enable conditional logic by toggling the ‘Enable Conditional Logic’ option.
Once enabled, you can set up conditional logic for your new field.
Begin by choosing to ‘Show’ or ‘Hide’ the new field. Next, select an existing field and a user response.
Here’s our configuration for your reference:‘Show’ this field if ‘Would you like to subscribe to our newsletter’ is answered with ‘Yes, please’.
🧑💻 Pro Tip:Looking to add users directly to your email list? Check out our tutorial on building an email list in WordPress.
Step 5: Customizing Your Form Notifications and Confirmation Messages
Now it’s time to customize your new form.
Begin by configuring email notifications to alert you whenever a new user submits a form. Navigate to Settings » Notifications and enable the ‘Enable Notifications’ option.
Next, review the default notification settings for your form located below the toggle.
Some entries in the ‘Default Notification’ field include ‘Smart Tags’. These tags determine where to send notifications for form submissions, among other things. You can modify these settings to suit your requirements.
For instance, the ‘Sent To Email Address’ field contains the {admin_email} ‘Smart Tag’. By default, this points to your WordPress site’s admin email, meaning all form submission notifications will be sent to that inbox.
You can include additional recipients, such as your email marketing specialist. Just remember to separate each email address with a comma.
If you’re interested in learning how to send form emails to multiple recipients or different departments, check out our guide on creating a contact form with multiple recipients.
The default text for your ‘Email Subject Line’ is ‘New Entry: Your Form Name’. However, feel free to customize the subject line to make it easily recognizable.
When users submit a form, they will receive a notification email. The ‘From Name’ field indicates the sender of the notification.
The next field is ‘From Email’, which uses the ‘Smart Tag’ {admin_email}.
With this default configuration, users will receive notification emails from the admin email address of your site.
The highlighted section alerts you that your site’s admin email address is from a different domain, such as @gmail.com. This may cause deliverability issues, leading to emails being marked as ‘Spam’.
You can refer to our guide on configuring WP Mail SMTP to ensure that your emails reach your readers’ inboxes.
Each notification email sent will allow the recipient to reply directly.
In the ‘Reply-To’ field, you can specify which email address will receive user replies. The ‘Smart Tag’ for this field is {field_id= “1”}, meaning replies will be directed to the same email address as the ‘From Email’.
Finally, the ‘Email Message’ field includes the {all_fields} ‘Smart Tag’, allowing your email message to contain all form fields along with user responses.
After customizing your notifications, go to the ‘Confirmations’ section to set up how confirmation messages will be displayed after form submission.
Begin by selecting your preferred confirmation type: ‘Messages’, ‘Show Page’, or ‘Go to URL (Redirect)’.
Choosing ‘Message’ will allow you to show a confirmation message to inform users that their form submission was successful.
You can customize the default confirmation message to align with your brand by editing the text in the ‘Confirmation Message’ field.
If you select ‘Show Page’, you will need to pick a page from your existing WordPress site. Alternatively, if you choose ‘Go to URL (Redirect)’, you will enter a specific URL.
Make sure to click ‘Save’ before proceeding to the next step to ensure your changes are not lost.
Now that you’ve completed the setup, you’re ready to showcase your new form on your WordPress website.
Step 6: Adding Your Form to WordPress
To add your new form to your WordPress site, utilize the ‘Embed’ wizard found in the WPForms form builder.
This action will open the ‘Embed in a Page’ pop-up window, where you can choose to ‘Select Existing Page’ or ‘Create New Page’ based on your needs.
For this example, we will select ‘Selecting Existing Page’.
The next step is to select the specific page where you wish to display your new form.
Click on the dropdown menu and select an existing webpage. After that, press ‘Let’s Go!’.
This action will take you to the WordPress block editor.
Next, click the ‘+’ button to insert a WPForms block.
Type ‘WPForms’ into the search bar, and you should find the WPForms block in the search results.
Click to add the block.
Once the WPForms block is added, a dropdown menu will appear on your page.
Click on the dropdown and select a form from the list. We’ll choose ‘Contact Form’ since that’s the one we just created.
Step 7: Publish Your New Form on Your WordPress Site
In this final step, let’s preview the form before publishing to ensure everything appears as it should. In the WordPress content editor, click View » Preview in new tab.
If desired, you can also see how the form looks on tablets and mobile devices. Just click View » Tablet or Mobile » Preview in new tab.
If no further changes are needed, you can click ‘Update’ to finalize.
Congratulations! You’ve successfully added your new contact form with dropdown fields to your WordPress website.
Here’s a glimpse of our demo website:
Pro Tip: Innovative Uses for Dropdown Fields
What’s truly remarkable about dropdown fields is their versatility! They can be used in ways many people don’t realize.
After years of website development, we’ve uncovered some clever applications for dropdowns that extend beyond standard contact forms. Here are some of our top creative ideas to inspire you:
🛍️ Product Customization Tools – This feature allows users to personalize products by selecting options like ‘Choose your color,’ ‘Select size,’ or ‘Pick a finish.’ It’s ideal for WooCommerce product pages or custom order forms.
📅 Appointment Booking – Small businesses or service-oriented websites can utilize cascading dropdowns for selecting dates and time slots. This is particularly beneficial for booking systems or consultation requests.
🗺️ Location Selection Services – You can incorporate dropdowns for selecting country, state, and city while integrating maps into your forms. This is extremely helpful for delivery services or local business listings.
✏️ Interactive Quiz FormsDropdown fields are ideal for multiple-choice questions. If you’re offering an online course, these fields help keep your content organized and user-friendly!
Additionally, you can easily customize and style your WordPress forms to match your website’s design seamlessly.
Frequently Asked Questions: Implementing Dropdown Fields in WordPress Forms
Here are responses to some of the most frequently asked questions regarding the use of dropdown fields in WordPress.
What is the top plugin for creating forms with dropdown fields?
We recommend WPForms as the best choice. Its AI features streamline the process, the drag-and-drop builder is user-friendly, and the dropdown field is available even in the free WPForms Lite version.
For advanced functionalities like conditional logic, consider upgrading to the WPForms Pro version.
Can I incorporate dropdown fields into my forms at no cost?
Absolutely! The free WPForms Lite plugin includes standard dropdown fields, allowing you to create organized and user-friendly forms without any cost.
Are dropdown fields optimized for mobile devices?
Yes, they are! When using a high-quality plugin like WPForms, all form fields are fully responsive, ensuring that dropdown menus adapt beautifully and function smoothly on desktops, tablets, and smartphones.
Is it possible to use images as options in my form fields?
WPForms Pro offers an ‘Image Choices‘ feature for radio buttons and checkboxes. Although this feature is not available for dropdowns, it allows users to select from visual options, making it ideal for product selections and similar forms.
Additional Resources: Enhance Your WordPress Forms Skills
We hope this guide has assisted you in learning how to create WordPress forms with dropdown fields. If you found this information useful, here are some carefully selected guides to help you maximize their potential:
- How to Personalize and Design Your WordPress Forms
- How to Utilize a Contact Form to Expand Your Email List
- How to Prevent Spam in Your WordPress Contact Forms
- How to Monitor and Decrease Form Abandonment in WordPress
- Comprehensive Guide to Utilizing WordPress Forms
If you enjoyed this article, please subscribe to our YouTube Channel for WordPress video tutorials. You can also connect with us on Twitter and Facebook.