Do you recall when email addresses and passwords were the standard for website logins? User expectations have evolved; many now favor the simplicity of phone number authentication.
Having assisted numerous individuals in implementing phone-based login mechanisms on their WordPress platforms, I’ve identified the most effective – and least effective – approaches. I’ve thoroughly evaluated various options, ranging from commercial plugins to bespoke implementations, to pinpoint the most dependable solutions.
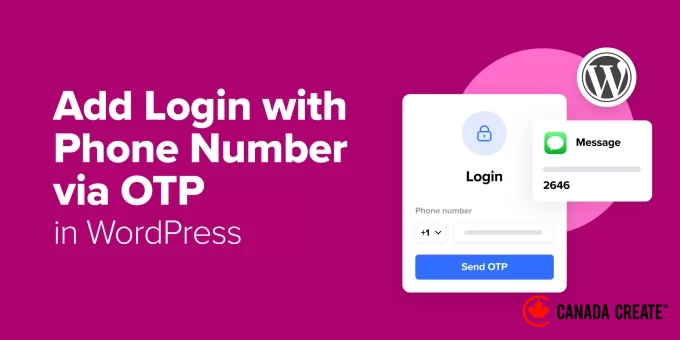
This tutorial will walk you through integrating phone number login with OTP verification into your WordPress website. Whether you operate a small business website or a sizable membership platform, you’ll discover a suitable solution.
Why Enable Phone Number Logins for WordPress Users?
Passwords can be especially troublesome,particularly if you manage a community-focused websitesuch as a membership portal, collaborative blog, or e-commerce platform.
The challenge lies in users frequently forgetting passwords, employing easily guessed passwords, or recording them in plain sight. This poses a security risk, and many users have expressed a desire for a more streamlined WordPress login process.
Providing phone number login coupled with a one-time passcode (OTP) streamlines the experience. It eliminates the necessity of memorizing passwords while preserving the security of user accounts.
Here’s why integrating phone login into your WordPress site is worth considering:
- 🔒 Secure your account!Enhanced Security: Passwords are vulnerable to hacking and theft. OTPs, due to their dynamic nature, bolster login security.
- ⚡ Experience faster logins!Expedited Logins: Users bypass the need to input lengthy passwords, gaining immediate access via a swiftly delivered code.
- ⏳ Just a moment…Reduced Password Reset Requests:For community sites, users avoid password resets, which reduces your support workload.
- 😊 Improved User Experience: A simplified login process improves user satisfaction and encourages repeat visits.
- 📱 Optimized for Mobile:Given the prevalence of mobile browsing, OTP login provides a fluid mobile experience.
Let’s explore how to enable phone number login with OTP in WordPress simply.
How to Add Login with Phone Number via OTP in WordPress
You can easily add a phone number login to WordPress using the free Login with Phone Number plugin.
Since WordPress lacks built-in SMS capabilities, you’ll need a service like Firebase or Twilio for OTP delivery. I will show you how to set this all up.
Begin by installing and activating the Login With Phone Number plugin. Refer to a WordPress plugin installation guide if needed.
After activating the plugin, go to theLogin Settings » General page from the WordPress dashboard and check the ‘Enable phone number login’ option.
Following that, include country codes for user login regions. By default, the plugin offers phone number country codes for every country.
I recommend leaving this setting as it is. It ensures that your site remains accessible to a global audience.
Next, you need to check the ‘Enable email login’ option if you want to allow email login for your users.
We recommend this setting if you have existing users who are used to logging in with their email. By doing so, you’ll ensure that they won’t get frustrated once phone number login is enabled, as they’ll still be able to log in using their email.
You can then check the ‘Force to get email after phone number’ option. This setting ensures that new users are required to provide their email address before they can complete registration. It’s especially useful if you already have an email list and want to collect emails from new users.
You can also enable user registration with a phone number. Once that is done, type the length of the activation code that will be given to users.
After that, you have to scroll down and find the ‘Enable Timer’ option. Click to enable it, then set the time limit for users to enter the OTP.
For example, if you set it to 60 seconds, users will have one minute to enter their code before it expires. Then, click the ‘Save Changes’ button to store your settings.
Go ahead and switch to the ‘Gateway’ tab from the top. Here, you must select an SMS service provider for your phone number OTP login.
I will be choosing Firebase for this tutorial. It’s a Google service that lets you send one-time passcodes to users’ phones for secure login. However, you can also choose options like Twilio, WhatsApp, Alibaba SMS, and more.
Keep in mind that some of the options will only be available in the Pro plan.
Once you choose Firebase, you will need to add its API key and config.
For this, you need to visit the Firebase Console and select the ‘Create a Firebase Project’ option.
This will take you to a new screen, where you must add a project name. You can call it anything that helps you remember what you’re using it for.
Then, click the ‘Continue’ button.
Firebase will now ask permission to enable Google Analytics for the project.
Once you have allowed that, you must select ‘Default Account for Firebase’ from the dropdown menu and click the ‘Create Project’ button.
You will now be taken to the Project Overview page. Here, navigate to the Build » Authentication tab from the left column.
Go ahead and click the ‘Get started’ button.
Once you do that, some new settings will become visible on the screen. From here, choose ‘Phone’ as the native provider and toggle the ‘Enable’ switch.
This will allow users to sign in with a mobile phone number using Firebase SDK phone verification. Then, click the ‘Save’ button.
Now, switch to the ‘Settings’ tab and select the ‘Authorized domains’ option from the left column.
Here, you have to click the ‘Add domain’ button. This will open a prompt where you need to add your website’s domain name.
After that, just click the settings icon next to Project Overview at the top and select the ‘Project Settings’ tab.
Then, scroll down to the ‘Your Apps’ section and select the web icon.
You will now need to add a name for your app and click the ‘Register App’ button.
When you do that, Firebase will generate an SDK for you. This stands for Software Development Kit, but it works like an app.
From here, simply click the ‘Continue to Console’ button.
Once you are back on the Project Overview page, simply copy the ‘Web API Key’ and store it somewhere safe.
Now, scroll down to the ‘Your Apps’ section where details for your newest app will be displayed on the screen.
Here, choose the ‘Config’ radio button to display your Firebase SDK as config. Simply copy and store it somewhere safe.
After that, you need to head back to your WordPress dashboard and add the Firebase API key and config into their respective fields in the Login with Phone Number plugin settings.
Next, click the ‘Save Changes’ button to store your settings.
Once that is done, open the WordPress page where you want to add the login form and click the ‘Add Block’ button.
From the block menu, you need to choose the ‘Shortcode’ block and add the following shortcode into it:
[idehweb_lwp]
Finally, click the ‘Update’ or ‘Publish’ button to store your settings.
Now, when new users visit your website, they will be able to register and log in using their phone number, while existing users can still log in with their email.
Once you’ve set this up, we recommend sending an email to your existing users, encouraging them to add their phone numbers as soon as possible.
They can do this by visiting their profile page in the WordPress dashboard, scrolling down to the ‘Personal Information’ section, adding their phone number, and clicking Update User.
This ensures that even existing users who have signed up already can log in with their phone numbers later on.
Bonus: Add One-Click Login With Google in WordPress
While logging in with a phone number and OTP is a secure option, some users prefer an even quicker way to access their accounts.
Adding Google one-click login allows users to sign in instantly without typing in a phone number or waiting for an OTP. Bypassing the WordPress login form like this can improve the user experience, reduce login friction, and increase signups.
It is especially useful for sites with frequent visitors, such as membership platforms, online stores, or communities.
You can easily add this feature using the Nextend Social Login plugin. It lets users log in with their Google account and even supports Facebook and Twitter logins.
Nextend also allows you to link social profiles to existing accounts, so returning users do not create duplicates.
To get started, just see our tutorial on how to add one-click login with Google in WordPress.
I hope this article helped you learn how to add login with phone number via OTP in WordPress. You may also want to see our beginner’s guide on how to remove the password reset/change option from WordPress and our tutorial on creating a WordPress login popup modal.
If you liked this article, then please subscribe to our YouTube Channel for WordPress video tutorials. You can also find us on Twitter and Facebook.