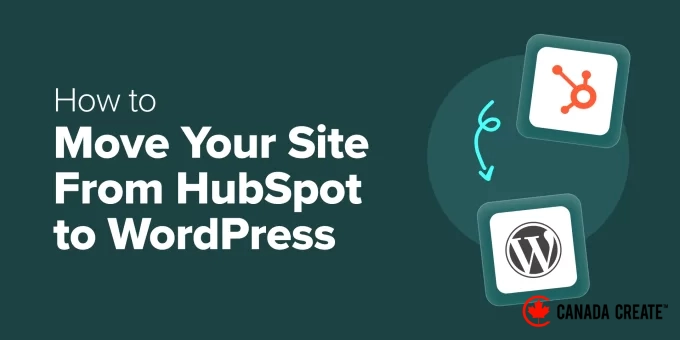
Many users share the feeling of being stuck with HubSpot. I have assisted numerous individuals concerned about content loss or SEO damage during a platform migration, and I fully appreciate those worries.
Based on my experience, transitioning to WordPress is achievable and represents a significant advancement for your content autonomy. A well-defined, step-by-step strategy ensures a successful migration.
This guide offers that precise strategy. We will navigate the entire procedure together, ensuring the protection of your content, the preservation of your search engine rankings, and your overall peace of mind.
Why Move Your Blog From HubSpot to WordPress?
HubSpot’s popularity stems from its robust customer relationship management (CRM) capabilities, including marketing automation features.
Users often express satisfaction with HubSpot as a CRM, a sentiment I share, as I also appreciate it. My detailed HubSpot review provides further information.
Frequently, users begin utilizing HubSpot’s built-in blogging functionality out of convenience, only to encounter limitations later.
I’ve worked with clients who started blogging on HubSpot and eventually felt the same way.
Now, I’ll be honest. HubSpot’s content management system is useful for landing pages and integrated marketing campaigns. But for blogging specifically? WordPress comes out on top.
Even minor design adjustments or layout modifications to a HubSpot post can feel unnecessarily complex.
Conversely, WordPress is designed specifically for content creation. It originated as a blogging platform and has developed into a comprehensive system.
If blogging is central to your strategy but HubSpot feels limiting, WordPress offers a refreshing change. It combines simplicity with greater flexibility, enhanced design control, and more options for blog growth.
If you’re concerned about losing HubSpot’s CRM features, don’t be. WordPress integrates smoothly with HubSpot, ensuring continued access.
What You Should Expect During Your HubSpot to WordPress Migration
Before undertaking any major change, it helps to know what to anticipate. Here’s a quick overview of our migration process:
- First, prepare your materials. Imagine it as the preparation phase when you export your content from HubSpot and set up your new WordPress environment.
- Next is the migration phase itself.We will guide you as you transfer blog posts, key pages, and all the images that give your blog visual appeal.
- Then, the focus shifts to preserving your SEO.This is similar to ensuring your mail is forwarded correctly after a move. We’ll assist in setting up permalinks and redirects to prevent broken links and maintain your search engine positions.
- The last step is post-migration tasks.Consider this settling in; we’ll suggest vital plugins and learning tools to optimize your WordPress experience.
All that said, you’re probably ready to move your site from HubSpot to WordPress! Here’s how you can do it step by step:
- Step 1. Installing and Setting Up WordPress
- Step 2. Export Your HubSpot Blog Content
- Step 3: Import your blog posts from HubSpot to WordPress.
- Step 4: Transfer your HubSpot images into the WordPress media library.
- Step 5: Update your domain’s DNS records to point to your new WordPress site.
- Step 6: Configure permalinks and implement redirects.
- Step 7. Add Your HubSpot CRM to WordPress
- Step 8: Configure and customize your WordPress theme.
- Step 9. Recreating HubSpot Landing Pages in WordPress
- Step 10. Install Essential WordPress Plugins
- Alternative: Consider hiring professionals for your HubSpot website migration.
- Bonus: Learning WordPress
- Frequently Asked Questions About Moving from HubSpot to WordPress
Want a Stress-Free HubSpot Migration? 📦
Avoid manual exporting, importing, and setup by letting migration experts handle everything.
Here’s why choosing a paid migration service is the smarter, faster way:
- Expert WordPress Engineers: Your site migration is handled by real WordPress experts who know migrations inside and out.
- Professional Site Migration: All aspects of your site, from content to design, are carefully migrated with zero downtime.
- Peace of Mind: Relax, knowing experienced professionals are handling your site.
Step 1: Install and configure WordPress.
WordPress requires hosting; it’s essential for providing the resources your site needs to operate online.
A quality hosting provider is like a dependable landlord, providing reliable and smooth service.
WordPress hosting is essentially the online home for all your WordPress content, making your blog accessible globally.
You might wonder if you can simply install WordPress on your existing HubSpot hosting. Unfortunately, HubSpot is a closed platform, making WordPress installation impossible there.
Therefore, you’ll need a hosting service specifically designed for WordPress. Bluehost offers a user-friendly experience, particularly beneficial if you’re new to WordPress.
Having used Bluehost for various websites over the years, I believe it’s an excellent option for beginners. You can find more details in my detailed Bluehost review.
Currently, they provide Canada Create™ readers an exclusive offer, including a free domain name and a significant hosting discount, starting at only $1.99 per month.
Alternatives:Hostinger and SiteGround are also frequently recommended hosting solutions. If budget is a concern, Hostinger is a solid choice, whereas SiteGround excels in performance and customer service. Comparing them is worthwhile.
For the purpose of illustrating the process, this tutorial will use screenshots from Bluehost. However, the general steps are similar across most reputable WordPress hosting providers.
You can get started by visiting the Bluehost website and clicking the ‘Get Started Now’ button.
You’ll be directed to a page displaying various hosting plans. The Basic plan generally suffices for a new blog, particularly during the migration phase.
Select the ‘Select’ button on the plan that best aligns with your requirements.
When prompted for your domain, choose the option that indicates ‘I’ll create my domain name later.’
This allows you to complete the migration before changing your domain’s settings to point to your WordPress site.
Why delay setting up a domain? 🤔
If your domain is currently connected to HubSpot, this approach allows you to configure WordPress without disrupting the existing live site.
After the initial setup, your new WordPress site will be accessible via a temporary address from Bluehost, allowing you to build and test privately prior to the official launch.
Once you’ve finalized everything, I’ll guide you through the process of pointing your domain to your new WordPress site.
Next, complete the registration process by providing your account information and payment details to finalize your purchase.
After you sign up, Bluehost (and most WordPress hosting providers) will send you a welcome email with your login details. Keep this email safe! You’ll need it to access your hosting account.
This is where selecting a reliable WordPress hosting provider becomes valuable.
When you log in to your Bluehost account for the first time, they will automatically install WordPress for you. I love how this streamlines setting up new WordPress websites.
From your Bluehost account page, go to ‘Websites’ then click ‘Edit Site.’
This action should directly lead you to your freshly installed WordPress dashboard.
Need a more comprehensive guide on WordPress installation? My team has developed a highly detailed WordPress installation tutorial if you’re interested.
Step 2. Export Your HubSpot Blog Content
Prior to making any changes within HubSpot, your initial action should be to export your core content. Subsequently, this content will be imported into WordPress, as outlined later.
It’s also advisable to create a backup of your website’s link structure, and I’ll guide you through that process.
Exporting Your HubSpot Blog Content
A crucial step involves extracting your HubSpot blog content for WordPress migration. Fortunately, HubSpot offers a straightforward method for exporting blog posts in a format compatible with WordPress imports.
Simply go to your HubSpot account and find your blog content at Content » Blog.
Then, locate the ‘Export blog posts’ option, usually found within an ‘Actions’ menu.
This feature enables you to export posts as a .CSV or Excel file (XLS or XLSX). The .CSV format is generally favored due to its ease of import into WordPress.
Upon completion of the export, a download link to the .CSV file will be sent to your email address. Note that the file link remains active for 90 days.
Exporting your blog posts like this is a great starting point because you can easily import them into your new WordPress website.
However, this export focuses solely on blog content, excluding other page types like landing or sales pages, which I’ll cover how to manually recreate further on.
Backing Up Your Link Structure
Preserving your blog’s link structure is extremely important for maintaining SEO performance.
You’ll need to compile a comprehensive list of all your HubSpot blog’s URLs. This is crucial for setting up redirects, which preserve your existing SEO value after the WordPress migration.
I recommend using the Link Klipper browser extension for this task due to its convenience. It is a free tool compatible with Chrome and similar browsers.
Begin by installing Link Klipper. Next, navigate to your HubSpot blog’s main page. Select the Link Klipper icon in your browser’s toolbar, and then choose the ‘Extract All Links’ option.
The extension will quickly gather all links present on the page and save them to a .CSV file. Opening this file in applications like Excel or Google Sheets will display a list of your blog’s URLs.
While I suggest Link Klipper for its speed, you could alternatively use an online sitemap generator such as XML-Sitemaps.com. This type of tool crawls your entire website, creating a URL list available for export.
Sitemap generators might locate more URLs than Link Klipper by thoroughly scanning your site. XML-Sitemaps produces standard XML sitemaps, along with a urllist.txt file containing all URLs for easy redirect creation.
With your blog content, pages, and URLs now exported, you’ve made excellent progress! You now possess a backup and a collection of files ready for import into WordPress.
Step 3. Importing Your HubSpot Blog Content
This part involves setting up your WordPress site with your content. It’s akin to unpacking and arranging things in your new home, and it’s where your blog starts to materialize.
Now, import your exported HubSpot content into WordPress. I advise using a plugin named Import any XML, CSV or Excel File to WordPress.
Install and activate the plugin via your WordPress dashboard. Consult our guide on installing WordPress plugins if needed.
After activation, go to theAll Import » New Import page in your WordPress dashboard. Once there, you should click the ‘Upload a file’ button.
You’ll then be prompted to select your import file. Choose the .CSV file you exported from HubSpot in Step 2.
The plugin typically recognizes the content type automatically (often “Posts” for blog entries).
Proceed by clicking ‘Continue to Step 2’. A preview of your import file will appear, enabling you to review your posts in a spreadsheet format.
After reviewing, select ‘Continue to Step 3’ located at the top or bottom of the interface.
Field mapping is crucial here. You’ll instruct the plugin how your .CSV file’s columns align with WordPress fields. This configuration is a one-time setup.
For instance, drag the column containing your blog post titles from the import file to the Title field in WordPress.
Repeat this for post content, tags, and all other data you exported from HubSpot. Think of it as correctly labeling boxes during unpacking.
After you’ve completed the field mapping, proceed by clicking ‘Continue to Step 4’ located at the bottom.
The next step involves setting up a unique identifier for your posts. WordPress utilizes this to monitor your imported content effectively.
Simply select the ‘Auto-detect’ option, and the plugin will manage this process automatically.
Finally, click ‘Confirm & Run Import.’
The plugin will commence importing your content. The duration depends on the volume of content being imported. Expect a few minutes for larger blogs.
Upon completion, the plugin will display an ‘Import Complete!’ notification.
Now, you can navigate to Posts » All Postswithin your WordPress dashboard. Here, you should find your HubSpot blog posts. Verify that they’ve been imported accurately.
Step 4. Importing Your HubSpot Images to WordPress
Following the content import, you may observe that your images are still hosted on HubSpot’s servers. While the text has been transferred, the images remain at their original locations.
It’s necessary to transfer these images to your WordPress Media Library. This is advantageous because it provides greater reliability, improved speed, and increased control by hosting images directly on your WordPress site.
Consider the possibility of HubSpot altering its image hosting structure, or, in a worse scenario, you deciding to terminate your HubSpot account. This could lead to the disappearance of your images.
You can import your images with the help of a useful plugin called Auto Upload Images. If needed, consult our guide on installing WordPress plugins.
Note: This plugin might be marked as outdated; however, it was tested for this guide and functioned correctly. Refer to the linked guide for more information on using outdated plugins.
After activating the plugin, initiate the bulk image import using the WordPress bulk edit feature. This process uses bulk edit to re-process your posts and pages.
Navigate to Posts » All Posts within your WordPress dashboard. Select all posts containing imported HubSpot content, typically by checking the top checkbox in the post list.
Then, in the ‘Bulk actions’ dropdown menu, choose ‘Edit’ and click the ‘Apply’ button.
A number of bulk edit options will be displayed. Leave everything as is and click the ‘Update’ button.
This action forces WordPress to re-save the selected posts, triggering the Auto Upload Images plugin.
The plugin will scan the content of each post, look for external image URLs (pointing to HubSpot), and then automatically download each image and import it into your WordPress Media Library.
It will then update the image URLs in your posts to point to the newly imported images in your Media Library.
Repeat this process for your Pages by navigating to Pages » All Pages, select all your pages, choose ‘Edit’ in bulk actions, apply, and then just click ‘Update’.
For more detailed steps, consult the tutorial on importing external images into WordPress.
Following the bulk updates for both posts and pages, proceed toMedia » Library in your WordPress dashboard. You should see all those images from your HubSpot blog and pages in your WordPress Media Library!
Step 5. Pointing Your Domain Name to Your New WordPress Website
If a custom domain was used for your HubSpot blog (e.g.,yourblogname.comyou will likely want to maintain its use for your WordPress blog.
This is important for branding, ensuring consistent access. More critically, it’s vital for SEO.
Search engines recognize your domain name in relation to your content and authority. Keeping it supports existing search engine rankings.
To implement this, you’ll need to modify your domain name settings, specifically the nameservers.
Nameservers function as the internet’s directory for domain names, guiding browsers to the location where your website is hosted.
Currently, your domain likely points to HubSpot’s servers. It needs an update to point toward your new WordPress hosting account.
Your WordPress hosting provider (like Bluehost, Hostinger, or SiteGround) will give you the nameserver information you need. It usually looks like a pair of addresses, something like:
ns1.yourhostingprovider.com
ns2.yourhostingprovider.com
Obtain the correct nameservers from your specific hosting provider.
I usually find this information in my hosting account dashboard, but you can also check the welcome email they sent you when you signed up. If you’re not sure, then their support team can help you out. See the tips in my guide on how to contact WordPress support.
Okay, so where do you actually change these nameserver settings? That’s at your domain name registrar. This is the company where you registered your domain name in the first place.
Sometimes, your domain registrar is the same company as your hosting provider. But often, they are separate. Common domain registrars include companies like Network Solutions or Namecheap.
You’ll need to log in to your account at your domain registrar. Find the settings for your domain name. Look for something like ‘DNS Settings’, ‘Nameservers’, or ‘Domain Management’.
For example, if your domain is registered with Bluehost, then the nameserver settings in their domain management area will look something like this:
The exact steps vary depending on your domain registrar. But the general idea is always the same: you need to replace the old nameservers (the ones pointing to HubSpot) with the new nameservers provided by your WordPress hosting company.
Our team has written a handy guide on how to easily change domain nameservers at many popular domain registrars if you need more detailed instructions.
Once you’ve updated your nameservers, it takes a little while for these changes to spread across the internet. This is called DNS propagation.
DNS propagation can take anywhere from a few hours to, in rare cases, up to 48 hours. During this time, some people might still see your old HubSpot blog, while others might start seeing your new WordPress blog. This is totally normal, don’t worry!
After DNS propagation is complete, when users enter your domain name into their browsers, they will be automatically directed to your WordPress site.
Step 6. Setting Up Permalinks and Redirects
You’re in the home stretch now! You’ve moved your content and images and pointed your domain to your new WordPress blog. But there’s another really important step for a smooth migration: setting up permalinks and redirects.
Your HubSpot blog probably had its own way of creating URLs. WordPress, naturally, has its own system too, called permalinks.
And here’s the thing. It’s highly likely that your old HubSpot URLs are different from how WordPress creates URLs by default.
Without proper URL redirection from your old HubSpot blog to your new WordPress site, visitors following the old blog post URLs will encounter 404 errors. These broken links not only frustrate users but also negatively impact your search engine rankings since Google penalizes sites with too many broken links.
To fix this issue, you need to do two key things:
- Set up SEO-friendly permalinks in WordPress so your new URLs are clean and readable.
- Set up redirects to automatically send visitors from your old HubSpot URLs to the correct pages on your new WordPress site. It’s like setting up a forwarding address when you move house.
Let’s start with permalinks.
Setting Up WordPress Permalinks
WordPress gives you control over how your website addresses (URLs) are structured. This is managed through permalink settings.
While you can choose any permalink structure, for the sake of this example, let’s choose ‘Post name’.
‘Post name’ permalinks create clean, easy-to-understand URLs that clearly include the title of your page or blog post. It incorporates keywords from your title, providing an additional SEO advantage and making it readable for people.
For example, instead of a URL that looks like this, which gives no context at all
yourblog.com/?p=123
You get something much nicer and more informative, like:
yourblog.com/your-blog-post-title
See the difference? The second option is much clearer.
Setting this up is quick and easy. In your WordPress dashboard, go to Settings » Permalinks.
You’ll see a section called ‘Common Settings.’ Find the option labeled ‘Post name’ and select it.
Then, just scroll down to the bottom of the page and click the ‘Save Changes’ button.
Done! Permalinks are set up. From now on, WordPress will use the post name structure for all your new blog posts and pages.
Setting Up Redirects From Your Old HubSpot URLs
Now for the redirects, which are extremely important for a smooth migration. Remember that list of old HubSpot URLs you grabbed using Link Klipper way back in the export step? We’re going to put it to good use.
To set up redirects in WordPress without pulling your hair out, I recommend the Redirection plugin. It’s free, it’s powerful, and it makes setting up redirects straightforward.
The first step is to install and activate the Redirection plugin. If you need help, then see our guide on how to install a WordPress plugin.
Once activated, you’ll find the Redirection plugin settings under Tools » Redirection.
In the Redirection plugin interface, you’ll see fields for Source URL and Target URL.
- Source URL is where you enter your old HubSpot URL. But here’s a little trick: you only need to enter the part of the URL after your domain name. For example, if your old HubSpot blog post URL was
https://yourdomain.com/blog/my-awesome-post, then you’d just enter/blog/my-awesome-post. - Target URL is where you enter the new WordPress URL for the same content. Again, just the part after your domain name. If you set your permalinks to ‘Post name,’ the new URL will likely be
https://yourdomain.com/my-awesome-post, so you would enter/my-awesome-post.
Make sure the ‘301 – Moved Permanently’ option is selected for the Redirect Type. Using a 301 redirect is crucial for SEO. It’s like telling Google, ‘This page has moved forever.’ This makes sure that all the trust and ranking power your old page earned is passed on to the new one, helping you keep your spot in search results.
Finally, click the ‘Add Redirect’ button to save your redirect.
Now, you need to go through your entire list of old HubSpot URLs and repeat these steps for each one. Yes, it can take a bit of time, especially if you have a lot of blog posts. But it’s essential for a smooth transition.
Once you’ve added all your redirects, test them! Type your old HubSpot URLs into your browser and make sure they correctly redirect you to the right pages on your new WordPress site.
Alternative: Using All in One SEO (AIOSEO) for Redirects
Now, if you’re thinking about SEO seriously (and you should!), you might want to consider All in One SEO (AIOSEO). I use this plugin on my own websites, and it’s fantastic.
Yes, it’s a premium plugin, but it’s packed with SEO features to help your blog rank higher – and it includes a really handy Redirection Manager that lets you set up full site redirects.
What I really appreciate is that AIOSEO is an all-in-one SEO powerhouse. Instead of juggling separate plugins for redirects, sitemaps, schema, and everything else SEO-related, AIOSEO puts it all in one place.
Plus, its Redirection Manager is quite powerful and makes setting up even complex redirects straightforward. It’s a real time-saver and keeps my SEO workflow streamlined.
Step 7. Add Your HubSpot CRM to WordPress
Now, if you’re like many HubSpot users, then you’re probably using HubSpot CRM to manage your leads and customer interactions. Good news! You can easily connect your new WordPress blog to your existing HubSpot CRM.
Think of it as keeping the best of both worlds – the flexibility of WordPress for your blog and the robust CRM capabilities of HubSpot.
The official HubSpot plugin lets you connect your WordPress site to your HubSpot account and unlock a bunch of useful features right within your WordPress dashboard.
With the HubSpot plugin, you can:
- Capture leads from your WordPress site.
- Track website visitors.
- Access HubSpot CRM tools from WordPress.
- Use live chat to engage with your website visitors.
- Analyze your marketing performance.
Simply install and activate the HubSpot plugin. For more details, see our step-by-step guide on how to install a WordPress plugin.
Once activated, the plugin will add a new HubSpot menu to your WordPress admin sidebar. This will take you to the setup wizard, where you can click the ‘Sign in here’ link at the top.
Once you have signed in, simply follow the prompts to connect the plugin to your existing HubSpot account.
After connecting, you can explore the HubSpot plugin settings to customize features like form embedding, live chat, and tracking options.
And that’s it! You’ve now integrated your WordPress blog with HubSpot CRM. You can now manage your blog content in WordPress while still making the most of HubSpot’s powerful CRM and marketing tools.
If you’d like a more detailed walkthrough of setting up HubSpot on your WordPress site, then see our guide on how to add a CRM on your WordPress site.
Bonus: Now that you’ve installed the HubSpot plugin, you can also set up HubSpot Analytics and create HubSpot forms in WordPress.
Step 8. Setting Up Your WordPress Theme
Now for the fun part: making your new WordPress website look good. That’s where themes come in.
WordPress themes are ready-made design blueprints for your blog. They control everything visual, like the colors, the fonts, and how your blog posts are laid out. It’s like choosing the style of your new house.
WordPress has a huge collection of themes. Seriously, thousands upon thousands. Free themes, paid themes, themes for every niche imaginable.
The WordPress Theme Directory is a good place to start exploring free themes.
But having too many choices can be a bit paralyzing. To help you narrow down the options, my team has created a helpful guide on selecting the perfect WordPress theme.
In my experience, clean, uncluttered designs tend to work best. They look professional, they’re easy for readers to navigate, and they put the focus on your content – which is the most important thing.
Step 9. Recreating HubSpot Landing Pages in WordPress
Let’s talk about those special pages you might have built in HubSpot – landing pages, sales pages, or other custom pages.
Unfortunately, these often don’t transfer perfectly with a simple import like blog posts do. This is because HubSpot uses its own proprietary modules and styling that don’t have a direct equivalent in the WordPress editor.
Rebuilding them ensures your design looks exactly as you want and works perfectly with your new WordPress theme.
So, the best approach for these pages is to recreate them in WordPress. It might sound like extra work, but it gives you the most control over the final result and makes sure everything looks right.
Now, while you could try to rebuild these pages using the standard WordPress block editor, it’s worth considering a dedicated page builder for landing pages.
The block editor is great for creating regular content pages and blog posts. It uses a system of blocks that you can easily add and arrange to build your page. However, for more complex layouts, a page builder plugin like SeedProd offers more advanced features and flexibility.
SeedProd is a drag-and-drop page builder specifically designed for creating landing pages, sales pages, and other marketing-focused pages. It offers a more visual and intuitive way to design intricate layouts without needing to write code.
Whenever I’ve used SeedProd, I’ve found it to be very user-friendly, even if you’re not a design expert. It has a visual interface, tons of pre-designed templates, and all sorts of elements you can just drag and drop onto your page. To learn more, see my complete SeedProd review.
The first step, of course, is to install and activate the SeedProd plugin. For details, see our tutorial on how to install a WordPress plugin.
Once SeedProd is active, you can go to SeedProd » Landing Pages in your WordPress menu and then click ‘Add New Landing Page.’
SeedProd will then show you a library of templates.
Browse through them and pick a template that looks similar to the HubSpot landing page you want to recreate.
Don’t worry about getting it exactly the same at this stage, you can customize everything later.
Next, give your new page a name and set the URL slug.
Click the ‘Save and Start Editing the Page’ button to open the SeedProd page builder.
Here’s where the fun begins! You’ll see a visual drag-and-drop interface. You can click on any element on the template and edit it – change text, images, colors, fonts, everything.
On the left-hand side, you’ll find a panel with all sorts of elements you can add to your page – headings, text blocks, images, videos, buttons, forms, and much more. Just drag and drop them onto your page to build your layout.
Take your original HubSpot landing page as a reference. Section by section, element by element, recreate it in SeedProd.
For more details, see our tutorial on how to create a landing page in WordPress.
Want to explore other page builder options? Thrive Architect is another excellent page builder plugin for WordPress, and it’s also very visual and drag-and-drop based.
Thrive Architect is particularly strong if you are heavily focused on marketing and sales pages. It’s built by the team behind Thrive Themes, which is known for its conversion-focused tools. It excels at creating high-converting sales pages, opt-in pages, and webinar registration pages.
If your primary goal is to build pages specifically designed to drive conversions and sales, Thrive Architect is a powerful alternative to consider.
Yes, recreating your HubSpot landing pages in WordPress takes a bit of hands-on work. However, it’s the most reliable way to bring those important pages over properly.
And the great news is, using a page builder like SeedProd makes the process much smoother and allows you to build even more powerful and customized landing pages in WordPress.
Step 10. Install Essential WordPress Plugins
One of the best things about using WordPress is that you can easily extend your site’s features with plugins.
There are thousands of WordPress plugins available, both free and paid.
At Canada Create™, we put together a guide on how to pick the best plugins for your website. It’s worth a read to learn how to evaluate plugins and pick the right ones for your specific needs.
But to get you off to a flying start, here are a few top plugins we often recommend for almost every new WordPress blog:
- WPForms is a fantastic plugin for creating all sorts of forms – contact forms, surveys, order forms, and more. I use WPForms on my own websites and love how user-friendly it is.
- SeedProd is a drag-and-drop website builder that makes customizing your design a breeze. You can create custom page layouts beyond your theme’s standard options.
- AIOSEO (All in One SEO) is one of the most popular and powerful SEO plugins for WordPress. It helps you optimize your blog for better search engine rankings.
- MonsterInsights makes it easy to understand your blog traffic and visitor behavior. It connects WordPress to Google Analytics and shows you key stats in your dashboard.
- OptinMonster is a powerful toolkit for growing your email list and boosting conversions. It helps you create popups, slide-in forms, and other opt-in forms to capture email addresses.
For even more plugin ideas and recommendations, be sure to check out our comprehensive list of essential WordPress plugins. It’s packed with plugins we use and trust.
Alternative: Get Professional Help to Migrate Your HubSpot Website
Okay, I’ve walked through all the steps to migrate your blog from HubSpot to WordPress. And you know what? For many of you, following these steps will be totally doable!
But let’s be real. Even with a detailed guide, moving a website from HubSpot to WordPress is still quite a technical project. And time-consuming.
Perhaps you’re not super comfortable with the website side of things. Or maybe you’re already juggling a million tasks and just want this migration done quickly, correctly, without headaches.
If that sounds like you, then Canada Create™ can help. Our WordPress Website Design service team can design and build you a brand-new, custom WordPress website that’s perfectly tailored to your needs. They can handle the migration of your content from HubSpot, too.
If you’re curious to learn more about these services, or if you just have some questions, then you can easily chat with our support team on our Website Design Services page. They can give you all the details and help you figure out if professional migration help is the right path for you.
Bonus: Learning WordPress
You’ve made the move from HubSpot to the wonderful world of WordPress!
Now, you might be looking at your new WordPress dashboard and thinking, ‘Okay, this is different!’ And you’d be right. WordPress works in its own way, and it has a lot of features and options that might be new to you if you’re coming from HubSpot.
Luckily, I can recommend tons of completely free resources to help you become a WordPress pro in no time. Here are just a few that I think you’ll find super helpful:
- Canada Create™ Blog: This is the heart of Canada Create™. Think of it as your go-to library for everything WordPress. You’ll find thousands of easy-to-follow tutorials, guides, and articles.
- Canada Create™ Dictionary: WordPress has its own vocabulary! Our dictionary helps you understand all the WordPress terms and jargon.
- Canada Create™ Videos: Prefer to learn by watching? Our video tutorials walk you through common WordPress tasks step-by-step, visually.
- Canada Create™ YouTube Channel: Even more video help! Our YouTube channel is packed with WordPress tips, tutorials, and how-tos.
- Canada Create™ Blueprint: Curious about the tools and plugins we use here at Canada Create™? The Blueprint gives you a peek behind the scenes.
- Canada Create™ Deals: Who doesn’t love a good deal? In our Deals section, we gather exclusive discounts and coupons on WordPress themes, plugins, hosting, and more.
So, don’t feel overwhelmed by learning WordPress. With Canada Create™ as your guide, you have all the resources you need right at your fingertips. Dive in, explore, and start enjoying the power and flexibility of WordPress.
Frequently Asked Questions About Moving from HubSpot to WordPress
We know that moving your website can bring up a lot of questions. Here are answers to some of the most common ones we hear from users making the switch from HubSpot to WordPress.
1. Will I lose my SEO when I migrate from HubSpot to WordPress?
You can successfully move your site without losing your SEO rankings. The key is to carefully set up 301 redirects from your old HubSpot URLs to your new WordPress URLs. This tells search engines that your content has moved permanently, passing along the link authority you’ve already built.
2. Can I still use my HubSpot CRM and marketing tools?
Absolutely. One of the best parts of this move is that you don’t have to give up HubSpot’s powerful CRM. The official HubSpot WordPress plugin lets you integrate your account directly, so you can continue to manage contacts, create forms, and use live chat from your WordPress dashboard.
3. Is it expensive to move a site to WordPress?
The WordPress software itself is free and open-source. Your main cost will be for web hosting, which is typically much more affordable than the HubSpot CMS Hub plans. For example, a shared hosting plan can start at just a few dollars per month.
4. What is the hardest part of migrating from HubSpot?
For most users, the most technical part is ensuring all content is imported correctly and that the URL redirects are set up properly. Recreating custom landing pages can also take time. However, by following the steps in this guide and using the recommended plugins, the process becomes much more manageable.
I hope this tutorial helped you move your site from HubSpot to WordPress. You may also want to see my ultimate WordPress SEO migration checklist for beginners or my expert pick of the best WordPress migration services.
If you liked this article, then please subscribe to our YouTube Channel for WordPress video tutorials. You can also find us on Twitter and Facebook.