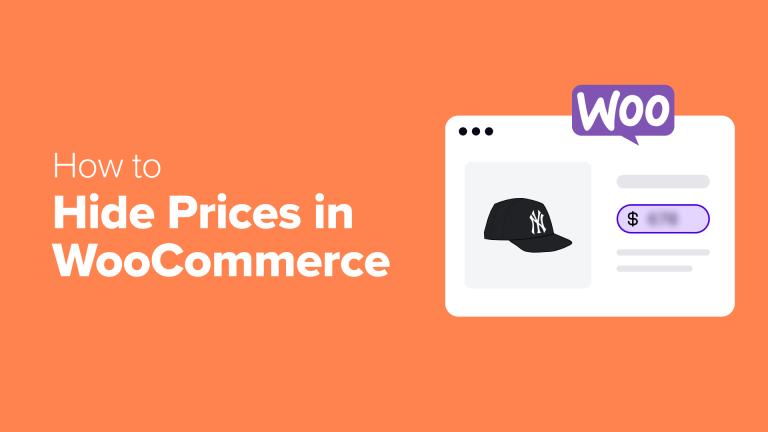
By default, WooCommerce displays product prices publicly. While suitable for many, certain businesses require greater control over price visibility.
Through assisting online store owners, we’ve identified scenarios where concealing WooCommerce prices becomes crucial.
For example, wholesale suppliers often restrict special pricing to verified business clients. B2B firms might prefer pre-sale consultations to tailor solutions and pricing accurately.
After evaluating numerous approaches, we’ve identified 3 dependable methods for hiding prices in WooCommerce, suitable for diverse businesses, from wholesale to luxury sectors.
Considerations Before Concealing Product Prices
We’ve encountered various scenarios where operating a WooCommerce store without displaying prices is advantageous.
For example, many wholesale suppliers hide prices to prevent retail customers from seeing bulk discounts. Additionally, custom furniture makers often remove prices because each piece has unique costs based on materials and design.
Luxury brands sometimes create exclusive, members-only experiences by revealing prices solely to qualified buyers.
WooCommerce lacks a native price-hiding feature. However, after rigorous testing, we’ve discovered 3 effective methods to accomplish this.
You can use the quick links below to skip to your preferred method of hiding prices on WooCommerce:
- Method 1: Hide All/Specific Product Prices and Cart Buttons With Code
- First Option: Restrict Price Visibility & Cart Functions on Select Products (For Guests)
- Second Option: Completely Restrict Price and Cart Button Visibility
- A Second Way: Restrict Product Price Display to Wholesale Clients Exclusively
- A Third Way: Build a Streamlined Online Catalog Without Showing Prices
Ready to proceed? Let’s begin!
First Method: Use Code to Hide Prices and ‘Add to Cart’ Buttons for Entire Site or Specific Items
This method demonstrates concealing product prices and cart buttons, either store-wide or for particular products. This is useful when you prefer customers to inquire about pricing directly or log in to view them.
During our research, many price-hiding plugins seemed costly or overly complicated. Thus, we devised a straightforward code-based solution for a swift outcome.
This is perfect if you prefer a simple, single setup, and don’t require the advanced management of wholesale/catalog plugins.
The term ‘code solution’ may seem daunting, but don’t be concerned. This is tailored for beginners.
We’ll utilize WPCode, a plugin simplifying code addition to your site via copy-paste. We’ve used it extensively, finding it secure and dependable.
The free version is sufficient for price hiding. For additional features like AI code generation for custom solutions, consider the Pro version.
We’ve thoroughly examined both WPCode versions in our review.
First, you’ll need to install and activate the free WPCode plugin. If you need help, check out our guide on how to install a WordPress plugin.
Next, you can follow one of the tutorials below.
Option 1: Hide Price & Cart Buttons for Specific Products (Logged-Out Users)
The easiest way to hide prices is using WPCode’s ready-made snippet from their free code snippet library. This code will hide prices and cart buttons from specific products when users aren’t logged in.
If you’re already familiar with WPCode, you can simply find it in WPCode’s snippet library.
Otherwise, if this is your first time using the plugin, just click the link below:
Hide Price & Add to Cart for Non Logged in Users for Specific Products
Then, click the ‘Add to Site’ button to get started.
At this point, you’ll need to either create a free WPCode account or log in if you already have one.
During registration, you will be asked to connect your WordPress website with the WPCode library.
After logging in, you’ll choose which website you want to add the snippet to.
Then, click ‘Deploy.’
The system will take you back to your WordPress admin area to finish the setup.
Here, just click ‘Confirm & Install Snippet.’
This brings you to the code snippet editor, where you’ll make two simple changes to customize the code for your needs.
First, you’ll need to change the product IDs. Look for this line of code:
$not_purchasable_products = array( 23, 22 );
Replace those numbers with your own product IDs.
If you’re not sure what they are, then you can read our article on how to find product IDs in WooCommerce.
For example, if you want to hide prices for products 63, 64, and 65, you’d write:
$not_purchasable_products = array( 63, 64, 65 );
Next, you can customize the message shown instead of the price.
Here is the code you need to find:
function wws_hide_price_not_logged_in( $price_html, $product ) { if ( is_non_purchasable_products_for_visitors( $product ) ) { $price_html = ''; } return $price_html;
You can change this text: ‘Login with wholesale account to see prices’ to whatever you’d like, such as ‘Login to see prices’ or ‘Contact us for pricing.’
Here’s an example:
function wws_hide_price_not_logged_in( $price_html, $product ) { if ( is_non_purchasable_products_for_visitors( $product ) ) { $price_html = ''; } return $price_html;
When users click this link, it will bring them to the WooCommerce login page to sign in.
After that, change the status from ‘Inactive’ to ‘Active,’ and select ‘Update.’
To view the changes, simply navigate to your product pages.
The prices and cart functionalities will be hidden, replaced by the custom message you created.
The custom message you set up will now be displayed on the chosen product pages.
Option 2: Hide Price & Cart Buttons for All Users
To universally hide prices and cart buttons on your WooCommerce site, regardless of login status, a different code snippet is required.
Begin by navigating to Code Snippets » + Add Snippet in your WordPress dashboard. Click on ‘Add Your Custom Code (New Snippet)’ and then the ‘+ Add Custom Snippet’ button.
Next, you will be presented with a selection of code types to choose from.
Simply select ‘PHP Snippet’ here.
Assign a title to your code snippet, such as ‘Hide All WooCommerce Prices.’
Copy the code provided below and paste it into the ‘Code Preview’ section:
/** * Hide Price & Add to Cart for All Users for All Products */
/** * Function to check if products should be non-purchasable. * This will always return true to apply to all products. */
function is_non_purchasable_products( $product ) { // Always return true to make all products non-purchasable for all users return true;
}
/** * Set product as not purchasable */
function wws_set_not_purchasable( $is_purchasable, $product ) { if ( is_non_purchasable_products( $product ) ) { // Set product as not purchasable $is_purchasable = false; } return $is_purchasable;
}
/** * Replace price with 'Contact us for pricing' message linking to the contact page */
function wws_hide_price( $price_html, $product ) { if ( is_non_purchasable_products( $product ) ) { // Get the URL for the contact page by slug $contact_page = get_page_by_path( 'contact' ); if ( $contact_page ) { $contact_url = get_permalink( $contact_page ); } else { // Default to '/contact' if the page is not found $contact_url = site_url( '/contact' ); } // Set the price HTML to the contact message $price_html = ''; } return $price_html;
}
/** * Hide the 'Add to Cart' button */
function wws_hide_addcart( $add_to_cart, $product, $args ) { if ( is_non_purchasable_products( $product ) ) { // Remove the 'Add to Cart' button $add_to_cart = ''; } return $add_to_cart;
}
// Add filters to apply the above functions
add_filter( 'woocommerce_is_purchasable', 'wws_set_not_purchasable', 10, 2 );
add_filter( 'woocommerce_get_price_html', 'wws_hide_price', 10, 2 );
add_filter( 'woocommerce_loop_add_to_cart_link', 'wws_hide_addcart', 10, 3 );
This code will remove all prices and cart buttons from your store and replace them with a ‘Contact us for pricing’ link that takes visitors to your contact page.
Pro Tip:This code automatically links to a page with the URL ‘/contact’. Ensure that a published page on your site has that exact URL slug for the link to function properly. If your contact page uses a different URL, adjust the code accordingly.
After pasting the code, switch the toggle from ‘Inactive’ to ‘Active’ and click ‘Save Snippet.’
Once the snippet is saved and activated, the modifications will be visible on your live site.
You can now visit your store to see that all prices and cart buttons have been replaced with a link to your contact page.
For more information, refer to our beginner-friendly tutorial on adding custom code snippets to WordPress.
Method 2: Hide Product Prices from Non-Wholesale Customers
This approach is ideal for businesses that wish to display prices only to approved wholesale clients while concealing them from regular site visitors.
This strategy is particularly effective for manufacturers, distributors, and B2B businesses that wish to offer exclusive prices to their wholesale clients.
This method also avoids the need for the earlier code-based solution, as it leverages plugins from the Wholesale Suite, known for its ease of use.
Before proceeding, we suggest reading our comprehensive Wholesale Suite review to fully understand the features provided by this plugin suite.
Step 1: Install the Necessary Wholesale Suite Plugins
This approach requires purchasing the premium Wholesale Suite bundle.
Once you purchase the suite, you will need to install and activate two of its core plugins: ‘WooCommerce Wholesale Prices Premium’ and ‘WooCommerce Wholesale Lead Capture’.
The ‘Wholesale Prices Premium’ plugin is what allows you to hide prices from regular customers while showing them to your wholesale buyers.
The ‘Wholesale Lead Capture’ plugin establishes a registration system where prospective wholesale customers request an account. Alternatively, WPForms can create registration forms.
With those plugins installed, navigate toWholesale » License within your WordPress dashboard.
Input the license keys and email used during your premium plugin purchase. These details are in the purchase confirmation email.
If you’ve purchased multiple Wholesale Suite plugins, then you can use the tabs at the top to access the license key settings for each one.
After entering each tool’s license, click ‘Save Changes.’ Then, proceed to the next step.
Step 2: Set Up a Test Wholesale Customer Account
Wholesale Suite provides a ‘Wholesale Customer’ role to centralize pricing management for wholesale clients. Logged-in customers see their specific wholesale prices automatically.
To verify that the price hiding is functioning as expected, set up a test Wholesale Customer account. This allows you to preview your WooCommerce setup as both a wholesale customer and a typical visitor.
Setting up a wholesale account is straightforward. First, navigate to Users » Add New in your WordPress dashboard.
Enter the necessary details such as email and username, then choose ‘Wholesale Customer’ from the ‘Role’ selection box.
Afterward, select ‘Add New User’ to finalize the account creation.
It may also be useful to stop wholesale clients from completing standard-price purchases if they don’t satisfy the wholesale requirements. The plugin alerts them by default, but they can still purchase at retail prices.
To adjust this, go to Wholesale » Roles and locate the ‘Wholesale Customer’ role. Select the ‘Edit’ option beneath the role to personalize its settings.
Then, check the box for ‘Prevent purchase if wholesale condition is not met.’
Finally, select ‘Edit Wholesale Role’ to apply your modifications.
Step 3: Hide Prices and Cart Buttons
Now, you should conceal prices and cart buttons from typical online store users.
To accomplish this, go to Wholesale »Settings. Make sure you’re in the ‘Wholesale Prices’ section, and navigate to the ‘Price’ tab.
Then, scroll down to the ‘Hide Price and Add to Cart button’ setting and check the box right next to it.
In the provided field, you can input personalized text that substitutes the price and cart functionalities. Leaving it blank will display the default ‘Login to see prices’ notification.
Now, scroll down and make sure the ‘Show Wholesale Price to non-wholesale users’ setting is disabled.
To finalize these adjustments, select the ‘Save Changes’ button.
Step 4: Add and Hide Wholesale Prices to WooCommerce Products
You’re prepared to incorporate wholesale pricing on individual items. Proceed to open a new product or modify an existing one.
If adding a product is new to you, consult our WooCommerce made simple guide for details.
During the process of setting up a new product, or changing an existing one, you must access the ‘Product Data’ area.
Here, define the ‘Regular Price,’ visible to standard customers. Then, locate the ‘Wholesale Prices’ area and select your preferred discount method from the dropdown menu. You can provide either a percentage-based reduction or a set price.
For percentage-based reductions, choose the ‘Percentage’ discount form and input the discount value.
Wholesale Suite will automatically calculate the final price.
If you opt for the ‘Fixed’ discount style, simply input the precise wholesale cost you wish to apply.
Do you want to implement limited-time wholesale specials? This is an effective strategy for seasonal deals and boosting WooCommerce visitor-to-customer conversions.
To achieve this, select the ‘Schedule’ link.
Afterward, specify the beginning and ending dates for your discounted wholesale pricing offer.
With this approach, you don’t have to repeatedly turn the discount on and off; it resembles scheduling WooCommerce coupon codes.
This setting is optional, but you might want to remember it for future use.
In the ‘Wholesale Minimum Order Quantity’ area, establish the minimum order requirements.
This determines the minimum number of items a wholesale customer needs to purchase for special pricing.
Next, scroll down to the ‘Wholesale Order Quantity Step’ section.
This setting dictates the quantity increments for product purchases.after meeting the minimum quantity. For example, if your minimum order quantity is 10 and the quantity step is 5, customers can buy 10, 15, 20, and so on.
If you set the step to ‘1’, customers can buy any amount above the minimum, like 10, 11, 12, etc. This prevents customers from misusing their wholesale privileges on smaller, individual purchases.
For this tutorial, enter ‘1’ into the field.
This will make it so that the minimum order quantity you set above is applied to each item.
This will prevent people from abusing wholesale privileges. Review the Wholesale Suite documentation on minimum order requirements for details.
Finally, you can make your product visible only to wholesale customers by using the ‘Restrict To Wholesale Roles’ setting at the top of the page. Type and select ‘Wholesale Customer’ in this field.
At this stage, you can continue finalizing your product settings. For instance, you can add a product image gallery, embed a product video, or insert product tags.
After making adjustments, select ‘Update’ or ‘Publish’ to finalize the changes. Repeat these steps for your other wholesale products.
Step 5: Configure Your Wholesale Registration Forms
The Wholesale Suite plugin generates wholesale registration and login pages. Before accepting applications, customize the registration form.
Go to Wholesale » Settings, then click the ‘Wholesale Lead Capture’ tab and open the ‘Registration Form’ menu.
You’ll find a table of available form fields as you scroll.
While basic fields like First Name, Last Name, Email, and Username are included by default, some might need to be activated. To enable a field, click the pencil ‘Edit’ icon in the ‘Action’ column.
Simply check the ‘Enabled’ box to display it, and check ‘Required’ to make it mandatory.
Ensure you click ‘Save Custom Field’ when finished.
Now, switch to the ‘General’ tab to find your new Wholesale Log In and Registration pages.
Go ahead and click ‘View Page’ to preview them.
After opening the pages, add links to them in your navigation menu for easy access.
Refer to our guide on creating a navigation menu in WordPress for instructions.
Decide how you’ll manage incoming applications.
Under ‘Auto Approve New Leads,’ choose between ‘Manual Approval Required’ or ‘Auto Approval.’
We strongly recommend manual approval to protect your wholesale pricing and verify legitimate businesses.
Once you’re happy with the registration form settings, you can scroll back up.
Finally, click on the ‘Save Changes’ button.
💡 Pro Tip: For more control over your registration form, we recommend using WPForms. If you need advanced features like conditional logic, multi-page forms, or want full design flexibility with a drag-and-drop builder, then WPForms is the best solution.
You can read our guide on how to create a custom registration form for step-by-step instructions.
Step 6: Create a Wholesale Order Form
The final step is to create a wholesale order form, which streamlines the ordering process for your wholesale customers. This form lets them easily place bulk orders without navigating through multiple product pages, saving time for both you and your customers.
When setting up wholesale order forms, we’ve found that businesses get the best results by including essential fields like product SKUs and preferred delivery dates.
This way, wholesale customers can quickly place bulk orders while providing all the information you need to process their requests efficiently.
For detailed instructions on creating an optimized wholesale order form, check out our comprehensive guide on how to create a wholesale order form in WordPress.
You’re all set! Your wholesale pricing rules are now active. Let’s look at how this works in practice.
We also tried logging in as a wholesale customer to see if the price was visible this time.
Check out the result below.
You can also read our guide on how to switch between user accounts in WordPress if you need help signing in and out of your accounts.
Method 3: Create a Professional Online Catalog Without Prices
This method transforms your WooCommerce store into a professional product catalog. It’s perfect for businesses that prefer handling pricing discussions via email, a contact form, or offline.
The YITH WooCommerce Catalog Mode plugin offers a straightforward way to create a price-free catalog. We’ve tested and shared how to use this plugin before in our tutorial on how to add a product catalog in WooCommerce.
Unlike the wholesale method, this approach lets you remove prices completely while replacing them with custom contact buttons. You can hide pricing for your entire store, specific product categories, or individual items.
This flexibility makes it ideal for custom manufacturers, luxury retailers, or service providers who need to quote prices based on client requirements.
For this guide, we’ll focus on the essential settings to enable catalog mode and hide prices using YITH’s plugin. Based on our testing, we found that these basic features are enough to get most stores started with hidden prices.
That said, keep in mind that we’re only scratching the surface of what this plugin can do. We’ve explored many more advanced features in our detailed YITH WooCommerce Catalog Mode review.
Also, you’ll need to purchase the premium version of the plugin. The free version works well, but the price-hiding feature is only available in the paid version.
Step 1: Install and Activate YITH WooCommerce Catalog Mode
After you purchase the plugin, go to the YITH website and log into your YITH account. Then, head over to the ‘Licenses & Downloads’ tab.
Next, click on the ‘Download Plugin’ button to download the plugin file from your YITH account. Make sure to keep your browser tab open, as you’ll need the license key in a moment.
Now, just install the plugin on your WordPress site.
When the setup wizard appears, you’ll need to enter your YITH email address and license key.
After entering your details, click ‘Activate license’ to complete the setup process.
Once that’s done, click ‘Go to plugin dashboard’ to begin customizing your catalog mode settings.
Let’s now continue to the next step.
Step 2: Configure Basic Catalog Mode Settings
Catalog mode transforms your store from a shopping site into a product showcase. This is perfect for businesses that want to display products without immediate purchasing options.
To begin, go to YITH » Catalog Mode and navigate to the ‘Settings’ tab. This is where you’ll configure the options to run WooCommerce without prices.
First, you can pick whether to enable catalog mode for all users or just guest users.
You can also enable catalog mode for users with the Administrator user role to test how the mode looks.
As you scroll down, you can activate the ‘Disable shop’ function if you want to remove the cart page, checkout page, and all add-to-cart buttons from your store.
If you disable the shop function, you’ll get additional options to set specific time ranges or days.
This is particularly helpful if you only want to hide prices on days or holiday seasons when your online store doesn’t accept orders.
For more targeted control, you can just skip the ‘Disable shop’ menu and focus on the settings under ‘”Add to Cart” settings in the Catalog Mode’ section.
Here, you can use dropdown menus to choose exactly where to hide or show add-to-cart buttons. For example, you can hide or show them for items in your exclusion list, which is a feature that lets you group specific products, categories, or tags together.
This makes it easy to hide buttons for just those selected items instead of your entire store. Think of it like a VIP list, where you can apply special rules to only the products on that list.
We’ll talk more about creating exclusion lists in a later section.
Moving down, you can choose to hide the ‘Add to cart’ button in product variations. This keeps your catalog mode consistent across all product types, including those with multiple options like size or color.
You can also decide what appears in place of the ‘Add to cart’ buttons on the WooCommerce pages.
We recommend selecting ‘Nothing’ for these options to keep the space clean. We’ll add custom buttons in a different section later.
Further down, you’ll find ‘Price settings in Catalog Mode.’
You can choose between hiding prices for all products or just those in your exclusion list.
When you hide prices, you can replace them with custom buttons. The plugin includes several pre-designed button styles, like ‘Sample Button 1,’ which we’ll customize in the next step.
Remember to click ‘Save Options’ when you’re done making your selections.
Step 3: Create a New Button to Replace the Cart Button
Now, it’s time to customize the button that will replace your cart buttons and prices. Head over to the ‘Buttons & Labels’ tab to get started.
Select one of the pre-designed buttons provided by YITH, then click the pencil ‘Edit’ icon to customize it.
First, give your button a straightforward name so you can easily find it later.
In the ‘Content’ tab, you can change the button text to something that fits your needs. Popular choices include “Request a Quote,” “Contact Us for Pricing,” or “Get Custom Price.”
Adding an icon can make your button more engaging. To do that, you can select ‘Choose from default icons’ in the Icon section.
You can browse through the available options to find one that matches your message.
You can also fine-tune your icon by adjusting its size, alignment, and colors.
Just watch your changes appear in the live preview on the right side of the page.
Now, switch to the ‘Style’ tab to customize your button’s appearance.
This is where you can modify the background colors, width, borders, padding, and margins to match your website’s design.
Finally, in the ‘Options’ tab, set up the link for your button. We recommend using the ‘Custom URL’ option to direct visitors to your contact or login page.
You can also add a hover animation to make your button more interactive and eye-catching.
Once done, just click the ‘Update’ button.
With your new button saved, it will now replace the standard Add to Cart button where specified.
Step 4: Create a Product Inquiry Form (Optional)
Adding an inquiry form directly to your product pages can make it easier for customers to ask about prices. This way, they won’t need to leave the product page to contact you.
To set this up, navigate to the ‘Inquiry Form’ tab. Select ‘Visible in all products’ under ‘Set inquiry form as.’ This ensures the form appears on every product page.
For the ‘Form to show’ option, you can use the ‘Default’ form that comes with the plugin.
If you already use WPForms or another form plugin, you can select your existing forms instead.
When using the ‘Default’ form, you can customize which fields appear.
We recommend keeping it simple with essential fields like first name, email, and message. From our experience, shorter forms typically get more submissions.
You have two choices for where the form appears: in a WooCommerce tab below the product image or in the short description area.
If you choose the tab option, you can customize the tab’s title to something like “Request Price” or “Product Inquiry.”
Don’t forget to enable the ‘Include product Permalink’ setting.
This adds the product’s URL to inquiry emails, making it much easier to track which products customers are asking about.
Need help deciding whether to choose between a WooCommerce tab or a short product description?
Here is what the first option looks like:
Meanwhile, if you choose the product description option, the inquiry form will appear right below the button you just created.
Like so:
Bonus: How to Create an Exclusion List (Hide Prices for Specific WooCommerce Products)
Now, let’s look at hiding prices for specific products instead of your entire store. This assumes you’ve already set up your catalog mode to work with an exclusion list in Step 2.
To get started, go to the ‘Exclusion List’ tab and click ‘+ Add exclusion list.’ A new window will open where you can choose what types of items to hide prices for.
The ‘Item type’ dropdown gives you three options: individual products, entire product categories, or product tags. This flexibility lets you hide prices in ways that make sense for your small business.
Next, start typing product names, categories, or tags in the ‘Select products’ field. The plugin will suggest matches as you type. You can also choose whether to show an inquiry form for these specific items.
You’ll notice settings to ‘Use custom options for “Add to Cart”‘ and ‘Use custom options for price.’ We recommend leaving these unchecked if you want to keep the settings you created in Step 2.
Once you’re done, simply click ‘Add exclusion list’ to save your changes. Your new exclusion rule is now active.
Here is an example of what your product page may look like when you enable the plugin:
Learn More WooCommerce Tips and Tricks
Now that you’ve learned how to sell products on WooCommerce without prices, you may want to learn more ways to optimize your online store. Check out these beginner’s guides for more tips and tricks:
- How to Send a Coupon After a WooCommerce Product Review
- How to Add a Wishlist to Your WooCommerce Store
- How to Show Product Recommendations in WordPress
- How to Filter WooCommerce Products (Step-by-Step Tutorial)
- How to Hide WooCommerce Shipping Methods (2 Easy Ways)
- How to Send WooCommerce Order Notifications Straight to WhatsApp
- 32 Best WooCommerce Plugins for Your Store (Most are FREE)
We hope this article has helped you learn how to hide prices in WooCommerce. You may also want to check out our list of the best WordPress themes for WooCommerce websites and our guide on how to upsell products in WooCommerce.
If you liked this article, then please subscribe to our YouTube Channel for WordPress video tutorials. You can also find us on Twitter and Facebook.