
I vividly recall the first time I noticed a competitor’s brand featured in the official box on the side of Google’s search results. The Google Knowledge Panel gave them an air of credibility, and I realized we needed that same level of recognition for our business.
It can be disheartening to invest time and effort into building a brand you love, only to have it overshadowed by countless blue links. While the knowledge panel may seem elusive, it’s actually more within your reach than you think.
Having assisted numerous businesses in establishing their presence on Google, we have refined the process of using WordPress to claim and enhance these panels. In this guide, we will take you through the precise steps to achieve this.
In this article, we will discuss the following topics:
- Understanding the Google Knowledge Panel
- Benefits of Google Knowledge Panels for Website Owners
- Steps to Claim a Knowledge Panel for a Person or Organization
- How to Integrate Your Website Content into Google Knowledge Graph
- Additional Tips for Submitting Your Business Information to Google Knowledge Graph
- Frequently Asked Questions About Google Knowledge Panels
- Expert Resources on Other Authority Signals
What Is the Google Knowledge Panel?
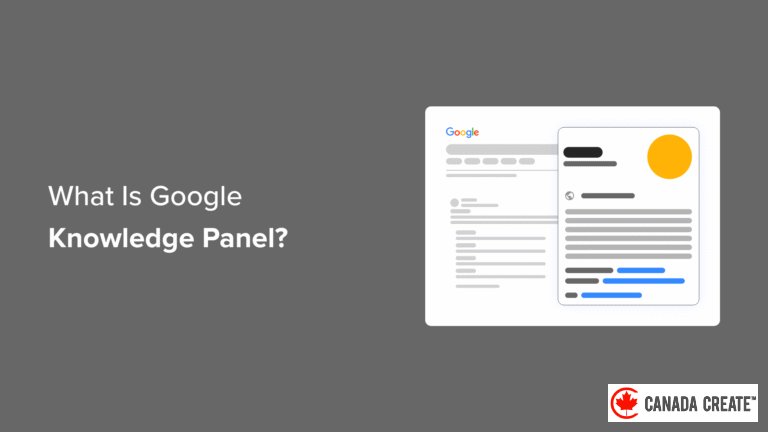
When searching for information on Google, you may notice a panel on the right side of the screen that displays relevant details. This feature is known as the Google Knowledge Panel.
The Knowledge Panel is designed to provide a quick overview of a topic, helping users gain a better understanding of their search queries. It can enhance your online visibility and strengthen your brand identity.
These panels are generated automatically using data from the Google Knowledge Graph, which is a vast repository of information that Google collects from various sources online, akin to an encyclopedia.
Consider the Knowledge Graph as Google’s extensive digital encyclopedia, with the Knowledge Panel serving as a concise summary box derived from that encyclopedia for your specific search.
Knowledge panels for organizations typically display the company’s name, logo, and a brief description sourced from Wikipedia.
It’s essential to understand that a Knowledge Panel differs from a Google Business Profile (formerly known as Google My Business). Business Profiles cater to local businesses that serve customers at specific locations or within designated service areas, and they include map information. In contrast, Knowledge Panels are intended for prominent entities such as brands, public figures, and large organizations.
You can find links to the company’s official website, contact information, historical and financial data, as well as a list of their top-selling products.
Knowledge panels for individuals are similar in format. They include a link to the person’s website, a brief biography, and a collection of key facts.
If a knowledge graph has not been claimed yet, you will see a ‘Claim this knowledge panel’ button at the bottom. We will guide you on how to claim your knowledge panel later in this article.
If the Google Knowledge Graph has extensive information about a person, there may be an additional knowledge panel displayed at the top of the page.
There are knowledge panels for products as well. These cannot be claimed by a single organization, as they showcase various online retailers selling the product.
These panels display an overall product rating, buttons for Details, Reviews, and Stores, and a shopping section that provides price ranges and links to different retailers.
Google knowledge panels are beneficial for users as they present relevant information in a user-friendly format. They are also advantageous for website owners.
What Benefits Do Google Knowledge Panels Offer to Website Owners?
Google knowledge panels are prominently displayed in search results and provide valuable information about your business. They significantly increase the likelihood of users clicking on your link and visiting your website, which positively impacts your SEO.
Similar to Google answer boxes and featured snippets, knowledge panels enhance your website’s visibility on search engine results pages (SERPs) and are often the first element users notice.
You can claim your business’s knowledge panel to confirm ownership. This allows you to enjoy benefits such as selecting a featured image and suggesting edits to Google.
If you operate an online store, it’s beneficial to aim for inclusion in product knowledge panels. This feature enables users to compare your prices and easily access a link to your store.
Google knowledge panels are excellent for enhancing brand visibility. These panels showcase your business’s logo and branding elements, helping to introduce your brand to a wider audience.
Now, let’s explore the steps to claim a Google knowledge panel using WordPress.
How to Claim a Knowledge Panel for a Person or Organization
Google permits you to claim a knowledge panel related to a person or organization, but claiming a product knowledge panel is not allowed.
To have your products featured in a Google Knowledge Panel, you must add them to the Google Knowledge Graph using product schema. We will guide you through this process in the following section.
Next, let’s explore the process of claiming a knowledge panel for a person or organization.
How to Claim a Knowledge Panel for a Person or Organization
Begin by signing in to your Google account to claim your knowledge panel. It’s best to use the account associated with your business, such as your Google Business Profile (previously known as Google My Business) or your business email.
Now, search for your business name or your own name and locate the knowledge panel on the right side of the search results. Ensure that the panel is not related to a different business or individual with a similar name.
You should see a button at the bottom of the panel that says ‘Claim this knowledge panel.’ Click on that button to proceed.
Important Note:If you do not see a knowledge panel for your business, it may not yet be included in the Google Knowledge Graph. Refer to the next section for instructions on how to add your website content to Google Knowledge Graph.
You will be directed to a page that explains how to improve your visibility on Google. Click the ‘Get Verified’ button to confirm your ownership of the business.
This will lead you to the ‘Get Verified on Google’ form, where you will need to confirm the name of the business or individual you wish to claim.
Next, you will answer a series of questions to prove your eligibility to claim the knowledge panel for that business or individual.
Google may request that you upload a photo of yourself holding a valid ID. Additionally, you might need to provide screenshots of your online profiles, such as LinkedIn, Facebook, Twitter, and YouTube.
After completing the form, check the box next to the agreement at the bottom of the page and click the ‘Submit’ button.
On the final page, you will receive a thank you message for your submission. Google will review your request and send a confirmation email. Please be patient, as the review process may take some time.
Proposing Edits to a Person or Organization’s Knowledge Panel
Once you have successfully claimed your Google knowledge panel, you can select a featured image and hide personal information you prefer not to display, such as your date of birth or marital status.
Although you cannot directly modify the information in the Google Knowledge Panel, being a verified representative allows you to propose changes. Google takes these suggestions seriously and often updates the panel if the information is verifiable online.
Ensure you are logged into the Google account that claimed the knowledge panel, and then click the ‘Suggest edits’ link located at either the top or bottom of the panel.
Before suggesting an edit, keep in mind that Google sourced the information from elsewhere on the internet. It’s advisable to locate the original source and request a change from them first. If that approach fails, you can then propose an edit to your knowledge panel.
How to Include Your Website Content in Google Knowledge Graph
The content displayed in knowledge panels is automatically generated from the Google Knowledge Graph. While you cannot choose the specific content shown, you can ensure that Google can discover and comprehend information from your WordPress website.
The most effective way to achieve this is by implementing schema markup to organize your website. This specialized HTML code provides search engines with additional details about your website and its individual pages.
You can easily implement schema markup on your website and individual pages using All in One SEO (AIOSEO), the leading SEO plugin for WordPress. It automatically integrates schema support and provides various tools to enhance your content for improved search engine visibility.
Important Note:In this tutorial, we will utilize the free version of AIOSEO, which allows us to add schema markup. There is also a premium version, AIOSEO Pro, that includes additional features to further boost your website’s search engine performance.
For detailed instructions on how to install and configure the plugin, refer to our comprehensive guide on installing and setting up All in One SEO for WordPress.
Integrating Knowledge Graph Schema into Your Website
Navigate to theAll in One SEO » Search Appearancesection and scroll down to the ‘Knowledge Graph’ area. Here, you can provide search engines with essential information about yourself or your business.
Start by entering the name of your website. This can be your business name or a more specific title, such as ‘My Awesome Business Blog’. You may also include an alternate name for your website, like an acronym.
In the next step, click the button to indicate whether your website represents a person or an organization. This helps Google accurately categorize your site in its Knowledge Graph.
Next, enter your organization’s name and phone number. You can also choose the relevant team or department from a dropdown menu.
Lastly, upload your logo. For optimal results, Google recommends using a square image that is at least 112 x 112 pixels in size.
There is also an option to add local SEO settings. For more information, refer to the local business SEO setup section in our All in One SEO guide.
After completing these steps, be sure to click the ‘Save Changes’ button at the bottom of the screen to save your settings.
Integrating Product Schema into Your Online Store
You cannot directly claim your products for inclusion in product knowledge panels. Instead, you must implement the appropriate schema markup so that Google can recognize your online store when showcasing options for purchasing various products.
Fortunately, All in One SEO supports Merchant Listing schema markup, providing Google with the necessary information to feature your store.
When editing any product in WooCommerce, you’ll see that All in One SEO has automatically created a new ‘AIOSEO Settings’ section below the product editor.
This section allows you to customize how your product title and description appear on search results pages. You can view a preview next to ‘Snippet Preview’.
Next, switch to the ‘Schema’ tab, where you’ll find that AIOSEO has already included Product schema for you.
You can enhance your product information by clicking the ‘Edit Schema’ pencil icon.
If desired, you can automatically generate fields based on the product data from WooCommerce. Be sure to fill in as much information as possible for each product, including details like brand, material, identifiers, and more.
This product information will be incorporated into Google’s Knowledge Graph, giving Google the option to feature it in product knowledge panels.
For comprehensive instructions, refer to the optimizing WooCommerce SEO section in our guide on setting up All in One SEO.
Creating an About Page in WordPress
Google may also reference your About page when displaying information about your business in a Google knowledge panel.
Ensure your website includes an About page and add it to your navigation menu.
This page provides insight into your business’s purpose, mission, and values, making it an ideal place to introduce your team.
Discover more in our comprehensive guide on essential pages that every WordPress blog should include.
Additional Tips for Getting Your Business Information Featured in Google Knowledge Graph
Keep in mind that your website is just one of many sources of information about your business that Google utilizes in its knowledge panels.
Here are several effective strategies to promote your business and enhance the likelihood of your information being incorporated into Google Knowledge Graph.
Enhancing Your Social Media Presence
Google gathers information from social media platforms to populate knowledge panels.
This highlights the importance of establishing social media accounts for your business on key platforms such as Facebook, Twitter, Instagram, Pinterest, and others. You may also want to consider creating a Wikipedia page or listing your business on Wikidata.org.
Once you’ve set up your social profiles, proceed to All in One SEO » Social Networks. Here, you can enter the URLs of the profiles you created.
This will inform search engines about the social media profiles linked to your website, which may be featured in your Google Knowledge Panel.
For detailed instructions, refer to the section on social media optimization in our WordPress social media cheat sheet.
Get Featured on Wikipedia and Wikidata
Google collects information from authoritative sites like Wikipedia to populate knowledge panels, making a Wikipedia feature highly beneficial.
Wikipedia’s guidelines prohibit you from creating a page about yourself or your business to ensure objectivity in entries.
You can, however, submit your business details to Wikidata.org. The Google Knowledge Graph utilizes this information, which is also frequently referenced by Wikipedia contributors.
Remember that both Wikipedia and Wikidata are edited by the community and have strict notability criteria, so inclusion is not guaranteed. Nevertheless, providing accurate and well-sourced information to Wikidata is a great start.
Ensure you include links to any third-party sources that can validate the information you provide. This enhances the credibility of the claims about your business.
Promote Your Business on External Websites
You can also share information about your business on various websites. A great strategy is to find blogs that welcome guest contributions.
Contributing guest posts to other websites can provide valuable backlinks to your site, enhancing your SEO. This also allows you to showcase your business’s history and the products and services you provide.
Consider using a free platform called Connectively, previously known as HARO (Help a Reporter Out), which connects journalists with expert sources.
You might also conduct interviews with industry peers and feature them on your website. Those interviewed may link back to your site. Other options include being a guest on podcasts, creating expert roundups relevant to your industry, and speaking at industry events.
Frequently Asked Questions About Google Knowledge Panels
Here are some of the most common questions our readers have regarding Google knowledge panels.
What is a Google knowledge panel?
A Google knowledge panel is a concise summary of information that appears on the right side of a Google search results page. This panel can provide details about a person, organization, product, or location.
Information is automatically sourced from the Google Knowledge Graph. Individuals and organizations have the opportunity to claim their knowledge panels.
How can I obtain a Google knowledge panel?
A Google knowledge panel appears automatically when someone searches for your business, provided that the Google Knowledge Graph has relevant information about it.
If a knowledge panel does not appear after searching for your business, the best approach is to implement schema markup on your website to help Google better understand your content.
If a Google knowledge panel is available for you or your business, you can follow our guide to claim it.
What are the benefits of claiming a Google knowledge panel?
Claiming your Google knowledge panel offers several advantages. It verifies that the business belongs to you, allows you to select a featured image, and enables you to propose modifications to the content.
What is the cost of a Google knowledge panel?
Google knowledge panels are completely free. They are automatically generated when Google has information about your business. Claiming your Google knowledge panel also incurs no cost.
Is it possible to create my own Google knowledge panel?
Google knowledge panels are automatically generated, and you cannot create one yourself. However, these panels include information sourced from the internet.
You can shape the information in your knowledge panel by enhancing your website with schema markup and by claiming your panel to suggest edits.
Additionally, you can impact the content by providing details about your business on social media and third-party websites.
Why is my Google Knowledge panel missing?
If your business does not have a knowledge panel appearing in Google search results, it likely means that Google lacks sufficient information about your business in the Knowledge Graph.
To help Google recognize your business, implement schema markup on your website, engage actively on social media, and seek features on other websites.
Comprehensive Guides on Other Authority Signals
We hope this guide has assisted you in claiming your Google knowledge panel using WordPress. You may also find value in articles about other methods to enhance your website’s authority signals:
- Understanding Google E-E-A-T: An In-Depth Guide for WordPress Websites
- A Beginner’s Guide to Implementing Rich Snippets in WordPress
- How to Get Featured in Google Answer Boxes Using Your WordPress Site
- A Complete Guide to Adding Schema Markup in WordPress and WooCommerce
- Step-by-Step Guide to Adding an Author Info Box in WordPress Posts
- How to Secure Your WordPress Pages with SSL: A Comprehensive Guide
- Top Social Proof Plugins for WordPress and WooCommerce
- How to Showcase Rotating Testimonials on Your WordPress Site
- The Best Backlink Checker Tools: Free and Paid Options
If you enjoyed this article, consider subscribing to our YouTube Channel for WordPress video tutorials. You can also connect with us on Twitter and Facebook.

