Skip to content
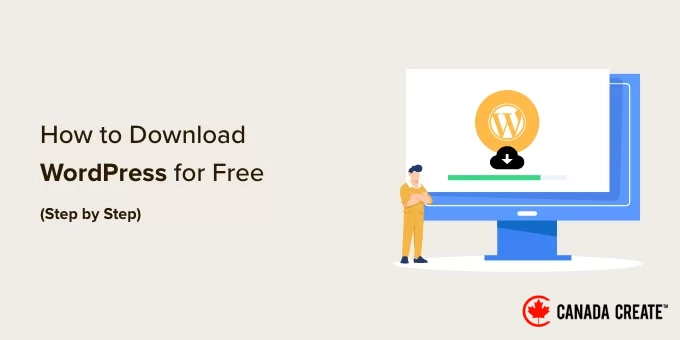
Are you ready to download WordPress and embark on the journey of creating an exceptional website? Whether you’re a novice or a seasoned user, learning how to manually download and install WordPress is an essential skill.
WordPress is an open-source platform, allowing you to download the software at no cost. While many web hosting services offer automatic WordPress installation, you can also choose to download and set it up manually on your own server or computer.
At Canada Create™, we have been installing WordPress on various types of websites for years. By maintaining multiple WordPress sites, we can easily test new themes and plugins and explore innovative techniques for our tutorials.
In this article, we will guide you on how to download WordPress for free, along with detailed step-by-step instructions on what to do next for installation.
Why Is WordPress Available for Free Download?
WordPress is freely available for anyone to download and use for building any type of website without limitations. This is because WordPress is a collaborative open-source project supported by contributions from thousands of skilled individuals.
According to our WordPress market share report, over 43% of all websites on the internet are powered by WordPress.
A dedicated team of developers spearheads the project, but contributions are welcome from anyone who wants to submit patches, resolve bugs, add features, or propose new ideas.
Important Note:When we refer to the WordPress open-source project, we mean the self-hosted version available at WordPress.org, which differs from the WordPress.com hosting service. For a detailed comparison, check out our article on WordPress.com versus WordPress.org.
Although the core software is available for free, there are associated costs for creating a WordPress website. Your overall expenses will vary based on your budget and objectives, but it can be very cost-effective.
The primary expenses include purchasing a domain name, which serves as your website’s unique address on the internet, and a website hosting plan, where your website’s files and database will be stored.
Fortunately, most web hosting providers offer automatic WordPress installation, so you likely won’t need to download or install it manually.
However, if you possess intermediate or advanced skills, you can opt for a manual WordPress installation. This is particularly useful if you want a customized setup or plan to run WordPress on your own server or computer.
Now, let’s explore the steps to download WordPress for free and what to do next. This tutorial will cover the following topics:
- Steps to Download WordPress for Free
- Guide to Manually Install or Reinstall WordPress on a Web Server
- Instructions for Installing WordPress Locally on Your Computer
How to Download WordPress for Free
Begin by visiting the WordPress.org download page, which provides two options:
- You can choose to download WordPress and install it manually, as we will explain in this article, or
- You can opt for an automatic setup of WordPress through a hosting provider.
We recommend that most users select the second option. Trusted hosting providers like Hostinger, Bluehost, DreamHost, or SiteGround can install WordPress for you in just five minutes. For detailed instructions, refer to our comprehensive guide on installing WordPress.
However, if you are an advanced or intermediate user and prefer to install WordPress manually, feel free to click the ‘Download WordPress’ button.
This button will display the version of WordPress you are downloading, which in this case is WordPress 6.1.1.
After downloading the file from WordPress.org, unzip it to create a ‘wordpress’ folder on your computer. This folder contains all the necessary files to set up your WordPress website.
With your free WordPress download, you can install or reinstall WordPress on your server or set up a local WordPress installation on your computer.
Step-by-Step Guide to Manually Install or Reinstall WordPress on a Web Server
Manually installing WordPress involves a few extra steps, but it can be simpler than you might think. You’ll need the downloaded files and either an FTP client or a web-based file manager.
This manual installation method can also be used for updating WordPress or for uninstalling and reinstalling it.
Transferring WordPress Files to Your Web Server
Your first task is to use FTP to upload the WordPress files you downloaded to your web server. Think of FTP as a tool for managing files over the internet.
Most web hosting providers offer an FTP server and will send you your FTP username, password, and other details via email when you sign up for your WordPress hosting account. You can also find your FTP account information in your hosting account’s cPanel or Site Tools dashboard.
Instead of using FTP, many hosting providers offer a web-based file manager that you can access through your hosting control panel, as shown above.
We will utilize the FileZilla FTP client, which is free and compatible with Windows, Mac, and Linux operating systems.
Begin by launching FileZilla and selecting File » Site Manager from the menu. Then, click the ‘New site’ button and enter a name for your website. After that, fill in your login credentials in the ‘User’ and ‘Password’ fields.
In the Protocol dropdown menu, choose ‘SFTP’ if your hosting provider supports it; otherwise, keep it set to ‘FTP.’
Next, enter your domain name, such as ‘example.com’, in the Host field and select ‘Normal’ for the Logon Type.
After entering these details, click the ‘Connect’ button to proceed. FileZilla will attempt to log in to your website using the credentials you provided.
Once connected, you will see two columns displaying files and folders. The left column shows the Local files on your computer, while the right column displays the Remote files on your website. This setup makes it easy to transfer files to and from your website.
In the left column, find the ‘wordpress’ folder that you previously downloaded and extracted. In the right column, navigate to the folder on your website where you will upload these files:
- To install WordPress on your main domain (like example.com), upload the WordPress files to your website’s root directory. This directory is typically named
/public_html/. - Alternatively, if you want to install WordPress in a subdirectory (like example.com/blog), upload it to the folder
/public_html/blog/.
Now, select all the files in the left column. Then, right-click on the selected files and choose ‘Upload’ from the menu, or simply drag the files to the right column.
Your FTP client will now transfer the WordPress files to your website.
Setting Up Your WordPress Database
After the WordPress files are uploaded, access your hosting control panel to create a new database.
We will guide you through this process using cPanel, but if your hosting provider uses a different control panel, look for the ‘phpMyAdmin’ option.
Click the ‘phpMyAdmin’ icon to launch the phpMyAdmin application in a new tab. Once in the phpMyAdmin dashboard, select the ‘Databases’ tab.
Enter a name for your database in the ‘Database name’ field. You can choose any name you like, but remember it for future reference.
For this tutorial, we will name our database test_db.
After entering your database name, click the ‘Create’ button.
phpMyAdmin will create your database.
Now that you have uploaded the WordPress files to your website and created a database, you are ready to install WordPress.
Installing WordPress
To begin the WordPress installation, navigate to your website’s URL, such as example.com or www.example.com. This will launch the WordPress installation wizard.
You will be greeted with a language selection page. Choose your preferred language for the installation process, or stick with English for now and change it later.
Next, click the ‘Continue’ button to move forward.
You will now see instructions for the installation process, including essential details like the database name, username, password, and host.
After reviewing the information on the screen, click the ‘Let’s go!’ button to proceed. The setup wizard will present a form where you can input the database details you created earlier.
Once you’ve completed that, ensure the Database Host field remains set to the default ‘localhost.’ This indicates that the database and website are hosted on the same server. Unless you modified the database prefix, the Table Prefix field should display wp_.
After entering this information, click the ‘Submit’ button. WordPress will connect to your database and display a success message.
To proceed to the next step, simply click on the ‘Run the installation’ button. WordPress will create tables in your database and guide you to the next phase of the installation.
The following screen will request some additional information.
You will need to enter the Site Title you want to appear at the top of your website, such as your business name. You can modify the title at any time in your WordPress dashboard.
You will need to create a username and password, which will serve as your login credentials to access the WordPress dashboard.
You can enter your email address in the ‘Your Email’ field. This is where WordPress will send all administrative emails.
If you prefer to keep your website hidden from search engines at this stage, you can check the box for search engine visibility.
When you’re ready to make your site visible, you can adjust this setting in the WordPress dashboard. If you’re uncertain, it’s best to leave it unchecked for now.
Once you have filled out this form, click the ‘Install WordPress’ button. WordPress will begin the installation process, and after a short wait, you should see a ‘Success!’ message.
You can now access your WordPress dashboard by clicking the ‘Log In’ button.
Congratulations! You have successfully installed WordPress by downloading the core software for free and completing the manual installation.
How to Install WordPress on Your Local Computer
You can use the WordPress core files you downloaded to set up WordPress on your own computer. This allows you to explore WordPress before launching your blog or website, and it’s a fantastic way to experiment with themes and plugins without any risks.
Note:When you install WordPress locally on your computer, only you will have access to it.
To ensure WordPress runs smoothly on your computer, you must first install the necessary software, which includes the PHP programming language, the Apache web server, and the MySQL database management system.
Installing all these components separately and ensuring they work together can seem overwhelming.
Fortunately, there are free development tools available that simplify this process by allowing you to install everything as a single package, even if you lack technical expertise. After installing one of these applications, you can set up WordPress using a straightforward method.
We recommend using Local WP for installing WordPress on your computer. Check out our comprehensive tutorials on how to install WordPress on Windows and how to install WordPress on Mac.
Important Note:With Local WP, you won’t need to manually download and install WordPress on your computer. The application streamlines this process, allowing you to do it with just a few clicks.
We hope this tutorial has guided you in downloading and manually installing WordPress for free. Additionally, you may want to explore our guide on cloning a WordPress site or our expert recommendations for the best plugins to effectively manage WordPress multi-author blogs.
If you enjoyed this article, consider subscribing to our YouTube Channel for helpful WordPress video tutorials. You can also connect with us on Twitter and Facebook.