
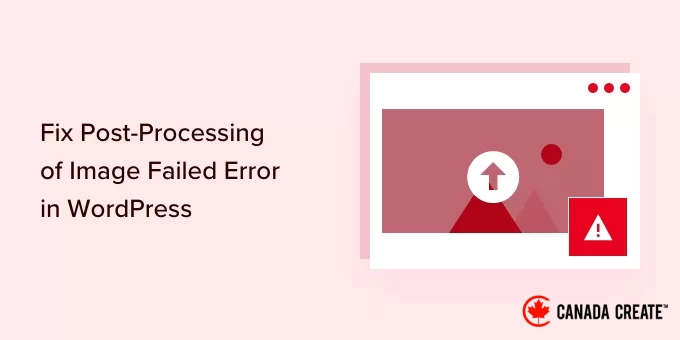
Imagine this: you’re updating your WordPress site with new images, and suddenly you encounter a problem. The frustrating ‘Post-Processing of Image Failed’ error pops up, halting your upload completely.
I recall when this first occurred on my website. I was attempting to upload images for a new blog post, and this error message kept showing up. The most frustrating part was not knowing the cause or how to resolve it.
This bothersome error typically occurs when using WordPress’s built-in media uploader. It can strike at the most inconvenient times, preventing you from adding images to your posts or pages.
Fortunately, I discovered how to resolve it, and it’s simpler than you might expect. Most often, it’s due to server settings or file permission issues that can be fixed in just a few minutes.
In this article, I will guide you on how to fix the ‘Post-Processing of Image Failed’ upload error in WordPress. This will enable you to resume uploading stunning images in no time.
What Triggers the ‘Post-Processing of Image Failed’ Error?
When you upload an image to a post or the media library on your WordPress site, several processes take place. The image file is transferred to your WordPress hosting server, an attachment page is generated for the image, and a PHP image editing module carries out some post-processing.
Occasionally, during the image upload process, you might encounter an error message in WordPress.
‘Post-processing of the image likely failed due to the server being busy or lacking sufficient resources. Consider uploading a smaller image, ideally no larger than 2500 pixels.’
Fortunately, this WordPress error message offers valuable insights. It indicates that the issue arose during the post-processing of the image and suggests there may be a server-related problem.
The error message also proposes a potential solution: upload an image that does not exceed 2500 pixels in its longest dimension.
Now, let’s explore how to resolve the ‘Post-Processing of Image Failed’ error in WordPress.
1. Verify That the HTTP Error is Not Temporary
First, ensure that the file name does not contain any special characters, such as an apostrophe. If it does, rename the image file.
Next, wait a few minutes and attempt to upload your image file again. If your server was busy, as indicated, it might have been due to unexpected traffic or limited server resources.
Such issues are typically resolved automatically by most WordPress hosting providers.
If you’re still experiencing issues with image uploads after some time, try uploading a different file. Additionally, consider clearing your browser cache or using an alternative web browser.
If the ‘Post-Processing of Image Failed’ error persists after following these steps, it indicates that the issue is not temporary. Continue reading for further troubleshooting.
2. Increase the Memory Limit in WordPress
This error message indicates that your server may lack sufficient resources. Let’s increase the memory allocated to WordPress.
You will need to enhance the memory available to PHP on your server. This can be accomplished by adding the following line to your wp-config.php file.
define( 'WP_MEMORY_LIMIT', '256M' );
This line of code raises the WordPress memory limit to 256MB, which should resolve any memory-related issues.
Additionally, check if the file exceeds your website’s upload limit. For guidance on increasing the maximum file upload size in WordPress, refer to our detailed guide.
If your WordPress hosting provider does not permit you to raise the memory limit, consider switching to a managed WordPress hosting service like SiteGround or WPEngine.
3. Optimize the Image to Reduce Its Size
The error message suggests that uploading a smaller image may resolve the issue. It advises that the longest side of your image should not exceed 2500 pixels.
When launching a new blog, many newcomers upload images without optimizing them for web use. This can lead to error messages like this one, and large image files can also slow down your website.
A slow website can negatively impact your overall SEO rankings.
To optimize your image, use image editing software to save it in an appropriate file format (such as JPEG, PNG, or GIF), resize the image dimensions to a smaller size, and compress the image to further reduce the file size.
For detailed instructions, refer to our guide on optimizing images for web performance without sacrificing quality. This guide includes tips on how to optimize your images and recommends the best tools and practices for image optimization.
It’s important to understand that this error message can sometimes appear even when uploading smaller images. If you encounter the error while using optimized images, proceed to the next troubleshooting step.
4. Change the Image Editor Library Used by WordPress
WordPress processes images using two PHP modules: ImageMagick and the GD Library. The platform selects one based on availability.
However, ImageMagick may encounter memory issues that lead to errors during image uploads. To resolve this, you can set the GD Library as your default image editor.
You can achieve this by adding the following code to your theme’s functions.php file, a site-specific plugin, or by utilizing a code snippet plugin.
function wpb_image_editor_default_to_gd( $editors ) { $gd_editor = 'WP_Image_Editor_GD'; $editors = array_diff( $editors, array( $gd_editor ) ); array_unshift( $editors, $gd_editor ); return $editors;
}
add_filter( 'wp_image_editors', 'wpb_image_editor_default_to_gd' );
The simplest and safest way to add this code in WordPress is by using WPCode, the top code snippets plugin trusted by over 2 million users.
WPCode enables you to insert custom code without modifying your theme’s functions.php file, eliminating the risk of breaking your WordPress site.
To learn more about how we utilize WPCode at Canada Create™, check out our comprehensive WPCode review.
Begin by installing and activating the free WPCode plugin. If you need assistance, refer to this guide on installing a WordPress plugin.
After activating the plugin, navigate to theCode Snippets » + Add Snippetsection in your WordPress dashboard.
Here, locate the ‘Add Your Custom Code (New Snippet)’ option and click the ‘+ Add Custom Snippet’ button below it.
Next, select a code type from the available options displayed on your screen.
For this tutorial, choose ‘PHP Snippet.’
Then, provide a title for your snippet; this is for your reference and can be anything that helps you remember the purpose of the code.
Once that is done, paste the code from above into the ‘Code Preview’ box.
Now, switch the status from ‘Inactive’ to ‘Active’ and click the ‘Save Snippet’ button at the top of the page.
After adding this code, try uploading the image again.
I hope this tutorial has helped you resolve the ‘Post-Processing of Image Failed’ error in WordPress. You may also want to check our comprehensive guide on fixing the HTTP image upload error in WordPress and explore our expert recommendations for the best WordPress plugins for image management.
If you found this article helpful, consider subscribing to our YouTube Channel for WordPress video tutorials. You can also connect with us on Twitter and Facebook.


