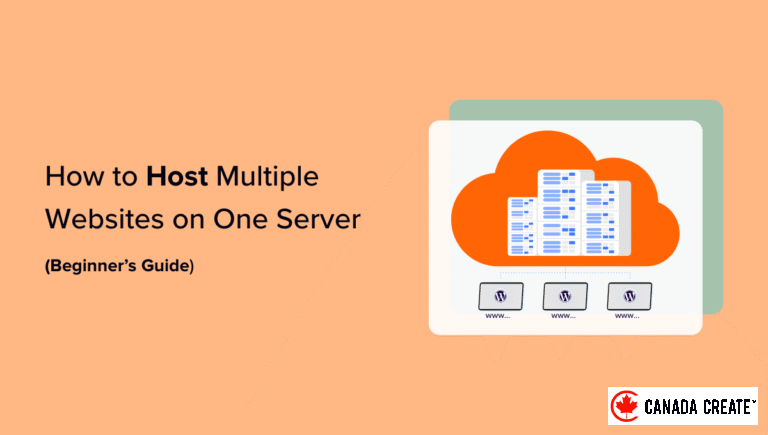
Did you know that you can manage multiple domains from one server, making it easier to oversee all your websites in one place?
This approach allows you to maximize your server’s resources for various sites while reducing costs, as you won’t need to buy separate servers for each domain.
Over the past 16+ years, we have evaluated numerous hosting providers. Based on our findings, Hostinger, Bluehost, and SiteGround stand out as the top choices for hosting multiple websites.
In this article, we will guide you through the process of hosting multiple websites on a single server.
Benefits of Hosting Multiple Websites on One Server
If you’re considering expanding your business by adding more websites, hosting them on a single server is a practical solution.
This method simplifies management, as you can easily navigate between your sites without the hassle of logging in and out of different WordPress installations on various servers. With all your websites on one server, you can switch between them effortlessly from the same dashboard.
Hosting multiple sites on a single server is also a cost-effective strategy for your business.
Many hosting providers offer dedicated hosting solutions that give you complete control over the server, enabling you to set up multiple websites.
Instead of buying separate hosting plans for each website, opt for a plan that supports multiple WordPress sites on a single server. This approach maximizes your server’s resources.
Now, let’s explore how to host several websites on one server.
Choose a Hosting Provider and Register Domain Names
Before adding any website to your server, the initial step is to select a hosting provider and register domain names for your sites.
Selecting a WordPress Hosting Provider
There are numerous options available, but we recommend Hostinger. It’s an emerging web hosting provider known for its diverse hosting solutions.
For example, you can choose from premium shared hosting, WordPress hosting, VPS hosting, cloud hosting, managed hosting, and more.
We have thoroughly evaluated this hosting provider. You can find detailed insights in our Hostinger review.
With the Hostinger WordPress Starter plan, you can host up to 100 websites, enjoy free email services, an SSL certificate, unlimited bandwidth, managed WordPress, and additional features. You also receive one free domain name, but you will need to buy any extra domains.
The best part is that CanadaCreate users can receiveup to 78% offon WordPress hosting plans. Just click the link below to take advantage of this offer.
One of the key benefits of using Hostinger’s WordPress plans is that WordPress is pre-installed, eliminating the need for manual installation for your websites.
If you’re seeking alternatives, consider using Bluehost or SiteGround to host multiple websites on a single server.
Acquiring Domain Names for Your Website
Once you’ve selected a web hosting platform, the next step is to purchase the domain names you need for hosting on your server.
Hostinger allows you to either buy a new domain or transfer an existing one. To purchase a domain, simply navigate to the ‘Domains’ tab in your Hostinger dashboard.
From there, select the ‘Get a new domain’ option.
Next, you can search for your desired domain name.
Enter a keyword or brand name into the search bar.
You’ll then see a list of available URLs along with various domain extensions and their corresponding prices.
Choose the option you prefer and click the ‘Buy domain’ button.
A popup will appear, presenting different billing periods for your domain name.
Select your preferred billing period.
Finally, complete the checkout process by selecting a payment method and purchasing your domain name.
You can repeat this process to purchase as many additional domain names as you wish.
Alternative Method:If you prefer not to buy a domain from Hostinger, there are numerous domain registrars that make it easy to register a domain name. For example, Network Solutions provides a variety of top-level domain extensions, a straightforward registration process, and a range of features.
How to Add Multiple WordPress Sites to One Server
Once you have chosen a hosting provider and purchased your domain names, you can add multiple websites to a single server.
From your Hostinger dashboard, navigate to the ‘Websites’ tab and click on the+ Create or Migrate a Websiteoption.
Next, Hostinger will guide you through the steps to create a new website on the same server.
For example, you can choose the type of website you want to create, such as an online store, blog, business site, portfolio, or other options.
Afterward, you will need to decide whether you want to create a new website or migrate an existing one.
If you have a website hosted on another platform, you can easily transfer it to Hostinger. Just select the ‘Migrate my website’ option and follow the instructions.
For the purposes of this tutorial, we will choose the ‘Create a new website’ option.
Next, choose a platform to create your new website. Hostinger provides two options: you can use WordPress with artificial intelligence (AI) or utilize Hostinger’s AI-powered website builder.
Select the ‘WordPress with AI’ option to proceed.
You will need to enter your account login details from this point.
Simply select your preferred language, provide an administrator email, create a password, and click the ‘Continue’ button.
In the next step, Hostinger will prompt you to add plugins to your WordPress site.
You can easily choose the plugins you wish to install and then click the ‘Continue’ button.
After that, you will need to pick a design for your website.
Hostinger will display the default theme, but you can click on ‘Browse more templates’ to explore additional design options.
From here, you can select a different WordPress theme for your site.
You can also click the ‘Show More’ button at the bottom to view more templates.
Once you have made your choice, simply select a design and click the ‘Select’ button.
Next, Hostinger will ask you to provide a brand name and a description of your business.
It utilizes ChatGPT to generate content for your website. Once you are satisfied, simply click the ‘Continue’ button.
You can choose to bypass this step by providing a name and a short description, then clicking the ‘Skip, I will write content later’ option at the bottom.
Next, you will need to choose a name for your website. Hostinger will present you with two options: ‘Buy a Domain’ or ‘Use an Existing Domain’.
If you haven’t secured a domain name yet, you can select the ‘Buy a Domain’ option to purchase one directly through Hostinger.
If you already own multiple domains with another provider, you can opt for the ‘Use an Existing Domain’ option.
For this tutorial, we will select the ‘Use an Existing Domain’ option.
Then, you will need to enter your domain name and click the ‘Continue’ button.
A popup window will appear with instructions on how to point your domain to Hostinger’s nameservers.
You will see your domain’s current nameservers along with the necessary nameservers you need to update with your domain registrar. The specific instructions may differ based on the registrar you are using.
If you require assistance with domain transfer, Hostinger provides detailed guides and documentation. You can also contact their support team for additional help.
Important:Make sure that the domain you are transferring is unlocked by the current registrar and that at least 60 days have passed since its initial registration.
After recording the nameservers, click the ‘Continue’ button.
Hostinger will begin setting up your website, which may take a few minutes to complete.
The last step is to click the ‘Connect’ button located under theConnect Your Domainoption after you have updated the nameservers in your domain registrar.
Once connected, you can view your website from the Hostinger dashboard.
Simply navigate to the ‘Websites’ tab to see your newly added site.
You can repeat these steps and select the ‘+ Create or migrate a website’ option to add as many websites as you wish to a single server.
Bonus: How to Create Additional Sites Using WordPress Multisite
A WordPress multisite enables you to operate and manage multiple websites from one WordPress installation. This setup is commonly used by large organizations that require separate domains for different departments, educational institutions, news organizations, online businesses, and more.
There is a subtle distinction between hosting multiple sites on a single server and utilizing a WordPress multisite.
In a multisite setup, you operate under a single parent domain (like example.com), while the additional sites are organized as subdomains (such as blog.example.com). These sites can share plugins, user accounts, and other features based on your configuration.
Conversely, hosting multiple websites on a single server allows you to use distinct domain names for each site. Each website operates independently from the others.
Setting up a WordPress multisite is straightforward with any web hosting provider, including Hostinger. After the initial setup, you can easily add multiple sites to your network and manage them all from a single dashboard on one server.
For further information, please refer to our comprehensive guide on installing and configuring a WordPress multisite network.
We hope this article has helped you understand how to host multiple websites on a single server. You might also find our guide on the true cost of a domain name and the best alternatives to GoDaddy useful.
If you enjoyed this article, please consider subscribing to our YouTube Channel for WordPress video tutorials. You can also connect with us on Twitter and Facebook.