Have you ever visited a WordPress website that felt bland and unoriginal? It’s as if it was built from a standard template, lacking any unique or memorable features.
This is the impression you create when you use the default WordPress header, which can undermine your credibility with every visitor.
Your header is the first element visitors encounter when they arrive at your site, making it essential to create a powerful first impression. Customizing it allows you to incorporate important features like navigation links, social media icons, and a search bar.
These enhancements improve user experience and help establish a professional and lasting impression. Additionally, we’ve observed that a custom header can significantly increase both trust and user engagement.
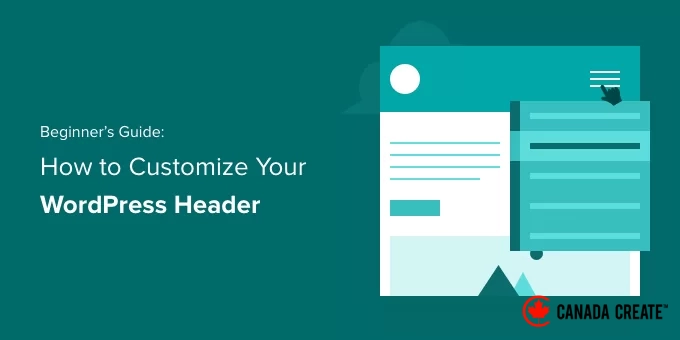
In this guide, we will walk you through the process of customizing your WordPress header, even if you are a complete novice. You will discover several methods that require no coding skills, enabling you to create a distinctive header that better serves your visitors. 🌟
What Is the Header in WordPress?
The header of your website is the uppermost section on every page of your WordPress site, and it is likely the first thing that visitors notice. It typically includes your website logo, title, navigation menus, and other essential elements you want users to see immediately.
For instance, here’s our header section on Canada Create™, which is viewed by millions of readers every month.
By personalizing your website’s header, you can add a distinctive flair and enhance its functionality for your visitors. You can link to your most popular pages, showcase social media icons or your business phone number, and include call-to-action buttons to boost conversions.
In the upcoming sections, we will guide you through the process of easily customizing your WordPress header. Use the links below to navigate to the section you wish to explore:
- Customize the Header Using the WordPress Theme Customizer
- Customize the Header Using the WordPress Full Site Editor
- Create Custom Header and Page Layouts with SeedProd
- Add a Unique Header for Each Category
- Incorporate a Widget Area into Your WordPress Header
- Add Random Header Images to Your WordPress Blog
- Insert Code into Your Website’s Header (Advanced)
- Bonus Tip: Experiment with Different Header Styles (Using A/B Split Testing)
- Frequently Asked Questions: Customize Your WordPress Header
- Additional Resources: More Tips on WordPress Design and Navigation
Are you ready? Let’s begin.
Customize the Header Using the WordPress Theme Customizer
Many popular WordPress themes enable you to customize your site’s header area using the WordPress theme customizer. This feature is often referred to as a custom header, but keep in mind that not all themes provide this option.
To begin, go to Appearance » Customize in your WordPress admin dashboard.
💡Important Note: If you cannot find Appearance » Customize in your WordPress admin menu and only see Appearance » Editor, it indicates that your theme supports full-site editing. In this case, please proceed to the next section.
Your theme might feature a ‘Header’ section within the customizer or offer header options under the ‘Color’ section. However, this can differ from one theme to another. Here are some examples.
Certain themes, such as Twenty Twenty-One, do not provide any header customization options. If that’s the case, we suggest using a drag-and-drop theme builder plugin like SeedProd, which we will discuss later.
The Twenty Sixteen theme allows you to upload a background image for the header and even includes the option for random header images.
Numerous free and premium WordPress themes provide a wider range of customization options.
You can customize your header’s font style, layout, colors, and more. However, the options available will vary depending on the theme you are using, as they are determined by the theme developer.
For instance, the Sydney theme includes a specific ‘Header Builder’ feature in its customization panel located on the left side.
In this section, you can adjust various settings to modify the appearance and style of your header. You can create a personalized header by adding blocks, similar to how you would edit a blog post or page in the WordPress content editor.
To begin, simply hover over an empty section of the header and click the ‘+’ icon to insert a header block, whether it’s in the top, middle, or bottom row.
Next, choose any block you want to include in your custom header. Options include a widget block, an account block, a search block, and more.
The header builder also allows you to drag and drop blocks to arrange them above or below the header.
💡Important Note:The free version of Sydney allows you to add up to 5 components to your header. To access the complete library, including advanced features like a login function and custom HTML, you will need to upgrade to Sydney Pro.
For more information about the theme, please refer to our comprehensive Sydney review.
You can further personalize each block that you include in the header.
For example, choosing the Site Title & Logo block allows you to upload a site title and logo, adjust the logo’s width, display a site tagline, and more.
Additionally, you can modify the header’s background color or add a background image to enhance its appearance.
Once you finish customizing the header, simply click the ‘Publish’ button to save your changes.
For more information, check out our comprehensive guide on using the WordPress theme customizer.
Customize Your Header with the WordPress Full Site Editor
WordPress introduced full-site editing in version 5.9. If your theme supports this feature, it will replace the traditional theme customizer. Currently, only a limited number of themes are compatible with the full site editor.
When using a compatible theme, you can modify your header by going to Appearance » Editor. This will open the full site editor, which resembles the block editor you use for creating WordPress posts and pages.
When you click on the header, you’ll see that the template name at the top of the page changes to ‘Page Header.’
By clicking the ‘Settings’ icon on the toolbar, you will access options to personalize the layout, color, border, and dimensions of your header.
For instance, to change the background color of the header, first expand the ‘Color’ section and then select the ‘Background’ option.
In the pop-up window, you can choose between a solid color or a gradient.
You can select from various preset colors, and as soon as you click on a color, the background of your header will update instantly.
To discover more customization options, click the ‘Styles’ icon located at the top right of the page. This feature allows you to modify the header’s font, colors, and layout.
For a deeper understanding of how the full site editor functions, check out our beginner’s guide on customizing your WordPress theme.
Design Custom Header and Page Layouts with SeedProd
If you want complete control over your headers, footers, and sidebars to create a distinctive website design, we recommend SeedProd, the top WordPress theme builder plugin.
SeedProd enables you to effortlessly craft a custom WordPress theme without any coding. This includes designing headers, footers, and all other elements necessary for an appealing WordPress theme.
You can create various custom header styles tailored for different pages and sections of your website.
Many of our partner brands utilize SeedProd to build their websites, and it has proven to be highly effective for them. To learn more, feel free to read our comprehensive SeedProd review.
💡Important Note:The free version of SeedProd allows you to create custom landing pages, including custom headers. However, to design fully custom themes with site-wide header layouts, you will need to upgrade to the Pro version.
We suggest starting with our guide on how to create a custom WordPress theme without any coding. After that, you can begin customizing your header using the SeedProd editor.
To access the editor, simply click the ‘Edit Design’ link located beneath the header.
This action will launch the header in SeedProd’s user-friendly drag-and-drop editor.
From this point, you can easily modify your header by adding new content blocks.
There are blocks available for template tags like your site logo or any of your WordPress widgets, as well as advanced blocks such as countdown timers, navigation menus, and social sharing buttons.
The great thing is that you can further personalize each block using the theme builder. For example, you can adjust the size and alignment of your logo or select which pages to display in the navigation menu. It also allows you to add an image to the header.
With SeedProd, you can add an entire section to your theme’s header template.
Sections are collections of blocks that you can use for various parts of your website, including headers, footers, features, testimonials, calls to action, and more.
To utilize a header section, switch to the ‘Sections’ tab in the ‘Design’ panel.
Next, select a header section that you want to use for your website. SeedProd provides a variety of section templates for you to choose from.
Now, start customizing the header section to fit your style.
Once you are satisfied with your custom header, be sure to click the ‘Save’ button to apply your changes.
You are now ready to publish your custom header.
Simply navigate to SeedProd » Theme Builder in your WordPress dashboard and toggle the ‘Enable SeedProd Theme’ option to ‘Yes.’
After enabling this option, SeedProd will replace your default WordPress theme with a new custom theme and header.
Visit your website now to see your newly customized header in action.
Create Unique Custom Headers for Every Page
Additionally, SeedProd simplifies the process of designing custom headers for specific pages on your site.
The theme builder allows you to add personalized headers for each page on your WordPress website. This enables you to display tailored headers for various categories, tags, post types, page types, and more.
To begin, navigate to SeedProd » Theme Builder in your WordPress dashboard and click the ‘Add New Theme Template’ button.
A new pop-up window will appear where you can enter the details for your theme template.
Enter a name for your theme template and select ‘Header’ as the template type from the dropdown menu. You can leave the ‘Priority’ field empty.
Next, specify the display conditions for your custom header. For instance, we set the conditions to show on all posts and pages within the tutorials category.
Remember to click the ‘Save’ button once you’re finished.
After saving, proceed to customize the header using the SeedProd drag-and-drop theme builder.
After finishing your custom header edits, click the ‘Save’ button located at the top.
For more inspiration on customizing your header with SeedProd, check out our beginner’s guide on effortlessly creating a custom WordPress theme using the SeedProd theme builder.
Creating a Unique Header for Each Category
Typically, websites feature the same header across all posts, pages, categories, and archive pages. However, you have the option to set a distinct header for each WordPress category.
While you can achieve this by adding code to your theme files, using a theme builder will give you greater control.
Previously, we demonstrated how to customize your header with the SeedProd theme builder plugin. Now, SeedProd also enables you to create multiple custom headers and assign them to different categories using conditional logic.
To create a new header, navigate to SeedProd » Theme Builder and click the orange ‘Add New Theme Template’ button. Alternatively, you can duplicate your existing header to use as a base.
A pop-up window will appear, allowing you to name the theme template and select ‘Header’ from the Type dropdown menu.
You need to set a priority for your header. If multiple headers qualify for a specific page, the one with the highest priority will be shown.
The default priority for the header is set to 0, so ensure you enter a value of 1 or higher.
Next, you will set one or more conditions to inform SeedProd when to show a specific header. You can easily select these conditions from the dropdown menus.
In the first two dropdowns, select ‘Include’ and then ‘Has Category.’ In the last field, enter the name of the category where you want the header to appear.
You can display the same header across multiple categories by clicking the ‘Add Condition’ button to include another category. Don’t forget to click the ‘Save’ button to save your new header.
Now, customize the design of each new header using SeedProd’s intuitive drag-and-drop editor as demonstrated earlier.
For more information, including how to implement this using code, refer to our guide on adding a custom header, footer, or sidebar for each category.
Incorporate a Widget Area into Your WordPress Header
If you are developing a custom theme from the ground up using code, consider adding a WordPress widget to your header to engage your visitors.
Widgets enable you to easily insert content blocks into designated areas of your theme, but keep in mind that not all themes provide a header widget area.
Earlier, we discussed how straightforward it is to incorporate widgets into your header using the SeedProd theme builder. But what if you want to add a widget to the header of a standard WordPress theme?
Certain themes, such as the Sydney theme, allow you to do this through the WordPress theme customizer. Sydney features a ‘Header Builder’ option that lets you fully customize the header, including the addition of widgets.
If your WordPress theme does not currently include a widget area in the header, you will need to add it manually.
While the typical method involves inserting code snippets into the functions.php file, a simpler and safer option is to use WPCode. This plugin is ideal for adding code snippets without risking your site’s functionality.
Many of our partner brands utilize WPCode to add and manage their custom code snippets. We receive positive feedback about the plugin, and you can also check out our comprehensive WPCode review for more information.
To begin, ensure that you have the WPCode code snippets plugin installed and activated on your WordPress website. If you require assistance, please refer to our guide on how to install a WordPress plugin.
💡Note:You can follow this tutorial using the free version of the WPCode plugin. However, upgrading to WPCode Pro provides additional features such as scheduled snippets, complete revision history, and access to a comprehensive library of developer-approved code snippets.
After activating the plugin, navigate to Code Snippets » + Add Snippets.
First, create a title for your snippet. For instance, we suggest naming it ‘Adding a WordPress Widget to the Header Area.’ Next, expand the code type dropdown and select ‘PHP Snippet.’
Once you’ve done that, simply copy the following code and paste it into the ‘Code Preview’ section.
function wpb_widgets_init() {
    register_sidebar(
        array(
            'name'          => 'Custom Header Widget Area',
            'id'            => 'custom-header-widget',
            'before_widget' => '<div class="chw-widget">',
            'after_widget'  => '</div>',
            'before_title'  => '<h2 class="chw-title">',
            'after_title'   => '</h2>',
        )
    );
}
add_action( 'widgets_init', 'wpb_widgets_init' );
This code will create a new header or widget-ready area for your theme.
This is an example of what you might see in your WPCode editor:
To enable the snippet, toggle the switch next to the blue ‘Save Snippet’ button to ‘Active.’ Remember to click the ‘Save Snippet’ button to save your changes.
After activating the switch and saving your changes, your editor should appear like this:
Next, navigate toAppearance » Widgets, where you will find a new widget area called ‘Custom Header Widget Area.’
This is the section where you can add your widgets. If you need assistance, refer to our guide on adding and using widgets in WordPress.
Depending on your theme, you may also need to add CSS to customize the display of the widget area in WordPress.
For comprehensive instructions, visit our guide on adding a WordPress widget to your website header.
Incorporate Random Header Images into Your WordPress Blog
Another effective way to enhance your WordPress headers is by including random images in the header section.
Displaying images that change randomly can attract your visitors’ attention and make your content more engaging.
To incorporate random header images into your WordPress blog, utilize the theme customizer to upload images in the header section. The availability of this feature may differ based on the specific WordPress theme you are using.
Next, select the ‘Randomize uploaded headers’ option to enable this feature.
For greater control and flexibility in displaying random images in the header, consider using a WordPress plugin.
For further information, refer to our comprehensive guide on adding random header images to your WordPress blog.
Adding Code to Your Website’s Header (Advanced)
If you wish to insert custom code into your website’s header section, you can do so directly from your WordPress dashboard. This method is intended for advanced users and may not be suitable for beginners, as it involves code editing and requires technical expertise.
You can locate your theme’s header files by navigating to Appearance » Theme File Editor in the WordPress admin panel. Within the ‘style.css’ theme files, scroll down to the site header section to add or remove code as needed.
💡Important Note: We advise against directly editing theme files, as even a minor error can disrupt your website and affect the overall WordPress design.
A simple way to add custom code for editing your site’s header is by using WPCode, the top code snippet plugin available.
Begin by installing and activating the free WPCode plugin. For detailed instructions, refer to our guide on how to install a WordPress plugin.
Once activated, navigate to Code Snippets » Header & Footer in your WordPress dashboard. Then, just input the custom code in the ‘Header’ section.
After entering your code, click the ‘Save Changes’ button.
For further information, check out our guide on how to add header and footer code in WordPress.
That’s all there is to it!
Bonus Tip: Experiment with Different Header Styles (Using A/B Split Testing)
After customizing your header, you might be curious, “Is this the most effective version for my visitors?” This is where A/B split testing becomes useful.
It allows you to compare various versions of your header, whether it’s a layout adjustment, button color change, or the addition of elements like a search bar, to determine which one performs better.
This way, you can make design choices based on actual user behavior rather than mere speculation.
Don’t worry, you don’t have to be a developer to accomplish this.
With user-friendly tools like Thrive Optimize and Nelio A/B Testing, you’ll be conducting tests like an expert in no time. This method allows your header to improve with each adjustment.
For comprehensive information, check out our guide on performing A/B split testing in WordPress.
Frequently Asked Questions: Customizing Your WordPress Header
Do you still have questions about how to customize your WordPress header? No worries; we’ve got the answers! Here are some common inquiries that beginners often have:
What is a WordPress header, and why is it significant?
The header is the uppermost section of your WordPress site, and it’s the first thing visitors notice. It typically features your site’s logo, navigation menu, and other essential elements. A well-crafted header creates a positive first impression and directs visitors to the most important areas of your site.
Do I need coding skills to customize my WordPress header?
Not at all! You don’t need any coding experience. Numerous WordPress themes and plugins (such as SeedProd) allow you to customize your header using an easy drag-and-drop interface – ideal for beginners.
What are the advantages of using a plugin like SeedProd for headers?
SeedProd simplifies the process of designing custom headers without any coding knowledge. You have complete control over the appearance and layout, along with advanced features to align with your site’s aesthetic and enhance the overall user experience.
What benefits does adding a widget to my header provide for my website?
Incorporating widgets into your header, such as a search bar, social media icons, or contact information, makes essential features more accessible. This improves navigation for visitors and gives your website a more refined and professional appearance.
Is it possible to have unique headers for different pages or posts?
Absolutely! With the right tools, such as SeedProd, you can create custom headers for various pages, posts, categories, or even tags. This allows you to tailor the look and feel of your site across different sections.
Additional Resources: More Tips for WordPress Design and Navigation
We hope this tutorial has guided you in customizing your WordPress header. Next, you might also want to explore our guides on:
- How to Properly Add Images in WordPress
- How to Implement a Font Resizer in WordPress for Enhanced Accessibility
- How to Style Each WordPress Post Uniquely
- How to Create a Collapsible Sidebar Menu in WordPress
- How to Display Different Sidebars for Each WordPress Post and Page
- How to Design a High-Converting Waitlist Landing Page in WordPress
- Essential Design Features for a Successful WordPress Website
- Comprehensive Guide: Steps to Successfully Change Your WordPress Theme
If you enjoyed this article, consider subscribing to our YouTube Channel for WordPress video tutorials. You can also connect with us on Twitter and Facebook.