 Skip to content
Mega menus enable you to showcase a diverse range of links and content categories in a well-organized and user-friendly layout.
This significantly enhances the browsing experience for visitors by making your site’s navigation more intuitive and easier to use.
At Canada Create™, we utilize a mega menu to feature our most important links prominently at the top of the page. When users click on it, a dropdown menu appears, displaying additional essential links. This approach has helped us maintain a clean and organized navigation menu, offering a wide variety of options without overwhelming the page’s appearance.
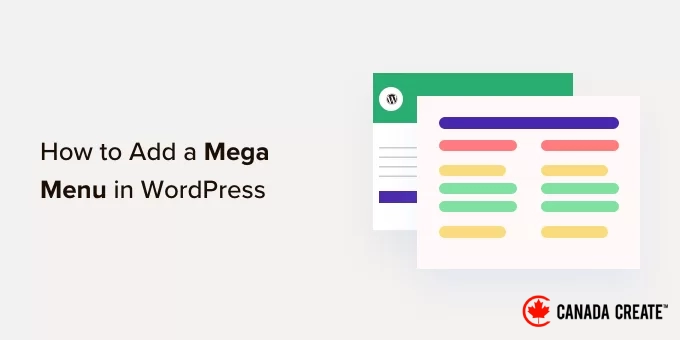
In this article, we will guide you through the process of easily adding a mega menu to your WordPress website, step by step.
Why Should You Implement a Mega Menu on Your WordPress Site?
WordPress includes a drag-and-drop builder that allows you to create various types of menus, such as dropdown menus, header menus, and more. There are also plugins available that enable you to design custom navigation menus within WordPress themes.
However, if your site contains a substantial amount of content, you may find it necessary to implement a mega menu. This feature allows you to incorporate multi-column dropdowns into the standard WordPress menu structure.
Mega menus help you structure your content with clear headings and subheadings, allowing visitors to easily navigate and find what they need. For instance, if you run an online store, you can organize all your product categories and subcategories within a mega menu.
Mega menus can display rich content for your visitors, including videos, text, search functionality, and recent posts.
Including images in your mega menus can enhance their visual appeal and make them easier to navigate.
Now, let’s explore how to effortlessly add a mega menu to your WordPress website.
Step-by-Step Guide to Creating a Mega Menu for Your WordPress Site
The simplest way to incorporate a mega menu into your WordPress site is by using the Max Mega Menu plugin. This tool enables you to enrich your mega menus with various content types, such as videos, image galleries, search options, and more.
This approach allows you to design more engaging and user-friendly menus.
You can customize the menu’s appearance by adjusting colors, font sizes, and incorporating different icons.
First, install and activate the plugin. If you need assistance, refer to our guide on installing a WordPress plugin.
Activating Mega Menus on Your WordPress Website
After activation, navigate to theMega Menu » Menu LocationsAccess the page from your WordPress dashboard to view all the areas where you can implement a mega menu.
The available options may vary based on your chosen WordPress theme.
First, you need to activate mega menus in each location where you plan to use them.
To do this, simply expand a location and check the ‘Enabled’ box.
Next, you can customize the ‘Event’ that will trigger the mega menu.
The default setting is ‘Hover intent,’ meaning visitors must hover their mouse over the mega menu for a few seconds to activate it. This option works effectively for most WordPress sites, but you can also select ‘Hover’ or ‘Click’ from the ‘Effect’ dropdown menu.
If you opt for ‘Click,’ visitors will need to click to access the mega menu. This can be beneficial if you’re concerned about accidental menu activations, which can lead to frustration.
On the other hand, selecting ‘Hover’ will open the mega menu as soon as the visitor hovers over it. This can encourage users to explore various sections of your site, making ‘Hover’ a great choice for landing pages or your homepage.
After deciding on this, you can adjust how the menu opens through the ‘Effect’ settings.
Max Mega Menu offers various animations, such as fade and slide up, which you can customize in terms of speed. Experimenting with different animations can help you create an eye-catching mega menu that attracts visitors.
If you prefer not to use animations, just open the first dropdown and select ‘None.’
By default, Mega Menu does not apply animations on mobile devices due to their limited processing power. However, if you wish to implement a unique animation for mobile users, you can adjust the settings in the ‘Effect (Mobile)’ section.
To test your mega menus on mobile devices, refer to our guide on how to view the mobile version of WordPress sites from a desktop.
If you selected ‘Click’ from the ‘Event’ dropdown menu, be sure to navigate to the ‘Advanced’ tab next.
In this section, you can use ‘Click Event Behavior’ to determine the action that occurs when a visitor clicks on your mega menu. For instance, a second click could either close the menu or open a new link.
There are additional settings available for exploration, but these should suffice for most WordPress blogs and websites.
Once you are satisfied with the plugin’s configuration, click on ‘Save Changes.’
To activate mega menus in more locations, simply repeat the process outlined above.
Customize the Appearance of Mega Menus on Your Website
The next step involves setting up the visual design of your mega menus.
You can achieve this by selecting the ‘Menu Themes‘ tab located on the left side of the screen.
On this page, you can adjust the direction of the arrow icons, modify the line height, add shadows, and more.
Once you are satisfied with your adjustments, remember to click on ‘Save Changes.’
If you wish to revert these changes at any time, simply check the ‘Reset Widget Styling’ box and click on ‘Save Changes.’
Next, you can personalize the menu bar, which is the bar that visitors see when the menu is in its default, collapsed view.
To make these adjustments, click on the ‘Menu Bar’ tab and use the settings to change the background color, padding, border radius, and more.
You can even create a color gradient by selecting two different colors in the ‘Menu Background’ section.
If you scroll down, you can modify the appearance of the top-level menu.
This refers to the first row of items that is displayed when the mega menu is in its collapsed state.
Since these items are crucial, you may want to highlight the top-level menu items.
For instance, in the image below, we have applied a different background color.
In the ‘Hover State’ section, you can emphasize the currently selected top-level menu item.
For instance, in the image below, we are utilizing an underline effect.
This feature helps visitors identify their location within the menu, making it especially beneficial for websites with extensive mega menus.
If you decide to implement a hover state, scroll to the bottom of the screen and check the ‘Highlight Current Item’ option.
Afterward, you can modify the appearance of the submenu.
This refers to the menu that appears beneath a top-level parent, as illustrated in the image below.
To personalize the submenu, click on the ‘Mega Menus’ tab.
You can now utilize these settings to adjust the submenu’s background color, increase the radius for rounded corners, add padding, and more.
You can enrich your mega menus with widgets. For example, you might include a Gallery widget to showcase your most popular WooCommerce products or embed a tag cloud within the mega menu. These widgets can offer additional information or motivate visitors to click on specific menu items.
You can personalize the appearance of these widgets by navigating to the ‘Widgets’ section. For instance, you can modify the widget title’s color, increase the font size, add padding, and adjust the alignment.
On this screen, you can also tailor the appearance of second-level and third-level menu items on your website, blog, or online store. These items are subcategories of the top-level menu.
While creating your menus, you can incorporate four or more levels to design a nested mega menu. In this case, WordPress will apply the styling of the third level to all subsequent levels.
You can observe this in the following image. The second level features red text, while both the third and fourth levels display the same blue text.
Once you are satisfied with the menu configuration, remember to click on ‘Save Changes.’
How to Create a Mega Menu on Your WordPress Site
After customizing your mega menu, it’s time to add it to your website.
Simply navigate to theAppearance » Menuspage in the admin sidebar.
To convert an existing menu into a mega menu, open the ‘Select a menu to edit’ dropdown and choose your desired menu from the list. Ensure that the selected menu is assigned to a location where the mega menu feature is activated.
To create a new mega menu from scratch, click on ‘Create a new menu’ and enter a title for your new menu.
Next, select the desired location for your menu and click on ‘Create Menu.’ Remember, this location must have the mega menu feature enabled.
Adding Content to Your WordPress Menu
Afterward, include all the pages, posts, WooCommerce products, and any other content you wish to feature in your mega menu.
For detailed instructions, please refer to our beginner’s guide on adding a navigation menu in WordPress.
Next, organize your items into the parent and submenu structure you want for your mega menu. To create a submenu, drag an item below the parent item and shift it slightly to the right before releasing it.
To create multiple levels, continue dragging items to the right so they appear indented beneath each other, similar to creating a dropdown menu in WordPress.
Activate the Mega Menu Feature
Once completed, click to expand the ‘Max Mega Menu Settings’ and check the box labeled ‘Enable.’
In this section, you can also customize the default mega menu settings. This feature allows you to design unique mega menus for various sections of your WordPress website, so feel free to make any desired adjustments.
Next, click on ‘Save.’
Designing the Mega Menu Layout
Now, hover your mouse over the first top-level item, and you will notice a new ‘Mega Menu’ button. Click on this button.
You will now have access to all the settings for this top-level item.
By default, Max Mega Menu utilizes a flyout style, where submenus extend from the side. To create a mega menu instead, open the ‘Sub menu display mode’ dropdown and select either ‘Standard Layout’ or ‘Grid Layout.’
The standard layout displays all submenus in columns.
In contrast, the grid layout enables you to arrange submenu items into both columns and rows.
This is perfect if you wish to showcase a large amount of content, such as all the digital products in your online store, or if you have a specific layout in mind.
After choosing either the standard or grid layout, you will see all the submenus linked to this parent item.
Now, you can rearrange how these items are displayed in the mega menu.
If you’re utilizing the standard layout, you can adjust the number of columns through the dropdown menu located in the top right corner.
For those using a grid layout, you can add additional columns and rows by clicking the ‘+Column’ and ‘+Row’ buttons.
Once you’re satisfied with the layout, you can organize the submenu items into various columns and rows by simply dragging and dropping them.
Next, you’ll want to adjust the space each item occupies within the column. Max Mega Menu displays the current size as a fraction of the total available width.
For instance, in the image provided, both columns occupy half of the available space.
To modify an item’s size, simply click the arrow buttons to increase or decrease the fraction.
Designing a Mobile-Friendly Mega Menu (Grid Layout Only)
By default, Max Mega Menu displays the same content on both desktop and mobile devices. This can pose a challenge with grid layouts, as smartphones and tablets usually have smaller screens, making horizontal scrolling cumbersome.
If you’re using the grid layout, you can create distinct mega menus tailored for mobile devices. For instance, you might opt for fewer columns to eliminate the need for horizontal scrolling, ensuring your WordPress menu is mobile-friendly.
You can conceal entire columns or rows by using the ‘Hidden on mobile’ icon, which resembles a small mobile phone.
Easily toggle the icon on and off to display or hide different content for desktop and mobile views.
Enhance Your Menu with Mega Menu Widgets
Once you’ve set up the mega menu, you can begin adding widgets. This feature allows you to display additional content in the submenu, such as recent comments, videos, galleries, and more.
For instance, you could use images to promote a sale in your online store or showcase your newest products.
To add a widget, simply click on the ‘Select a widget…’ dropdown menu.
Now, you can select a widget from the available list.
WordPress will automatically place the widget in a column or row, but you can reposition it by dragging and dropping.
To customize the widget, click on its small wrench icon.
This will open a popup where you can input content for the widget and adjust its settings.
You will see various options based on the type of widget you are creating. For example, if you add an audio player widget to the mega menu, you will have settings to upload an audio track.
All widgets include a ‘Title’ field where you can enter text that will be displayed above the widget.
Once you’re done, click ‘Save’ to apply your changes and then select ‘Close.’ To add additional widgets to the mega menu, simply repeat the process outlined earlier.
Examine the Default Mega Menu Settings
Next, click on the ‘Settings’ tab.
Here, you can use checkboxes to control the visibility of various content in the submenu.
You can also choose to hide or display the submenu on mobile devices and desktops, and adjust the alignment so the submenu opens either to the left or right of the main menu item.
If you modify any of the default settings, be sure to click ‘Save Changes’ to keep your updates.
Incorporate Image Icons into Your WordPress Mega Menu
Image icons assist visitors in quickly grasping the purpose of a menu item without needing to read the navigation label. This is especially beneficial for extensive menus, allowing visitors to scan content rapidly.
Using icons can highlight the most significant content. For instance, you might add a cart icon to the ‘Checkout’ menu to encourage visitors to complete their purchase.
To add image icons to your navigation menu, click on the ‘Icon’ tab.
You can select any dash icon from the built-in library or upload your own image. Upgrading to Max Mega Menu Pro gives you access to additional icon fonts, including Genericons and FontAwesome.
Complete the Mega Menu Configuration on Your WordPress Site
Once you’ve adjusted all the settings, you can close the popup window to return to the main interface.Navigate to Appearance » Menus section.
You can repeat this process for each top-level parent menu item.
When you’re satisfied with the mega menu setup, click the Save Menu button to publish your changes.
Now, just visit the front end of your website to see the mega menu in action.
We hope this article has helped you learn how to add a mega menu to your WordPress site. You can also check out our step-by-step guide on adding a button to your WordPress header menu and our tutorial on creating a sticky floating navigation menu in WordPress.
If you enjoyed this article, please subscribe to our YouTube Channel for WordPress video tutorials. You can also follow us on Twitter and Facebook.


