
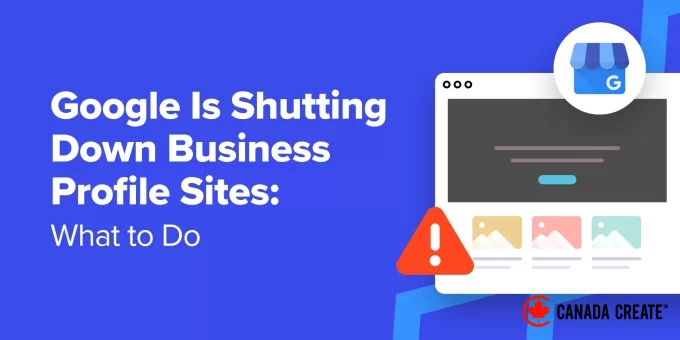
In 2024, Google officially discontinued millions of websites created through Google My Business, which were free small business websites available to users upon setting up a Google Business Profile.
As of March 2024, all of these websites have been deactivated, and visitors to those sites are now redirected to the corresponding Google Business Profiles. While this change surprised many small business owners, there are numerous strategies to ensure your business remains visible online.
Let’s explore how this transition impacts your business and the steps you can take to maintain your online traffic.
Here are the topics we will discuss in this article:
- Understanding Google Business Profile Sites
- The Importance of Replacing Your Google Business Profile Site
- Immediate Actions to Take After Google Business Profile Sites are Discontinued
- Step 1: Create a Website You Own and Manage
- Step 2: Implement Local SEO for Your Business Website
- Step 3: Update Your Google Business Profile with Your New Website
- Step 4: Develop Landing Pages for Your Google Ads (Optional)
- Step 5: Redirect Your Custom Domain to Your New Site
- Bonus: Optimize Your New WordPress Site for Success
Understanding Google Business Profile Sites
A Google Business Profile allows businesses to show up in local search results on Google, providing essential information such as directions, operating hours, contact numbers, and a link to their website.
Research shows that 76% of individuals searching for nearby businesses on their smartphones will visit a related establishment within a day.
Local searches have surged by nearly 500% in recent years. According to Google, 76% of people searching for something nearby on their smartphones will visit a related business within a day. (Source: ThinkwithGoogle)
This highlights the importance of businesses being visible in local search results, and the most effective way to achieve this is by setting up a Google Business Profile.
When setting up a Google Business Profile, there is an option to include your website link.
For businesses that do not have a website, Google previously offered a free website creation service that utilized the information from their Google Business Profile. These were referred to as Google Business Profile sites.
Many small businesses benefited from this service, using these complimentary websites to increase traffic, generate leads, and encourage in-store visits from local searches.
Reasons to Transition Away from Your Google Business Profile Site
Google Business Profile sites were officially discontinued in March 2024. These free, single-page websites were available to users upon creating a Google Business Profile.
With the closure of this service, any visitor attempting to access your former business site URL will now be redirected to your Google Business Profile.
While this redirection is preferable to encountering an error, it means you have lost your dedicated website, which allowed you to control the customer experience and provide detailed information.
This change significantly impacts the conversions generated from local searches. Without an alternative website to replace the Business Profile site, potential customers may have difficulty finding comprehensive information about your business, potentially leading them to choose a competitor.
Steps to Take Following the Shutdown of Google Business Profile Sites
If you were one of the millions of businesses that created a Google Business Profile site, here are the necessary steps to take now that the service has been discontinued.
Step 1: Create a Website You Own and Control
Google has a history of discontinuing services and products. Remember Orkut, Google+, and more recently, Google Domains? There is an extensive list of products and services that have been retired, which you can find in the Google Graveyard.
This is why it’s essential to create a website for your business that you fully own and manage.
You can showcase your website in local search results, and with complete control, you can attract even more visitors to your business.
The most effective way to achieve this is by using WordPress. As the leading website builder globally, it powers over 43% of all websites and serves as a great alternative to Google Business Profile Sites.
Important Note:When we refer to WordPress, we mean WordPress.org, also known as self-hosted WordPress. This should not be confused with WordPress.com, which is a hosting service. For clarity, please refer to our guide on the differences between WordPress.org and WordPress.com.
Why Choose WordPress for Your Business Website?
WordPress is the most robust yet user-friendly website builder available. Here are some compelling reasons to select WordPress:
- It is free, open-source, and has been a reliable option for over 20 years.
- Websites built with WordPress are completely under your control and ownership.
- It offers limitless possibilities. You can create anything from a simple one-page site to a comprehensive online store.
- It features thousands of design templates, tools, and plugins to choose from.
- Additionally, this approach is highly optimized for SEO, allowing you to attract even more visitors from Google search results.
For over 16 years, we have relied on WordPress for all our websites. During this time, we have successfully built extensive sites that generate millions of pageviews.
We frequently conduct tests and comparisons between WordPress and other leading website builders. Our findings consistently show that WordPress outperforms the competition in flexibility, user-friendliness, extensibility, performance, and security.
Still need more reasons? Check out our detailed guide on the benefits of using WordPress.
Getting Started with WordPress
WordPress is free to download and use, but you will need to acquire a domain name and web hosting to operate your site.
These tasks used to be quite technical for the average user, but fortunately, that is no longer the case.
All you need to do is register for a web hosting account and buy a domain name, and they will provide a 1-click WordPress installer for your convenience.
Web hosting generally costs around $7.99 per month when billed annually, while domain names start at approximately $16.99 per year.
This represents a notable investment, especially considering that creating your Google Business Profile site incurred no costs.
Fortunately, Bluehost is currently offering an attractive hosting discount that includes a free domain name, allowing you to start your website for just $2.99 per month.
Bluehost is among the largest hosting providers globally and is officially recommended for WordPress hosting.
Visit the Bluehost website and click on the yellow ‘Get Started Now’ button to begin.
You will then be prompted to select a hosting plan.
The ‘Starter’ and ‘Business’ plans are ideal for small business websites.
Click ‘Choose Plan’ to select your preferred option and proceed.
Next, you will need to select a domain name. If you already have one, you can use that instead.
A domain name serves as your website’s identity and the address users will enter in their browsers to access it (e.g., CanadaCreate.com or google.com).
💡Tip:Utilize our free business name generator tool to quickly come up with numerous ideas for your domain name.
After selecting your domain, you will be directed to the Cart page, where you can choose the duration of your Bluehost plan.
We suggest opting for the ‘3 Years’ plan, as it provides the most significant savings.
Next, click on ‘Continue to Checkout.’
You will then need to provide your contact information and payment details to finalize your purchase.
Bluehost will set up your hosting account and send you an email containing your login credentials.
After logging into your Bluehost hosting account, WordPress will be automatically installed for you.
Simply click the ‘Edit Site’ button to access WordPress and begin building your website.
Bluehost will guide you through the initial setup process, and you can follow the on-screen prompts to create your website.
For further information, please refer to our comprehensive WordPress installation tutorial.
Step 2: Optimize Local SEO for Your Business Website
Local SEO encompasses strategies aimed at enhancing your business website’s visibility in local search results.
It may sound complex, but it’s quite straightforward. Let us clarify.
Essentially, you need to incorporate your business information into your website using Schema.org markup.
This markup is formatted in a specific way and added to your website’s code, allowing search engines like Google to find and utilize this information. This helps search engines display your business in search results for users looking for services like yours.
Fortunately, you don’t have to write markup code yourself. There are fantastic tools available that can help you add this information to your website and enhance its local SEO.
We recommend using All in One SEO for WordPress. It’s the top SEO plugin for WordPress, making it easy to optimize your site for local search.
At Canada Create™, we use it to boost our site rankings and have experienced outstanding results. To find out more, check out our AIOSEO review.
Important Note:You will need at least the Plus plan of the plugin to access the Local SEO features.
First, install and activate the All in One SEO Plugin. For detailed instructions, refer to our tutorial on installing a WordPress plugin.
Once activated, the plugin will present a setup wizard. Just follow the on-screen instructions to complete the setup process.
After completing the setup, navigate to the All in One SEO » Local SEO section in your WordPress dashboard.
You will need to click the button to ‘Activate Local SEO’.
All in One SEO will then download and activate the Local SEO add-on.
After this, you will be taken to the Locations tab.
If your business operates in multiple locations, you can switch the ‘Multiple Location’ toggle to ‘Yes’.
For detailed instructions, check out our tutorial on adding multiple location schema in WordPress.
Scroll down to the Business Info section.
Here, you will need to provide essential details about your business, including its name, logo, type of business, full address, phone number, and more.
Next, navigate to the ‘Opening Hours’ tab to input your business hours.
Make sure the ‘Show Opening Hours’ toggle is set to ‘Yes’ if you want your business hours displayed on your website.
Scroll down a bit further and enter your business hours.
After that, switch to the ‘Google Maps’ tab.
To show a map on your site, you will need a Google Maps API key. Think of the API key as a password that allows your website to communicate with Google Maps.
The process may seem a bit technical, but don’t worry.
Simply click the ‘Learn More’ link, and the instructions will guide you through obtaining your key step by step.
Click the ‘Learn More’ link for guidance on how to acquire the API key.
Finally, click the ‘Save Changes’ button to apply your settings.
For more information, refer to our comprehensive WordPress local SEO guide.
Showcasing Your Business Information on Your Website
All in One SEO will seamlessly integrate schema markup into your website’s code, enhancing its visibility to search engines.
You can showcase your business information directly on your website, ensuring it is easily accessible to visitors and potential customers.
Simply navigate to the page where you want to display the information, then click the [+] add block button on the editing screen.
Search for AIOSEO Local and add the local SEO blocks to your page.
Utilize the WordPress block editor to customize the appearance and arrangement of these elements.
Remember to save your changes and preview the updated page.
For further information, refer to our comprehensive guide on using the WordPress block editor.
Step 3: Add Your New Website to Your Google Business Profile
After creating your new website, you can incorporate it into your Google Business Profile.
To do this, visit the Google Business Profile website or search for your business name on Google.
This will display a popup containing your business details.
Scroll down to the Website section and update your old website address with the new one.
Visitors who click the ‘Website’ link in your Google Business Profile will now be redirected to your new WordPress site instead of the previous Business Profile site.
Step 4: Optionally Create Landing Pages for Your Google Ads
Previously, Google provided free advertising credits to businesses that linked their websites to their Google Business Profile.
If your ads were directing users to your old Google Business Profile site, consider redirecting them to your new WordPress website.
With a proper website builder, you can now design appealing landing pages for your Google Ads campaigns.
The simplest way to create professional landing pages is by using SeedProd, a user-friendly drag-and-drop page builder for WordPress.
Many of our brands have built their entire websites with SeedProd, and their audiences have responded positively. For more information, check out our SeedProd review.
Note:There is a free version of SeedProd available, but we recommend upgrading to the paid version to access additional features.
SeedProd offers over 300 customizable page templates to kickstart your design process. You can easily create your landing page using its intuitive drag-and-drop interface. Additionally, it features a robust AI website builder that can generate a complete theme for your site in just seconds.
For further information, check out our comprehensive guide on creating a Google ad landing page using WordPress.
Step 5: Redirect Your Custom Domain
By default, Google hosted Google Business Profile sites on URLs formatted like:
https://example.business.site
Some businesses opted to use their own custom domains, redirecting them to their Google Business Profile sites.
If you previously used a custom domain with your old Google site, you may encounter one of two common scenarios.
Firstly, you might have simply forwarded your domain, meaning visitors to yourdomain.com were redirected to your old example.business.site address.
In this case, log in to your domain registrar and update the forwarding address to point to your new WordPress site’s URL.
The second, and more prevalent, scenario involves making that custom domain the primary address for your new WordPress site.
To achieve this, you need to update the domain’s nameservers to point to your new web hosting provider. We will guide you through this process below.
Log in to your domain management area and navigate to the ‘DNS & Nameservers’ section. The settings displayed in our screenshots are from Network Solutions, but the layout is similar across most domain providers.
You will see nameservers associated with your domain registrar. It is necessary to remove these entries.
After deleting the existing entries, you must add the nameservers provided by your new hosting provider.
For example, if your WordPress site is hosted on Bluehost, your nameserver information will appear as follows:
ns1.bluehost.com
ns2.bluehost.com
Don’t forget to click the ‘Save’ button to apply your changes.
For further information, refer to our guide on changing domain nameservers and pointing to a new host.
Once you update the nameserver details, it may take some time (from a few hours to up to two days) for the changes to propagate throughout the internet.
Bonus: Optimize Your New WordPress Site
With your WordPress website set up and linked to your Google Business profile, you can begin customizing your site.
Here are some helpful tips to get you started.
1. Select a WordPress Theme
WordPress offers a wide selection of thousands of themes (website templates), many of which are free. You can easily install one to quickly enhance your website’s design.
Check out our guide on selecting the ideal theme for your website for more insights.
With so many options available, it can be overwhelming. To simplify your choice, explore our curated collections of WordPress themes, expertly selected by our team:
- Top-rated WordPress themes
- Best free WordPress themes for businesses
- Best corporate WordPress themes for professional use
After selecting a theme, follow our detailed tutorial on how to install a WordPress theme.
2. Create Essential WordPress Pages
WordPress includes two primary content types: posts and pages. Posts are typically used for blogging, while pages help establish your website’s structure and layout.
You can begin adding pages by navigating to Pages » Add New Page in the WordPress admin dashboard.
For example, if you operate a small plumbing business, you might want to create an About page, a Services page, and a Contact page.
For further details, refer to our list of essential pages to include on your WordPress website.
We also suggest publishing blog posts to increase traffic to your business website. Check out our guide on starting a WordPress blog for detailed instructions.
3. Install Essential Plugins
Plugins function like applications for your WordPress site, enabling you to enhance its capabilities and introduce new features.
For a small business website, consider these essential plugins:
- WPForms– This plugin is essential for creating forms that users can fill out on your website, including contact forms, booking forms, and appointment requests. Additionally, WPForms allows you to accept online payments.
- All in One SEO– As previously mentioned, this SEO plugin is crucial for optimizing your website and attracting organic traffic from search engines.
- MonsterInsights– This plugin provides insights into your website traffic, showing how many visitors you have, their origins, and their activities on your site. It integrates WordPress with Google Analytics, offering valuable data to help you make strategic decisions for your business growth.
- DuplicatorThis is a robust WordPress backup plugin that enables you to create automatic backups and securely store them in the cloud. Most importantly, it simplifies the process of restoring your website from these backups.
- For additional plugin suggestions, check out our comprehensive list of essential WordPress plugins tailored for business websites.
We hope this article has provided you with valuable insights on how to safeguard your business now that Google Business Profile sites are no longer available. You may also want to explore our guide on growing your business online or discover the top WordPress eCommerce plugins to begin selling on your website.
If you enjoyed this article, please subscribe to our YouTube Channel for informative WordPress video tutorials. You can also connect with us on Twitter and Facebook.


