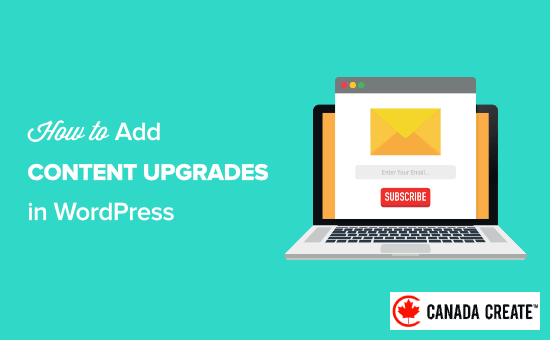
If you’re seeking effective strategies to expand your email list, offering content upgrades can be incredibly effective.
A content upgrade is an additional resource that your readers can receive by subscribing to your email list. This could include items like an eBook, a checklist, or a worksheet.
At CanadaCreate and our affiliated brands, we provide various content upgrades that users can download for free in exchange for their email addresses. This demonstrates how powerful this approach can be.
In this article, we will guide you through the process of adding content upgrades in WordPress to enhance your email list.
What is a Content Upgrade?
A content upgrade involves providing your readers with exclusive bonus content in exchange for signing up for your email list. This premium content offered as an incentive is often referred to as a content bribe.
What are some ideas for content upgrades?
- eBooks
- Checklists
- Excel worksheets
- Downloadable PDF version of your blog post
- Exclusive video interview related to the article
- Bonus how-to guides for the article
Essentially, content upgrades should be highly relevant to the topic of the post they accompany.
For instance, a blog post about baking banana bread should offer a content upgrade such as downloadable recipes or exclusive video tutorials.
Tip: To effortlessly create content upgrades, consider using Beacon. Beacon is a leading software for generating lead magnets, featuring a user-friendly drag-and-drop builder that allows you to design professional eBooks, checklists, workbooks, and more.
Understanding human psychology is key to maximizing the impact of content upgrades. The Zeigarnik Effect suggests that individuals are more likely to complete a task if they have initiated it themselves.
In the case of content upgrades, this principle applies as users take the first step by clicking on a link or image, making them more inclined to finish the signup process.
It may sound too good to be true, right?
Check out these statistics from Syed’s website that compare a standard popup with a MonsterLinks™ content upgrade.
The standard popup was displayed site-wide and reached nearly 26,000 users, resulting in 744 signups.
In contrast, the targeted MonsterLink™ was featured on a single page, viewed by 270 visitors, and led to 74 signups. This showcases an impressive conversion rate from just one page without any split testing.
Now that you understand what a content upgrade is, let’s explore how to implement it on your website to attract more email subscribers.
How can you add content upgrades in WordPress?
The simplest way to incorporate content upgrades into your WordPress site is by using OptinMonster, one of the top lead generation plugins available, trusted by over 1.2 million websites.
It enables you to create stunning opt-in forms such as lightbox popups, scroll-triggered slide-ins, floating bars, sidebar opt-ins, and forms placed below your content.
OptinMonster is incredibly fast and seamlessly integrates with WordPress sites. The MonsterLinks™ feature makes adding content upgrades effortless.
Important Note:Our founder, Syed, developed OptinMonster for use on CanadaCreate, resulting in a remarkable 600% increase in our email subscribers.
If you haven’t started building your email list yet, check out our guide on the importance of starting your email list immediately.
Step 1: Setting Up OptinMonster
Begin by installing and activating the OptinMonster plugin on your WordPress site. For assistance, refer to our guide on how to install a WordPress plugin.
This plugin serves as a bridge between your WordPress site and OptinMonster.
After activation, click on the OptinMonster menu item located in your WordPress admin bar.
Next, connect your site to OptinMonster by selecting ‘Launch the Setup Wizard’.
You will be prompted to either connect to an existing account or create a free account.
After completing the setup wizard, your WordPress site will be successfully linked to OptinMonster.
You can go to OptinMonster » Settings to verify your connection.
Step 2: Create a New Popup Opt-in
Once connected, proceed to OptinMonster » Campaigns.
Click the ‘Add New’ button to start a new campaign.
OptinMonster will prompt you to choose a template or select a pre-designed campaign inspired by well-known brands.
For this guide, we will select the ‘Templates’ option.
Next, choose the Campaign Type, which in this instance is Popup.
You can then select a popup template.
Hover over your preferred template and click ‘Use Template’.
This will serve as the basis for your popup design.
After that, enter a name for your campaign in the ‘Create Campaign’ popup and click ‘Start Building’.
The campaign name is for your reference and will not be displayed in the design.
This will launch the OptinMonster app, allowing you to fully customize your popup’s appearance.
You can customize nearly every aspect of your design, including background colors, font styles, text, subscription buttons, and more.
Once you’re satisfied with your design, proceed to the ‘Display Rules’ tab.
This section allows you to configure the display options for your content upgrade.
First, set the conditions for when the popup should appear. Simply select the ‘MonsterLink™ (On Click)’ option to establish this rule.
Next, click the ‘Done? Go to Actions’ button.
You can keep the default settings on the following screen.
However, you have the option to add an animation or sound effect to enhance the popup.
Scroll down to find the Cookie Settings for your campaign.
Here, you can specify when to re-show the popup to users who have not yet converted.
Once you’re done, click the ‘Done? Go to Summary’ button.
On the ‘Summary’ page, click the ‘Copy MonsterLink™ Code’ button.
Open a plain text editor like Notepad and paste the copied code. You’ll need this code later.
Then, go to the ‘Publish’ tab and change the ‘Publish Status’ from Draft to Publish. After that, click ‘Save’ and exit the screen.
Step 3: Activate MonsterLink™ Optin on Your Website
After leaving the form builder, you’ll arrive at the ‘WordPress Output Settings’ screen.
In this section, you can specify the pages and posts where you want MonsterLink™ to be active. You can keep the default settings, but ensure that the status is set to Published in the ‘Visibility & Status’ section.
If you make any adjustments, be sure to click ‘Save Changes’.
Step 4: Insert Your Monster Link into a WordPress Post or Page
Integrating your MonsterLink™ into WordPress is straightforward.
Simply edit the post or page where you wish to feature MonsterLink.
On the post editing screen, switch to the text editor and paste the MonsterLink™ code you copied earlier.
It will appear as follows:
This code will display a simple link for users, but it may not be very eye-catching.
So how can you make it more noticeable? You can add a box around it like this:
You can also create a shortcode to simplify the box styling for future use.
Just insert this code into your theme’s functions.php file, a site-specific plugin, or use a code snippets plugin like WPCode:
function wpb_make_yellowbox($atts, $content = null) { return '';
}
add_shortcode('yellowbox', 'wpb_make_yellowbox');
Now you can insert your content upgrade link into your WordPress posts using the shortcode like this:
[yellowbox] Exclusive Bonus:Download the Blog Post Checklist to review before publishing. [/yellowbox]
You can also display the link alongside an image, making it more eye-catching and appealing.
Here’s how to include an image with MonsterLink™ in WordPress:


Step 5: Delivering the Content Upgrade in WordPress
Next, let’s explore how to deliver the content upgrade that we promised to users.
Your content upgrade can take various forms, such as a PDF, video, audio, or any other type of content.
After users submit their email addresses, you can provide them with the promised content upgrade. There are several methods to accomplish this:
Display Download Link as a Success Message
Display a download link as a success message within your popup.
Modify your opt-in using the OptinMonster form builder and navigate to the ‘Success’ tab.
Next, customize your success message text and add a URL for your downloadable content upgrade.
Redirect to a Thank You or Download Page
You can also guide users to a thank you page that contains the download link. To do this, go to the ‘Success’ tab.
Now, let’s add a button labeled ‘Download Now’.
Then, click ‘Action’ and choose ‘Redirect to a URL’ from the dropdown menu.
Enter the URL in the ‘Redirect URL’ field.
Be sure to click ‘Save’ to apply any changes you’ve made so far.
Send as an Email
Most email marketing platforms provide autoresponder capabilities to send welcome emails to new subscribers. You can use this feature to send the download link to the user.
Refer to your email service provider’s documentation for guidance on how to set this up. OptinMonster integrates with many popular email marketing tools.
While content upgrades may not be as trendy as before, they remain a highly effective strategy for generating leads and expanding your email list.
To effectively grow your email list, consider implementing content upgrades. It typically takes between 30 minutes to 1.5 hours to create and integrate a content upgrade into your post, but the results are well worth the investment.
We hope this guide has assisted you in adding content upgrades in WordPress to enhance your email list. Additionally, check out our suggestions for accelerating your email list growth and learn how to set up a free trial subscription in WordPress.
If you enjoyed this article, please subscribe to our YouTube Channel for informative WordPress video tutorials. You can also connect with us on Twitter and Facebook.