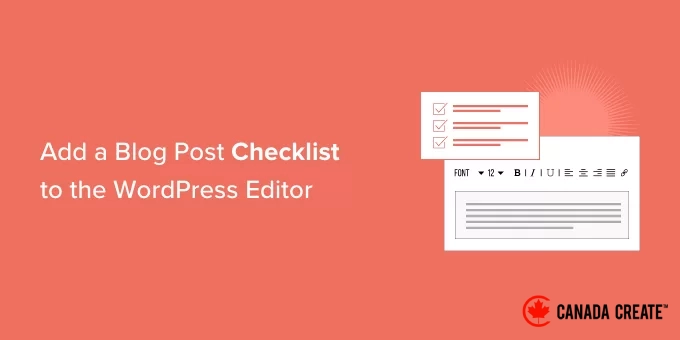
Creating a blog post checklist can help maintain a consistent writing style and ensure all essential details are addressed, especially when multiple bloggers contribute to your site. ✔
At Canada Create™, we utilize a blog post checklist to uphold consistency in our content and guarantee that each post adheres to our quality standards. 🌟
This tool has proven particularly beneficial as our team has expanded, ensuring that every writer adheres to the same process.
If you wish to implement a similar system, follow our comprehensive guide on adding a blog post checklist to the WordPress editor.
Benefits of Adding a Blog Post Checklist to the WordPress Editor?
A blog post checklist enables you to publish well-optimized, high-quality articles more efficiently.
It ensures that every author completes the necessary steps — including proofreading, formatting, and adding categories and SEO information — before publishing.
This approach keeps your content uniform and reduces errors, particularly beneficial for managing a multi-author blog.
Typically, editorial checklists emphasize content quality, tone, and structure. Since they are integrated within the WordPress editor, you can easily track what is finished and what requires further attention before your post is published.
Checklists are essential for optimizing your blogging process, saving you time, and ensuring high-quality content throughout your blog.
Now, let’s explore how to incorporate a blog post checklist into WordPress.
Adding a Blog Post Checklist in WordPressBlock Editor
The simplest way to implement a blog post checklist in the WordPress editor is by utilizing the PublishPress Checklists plugin.
This WordPress checklist plugin integrates a checklist feature into the right-hand menu of the page or post editor.
Important:For multi-author blogs, we recommend investing in the PublishPress suite to enhance your editorial workflow.
PublishPress provides a set of default tasks that can be included in your article writing checklist, along with the ability to create custom tasks for your WordPress blog.
Step 1: Install and Activate the PublishPress Checklists Plugin
Begin by installing and activating the PublishPress Checklists plugin.
For detailed instructions, please refer to our guide on installing a WordPress plugin.
Step 2: Enable Checklists for Blog Posts
After activation, navigate toChecklists » Settingsin the WordPress dashboard.
Select where you want your checklist to appear in WordPress. To integrate a blog checklist into the Gutenberg editor, make sure to check the ‘Posts’ option.
After making your selection, click the ‘Save Changes’ button.
Step 3: Create Your Checklist
Next, you can create your checklist by navigating to Checklists » Checklists.
In this section, you will find all the default tasks available for your blog post checklist. PublishPress can automatically recognize when certain tasks are completed and mark them as done for you.
All tasks are turned off by default and are organized into categories such as title, content, images, links, categories, tags, and custom.
Step 4: Select Required or Recommended Tasks
To include a task in your blog post checklist, simply open the ‘Disabled, Recommended or Required’ dropdown menu.
You can now select either ‘Required’ or ‘Recommended.’
Choosing ‘Required’ means authors must complete this task before they can publish their WordPress posts.
If a user attempts to click the ‘Publish’ button without completing all ‘Required’ tasks, WordPress will display a message prompting them to ‘Please complete the following tasks before publishing.’
If you select ‘Recommended,’ the editor will prompt authors to complete any outstanding ‘Recommended’ tasks before they can publish their posts.
Nevertheless, authors will still have the option to publish their posts without completing these tasks.
Step 5: Allow Specific User Roles to Bypass Tasks
After deciding between ‘Recommended’ and ‘Required,’ you can proceed to ‘Who can bypass the task?’
Here, you can designate certain user roles to publish a post without completing a task, even if it is marked as ‘Required.’ This provides greater flexibility in your workflow.
For instance, you might require all Contributors to ‘Add a featured image,’ but allow your Editors to bypass this requirement if they determine that a post does not need one.
To add a user role to your ‘bypass’ list, click on the ‘Who can bypass the task?’ box.
This will display a dropdown list of all the user roles available on your site.
You can easily click on a role to include those users in your ‘bypass’ list.
Step 6: Establish Minimum or Maximum Values for Tasks
For certain tasks, you may need to establish both maximum and minimum values. For instance, you can specify a minimum number of categories that authors must include in a post. To find out more, please refer to our guide on adding categories and subcategories in WordPress.
If the task includes a ‘Min’ and ‘Max’ section, you can enter the desired numbers.
To add additional tasks to your checklist, simply follow the same steps outlined above.
Step 7: Incorporate Custom Tasks
You can also include custom tasks in your blog post checklist.
However, keep in mind that PublishPress cannot verify whether the author has completed these custom tasks, so the author will need to check this manually.
For further details on custom tasks you might want to include, please check our guide on optimizing your blog posts for SEO like a professional.
To create a custom task, scroll down to the bottom of your screen and click on ‘Add custom task.’
This action will create a new task that you can customize.
To begin, enter the name of the task in the ‘Enter name of custom task’ field. This text will appear in your publishing checklist, so ensure it clearly communicates what authors need to do.
You can designate this task as either ‘Recommended’ or ‘Required’ and allow certain users the option to skip this task by following the outlined process.
Step 8: Select Who Can Mark Custom Tasks as Complete and Save Your Changes
For custom tasks, you can define which users are permitted to mark this task as complete. For instance, you might create a specific ‘Editing’ checklist for users assigned the Editor role.
To do this, click on the ‘Which roles can mark this task as complete’ option. This will open a dropdown menu where you can select any of your user roles.
After adding all the tasks to your checklist, simply click the ‘Save Changes’ button. You can then go to the WordPress editor to view your blog post checklist in action.
What Types of Tasks Can You Include in a Pre-Publish Blog Post Checklist?
Each WordPress site has its own unique workflow. A reliable checklist plugin supports both automated checks and manual reminders. Here are some examples to help you get started.
Examples of Automated Checklist Tasks
These tasks can be automatically verified by a plugin like PublishPress, which checks your content for specific elements:
- Include a featured image.
- Add alt text to every image.
- Ensure a minimum number of internal links are present.
- Add a meta title and meta description to enhance SEO.
Examples of Custom Checklist Tasks
These tasks require human input. You can include them as custom items that authors must manually check off before publishing.
- Utilize a grammar checker and carefully proofread the article.
- Incorporate relevant call-to-action buttons.
- Ensure that the post’s formatting appears correctly on the live site.
- Include external links to authoritative websites, and label any sponsored links as nofollow.
Frequently Asked Questions About Blog Post Checklists
Here are some common questions our readers ask about implementing a blog post checklist in WordPress:
Can I assign different checklists to various user roles?
Yes, plugins like PublishPress Checklists allow you to customize task requirements based on user roles. For instance, you can designate certain tasks as ‘Required’ for Contributors while marking them as ‘Recommended’ for Editors, providing experienced users with greater flexibility.
Are there other free checklist plugins available for WordPress?
While PublishPress Checklists is a widely used option, there are other plugins that offer similar features. Some alternatives include Pre-Publish Checklist and Ozone Pre-Publish Post Checklist.
It’s essential to review the different feature sets available to determine which one aligns best with your unique workflow requirements.
Does using a pre-publish checklist slow down the performance of the WordPress editor?
A well-designed checklist plugin should have a negligible effect on your editor’s performance. These plugins are generally lightweight and perform checks in the background, ensuring that your writing process remains smooth and uninterrupted.
Expert Strategies and Techniques to Personalize Your WordPress Editor
Incorporating a blog post checklist is just one effective method to enhance your experience with the WordPress editor.
Here are additional expert strategies and techniques to help you tailor and optimize your editing workflow:
- How to Enable Collaboration Features in the WordPress Block Editor (Similar to Google Docs)
- How to Change the ‘Add Title’ Placeholder Text in WordPress
- How to Restrict Block Visibility for Certain Users in the WordPress Editor
- How to Change the Background Color of the WordPress Block Editor
- How to Turn Off the Fullscreen Editor in WordPress
- How to Utilize the Distraction-Free Fullscreen Editor in WordPress
We trust this article has shown you how to incorporate a blog checklist into the WordPress editor. Additionally, explore our recommendations for the top Gutenberg block plugins for WordPress, and check out our guide on reversing changes in WordPress using post revisions.
If you enjoyed this article, consider subscribing to our YouTube Channel for insightful WordPress video tutorials. Connect with us on Twitter and Facebook for more updates.