Do you want to improve your online store’s conversion rate? Many store owners share this goal. When we began selling online, a large number of potential customers left the checkout page without buying.
The main cause was a lack of trust in the website’s security for handling their financial details.
We then learned the value of trust badges. Placing them on our checkout pages led to a quick increase in sales. These effective icons reassure buyers that their transactions are safe and valid.
Adding trust badges to your WordPress checkout pages is a straightforward process. This guide provides step-by-step instructions for adding trust seals to WordPress, regardless of whether you’re selling physical goods or digital downloads.
This guide will cover the best badges and their ideal placement for maximum effect. By the end, you’ll know exactly what’s needed to build your store’s trustworthiness and boost your sales numbers.
Before we begin, here’s a list of quick links to help you jump to the sections that interest you most:
- What Are Trust Badges?
- The Benefits of Using Trust Seals in Your Online Store
- Types of Trust Badges That You Can Use
- Method 1: How to Add Custom Trust Badges to Checkout Pages in WooCommerce (Custom Code)
- Method 2: How to Add Trust Badges to WooCommerce Checkout Pages (Plugin Method)
- Method 3: How to Add Trust Badges to Checkout Pages for Digital Products
- Bonus Tips for Using Social Proof in Your Online Store
- Related Guides for Boosting Sales in WordPress
What Are Trust Badges?
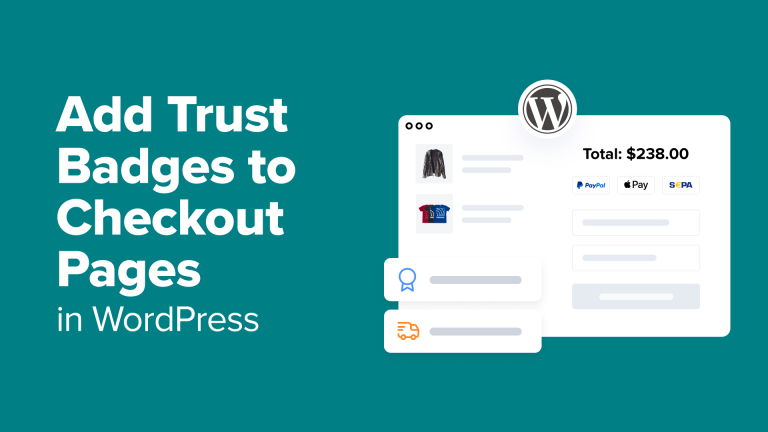
Trust badges are visual cues, such as icons, that show visitors your site is secure and trustworthy. They are often seen on checkout, product, or footer areas.
These badges often show messages like ‘Secure Checkout,’ or ‘Money-Back Guarantee.’ Such symbols reassure customers, boosting their confidence to purchase from your store.
Trust badges are very important for online stores since shoppers share private data, like credit card numbers.
A trust badge showing SSL or a known payment processor can reduce worry and cart abandonment.
Even small design additions, such as a PayPal or Stripe logo, can increase customer confidence.
WordPress makes it easy to add trust badges using plugins, widgets, or even custom code.
Whether you use WooCommerce or Easy Digital Downloads, trust badges are a simple addition that can increase sales.
The Benefits of Using Trust Seals in Your Online Store
Adding trust badges to your WordPress website does more than enhance its appearance; it gives customers more confidence to proceed with their purchase.
When visitors have faith in your site, they tend to stay longer, complete transactions, and potentially return for future purchases.
Here are some key benefits of using trust badges on your site:
- ✔️Reduce Cart Abandonment:A major reason for shopping cart abandonment is customer anxiety about potential fraud or security breaches. Displaying trust badges, such as ‘Secure Checkout’ or ‘SSL Secured’, can reassure visitors that their data is protected.
- ✔️Boost ConversionsTrust badges have a direct effect on your sales figures. Customers who observe verification or guarantees associated with your store often exhibit greater confidence in making purchases. Research indicates that integrating trust badges on checkout pages can elevate conversion rates by as much as 42%.
- ✔️Build CredibilityBadges, including ‘Verified Seller’ or those from recognized payment gateways like PayPal or Stripe, enhance the perceived credibility of your website.
- ✔️Encourage Repeat PurchasesCustomers are more inclined to return following a favorable, trustworthy experience. Badges like ‘Money-Back Guarantee’ or ‘100% Satisfaction Guaranteed’ communicate your commitment to product quality, fostering lasting loyalty.
- ✔️Improve Perceived ValueTrust badges can also positively influence customer perceptions of your offerings. A badge such as ‘Free Shipping’ can deliver a psychological advantage, as users value the prospect of enhanced value without incurring extra expenses.
Types of Trust Badges That You Can Use
Remember that trust badges vary in their effectiveness and address distinct customer anxieties. The particular type of badge you implement, ranging from security assurances to shipping guarantees, greatly impacts how customers view your store.
Here are some of the most common types of trust badges used on WordPress sites.
Secure Checkout Badges
A major worry for online shoppers involves the security of their personal and financial data; secure checkout badges address this concern.
Often featuring a padlock or the words ‘SSL Secured,’ these badges signal that your site encrypts sensitive data via SSL.
If you have a valid SSL certificate, WordPress can automatically show secure checkout badges.
Many hosting providers even include SSL for free.
Displaying a visible badge on your checkout alongside SSL encryption assures shoppers that their payment information is shielded from breaches.
Payment Processor Badges
Payment processor badges provide further reassurance. The logos of trusted payment platforms, like PayPal or Stripe, show that transactions are handled via reputable, secure systems.
For example, the MonsterInsights checkout page shows a ‘PayPal Verified’ logo, instantly assuring customers of secure payments through a trusted platform.
This small detail can greatly influence hesitant shoppers when deciding to finalize their purchase.
Credit Card Logo Badges
Consider displaying credit card logos on your checkout page. Logos for Visa, MasterCard, American Express, and others, inform customers they can pay securely with their preferred card.
Displaying familiar payment brand logos gives customers assurance when entering payment details. It’s an easy method to convey that your site facilitates secure transactions.
Position these logos prominently, for example, next to payment choices or the checkout prompt.
Customer Satisfaction Badges
Customer satisfaction badges build trust and encourage purchases. They communicate that your business prioritizes customer experience and reliable service.
A Money-Back Guarantee badge, for example, reassures shoppers they can get a refund if dissatisfied.
Likewise, a Free Shipping Badge can quickly enhance your store’s appeal and improve conversions by emphasizing a highly sought-after benefit.
If you sell on platforms like Etsy, add a Verified Seller Badge to showcase your store’s credibility.
Client and Partner Logo Badges
Presenting client logos on your site is an effective method for fostering trust and credibility.
Seeing recognizable brands associated with your company serves as validation for potential customers.
For example, OptinMonster displays logos of well-known brands that utilize our offerings.
Third-Party Endorsement Badges
Trust badges from third parties also boost credibility. Such badges indicate recognition or approval from an outside entity.
These badges independently vouch for your products or services, assuring customers about their purchases.
For instance, seals from trusted organizations, like the Better Business Bureau (BBB) or security certification seals (like Norton or McAfee), can go a long way in reassuring customers that your site is safe.
Show badges for industry awards or top publications your business has won or been featured in. This will prove that experts and influencers recognize your business’s quality and success.
Method 1: How to Add Custom Trust Badges to Checkout Pages in WooCommerce (Custom Code)
This method is for those who have designed their WooCommerce checkout page and now want to add trust badges. It’s also a free alternative to a WooCommerce plugin like FunnelKit (Method 2).
Since we’ll be working with custom code, which carries risks, we’ll use WPCode.
WPCode is the best WordPress code snippets plugin available. Testing confirms it’s the easiest and safest way to add custom code. See our WPCode review for more.
Note: Keep in mind that you will also need to add your own trust seal images to the WordPress media library. For details, see our guide on how to properly add images in WordPress.
Begin by installing and activating the WPCode plugin. Refer to our guide on WordPress plugin installation for detailed instructions.
Important Note🚨:A free version of the plugin is available for use with this guide. Upgrading to the pro version unlocks advanced features like smart conditional logic, block snippets, and a cloud library of code snippets.
Once the plugin is active, navigate to theCode Snippets » + Add Snippetpage within your WordPress admin area.
Here, click the ‘Use Snippet’ button under the ‘Add Your Custom Code (New Snippet)’ option.
You’ll be taken to a new page; specify a name for your code snippet. This name is for internal use and won’t be visible to users.
After that, from the popup menu, set ‘Code Type’ to ‘HTML Snippet’.
Go ahead and add the following custom code into the ‘Code Preview’ box:

After that, be sure to replace the placeholder image URL with the URL of your trust badge image to display it correctly on the checkout page.
Remember to upload the trust badge image to your WooCommerce store and copy its URL from the WordPress media library. Consult our tutorial on retrieving image URLs in WordPress if needed.
You have the option to include multiple trust badge images.
Next, navigate to the ‘Insertion’ area and select the ‘Shortcode’ setting.
Then, toggle the ‘Inactive’ switch to ‘Active’ and click the ‘Save Snippet’ button.
After doing this, WPCode creates a shortcode; you’ll put that on your WooCommerce checkout page.
Simply click the ‘Copy’ button and store the shortcode somewhere safe.
Now, in the WordPress block editor, access your store’s checkout page.
Related Post🔍: If you are just getting started with creating a store, then see our WooCommerce made simple guide for in-depth instructions.
Within the checkout block, decide where to put the trust badge, making sure customers can easily see it.
While the ‘Shortcode’ block isn’t available in this section, the trust badge shortcode will still work correctly when placed inside a ‘Paragraph’ block.
Finally, click the ‘Update’ or ‘Publish’ button to store your changes.
Now, visit your WooCommerce store to see the trust badges in action.
Method 2: How to Add Trust Badges to WooCommerce Checkout Pages (Plugin Method)
If you want to add trust badges to your WooCommerce checkout page without using custom code, then FunnelKit Funnel Builder is a great option.
It provides professionally designed checkout templates that have trust badges already, which assists you in making a checkout process that converts well with minimal work.
Remember that this method involves making a totally custom WooCommerce checkout page. If you only want to put trust badges on the current checkout page, use Method 1.
After extensive testing, we find FunnelKit an effective tool to enhance your WooCommerce store. Consult our comprehensive FunnelKit review for more information.
Begin by installing and activating the FunnelKit Funnel Builder plugin. Refer to our guide on WordPress plugin installation for detailed instructions.
Note🚨:The majority of checkout page templates are restricted in the free FunnelKit plan. Therefore, we suggest utilizing FunnelKit Pro.
After plugin activation, navigate to the FunnelKit » Store Checkout page and click the ‘Create Store Checkout’ button.
You can now choose from any of FunnelKit’s professionally designed checkout page templates.
To take a closer look at the trust badges for each template, simply click the ‘Preview’ button.
We are utilizing the Hific template, which includes various security-related trust badges.
Once you’ve selected a template, click the ‘Import This Funnel’ button.
A prompt will then appear on your screen.
Proceed by selecting the ‘Activate’ button. Next, enter a name for your online store’s checkout page.
You can now customize the checkout page to meet your needs.
For detailed guidance, see our tutorial on customizing WooCommerce checkout pages.
When finished, return to theStore Checkout page and click on the ‘Draft’ button.
Then, choose the ‘Publish’ option from the dropdown menu.
Now, visit your WooCommerce store to see the custom checkout page.
The trust badges will then appear at the bottom of the page.
Refer to our guide on crafting a high-conversion sales funnel in WordPress for in-depth insights on leveraging FunnelKit effectively.
Method 3: How to Add Trust Badges to Checkout Pages for Digital Products
Adding trust badges to your checkout pages is straightforward if you’re using Easy Digital Downloads (EDD) to sell digital products. Ensure that you have a working online store set up to sell digital downloads on your WordPress site.
The WPCode plugin is also necessary because it offers built-in EDD locations, simplifying the process of adding trust badges to your store.
Note🚨: Keep in mind the EDD specific locations are only available in the pro version of WPCode. If you use the free plan, then you can use the shortcode method instead.
Important: Also, remember to upload your chosen trust seal images to your WordPress media library. For instructions, consult our guide on how to correctly add images in WordPress.
Begin by installing and activating the WPCode plugin. Refer to our guide on how to install a WordPress plugin for detailed instructions.
Once the plugin is activated, go to theCode Snippets » + Add Snippet page and choose the ‘Add Your Custom Code (New Snippet)’ option.
After that, set the code type to ‘HTML Snippet’.
Next, paste this custom code into the ‘Code Preview’ area:
Be certain to include the URL for your trust badge graphic, which you can retrieve from your media library. Consult our tutorial on locating image URLs in WordPress if needed.
Navigate to the ‘Insertion’ area and select the ‘Auto Insert’ setting.
Next, access the ‘Location’ settings, then choose the ‘eCommerce’ tab.
Next, scroll down to the ‘Easy Digital Downloads’ section and select the ‘After the Checkout Cart’ option. Now, your trust badges will automatically be added to your EDD checkout page.
If you’re using the free version of WPCode, then you’ll need to copy the WPCode shortcode and paste it into your checkout page. For details, see our guide on how to add shortcodes in WordPress.
Go ahead and toggle the ‘Inactive’ switch to ‘Active’ from the top.
Save your settings by clicking the ‘Save Snippet’ button.
Now, visit the checkout page in your digital downloads store.
The trust badges should now be visible in the designated spot.
Extra Advice for Leveraging Social Proof within Your Online Store
Simply adding arbitrary icons to your checkout won’t guarantee higher sales. You must strategically use appropriate trust signals.
Consider these suggestions to maximize the effectiveness of social proof on your WordPress site:
- 🎨Ensure the badges complement your store’s overall design.Trust badges should be noticeable enough to attract attention, but they shouldn’t clash with your overall aesthetic. Steer clear of badges that are too large, pixelated, or don’t match, as these can make your checkout area appear disorganized.
- 🔥Test and See What Works BestThe effectiveness of trust badges can vary across different online stores. Experiment with various placements, designs, and messages to discover what appeals most to your target audience. A/B testing is useful for identifying the optimal combination.
- ⭐Show more social proof with customer reviewsPositive reviews from satisfied clients can greatly influence potential buyers to finalize their transactions. Consult our guide on displaying Google, Facebook, and Yelp reviews within WordPress for detailed instructions.
- 💰Show real-time purchase notificationsInforming website visitors that other customers are actively purchasing products can encourage them to make a purchase. To learn how, refer to our tutorial on implementing live sale notifications within WooCommerce.
Related Guides for Boosting Sales in WordPress
- How to Reduce Stripe Transaction Fees in WordPress (Expert Tips)
- How to Create a Services Section in WordPress (Easy Ways)
- Important Online Payment Statistics, Data, and Trends
- How to Make Money Using AI (Easy Ideas)
- Best Homemade Things to Make and Sell Online (Expert Pick)
- WordPress Payment Processing: The Ultimate Guide for Beginners
If you liked this article, then please subscribe to our YouTube Channel for WordPress video tutorials. You can also find us on Twitter and Facebook.