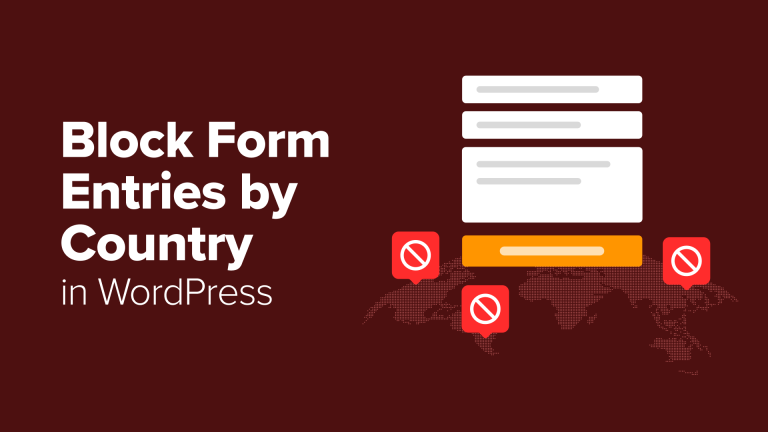
When a visitor completes a form on your website, it ideally represents an opportunity to engage with a potential customer. However, if your business operates within specific geographic boundaries, allowing worldwide form submissions often leads to sifting through irrelevant or spam entries from individuals you cannot assist.
Form filtering based on country offers a solution. By implementing this, you can eliminate unwanted submissions that consume your resources, enabling you to concentrate solely on prospective clients within your designated service area or target demographic.
I’ve used this approach to cut down on spam while making my forms more effective for lead generation.
This article will guide you through the process of configuring geographical restrictions for your WordPress form submissions. This will assist you in establishing a more targeted and secure lead generation process efficiently.
Why Block Form Entries From Certain Countries? 🌍
One of the most straightforward methods to minimize spam, conserve time, and gather only pertinent leads is by restricting form submissions based on the submitter’s country. If your business caters to particular regions, accepting form submissions globally typically involves managing irrelevant entries and communications that are unlikely to convert into actual customers.
When I set up contact forms on my own WordPress websites, I quickly noticed the same issue: my inbox filled up fast, but most of the messages weren’t helpful.
Instead of genuine inquiries, I had to manage spam submissions, off-topic messages, and submissions originating from regions outside my service area.
This situation can be overwhelming for a local business, making it more challenging to identify legitimate prospects.
Blocking form entries from certain countries helps you:
- Minimize spam and irrelevant communications, thereby maintaining a cleaner inbox.
- Conserve resources by targeting only those prospects within your service area.
- Elevate lead quality by connecting with users genuinely interested in what you offer.
- Shield your enterprise from fraudulent activities by restricting access from potentially risky regions.
Implementing this strategy on my contact forms proved invaluable. I shifted my focus from clearing irrelevant submissions to engaging with authentic inquiries.
Let’s explore a streamlined method for preventing form submissions originating from particular countries within WordPress.
Use the following links to navigate to your preferred method:
- Method 1: Block Form Submissions From Specific Countries (Recommended)
- Step 1: Install and Activate WPForms
- Step 2: Choose or Create a WordPress Form
- Step 3: Enable Country Filter
- Step 4: Embed Your Form
- Method 2: Filter Form Entries by Email Address Using Allowlist or Denylist (Free)
- Step 1: Install and Activate WPForms
- Step 2: Choose or Create a WordPress Form
- Step 3: Set up Allowlist / Denylist
- Step 4: Embed Your WordPress Form
- Things to Keep in Mind When Blocking Form Entries by Country
- Tip: Layer Additional Spam Protection for Stronger Security
- Frequently Asked Questions About Preventing WordPress Form Spam
Method 1: Block Form Submissions From Specific Countries (Recommended)
For a code-free way to block submissions from certain countries, utilize the integrated Country Filter in WPForms.
This lets you either ‘allow’ certain countries to submit your form or ‘deny’ specific countries that often send spam or irrelevant leads. This prevents spam from ever reaching your inbox.
Plus, the filter works right inside the form builder, so you can set it up in just a few clicks.
At CanadaCreate, we use WPForms for creating all kinds of forms, from simple contact forms to complex surveys and registration forms. We’ve thoroughly tested it over the years, which you can read more about in our full WPForms review.
Step 1: Install and Activate WPForms
First, you’ll need to install and activate the WPForms plugin. We have a complete guide on how to install a WordPress plugin that walks you through the process.
📌Note: WPForms offers a free plan. But advanced spam-fighting tools like the Country Filter, smart conditional logic, and multiple spam protection methods are only part of WPForms Pro.
Upon activation, you can edit the form where you want to block entries.
Step 2: Choose or Create a WordPress Form
Just go to the WPForms » All Forms page and click ‘Edit’ under your form’s name.
If you don’t have a form yet, then you can easily create one using WPForms’ drag-and-drop builder. Just head to WPForms » Add New from your WordPress dashboard.
The plugin offers dozens of premade form templates for contact forms, surveys, order forms, and more, so you can get started quickly.
Alternatively, utilize the AI form builder to automatically draft a tailored template. Simply name the form and detail your requirements; the tool will provide an initial design.
Upon completion, your template will be accessible in WPForms’ editor. Here, you can effortlessly modify, remove, or reorganize form fields.
I appreciate the streamlined nature of this process. During testing, I was able to progress from a blank canvas to a functional form in mere minutes.
The following step-by-step guides will assist you in building various types of forms:
- How to Create a Contact Form in WordPress (Beginner’s Guide)
- How to Make a Survey in WordPress (Step by Step)
- Beginner’s Guide to Creating an Order Form in WordPress
- How to Create a Custom User Registration Form in WordPress
Step 3: Enable Country Filter
After completing the previous steps, navigate toSettings » Spam Protection & Securityand then scroll to the Filtering section within the WPForms editor.
Here, you can configure the form to either accept or reject submissions based on the submitter’s country. Activate this feature by toggling ‘Enable Country Filter’.
A dropdown menu will then appear, presenting ‘Allow’ and ‘Deny’ options.
For example, if your business only serves customers in the United States, then you can set the filter to ‘Allow’ and select ‘United States’ from the dropdown list next to it.
This method provides a straightforward way to limit leads to your designated service region.
Or, opt to ‘Deny’ access to submissions from selected countries. This is a practical approach to minimize spam, particularly from areas with which you do not conduct business or that generate substantial bot-driven spam.
Once you have configured the settings, press the ‘Save’ button at the top of the screen. If the form is already live, these settings will automatically update, and no further steps are needed.
Step 4: Integrate the Form
If the form is new, you will need to integrate it so visitors can use it. The process is simple.
WPForms offers an integrated block, simplifying form integration. Add it to a page or post without needing any custom code.
Refer to our detailed guide on embedding forms in WordPress for comprehensive instructions.
Method 2: Use Email Address Filters (Allowlist or Denylist, Free)
WPForms provides options to manage form submissions based on the submitter’s email address. Use an allowlist to permit submissions only from specified addresses or domains, or use a denylist to prevent submissions from particular addresses or domains.
Note:This technique does not restrict users by their physical location. Rather, it filters submissions according to the email domain, the segment of the email address following the “@” symbol.
For example, in jane@example.comthe domain is example.com.
Certain email domains include a country code, such as:
- .au → Australia
- .cn → China
- .uk → United Kingdom
- .us → United States
This approach lets you block form submissions using domain names specific to certain countries, like .cn or .uk.
Remember that users from those countries using email addresses like gmail.com or outlook.com won’t be affected.
💡 Expert Tip:For enhanced protection, I suggest combining this technique with Method 1. This establishes a robust, dual-layered security system.
Method 1 relies on IP addresses to block users by location, while this method targets specific email domains that may bypass the first defense.
Step 1: Install and Activate WPForms
First, you’ll have to install and activate the WPForms plugin (free version). If you’re unfamiliar, we offer a tutorial on WordPress plugin installation.
📌Note: The Allowlist/Denylist function is included in the free WPForms plan.
Upgrading to WPForms Pro unlocks powerful tools such as conditional logic, multi-page forms, and payment options.
Step 2: Choose or Create a WordPress Form
After activating the plugin, navigate to the WPForms » All Forms page and select ‘Edit’ on the form you want to modify with country restrictions.
If a form isn’t already available, you’ll need to create one.
WPForms offers premade templates and an AI form builder to easily create a professional contact form without starting from zero.
Consult our guide on contact form creation in WordPress for a fast setup.
Step 3: Set up Allowlist / Denylist
Once your form is open in the WPForms visual editor, make sure you add the ‘Email’ form field from the left column into the form preview on the right.
Keep in mind that this method won’t work if your form doesn’t have an Email field.
After doing that, click on the field to open its settings in the left column. Then, switch to the ‘Advanced’ tab and scroll down to the ‘Allowlist/Denylist’ section.
By default, the ‘None’ option is selected, meaning there are no restrictions on which email addresses can submit the form.
You can change this by selecting one of the following options:
- Denylist: The email addresses or domains you specify will be blocked from submitting the form.
- Allowlist: Only the email addresses or domains you specify will be allowed to submit the form.
Once you make your choice, a text box will appear where you can enter the email addresses or domains you want to allow or block. Keep in mind that you will need to add each entry on a new line.
To filter form submissions by country, you must use an asterisk (*) before the country code.
For example:
- *.au — matches all email addresses ending in .au.
- *.us — matches all email addresses ending in .us.
- *.uk — matches all email addresses ending in .uk.
- *.cn — matches all email addresses ending in .cn.
This method is highly flexible, allowing you to combine country-based rules with individual email addresses for precise control over who can submit your form.
After making adjustments, save your settings by selecting the ‘Save’ button at the top.
The form on your site will automatically reflect any updates you’ve made.
Step 4: Embed Your WordPress Form
If you’ve just created a form, embed it on a page using the WPForms block within the WordPress editor.
For detailed instructions, consult our guide on embedding forms in WordPress.
Things to Keep in Mind When Blocking Form Entries by Country
Limiting form submissions by country helps minimize spam and concentrate on relevant leads.
Since it’s not a flawless method, remember these considerations when applying country-specific limitations:
- 🌐 Users can circumvent IP-based country blocks (Method 1) via VPNs or proxy servers, but email domain filtering (Method 2) remains effective.
- ❗ Be aware that blocking entire countries may inadvertently exclude real users and potential customers.
- 🛡️ Country blocking identifies a user’s location via IP address matched against extensive databases, which WPForms regularly updates, although no system is infallible.
- ✅ Confirm that your local audience is not inadvertently part of the blocked countries.
Keeping these points in mind ensures you use country restrictions effectively and avoid inconveniencing legitimate visitors.
Tip: Layer Additional Spam Protection for Stronger Security
While country blocking helps, it’s not foolproof. Supplementing it with additional spam prevention makes your forms more secure and reduces inbox clutter.
To enhance your form’s security, consider these tactics:
- Use CAPTCHA or reCAPTCHA to prevent automated spam submissions.
- Filter keywords to automatically block spam phrases.
- For sensitive data, use password protection on your forms.
- To prevent repeated spam, limit submissions based on IP address.
- Only display form fields when needed with conditional logic, minimizing potential abuse.
- If you collect health information, consider forms that meet HIPAA standards.
See our guide on stopping contact form spam for more advice.
Frequently Asked Questions About Preventing WordPress Form Spam
Even with country blocking and email filtering, questions often arise about WordPress form security.
Here are common concerns from WordPress users to help you confidently manage forms.
1. Can I block a country without using a plugin?
Yes. You can block a country at the server level by editing your .htaccess file on Apache or by using the NGINX GeoIP/GeoIP2 module to deny IP ranges assigned to that country.
However, this approach is advanced and risky. A single typo can take your site offline, and country IP ranges change over time, so rules need ongoing updates. For most beginners, using WPForms’ built-in Country Filter is the safer, easier option.
2. Will blocking countries in my forms affect my website’s SEO?
No. Blocking form submissions with a plugin like WPForms does not affect your website’s SEO because it only prevents users from submitting the form. Search engine bots can still view and crawl your content normally.
3. Can users bypass country blocking with a VPN or proxy?
Yes. Users with a VPN or proxy can bypass IP-based blocking (Method 1) by making it appear as if they are in an allowed country. However, VPNs do not affect email domain filtering (Method 2), so combining both methods gives stronger protection.
4. Do I need WPForms Pro to block countries?
Yes. The Country Filter feature is available only in WPForms Pro, so you’ll need the premium version to use it.
5. Can I use these methods together?
Yes. You can and should use both methods together for the strongest protection. For example, you could use the Country Filter (Method 1) to deny submissions from countries where you don’t do business, and then add the email Denylist (Method 2) to block common spam domains.
I hope this article helped you learn how to block WordPress form entries from certain countries. You may also want to see our beginner’s guide on how to auto export WordPress form entries and our detailed comparison of Contact Form 7 vs. WPForms to find the best option for your website.
Consider subscribing to our YouTube channel for WordPress video guides if you found this article helpful. You can also discover us on Twitter and Facebook.