You’ve invested significant effort into your WordPress site, but if it’s only available in English, you’re missing out on reaching a global audience. You may have noticed visitors from other countries leaving quickly or received requests for content in various languages.
We understand that translation can seem daunting and costly.
However, when we translated CanadaCreate into Spanish, French, Portuguese, and Italian, the results were remarkable. We experienced increased engagement, longer visit durations, and stronger connections with readers worldwide. 🌍
The good news is that after assisting thousands of WordPress users in adding multiple languages to their sites, we can confidently say that TranslatePress simplifies the process.
In this guide, we will walk you through the step-by-step process of translating your WordPress site using TranslatePress, ensuring your design remains intact and without any coding requirements.
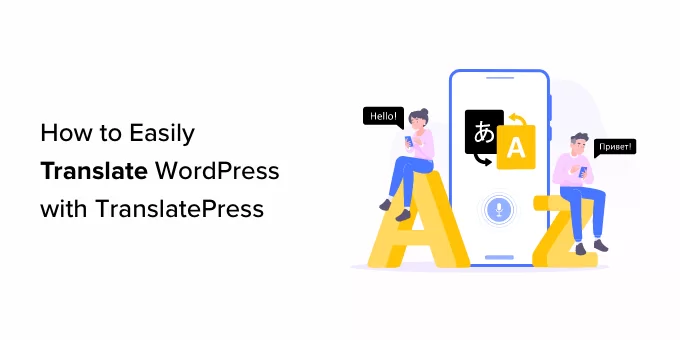
Why Choose TranslatePress for Your WordPress Website Translation?
TranslatePress is one of the simplest methods to create a multilingual WordPress site without the need to duplicate content or write any code.
One of the greatest advantages of WordPress is its versatility in supporting any language. Most WordPress themes and plugins can also be utilized and translated into various languages. Therefore, if your business website caters to a multilingual audience, translating your content can be extremely advantageous.
While machine translations like Google Translate might seem convenient, they often lack accuracy and can lead to misunderstandings.
If you’re using a multilingual WordPress plugin, you may need to create separate posts for each language, which can be cumbersome.
The TranslatePress plugin simplifies this process by allowing you to translate your entire site through an intuitive live visual editor.
This means you won’t have to manage multiple versions of the same post. You can translate text, images, theme elements, and plugin strings all in one place, ensuring your design remains intact.
In this guide, we will demonstrate how to effortlessly translate your WordPress website using TranslatePress. Here’s a brief overview of the steps we will cover:
- Step 1: Install the TranslatePress plugin on your WordPress site
- Step 2: Translate the content of your website
- Step 3: Add a language switcher to your website
- Bonus Tip: How to use the English WordPress admin interface on a multilingual site
- Common Questions About Translating a WordPress Website
- Continue Learning: Expanding Your Multilingual WordPress Site
Are you ready? Let’s begin.
Step 1: Install the TranslatePress plugin on your WordPress site
To begin, install and activate the TranslatePress plugin. For detailed instructions, refer to our comprehensive guide on installing a WordPress plugin.
📝 Important Note:This tutorial uses the free version of TranslatePress, which allows you to translate your site into one additional language. For more languages, multilingual SEO, or WooCommerce compatibility, consider upgrading to a premium plan.
Once activated, go to Settings » TranslatePress in your WordPress admin dashboard.
Make sure you are on the ‘General’ tab, where you will configure the plugin settings.
Start by selecting your website’s default language from the ‘Default Language’ dropdown menu.
Next, choose the language into which you want to translate your site.
To do this, navigate to the ‘All Languages’ section and select your desired language from the ‘Language’ dropdown menu.
Click the ‘Add’ button each time you select a new language.
Now, scroll down to the ‘Native Language Name’ setting on the page.
Here, you can choose whether to display language names in their native language or in English. Select ‘Yes’ or ‘No’ based on your preference.
The next option allows you to decide if you want the default language name to appear in the URL as a subdirectory, such as http://example.com/en/.
We recommend keeping this setting enabled as it enhances search engine optimization.
Next, let’s move on to the ‘Force language in custom links’ setting.
The default setting is ‘Yes,’ which enables the plugin to modify custom links for translated languages, resulting in more SEO-friendly URLs.
In the following option, you can decide whether to use Google Translate for automatic translations.
The default option is ‘No,’ but you can change it if you wish to utilize Google Translate.
If you opt for this, you will need to provide a Google Translate API key in the next step. A link will be available under this option to guide you on how to obtain one.
Finally, you will reach the settings for displaying the language switcher on your website.
TranslatePress offers three options for adding a language switcher to your site: you can use a shortcode, integrate it into your navigation menu, or display a floating menu. We will guide you through adding the language switcher to your website later in this article.
Next, click the ‘Save Changes’ button to apply your settings.
Step 2: Translating Your Website Content
To begin translating your website, click the ‘Translate Site’ tab on the plugin’s settings page or select the ‘Translate Site’ button in your WordPress admin bar.
This action will open the live translation editor in a new browser tab.
Simply click the blue translate icon next to any text on your website that you wish to translate.
TranslatePress will automatically display the selected text in the left column of the translation editor.
Once the text appears in the column, you can enter its translation in the box below and click the ‘Save Translation’ button at the top to save your changes.
This allows you to translate all content on any page of your site, including navigation menus, buttons, sidebars, meta-text, widgets, and more.
With TranslatePress, you can start translating any page or post on your site as soon as you are logged in.
Simply click the ‘Translate Page’ button at the top to open the live editor.
One of the advantages of this plugin is that you only need to translate each string once. After translating a string, the plugin will automatically apply that translation throughout your WordPress site.
Step 3: Integrating a Language Switcher into Your Website
Once you have translated your website, it’s important to add a language switcher.
A language switcher enables visitors to choose their preferred language when they access your website. It typically features flags representing the available languages.
TranslatePress lets you incorporate a language switcher through a shortcode, as a menu item, or as a floating banner.
The language switcher can be presented as flags, language names, or a combination of both.
Inserting a Language Switcher in WordPress Using a Shortcode
To add a language switcher in WordPress via shortcode, navigate to Settings » TranslatePress in your WordPress dashboard.
On the ‘Settings’ page, scroll down to the ‘General’ tab and copy the [language-switcher] shortcode from the ‘Language Switcher’ section.
You can easily insert this shortcode on any page, post, or sidebar widget to display the language switcher.
Here’s how the language switcher appeared on our demo site:
Incorporating a language switcher into your WordPress navigation menu
To add a language switcher as a menu item, navigate to Appearance » Menus in the dashboard.
📝Important Note: This method is not applicable if you are using a block-based theme with a full site editor.
From this point, click on the ‘Language Switcher’ tab in the ‘Add Menu Items’ section located in the top left corner of the screen.
Once you are in the tab, simply select the languages you wish to include in the language switcher. Then click the ‘Add Menu’ button to incorporate the language switcher as a menu item.
Finally, remember to click the ‘Save Menu’ button to save your changes.
You will now see a language switcher added to your WordPress navigation menu. For example, this is how it appeared on our test site:
Implementing a floating language switcher
To add a floating language switcher, navigate to Settings » TranslatePress in the WordPress dashboard.
Scroll down to find the ‘Language Switcher’ section under the ‘General’ tab. Ensure you check the box for the ‘Floating language selection’ option.
You can change the position of the floating language switcher using the dropdown menu located in the top right corner of the screen.
After making your changes, remember to click the ‘Save Changes’ button to apply your settings.
Now, visit your website to see the floating language switcher displayed at the bottom of every page.
Bonus Tip: Managing a Multilingual WordPress Admin Dashboard
When running a multilingual site, you may encounter challenges with the default language of the admin area. This is an easy detail to miss, but it can complicate teamwork, especially if you are collaborating with others or managing content in various languages.
You want your workflow to be as seamless and productive as possible, right?
Here’s a helpful tip: you can keep your WordPress admin area in English (or any language you prefer) while still presenting the front end of your site in your local language for your audience.
This allows you to navigate the backend effortlessly while providing your visitors with a fully localized experience. It’s a win-win situation! 😄
For more information, please refer to our comprehensive guide on utilizing the English WordPress admin in a multilingual environment.
Common Questions About Translating a WordPress Website
We have assisted thousands of users in starting their WordPress journey, which means we have encountered a variety of questions regarding website translation. Here are some of the most frequently asked questions, along with their answers.
Is TranslatePress available as a free plugin?
Yes, you can download a free version of TranslatePress from the WordPress.org plugin repository. This version is an excellent starting point, allowing you to translate your site into one additional language.
However, if you need support for multiple languages, enhanced multilingual SEO, or want to translate WooCommerce stores, you will need to upgrade to one of their premium plans.
Which is superior: manual translation or automatic translation?
Automatic translation tools are quick but may overlook nuances and context, resulting in awkward wording. Manual translation by a professional is always of higher quality.
TranslatePress offers the best of both options. You can utilize its integrated automatic translation for an initial draft and then easily review and perfect the text using the live editor for optimal accuracy.
If you’re considering alternatives, Universally is another robust tool that provides quick and dependable automatic translation.
Will translating my website negatively impact my SEO?
On the contrary. When executed properly, translating your website can greatly enhance your SEO by allowing you to rank in search results across various languages and regions.
TranslatePress is designed with SEO in mind. It generates unique URLs for each language and assists you in translating key SEO components such as page titles and meta descriptions.
Additionally, you can integrate it with an SEO plugin like All in One SEO to fully optimize your translated content. Check out our comprehensive AIOSEO review to discover all its features.
Can I use TranslatePress to translate my WooCommerce store?
Absolutely. The premium version of TranslatePress fully supports WooCommerce, enabling you to translate product pages, descriptions, checkout fields, and emails, thus providing a completely localized shopping experience for your customers.
What is the top WordPress translation plugin?
There are many excellent choices, but we recommend TranslatePress for its unparalleled user-friendliness. Its visual, front-end editor makes it extremely intuitive, even for those new to WordPress. It also integrates smoothly with any WordPress plugin or theme.
Universally is an excellent option for those seeking a seamless translation experience. Simply select your desired languages, and it will automatically translate new content, update existing pages, and manage multilingual SEO without requiring any further effort from you.
For more complex multilingual websites, WPML provides robust features and detailed control, although it requires a bit more time to learn. This is an ideal choice for larger online businesses.
Continue Discovering: Expanding Your Multilingual WordPress Website
We hope this article has guided you in translating your WordPress site using TranslatePress. You may also find our articles on the following topics helpful:
- How to Automatically Translate Your WordPress Site
- How to Create Multilingual Forms in WordPress
- How to Implement Multilingual Search in WordPress
- How to Translate a WordPress Plugin into Your Language
- How to Locate and Translate a Translation-Ready WordPress Theme
- How to Create a Multilingual Sitemap for Your WordPress Site
- Top RTL (Right to Left) Language WordPress Themes
- Best WordPress Translation Plugins for Multilingual Websites
If you enjoyed this article, consider subscribing to our YouTube Channel for helpful WordPress video tutorials. You can also connect with us on Twitter and Facebook.