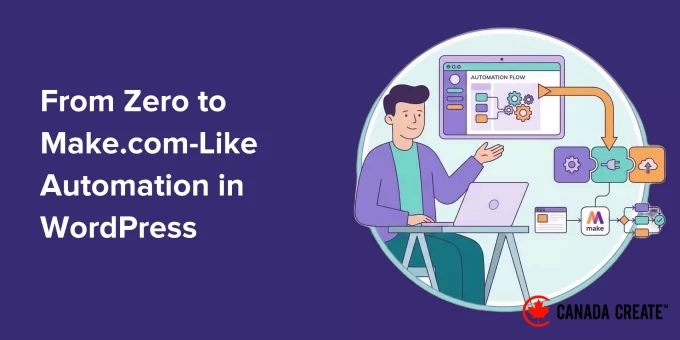
Automating your WordPress site can be straightforward and manageable.
While tools like Make.com offer powerful features, they can be daunting for beginners. The additional connection steps and intricate configurations, such as webhooks, can lead to frustration before you even get started.
This is where a plugin like Uncanny Automator shines. It enables you to create workflows similar to those in Make.com within WordPress, using a user-friendly setup that is easy to navigate.
You can link your favorite plugins, initiate actions based on user interactions on your site, and even incorporate AI-driven tasks in just a few minutes.
In this guide, I will demonstrate how I automated my WordPress site to function like Make.com.
The objective is clear: reduce time spent on repetitive tasks, ensure smooth operations, and concentrate on expanding your site rather than just managing it.
💡Quick Answer: How to Implement Make.com-Style Automation in WordPress
You can implement Make.com-style automation in WordPress using Uncanny Automator by creating a straightforward “if this happens, then do that” workflow, known as a recipe. You select a trigger, such as publishing a new post, and then determine the subsequent action, like generating an AI summary and saving it to Google Sheets. Once the recipe is configured,LiveThis automation runs automatically each time the specified trigger occurs.
Here’s a comprehensive overview of all the topics I will cover in this guide:
- Reasons for Transitioning from Make.com (And How You Can Do It Too)
- Key Strengths of Make.com
- 🌟 The Solution: How Uncanny Automator Offers Make.com-Like Features with Greater Ease
- How Uncanny Automator Can Help You Save Money
- Practical Example: Automating Blog Post Summaries Using Uncanny Automator
- Step 1: Install and Activate Uncanny Automator
- Step 2: Integrate OpenAI with Uncanny Automator
- Step 3: Link Uncanny Automator to Google Sheets
- Step 4: Create Your Automation Recipe in Uncanny Automator
- Step 5: Incorporate the OpenAI Action to Generate Blog Post Summaries
- Step 6: Add the Google Sheets Action to Save Summaries
- Step 7: Save and Activate Your Automation Recipe
- Next Steps for Creating Make.com-Style Workflows Directly in WordPress
- Common Questions About Uncanny Automator Compared to Make.com
- Extra Resources to Enhance Your Automation Skills
Reasons for Transitioning from Make.com (And How You Can Do It Too)
I transitioned away from Make.com due to its increasing complexity as my website expanded. Although it is a powerful automation tool, the setup and ongoing maintenance became overwhelming when all I wanted was seamless functionality within WordPress.
Make.com is a visual automation platform that allows you to link various applications and services through workflows known as scenarios.
You create these workflows by dragging and connecting blocks, so when an event occurs in one application, it initiates actions in another.
It’s an excellent tool, but many WordPress site owners may find it doesn’t align well with the daily operations of WordPress.
Eventually, I sought a solution that was simpler and more closely integrated with my website.
Three Challenges That Led Me to Move Away From Make.com
Make.com became unmanageable for me when the time required to set up and maintain everyday automations exceeded the time spent on the tasks themselves.
Here are the three primary reasons I chose to switch:
| Challenge | Implication | Importance |
|---|---|---|
| Steep Learning Curve | Even basic workflows demand hours of tutorials to grasp concepts like Routers, Iterators, and Aggregators. | Beginners may find themselves stuck before they can even get automations up and running. |
| Unpredictable Pricing | Costs are based on ‘operations,’ meaning you are charged for each internal step, filter, and logical check, not just the final outcome. Processing the same 500 WooCommerce orders can become significantly more expensive if you include a simple filter. | Budgeting becomes challenging as your website traffic or sales increase. |
| Increased Complexity with WordPress | Integrating Make.com requires the use of APIs, webhooks, and third-party connections. Workflows may fail when plugins are updated. | Continuous troubleshooting can hinder your progress and create additional stress. |
At that moment, I recognized the need for an automation solution that was simpler, more reliable, and tailored specifically for WordPress.
What Make.com Excels At
In simple terms, Make.com is ideal for creating numerous ‘if this, then that’ scenarios while connecting various applications outside of WordPress.
For example, it offers:
- A visual flowchart builderthat allows you to create automations by visually linking steps, making it easy to see how data transitions from one action to another.
- Integrated branching and routingusing Router modules, enabling different actions to execute based on the conditions you define.
- A comprehensive integration library, offering access to thousands of applications and services that you can integrate without starting from scratch.
- Sophisticated automation capabilities, featuring Iterators and Aggregators for managing data lists, along with filters to determine when actions should be executed.
These functionalities are ideal for achieving precise control over intricate workflows. However, for many routine WordPress automations, they may seem more complex than necessary.
When Is It Still Beneficial to Use Make.com?
Although I have transitioned away from Make.com, there are scenarios where it remains effective:
- For Applications Beyond WordPress – If you need to connect tools that Uncanny Automator does not support, Make.com provides access to a wide range of applications.
- Significant Investment Already Made – If you have created numerous workflows in Make.com, switching everything immediately may not be worthwhile.
- Advanced HTTP Functionality – While Automator Pro covers most webhook requirements, some highly specialized HTTP requests may still be more manageable in Make.com.
In most typical WordPress scenarios, Automator operates seamlessly, but it’s beneficial to recognize that Make.com can still be advantageous in these cases.
🌟The Solution: Why Uncanny Automator Offers a Simpler Experience Similar to Make.com
After facing numerous challenges with Make.com, I discovered a comprehensive solution: Uncanny Automator.
This is the top WordPress automation plugin that allows you to connect your favorite plugins, WordPress features, and a wide range of external applications. You can create workflows, known as Recipes, using an intuitive visual builder.
It operates similarly to Make.com, but everything is managed within WordPress, making setup quicker, management easier, and site scaling more efficient.
With Automator, you gain the benefits of advanced automation without the need to learn new modules, troubleshoot broken workflows, or face unexpected increases in your monthly expenses.
How Uncanny Automator Helps You Save Money
One of the key benefits of Uncanny Automator is its cost-effectiveness. By paying a flat annual fee for unlimited Recipes and actions, you eliminate the unpredictable costs per operation that can accumulate with Make.com.
| Usage Scenario | Estimated Yearly Cost with Make.com | Annual Cost of Automator Pro | Annual Savings |
|---|---|---|---|
| 500 complex WooCommerce orders per month | $183 | $149 | $34+ |
| 1,000 form submissions per month | $348 | $149 | $199+ |
💡 Primary advantage:Automator allows you to create unlimited workflows and actions within WordPress. Unlike some external tools like OpenAI that may charge usage fees, Automator does not impose additional costs for running your automations.
To understand how Automator stacks up against Make.com in typical WordPress workflows—and discover why it’s more straightforward and efficient—please expand the section below:
Technical Feature Comparison: Make.com vs. Automator
| Feature | Make.com | Automator | Reasons Why Automator Excels |
|---|---|---|---|
| Conditional Logic | Incorporate a Router module, set up filter conditions, and connect different paths. | Add Condition → choose field, operator, value → actions execute based on true/false outcomes. | Simplifies the creation of rules based on user interactions. |
| Processing Lists | Needs the ‘Iterator’ module to divide data lists using intricate mapping. | ‘Execute an action for each item in a list’ → map repeater field → generate action within the loop. | Streamlines repetitive tasks like managing orders or form submissions efficiently. |
| Data Transformation | Utilize formulas, JSON, or RegEx. | Employ tokens ({{user_email}}) along with a visual Data Formatter (to split text, perform math, or summarize with AI). | Enables you to visually modify and format data without the need for coding. |
| Advantages of Using WordPress Natively | API and webhooks required, which may cause slight delays | Direct access to the database for instant triggers | Quicker, more reliable, and minimizes troubleshooting |
Practical Example: Automating Blog Post Summaries with Uncanny Automator
Uncanny Automator allows you to build complex workflows more easily than Make.com, eliminating the need to manage APIs or webhooks since everything operates within WordPress.
Here are some examples of what you can achieve:
- Automatically transfer new WooCommerce orders to a Google Sheet for streamlined reporting.
- Send notifications or emails each time a new post is published.
- Utilize AI to summarize post content and save it in a spreadsheet for easy access.
In this article, I will guide you through creating a workflow that automatically generates an AI summary and adds it to Google Sheets whenever a new blog post is published.
Here’s the process:
Even if you don’t plan to store blog summaries in Google Sheets, this workflow will teach you the fundamental pattern for automating forms, WooCommerce orders, email reports, and AI-generated content across your website.
Once you grasp this setup, you can apply the same steps to nearly any other automation on your WordPress site.
Essential Requirements for This Tutorial:
- A WordPress websitewhere you have the ability to install plugins (administrator access required).
- Uncanny Automator. You will need the Pro versionfor this OpenAI and Google Sheets integration.
- An OpenAI Platform accountwith prepaid credits available.
- A Google accountthat has access to Google Sheets.
- A Google Sheet prepared. A blank one will suffice, but it’s beneficial to add column headings in advance, such as Post Title, URL, Date, and Summary.
Step 1: Install and Activate Uncanny Automator
The first step is to set up Uncanny Automator on your WordPress site.
Begin by signing up for an account on the Uncanny Automator website. Click the ‘Get Uncanny Automator now’ button and follow the instructions to create your account.
📍Note:The free version offers limited credits for testing app integrations. To establish a permanent workflow that operates automatically, you will need to upgrade to the Pro plan.
Next, navigate to your WordPress dashboard to install the necessary plugins. Start by installing the free core plugin from the WordPress repository, followed by the premium plugin using the ZIP file available for download from your Uncanny Automator account.
The premium plugin provides access to essential integrations for OpenAI and Google Sheets. If you need assistance, refer to our detailed guide on how to install WordPress plugins.
After installation, it’s time to activate your license. Go to Automator » Settings in your WordPress dashboard and input the license key from your Uncanny Automator account.
Click the ‘Activate License’ button, and your website will be set up to begin creating automation workflows.
Step 2: Link OpenAI with Uncanny Automator
To enable this workflow, you must connect your OpenAI account to Uncanny Automator. This integration allows OpenAI to automatically generate summaries of your blog posts before they are included in your Google Sheets reports.
The good news is that you only need to connect it once.
To begin, you will need your OpenAI secret key. This key is a unique identifier that confirms your identity when using OpenAI’s services. It ensures your account’s security and allows Uncanny Automator to connect with OpenAI safely.
To locate your secret key, log into your OpenAI account and navigate to the ‘API Keys’ section in the left-hand menu. Click on the ‘Create new secret key’ button to proceed.
You will be asked to name the key—this is for your own reference, making it easier to identify later.
📍Important:Your OpenAI API account is distinct from a ChatGPT Plus subscription. You need to purchase pre-paid credits in your OpenAI Platform billing settings for the API key to function. Without a credit balance, the automation will not work.
After adding credits, click on ‘Create Secret Key’.
OpenAI will generate the key and show it in a popup window.
Make sure to copy this key and keep it in a secure place, as you will not be able to view it again.
Next, head to your WordPress dashboard and navigate to the Automator » App Integrations page. Then, select the ‘OpenAI’ tab on the left and paste your secret key into the ‘Secret Key’ field.
Next, click on ‘Connect OpenAI Account’. This will link your Uncanny Automator and OpenAI accounts.
You are now set to incorporate triggers and actions with OpenAI in your workflows. This integration enables you to automatically summarize posts or execute other AI-driven tasks whenever a workflow is activated.
Step 3: Link Uncanny Automator to Google Sheets
The following step is to connect Uncanny Automator to Google Sheets. This integration will ensure that all your blog post summaries are sent to your selected spreadsheet.
To begin, navigate to Automator » App Integrations in your WordPress dashboard and choose ‘Google Sheets’ from the menu on the left.
Click the ‘Sign in with Google’ button and select the account you wish to connect. If your account is not displayed, you can add it by selecting the ‘Use Another Account’ option.
Next, Google will request permission for Uncanny Automator to access your spreadsheets.
This is standard procedure, and the plugin only requires these permissions to add new entries to the spreadsheets you choose.
Once you grant permission, you will be redirected back to your WordPress dashboard with a confirmation that your Google account is successfully connected.
To begin, click on ‘Select new sheet(s)’ and pick the spreadsheet where you want to save your post summaries.
You can include multiple spreadsheets if necessary, and all linked sheets will be visible in the recipe editor while creating automations.
For a comprehensive guide, refer to our tutorial on connecting WooCommerce to Google Sheets.
After connecting your spreadsheet, you can start creating a workflow that summarizes posts and automatically sends them to Google Sheets.
Step 4: Create Your Recipe in Uncanny Automator
Once you have successfully linked OpenAI and Google Sheets, it’s time to create a recipe in Uncanny Automator.
In Automator, a recipe outlines your automation process. Each recipe consists of two main components: the trigger, which initiates the automation, and the action, which defines the subsequent steps.
To get started, navigate to Automator » Add New Recipe in your WordPress dashboard. You will need to choose between a ‘Logged-in’ recipe and an ‘Everyone’ recipe. Logged-in recipes only activate when a user is signed in.
For this workflow, I suggest selecting Everyone.
Here’s why: When you schedule posts for future publication, WordPress handles them in the background using the system cron instead of requiring a logged-in user. Choosing ‘Everyone’ ensures that the automation functions properly for scheduled posts as well.
Next, give your automation recipe a descriptive name, such as ‘Blog Post Summary to Google Sheets’. This will make it easier for you to find it later when you create additional recipes.
After that, Uncanny Automator will display a list of all the plugins and services installed on your site. Choose ‘WordPress’ as the integration platform for your trigger.
Then, select the event that will initiate the recipe. For this workflow, choose ‘A post is published’.
This guarantees that every time a new post is published, the recipe will execute automatically.
Finally, you need to select the post type. By default, Uncanny Automator applies the trigger to all post types, including posts, pages, and products.
Since this workflow is specifically for WordPress blog posts, select ‘Post’ from the dropdown menu. Once you’ve done that, click ‘Save’ to activate your trigger.
Step 5: Add the OpenAI Action to Create Summaries for Blog Posts
With your trigger configured, the next step is to add the first action to your automation: creating a summary of your blog post using OpenAI.
Begin by clicking the ‘Add Action’ button within your automation recipe.
This will display a list of available integrations for your action.
Since you have already linked OpenAI, click on it to choose the platform.
You will see a list of actions that OpenAI can execute.
For this task, select ‘Use a prompt to generate text’. This instructs OpenAI on the specific content to generate.
Next, select the OpenAI model. I recommend using the latest model available, as it generates the most natural and precise summaries.
Now, adjust the Temperature setting. This determines how factual or creative the AI’s output will be. For a blog summary, it’s best to keep the AI’s responses straightforward and factual, so I suggest setting the temperature to 0.
Next, specify the maximum number of tokens. Tokens are the units OpenAI uses to quantify text. Generally, 1 token corresponds to about 1 word or 4 characters. Therefore, a 200-word summary would require approximately 300–350 tokens.
Tokens influence pricing. Remember that OpenAI charges for both the input text (your blog post) and the output text (the summary). By setting the Maximum Tokens to 300, you can ensure the summary remains concise, allowing you to manage your expenses effectively.
Next, define your prompt. An effective prompt clearly communicates to OpenAI what you need. For this workflow, consider using a prompt like:
‘Summarize the following blog post content in approximately 200 words, highlighting the main points and key takeaways: {{Post Content (Formatted)}}.’‘
If you’re just starting with AI prompts, check out our guide on the best AI prompts tailored for bloggers, marketers, and social media professionals.
In this context, the {{Post Content (Formatted)}} token ensures OpenAI understands precisely which blog post to summarize. This is distinct from the OpenAI API token (the secret key you connected earlier).
The OpenAI token allows Automator to access OpenAI, while these recipe tokens indicate to the AI which content should be included in the generated text.
You can insert these tokens by clicking the asterisk in the prompt editor. Uncanny Automator will show a list of available tokens, including the post title, author name, publication date, and more.
After configuring everything, click ‘Save’ to finalize the action. Your automation now includes a trigger and an initial action that produces concise, AI-generated summaries whenever a new post is published.
Step 6: Integrate Google Sheets to Save Summaries
Now, it’s time to introduce the second action to your workflow. This action will automatically create a new row in your selected Google Sheet and include the summary generated by OpenAI.
This feature enhances the workflow’s utility by ensuring that all your post summaries are automatically stored and organized.
To add this action, click the ‘Add Action’ button again in your automation setup. This time, select Google Sheets as the integration.
Uncanny Automator will present a list of available actions. For this workflow, select ‘Create a row in a Google Sheet’.
This instructs Automator to insert a new row into your spreadsheet whenever OpenAI produces a summary for a new blog post.
Next, you’ll see a dropdown menu to select the Google Spreadsheet you connected earlier. Choose the spreadsheet where you want to keep your blog post summaries.
Then, select the specific worksheet (tab) within that spreadsheet.
If your file contains only one sheet, there’s no need for concern. However, if your spreadsheet has multiple tabs, ensure you select the correct one to avoid misplacing your data.
Next, navigate to the ‘Rows’ section. Here, you will map your blog post information to the corresponding columns in your Google Sheet.
Mapping is easier than it seems. You simply align each column in your spreadsheet with the relevant data from your post or the summary generated by OpenAI.
To begin the mapping process, click the asterisk (*) icon next to a field. This will display a list of available data that Automator can extract from the trigger (your blog post) and the OpenAI action.
In the Triggers section, you’ll find options such as post title, author name, published date, and more.
In the Actions section, look for ‘OpenAI Response’, which contains the AI-generated summary.
Ensure you select ‘Response’ for the summary column in your sheet. This will guarantee that the summary is automatically placed in the correct column.
Take your time to carefully map each column.
After matching all the fields, click ‘Save’ to preserve your settings.
Step 7: Save and Activate Your Automation Recipe
With your trigger set for new post publications and actions configured to generate summaries using OpenAI and add them to Google Sheets, you are ready to activate your automation.
Before you go live, take a moment to review all your mappings. Ensure that the columns in Google Sheets correspond correctly to the blog post data and that the OpenAI summary is assigned to the appropriate column.
This step guarantees that each new post is added accurately without any mistakes.
When you’re sure everything is set up correctly, switch the Trigger and Action settings to ‘Live’. Then, update the recipe status from ‘Draft’ to ‘Live’ in the right-hand column.
That’s all there is to it! Your automation is now up and running.
To test your setup, navigate to Posts » Add New and publish a new blog post (or update an existing one if your trigger is set for updates).
Wait a few seconds, then check your Google Sheet. You should see a new row appear automatically with the summary generated by AI.
Next Steps for Creating Make.com-Style Workflows Directly in WordPress
After working with both Make.com and Uncanny Automator, I can confidently say that creating complex automations with Uncanny Automator is significantly easier.
In addition to the blog post summary workflow I previously demonstrated, you can also create simpler workflows in Uncanny Automator compared to Make.com.
| Example of a Workflow | Advantages of Using Uncanny Automator | Challenges with Make.com |
|---|---|---|
| Automatically send email notifications when a user submits a form, makes a purchase, or finishes a course. | Easily trigger actions from WordPress forms, WooCommerce, or LMS using simple dropdown menus. | Involves setting up webhooks, parsing JSON, and integrating multiple applications. |
| Add new WooCommerce orders to spreadsheets for effective reporting or bookkeeping. | Connect WooCommerce to Google Sheets in just minutes, with field mapping directly within WordPress. | Requires multiple modules, API keys, and data parsing for each order processed. |
| Create AI-generated summaries or content for posts, emails, or internal reports. | Integrate OpenAI directly within WordPress, with tokens that dynamically manage content. | Requires configuration of HTTP modules, API calls, and manual JSON handling. |
| Synchronize user data across plugins such as memberships, LMS, and CRM systems. | Automator natively reads plugin data, making triggers and actions straightforward. | Each plugin necessitates a unique API setup and webhook configuration. |
| Automatically schedule follow-ups for membership renewals and course completions | Trigger actions using native WordPress events without relying on external schedulers | Utilize multiple modules, set time delays, and customize setups for each platform |
Once your initial workflow is operational, you can confidently explore and develop new automations that save time, enhance processes, and improve your WordPress site’s functionality.
Common Questions About Uncanny Automator and Make.com
Now that you understand how Uncanny Automator simplifies Make.com-style workflows in WordPress, you may have some questions.
To assist you, I’ve provided answers to some frequently asked questions about AI, automation, and the integration of these tools:
Can Uncanny Automator manage complex workflows similar to Make.com?
Absolutely! For workflows primarily involving WordPress and its plugins, Uncanny Automator can manage them just like Make.com—without the need for additional setups, APIs, or webhooks.
Is coding knowledge necessary to use Uncanny Automator?
No coding skills are needed. The visual Recipe builder and tokens make it easy to create automations with a simple point-and-click approach.
What are the differences between the Free and Pro versions of Uncanny Automator?
The Free version offers unlimited recipes along with all the essential triggers and actions necessary to begin your automation journey.
The Pro version enhances your experience with features like conditional logic, loops, scheduled automations, over 150 integrations, and multisite support—everything you need for sophisticated workflows.
Will using Uncanny Automator impact the speed of my WordPress site?
Not noticeably. Automator executes actions asynchronously, so the impact on site performance is minimal—primarily dependent on your server’s resources.
Will Uncanny Automator provide summaries for my existing blog posts?
By default, this recipe activates only when a new post is published. It does not retroactively summarize your previous posts automatically. However, Uncanny Automator Pro offers a feature to run recipes on existing content if you wish to update your site in bulk.
Can I transfer my current Make.com workflows to Uncanny Automator?
There is no one-click migration option. You’ll need to manually recreate workflows: Router → Condition, Iterator → Loop, HTTP → Webhook. However, once established, Uncanny Automator’s integration with WordPress simplifies ongoing maintenance.
Additional Resources to Elevate Your Automation Skills
Discover a wealth of features to maximize your experience with Uncanny Automator.
Explore a variety of articles covering advanced workflows and AI-driven automations to enhance your skills.
- A Step-by-Step Guide to Implementing n8n-Style Automation in WordPress: Affordable and User-Friendly
- Leveraging AI to Automatically Generate Product Descriptions for WooCommerce
- Automatically Share Posts to Threads Directly From Your WordPress Site
- Seamlessly Post to Facebook From Your WordPress Site Automatically
- Automate Your WordPress Forms Using n8n: Save Time and Reduce Manual Effort
- Your Comprehensive Guide to Automatically Sharing WordPress Content on Instagram
If you enjoyed this article, consider subscribing to our YouTube Channel for insightful WordPress tutorials. Connect with us on Twitter and Facebook as well.