Transferring your WordPress site to a new domain is an exciting milestone for your project. However, once the main files are relocated, there’s one essential step that can significantly impact the outcome: updating your URLs.
Many users are surprised to discover that links within your content and image paths do not automatically update. Neglecting this step can result in a website filled with broken links, negatively affecting both user experience and your SEO performance.
Having assisted thousands of readers in successfully migrating their websites, we have developed a safe and effective method that guarantees a seamless transition without the typical challenges.
We will guide you through the precise process of updating URLs correctly, ensuring that your site operates flawlessly from the very first day in its new location.
Here’s an overview of the topics we will discuss in this guide:
- When Should You Update URLs on Your WordPress Site?
- How to Update URLs After Moving Your WordPress Site
- Redirecting Posts and Pages After URL Updates
- Bonus: How to Monitor Broken Links on Your Website
- Our Top Guides for Migrating Your WordPress Site
When Should You Update URLs on Your WordPress Site?
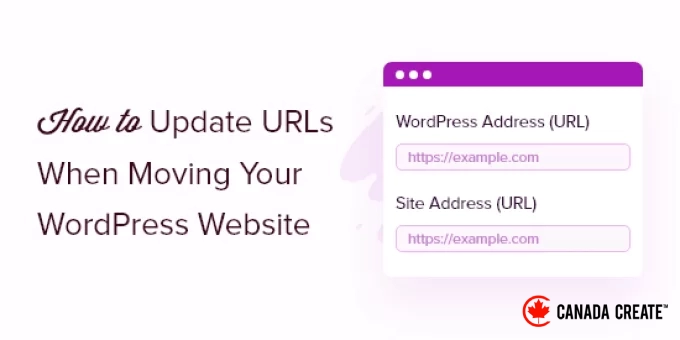
Imagine you have migrated your WordPress site to a new domain. To update the WordPress address and site address, navigate to the Settings » General section in your WordPress dashboard.
However, this action does not automatically update the URLs that you have previously inserted into your posts and pages. It also does not modify the URLs of images that are part of your WordPress site.
Manually changing all of these URLs in every blog post and page can be a tedious task. Additionally, there is a risk of overlooking some URLs, which may result in broken links on your website.
This is why updating your URLs is crucial when migrating your WordPress website.
Doing so enhances the user experience, making it easier for visitors to find the content they are searching for. Updating URLs also boosts your WordPress SEO and helps search engines discover and index your new content.
Furthermore, it is essential to set up proper 301 redirects from your old domain to the new one, ensuring that users are consistently directed to the correct location.
This step is vital since many other websites may still link to your old domain, including social media posts, Google, and more.
Now, let’s explore how to efficiently update URLs during the migration of your WordPress site.
How to Update URLs After Moving Your WordPress Site
The simplest method to update outdated links on your website is by using the free WPCode plugin, Search & Replace Everything. This powerful tool allows you to locate and replace text and URLs throughout your entire WordPress database, including posts, pages, images, and more.
Before proceeding, ensure that you have a complete backup of your WordPress site. A search and replace tool modifies your database directly, and even a minor typo could disrupt links or images.
Having a fresh backup is your best safety measure, enabling you to restore your site easily if any issues arise.
Next, install and activate the Search & Replace Everything plugin on your site. For detailed instructions, refer to our step-by-step guide on installing a WordPress plugin.
Important Note: There is also a premium version of Search & Replace Everything that offers additional advanced features.
After activation, go to Tools » WP Search & Replace in your WordPress admin dashboard.
Begin by locating the section for updating old links to the new site URLs. Enter the old URL in the ‘Search for’ field and the new URL in the ‘Replace with’ field.
Next, scroll down to select specific tables in the WordPress database that you wish to update. You can modify URLs in your posts, comments, options, user data, and other sections of your site by checking the relevant WordPress core tables in the plugin.
WordPress core tables are where all your website data is organized and stored. For instance, the wp_comments table contains all the information about comments on your site, including details about the users who commented.
We suggest selecting the ‘Select All’ option to include all tables. This is the safest method for a complete site migration, ensuring that old URLs are updated throughout your site, including in posts, user profiles, theme settings, and plugins.
Next, click the ‘Preview Search & Replace’ button to proceed.
The plugin will then allow you to preview the changes it intends to make, so you can avoid any mistakes.
Finally, click the ‘Replace All’ button.
The plugin will now update all URLs on your site to reflect the new domain.
Redirect Posts and Pages After Updating URLs
Once you have updated all the URLs on your website, it’s essential to set up 301 redirects for your entire site to the new domain. This step will maintain links from websites that were pointing to your old domain and help avoid 404 errors.
The simplest way to implement a full site redirect is by using the All in One SEO (AIOSEO) plugin. This plugin is the leading SEO tool for WordPress and is trusted by over 3 million professionals.
AIOSEO features a robust redirection manager that allows you to redirect old website URLs to new ones with just a few clicks. Additionally, the plugin helps monitor 404 errors on your site, enabling you to quickly identify and resolve any broken links.
For this tutorial, we will utilize the AIOSEO Pro version, as it includes the redirection manager along with other valuable features such as sitemaps, custom breadcrumbs, and schema markup. You can also start with the free version of AIOSEO.
The first step is to install and activate the AIOSEO plugin on your site. If you need assistance, please refer to our guide on how to install a WordPress plugin.
After activation, navigate to All in One SEO » Dashboard in your WordPress admin panel. Then, click the ‘Launch the Setup Wizard’ button to configure the plugin.
Simply follow the instructions provided in the setup wizard. For additional guidance, refer to our comprehensive tutorial on configuring All in One SEO for WordPress.
The AIOSEO redirection manager provides two main options for managing redirects after migrating your site. The ‘Full Site Redirect’ is ideal for transferring your entire website to a new domain, while ‘Individual Redirects’ can be used later to address specific broken links that may have been overlooked.
1. Configuring Full Site Redirects
This approach is highly beneficial when transferring your entire site to a new domain. It automatically redirects all your previous URLs to the new ones without requiring any coding.
Simply navigate to All in One SEO » Redirects in your WordPress admin dashboard and click the ‘Activate Redirects’ button.
After activation, go to the ‘Full Site Redirect’ tab and toggle the ‘Relocate Site’ option to enable it.
Then, enter your new domain name in the ‘Relocate to domain’ field.
Once you’ve entered your new domain URL, remember to click the ‘Save Changes’ button to apply your settings. AIOSEO will now redirect all links on your site to the new URL.
2. Configuring Individual Post/Page Redirects
AIOSEO provides various redirection methods to help you configure redirects for individual posts and pages.
We suggest using the ‘301 Moved Permanently’ redirection type. This informs your browser that the page has been permanently relocated to a new address, and you do not plan to revert it.
After entering the necessary information, just click the ‘Add Redirect’ button to save your changes.
You can view all the redirects you have set up by scrolling down to check the logs.
In the logs, you can see the URLs, the number of visitors to each link, the type of redirection applied, and you can also enable or disable any redirect as needed.
In the ‘Settings’ tab under Redirects, you have the option to configure server-level redirects, which are significantly faster. The default method is PHP, which is the simplest way to redirect old URLs without needing server-side adjustments.
Alternatively, you can select ‘Web Server’ as your redirection method and choose either Apache or NGINX for your web server.
For most users, the ‘PHP’ method is recommended as it is quick to implement without any complicated setup. The ‘Web Server’ option may offer faster performance but requires advanced knowledge of your server’s configuration.
Bonus: Monitor Broken Links on Your Website
When updating your URLs to a new domain, it’s crucial to monitor for any broken links. These links lead to non-existent pages and result in a 404 error. Broken links can occur if any URL is not updated correctly.
With AIOSEO, tracking and resolving 404 error pages is straightforward using the Redirection Manager.
To get started, navigate to All in One SEO » Redirects in your WordPress dashboard.
Next, click on the ‘Settings’ tab under Redirects and toggle on the ‘404 Logs’ and ‘Redirect Logs’ options.
Using AIOSEO, you can specify the duration for retaining your 404 error logs. We recommend keeping it to a maximum of one month for optimal WordPress performance.
After enabling these options, click the ‘Save Changes’ button at the top of the page to apply your settings.
You should now see a new ‘404 Logs’ tab under Redirects in AIOSEO. This tab will display the 404 error pages detected on your website.
It’s important to note that initially, you won’t see any data under the 404 Logs tab. The plugin will begin recording broken links only after you have activated the settings.
After the settings have been active for a while, click on the ‘404 Logs’ tab. You will find a list of broken links in the URL column, the number of visits in the Hits column, and the last accessed date.
To resolve any broken link, simply click the ‘Add Redirect’ button next to the specific URL. AIOSEO will provide options to configure redirection for the 404 error URL.
You need to enter the new link in the ‘Target URL’ field and choose ‘301 Moved Permanently’ as the Redirection Type from the dropdown menu.
Then, click the ‘Add Redirect’ button to correct the broken link on your website.
To verify if the redirection is functioning, visit the old URL. If you are redirected to the new URL, it indicates that you have successfully resolved the 404 error pages.
Frequently Asked Questions About Updating URLs in WordPress
Here are answers to some common questions our readers have regarding updating URLs after migrating a WordPress site. This information can help clarify the process.
1. What should I do if I forget to update URLs after migrating my WordPress site?
Failing to update your URLs can lead to numerous broken internal links and missing images on your website. This not only frustrates your visitors but also negatively impacts your SEO rankings, as search engines will encounter 404 errors.
Do I need to update the URLs for my images and other media files as well?
Absolutely, this is a crucial step. When you upload an image to WordPress, its complete URL is stored in the database. Simply changing your site address in the General Settings will not update these image paths, which is why using a search and replace tool is essential.
Is implementing a 301 redirect sufficient when migrating a site?
No, a 301 redirect is just one part of the overall solution. While redirects are vital for directing both visitors and search engines from your old domain to the new one, you must also update the internal URLs in your database to ensure that your site’s links and images function properly.
How can I locate and resolve broken links after the migration is finished?
The most effective approach is to utilize a plugin like All in One SEO. Its Redirection Manager features a built-in 404 error log that automatically monitors any broken links encountered by visitors. You can then easily redirect these broken URLs to the correct pages.
5. Is it safe to delete the search and replace plugin after completing the process?
Yes, definitely. After verifying that your URLs have been updated correctly, you can safely deactivate and remove the Search and Replace Everything by WPCode plugin. It’s advisable to keep only the plugins that you actively use.
Top Guides for Migrating Your WordPress Site
We hope this article has helped you understand how to update URLs when migrating your WordPress site. You might also find our other guides on website migration useful:
- A Simple Guide to Moving WordPress to a New Domain Without Losing SEO
- Essential WordPress SEO Migration Checklist for Beginners
- When is the Right Time to Change Your WordPress Web Hosting?
- How to Migrate WordPress to a New Host or Server Without Downtime
- How to Transfer WordPress From Local Server to Live Site
- How to Move a Live WordPress Site to a Local Server
- How to Correctly Move WordPress From a Subdomain to the Root Domain
- How to Seamlessly Transfer Your Blog from WordPress.com to WordPress.org
- Comprehensive WordPress Migration Guide for Beginners (Step by Step)
If you enjoyed this article, please subscribe to our YouTube Channel for WordPress video tutorials. You can also connect with us on Twitter and Facebook.