Managing form entries in WordPress is crucial whether you’re hosting an event, running a contest, or gathering survey responses.
At times, you may need to limit the number of entries to avoid system overload or to adhere to specific requirements.
For example, you might want to set a maximum number of participants or accept entries only within a designated time period.
This article will guide you through the process of effectively limiting WordPress form entries.
When is it Necessary to Limit WordPress Form Entries?
There are numerous scenarios where restricting form entries on your WordPress site can prove advantageous.
Whether you’re creating an RSVP form with limited capacity or a feedback form exclusive to registered members, WordPress forms can be tailored to restrict submissions according to your requirements.
Here are several methods to limit WordPress form entries:
- Set a maximum number of allowed form submissions – ideal for RSVP forms or contests and giveaways.
- Limit form submissions by a specific deadline – perfect for scholarship applications, event RSVPs, job applications, and more.
- Restrict form entries to users who are logged in – beneficial for membership sites or online stores.
- Limit each user to one submission on your WordPress form. This is particularly useful for feedback forms to prevent duplicate responses.
- Implement age verification to restrict WordPress form submissions. This is essential for compliance with local regulations.
- Restrict form submissions based on user location or IP address. This is effective for blocking specific regions and reducing spam.
WordPress form plugins offer customizable workflows tailored to your needs, helping you save time and streamline processes.
Now, let’s explore how to easily set limits on form submissions in WordPress.
How to Limit the Number of Submissions on Your WordPress Form
The most effective way to limit form submissions is by using WPForms. This top-rated WordPress contact form plugin is utilized by over 6 million websites for creating intelligent forms.
Our testing revealed that WPForms includes a Form Locker addon, allowing you to manage permissions and control access to your forms. You can also set various types of entry limits on your site. For more details, check out our WPForms review.
To get started, install and activate the WPForms plugin. If you need assistance, refer to our guide on how to install a WordPress plugin.
Important Note:WPForms offers a free version, but to access the Form Locker addon, you will need to upgrade to the pro plan.
Once activated, navigate to theWPForms » Settingssection in your WordPress admin dashboard and enter your license key.
You can find this information in your account area on the WPForms website.
Next, activate the Form Locker addon within WPForms.
To do this, go to theWPForms » Addonssection from the WordPress admin sidebar and locate the ‘Form Locker Addon.’
Then, click the ‘Install Addon’ button.
After installation, you will need to create a new WordPress form.
To do this, go toWPForms » Add Newin the WordPress dashboard.
On the following screen, the WPForms form builder will appear.
Here, enter a name for your form at the top.
You can choose from various pre-built form templates for a quick start, or opt for a blank template to create your form from scratch. For this tutorial, we will select the ‘Contest Registration Form’ template.
After that, you can customize your form using the intuitive drag-and-drop form builder.
The form template comes with pre-defined fields, but you can easily enhance it by dragging additional fields from the menu and dropping them onto the template.
A variety of fields are available, including checkboxes, dropdown menus, address fields, phone number fields, and more.
After adding fields, you can customize the form settings using the options available in the left column.
You can also modify any form field and establish entry limits for your forms.
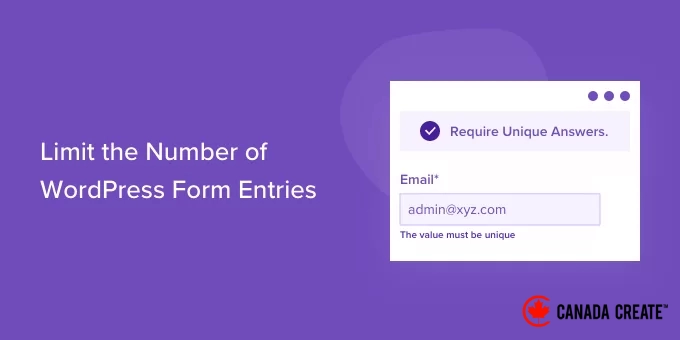
For instance, if you want to prevent the same user from submitting multiple forms on your WordPress site,
To set this limit, click on the Email field in the form template to access its settings in the left column. Then, navigate to the ‘Advanced’ tab in the menu panel on the left and enable the ‘Require unique answer’ option.
You can apply the same settings to other fields, such as name and username. This ensures that users can only submit one entry and cannot use the same email or name for multiple submissions.
Next, head to the ‘Settings’ tab in the form builder and choose the ‘Form Locker’ options.
You will now see various settings under the Form Locker section that allow you to restrict the number of form entries.
You can activate all available options if you prefer, but we suggest limiting it to one or two options. This approach helps maintain a positive user experience while enhancing engagement.
Let’s explore each of these settings in detail.
1. Restrict WordPress Form Entries with Verification
By enabling the ‘Form Verification’ feature in the Form Locker settings, additional options will become available. You can set restrictions by requiring users to provide a password, email address, or age.
Simply select your preferred option from the ‘Type’ dropdown menu.
For instance, if you choose the ‘Age’ option, you can specify the minimum age required for users to access the form.
You have the flexibility to set a minimum, maximum, or exact age requirement for form submissions.
2. Set Start and End Dates and Times for Form Submissions
Next, you can activate the ‘Form Scheduling’ feature, allowing you to set a start date and time as well as an end date and time for form submissions.
This is particularly useful for time-sensitive campaigns.
You can also include a Closed Message that will display when someone attempts to submit a form after the designated end date and time.
3. Limit theNumber of Form Submissions toUsers Who Are Logged In
WPForms allows you to restrict form submissions to users who are logged in.
To do this, activate the ‘Logged in users only’ feature and provide a message that will be displayed to users who are not logged in when they attempt to submit the form.
4. Establish Total Submission Limits and Restrictions
Activating the ‘Enable total entry limit’ option restricts the total number of submissions for your forms.
For instance, if you operate a WooCommerce store with only 1,000 units of a product available, you can set this limit.
Just input the desired number in the Limit field and include a message that will appear when the form is no longer accepting submissions.
Additionally, you can implement restrictions on form submissions by selecting the ‘Enable user entry limit’ option.
WPForms enables you to limit form entries based on both IP addresses and email addresses. To configure this, check the boxes for the ‘Restrict by IP address’ and ‘Restrict by email address’ options.
Next, choose an option from the dropdown menu and specify the number of submissions you wish to limit.
In this example, we have set the limit to one submission per day, but you can adjust this to weekly, monthly, or yearly limits.
Once you have selected the options to control the number of form submissions in WordPress, simply click the ‘Save’ button located at the top.
Integrating Your Form into Your WordPress Website
After creating your form, the next step is to integrate it into a page or post on your WordPress site.
The simplest method is to click the ‘Embed’ button in the WPForms form builder. Alternatively, you can use a shortcode or the WPForms block to add the form.
Once you click the button, a popup will appear prompting you to select an existing page or create a new one.
For this guide, we will choose the ‘Create New Page’ option.
Next, enter a name for your page and click the ‘Let’s Go!’ button.
You will then see the form in the WordPress content editor, where you can make any final adjustments to your form.
Afterward, preview your page and publish it.
You can also test the entry limits you’ve established for your WordPress form.
For instance, if you have set an age restriction on your form, users who do not meet the age requirement will be unable to submit it.
Conversely, if you reach the total number of required form submissions or if the submission deadline has passed,
users will see a notification when they access the form landing page.
Bonus: Distribute Form Entries to Multiple Recipients
Once you have established a limit on form entries and published your form, you will receive an email notification each time a user submits the form on your website.
This feature keeps you informed and aware of all activities on your site. Additionally, WPForms enables you to send form submissions to multiple recipients.
For instance, if you want all inquiries to be forwarded to your assistant or if you need specific messages directed to different departments, WPForms can facilitate this.
Simply open the form you created in the form builder, click on the ‘Settings’ button in the left column, then navigate to the ‘Notifications’ tab and enter the recipient’s email address in the ‘Send To Email Address’ field.
You can add as many email addresses as you wish in this field, just be sure to separate them with commas.
After you finish, click the ‘Save’ button at the top to apply your settings. Now, submission notifications for your limited form entries will be sent to multiple recipients. For further information, check out our tutorial on sending form entries to multiple recipients in WordPress.
WPForms provides complete control over your form workflows. You can implement conditional logic, manage user submissions, set up email notifications for form submissions, and integrate your forms with popular email marketing services.
This is the form builder plugin we use at CanadaCreate, and it’s no surprise that over 6 million websites rely on it to create intelligent forms.
We hope this article has helped you understand how to limit the number of entries in your WordPress forms. Additionally, check out our guide on creating more interactive forms to boost conversions and our comparison of WPForms, Gravity Forms, and Formidable Forms to choose the best form builder for your needs.
If you enjoyed this article, please subscribe to our YouTube Channel for WordPress video tutorials. You can also connect with us on Twitter and Facebook.