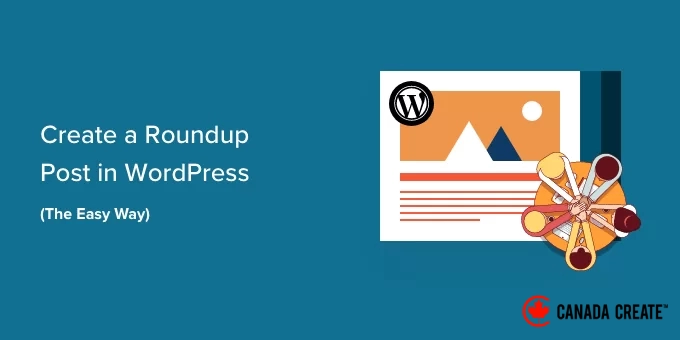
Through our experience assisting numerous WordPress users in enhancing their blogs, we have discovered that one type of content consistently shines: roundup posts. These unique posts compile your top articles, making it simple for readers to locate exactly what they are looking for.
At CanadaCreate, we frequently utilize roundup posts as a key strategy to keep our audience engaged. They not only allow us to highlight our best content but also breathe new life into older articles, ultimately increasing overall site traffic.
In this article, we will guide you through the process of creating impactful roundup posts in WordPress. You will learn our detailed step-by-step approach, whether you are just launching your blog or already have a wealth of content to showcase.
Why Should You Create Roundup Posts in WordPress?
A roundup or list post presents a curated selection of your top articles on a specific topic, providing a comprehensive overview of that subject. Often referred to as ‘listicles,’ these posts compile valuable content focused on a particular theme or industry.
For instance, you might create an engaging showcase of your most popular recipes from the past year, offer your best tips for small businesses, or highlight the top reviews featured on your WordPress site.
Roundup posts serve as an excellent tool for promoting your older articles. They can also highlight the best products within a specific category or present solutions to particular challenges.
Additionally, these roundup articles and listicles offer another advantage for your WordPress blog: they enhance your internal linking strategy, which can significantly boost your site’s SEO performance.
In this article, we will discuss the essential steps to help you create an effective roundup post.
- Step-by-Step Guide to Creating a Roundup Post in WordPress
- Including a Post From Your Own Blog
- Including a Post From External Blogs or Websites
- Personalizing Your Roundup Post
Let’s dive in.
Step-by-Step Guide to Creating a Roundup Post in WordPress
The simplest method to create a roundup post is by utilizing the WP Tasty Roundups plugin. After our testing, we discovered that it transforms your existing content into visually appealing roundup posts that perform well in search engine rankings.
Although the plugin is primarily tailored for food blogs, it is versatile enough to be used across various blogging niches and industries.
First, you need to install and activate the WP Tasty Roundups plugin. For detailed instructions, refer to our comprehensive guide on installing a WordPress plugin.
Once activated, navigate to Settings » Tasty Roundups in your WordPress admin dashboard to input your license key and set up the plugin’s default configurations.
To activate your plugin, simply enter your license key in the designated field at the top of the screen. You can find this key in the confirmation email you received after purchasing the plugin. Once entered, click the ‘Save License Key’ button.
On this page, you can also set the default style for your listicles to enhance their appearance.
For instance, you can choose to position images on the left, top, or right of each post and decide whether to add numbers to each item in the list.
By default, the roundup will adopt the formatting of your current WordPress theme. However, you have the option to customize the text, numbering, buttons, and block styles to suit your preferences.
After configuring the plugin settings, remember to click the ‘Save Changes’ button at the bottom of the page to ensure your adjustments are saved.
To create a roundup post, you can either start a new post or edit an existing one where you wish to include the listicle.
Next, click the ‘+’ button at the top of the screen, find ‘Tasty Roundup’ in the Widgets section, and drag the block to your desired location within the post.
You can then use the block to add posts to your roundup from both your own blog and other websites.
Each roundup post will feature a clean design, uniform formatting, and clear links to your original source posts. This enhances the user experience and enables readers to easily navigate your content.
Incorporating a Post From Your Own Blog
Your roundup posts will typically include entries from your own WordPress blog, and WP Tasty Roundups simplifies this process.
Just enter one or two keywords into the integrated search tool, and a list of relevant posts will appear on your screen.
Simply click on the post title or the ‘+ Add’ button beside it, and that post will be instantly included in your roundup.
The plugin automatically retrieves images, titles, descriptions, and links from the selected post to populate your roundup list. Later in this guide, we will explain how to customize this information.
You can continue adding more blog posts to your list by following these steps again.
Incorporating a Post From Another Blog or Website
You can also add posts from external blogs or websites, although this requires a bit more effort.
When you click the ‘+ Add Post Manually’ button, a blank item will be created at the bottom of the Tasty Roundups block.
Begin by entering the post title and description manually. You can also upload a new image or select one from the media library using the buttons in the image area.
Next, add the URL of the article by clicking the ‘Add link’ icon in the toolbar. Simply paste the article’s URL into the provided box and press Enter or click the ‘Apply’ icon next to the URL box.
To access additional options, click the ‘Link Settings’ down arrow icon on the right. For external links, we recommend turning on the ‘Open in new tab’ toggle. You can also enter ‘nofollow’ in the ‘Link Rel’ box to prevent passing your link authority to other sites.
For further details, check out our beginner’s guide on adding nofollow links in WordPress.
After you add the link, a ‘Read more’ button will be displayed in the article. Clicking this button will direct your readers to the full article.
Personalizing Your Roundup
Once you have completed adding all the articles to your list post, there are several ways to personalize the roundup.
For instance, you can rearrange the posts by selecting one and clicking the ‘Move Up’ or ‘Move Down’ buttons on the toolbar. Drag and drop functionality is also available.
You can customize the layout of each individual post in your roundup.
For instance, the toolbar buttons allow you to decide if the image appears on the left, top, or right. You may prefer some posts with the image on the right and others on the left.
You can also modify the title and excerpt. Use the ‘Bold’ and ‘Italic’ icons in the toolbar to format this text. Additionally, you can change the button text.
You can update the image in the roundup by clicking the ‘Replace’ button in the toolbar. This option lets you upload a new image or select one from your media library.
After completing your roundup post and making all necessary customizations, you can publish it by clicking the ‘Publish’ or ‘Update’ button at the top of the page.
Once published, visit your WordPress site to view your roundup post or showcase. Here is a preview of our sample roundup.
Comprehensive Guides on Creating Content in WordPress
We hope this tutorial has helped you learn how to create a roundup post in WordPress with ease. You may also want to explore additional articles on writing various types of content in WordPress:
- What Are the Key Differences Between Posts and Pages in WordPress?
- Essential Pages Every WordPress Blog Needs
- How to Craft an Engaging Blog Post: Structure and Examples
- Step-by-Step Guide to Adding a New Post in WordPress and Maximizing Features
- Creating an Effective Blog Post Outline for WordPress
- Quick Tips to Generate Over 100 Blog Post Ideas
- How to Create Custom Post Types in WordPress
- Discover the Most Popular Blog Types Revealed
- Using AI Content Generators to Write Blog Posts in WordPress
- Top ChatGPT Prompts for Bloggers, Marketers, and Social Media Managers
If you enjoyed this article, subscribe to our YouTube Channel for WordPress tutorials. Connect with us on Twitter and Facebook.