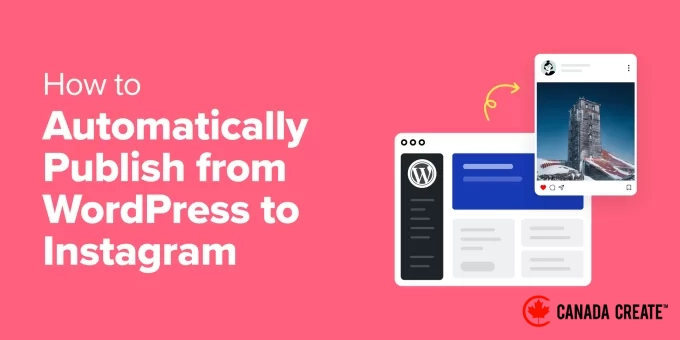
Creating content for your WordPress blog requires significant time and effort, but sharing that content with your Instagram audience can seem like an entirely different task.
Instagram is an excellent platform for visually engaging with your audience. However, maintaining an updated feed shouldn’t add to your already busy schedule.
The good news is that you don’t have to handle it all manually.
Many bloggers and website owners are now using automation tools that link WordPress with Instagram, making it much simpler to maintain an active social media presence without additional workload.
In this guide, we will outline the most effective method for automatically sharing your WordPress content on Instagram, based on practical testing. This will help you save time, expand your audience, and focus on what truly matters: creating exceptional content. 💡
Why Should You Automatically Publish From WordPress to Instagram?
If you’re aiming to save time and keep your audience engaged,automating your Instagram posts is a wise choice.
As one of the largest social media platforms globally, many WordPress site owners utilize Instagram to connect with potential new readers, website visitors, and customers.
Once you have built a following on Instagram, you can leverage this platform to promote your WordPress blog. It’s beneficial to inform your Instagram followers about each new blog post you publish.
To make your blog post visually appealing on Instagram, include a striking image and a captivating caption. Although Instagram captions do not support clickable links, you can direct your followers to your blog through a link in your Instagram bio, making it easy for them to access your latest content.
Additionally, you can include a link on your bio page, allowing you to highlight more than just a single link in your Instagram profile.
Managing an engaging Instagram account requires significant time and effort, but you can streamline this process by automating your posts to Instagram.
Now, let’s explore how to set up automatic posting to Instagram whenever you publish a new blog post on WordPress.
Automatically Share Your WordPress Posts on Instagram Using Uncanny Automator
Uncanny Automator is the leading WordPress automation plugin that enables you to create automated workflows without any coding skills.
It integrates with over 185 plugins and third-party applications, allowing you to design intelligent automation workflows that save you valuable time.
For instance, you can connect Slack with WordPress, set up a workflow that automatically shares posts on Facebook from WordPress, and much more.
Interested in discovering more about this tool? Check out our comprehensive review of Uncanny Automator.
In this tutorial, we will be using the free version of Uncanny Automator. It offers over 350 automation triggers and actions, including options for Instagram. This is ideal if you’re on a budget and just starting out.
However, if you wish to create more sophisticated and advanced workflows, you will need Uncanny Automator Pro, which features over 1000 triggers and actions.
The first step is to install and activate the Uncanny Automator plugin. For detailed instructions, refer to our step-by-step guide on installing a WordPress plugin.
After activation, navigate to Automator » Settings. Then, simply click on ‘Connect your site.’
Uncanny Automator will prompt you to upgrade for additional credits, triggers, and actions. If you wish to upgrade, click on the ‘Upgrade to Pro now…’ button and follow the instructions to purchase Uncanny Automator Pro.
To automatically publish your WordPress posts on Instagram using the free version of Uncanny Automator, click on ‘Connect your free account.’ You can upgrade to Uncanny Automator Pro whenever you choose.
Uncanny Automator will display a popup where you can create an account by entering your name, email address, and chosen password. After filling in this information, click on ‘Sign Up.’
After a brief moment, Uncanny Automator will confirm that you have successfully set up the plugin.
Next, click on ‘Return to dashboard.’
Before you can start automatically sharing posts from WordPress to Instagram, you must connect your Instagram account to Uncanny Automator.
💡Note:To enable automatic posting, you need an Instagram Business account linked to a Facebook page for your business. If you don’t have an Instagram Business account yet, the good news is that it’s free. Check out Instagram’s guide on converting a personal account to a Business account.
To link Uncanny Automator with your Instagram account, navigate to Automator » Settings. Then, select the ‘Premium integrations’ tab.
In the left-hand menu, click on ‘Instagram.’
Since Instagram is a subsidiary of Facebook’s parent company, you will need to link your Instagram Business account to the corresponding Facebook page.
To begin, click on the ‘Connect Facebook Pages’ button.
Uncanny Automator will guide you through the steps to connect your Facebook page. After connecting, you will be prompted to choose the Instagram account you wish to use.
Once you’ve selected an account, you need to specify the actions Uncanny Automator can perform and the information it can access on Instagram. To enable automatic publishing from WordPress to Instagram, make sure to activate the first two options:
- Allow access to your profile and posts from the Instagram account linked to your Page.
- Permit uploading media and creating posts for the Instagram account associated with your Page.
After that, click the ‘Done’ button.
Once completed, Uncanny Automator will redirect you back to the WordPress dashboard.
You should now see that Uncanny Automator is successfully connected to your Instagram account.
The next step is to create a workflow that will automatically publish content from WordPress to Instagram. Uncanny Automator refers to these workflows as ‘recipes,’ which consist of actions and triggers.
To create a recipe, navigate to Automator » Add New.
On this screen, you will choose between creating a ‘Logged-in’ recipe or an ‘Everyone’ recipe.
Only users with a WordPress account can publish blog posts. Therefore, select ‘Logged-in users’ and click the ‘Confirm’ button.
You can now begin to create your Uncanny Automator recipe.
First, enter a title in the field labeled ‘Add Title’ by default.
We will name the recipe ‘Automatically Publish from WordPress to Instagram,’ but feel free to choose any title you prefer.
Next, you need to specify the condition that will trigger the action. For this recipe, the trigger is when a new blog post is published.
To add a trigger, simply click the WordPress button in the Triggers section.
You will now see a list of all available Uncanny Automator triggers.
In the ‘Search for triggers’ field, begin typing: ‘A user publishes a type of post with a taxonomy term in a taxonomy.’
When the correct trigger appears, click on it to include it in your Uncanny Automator recipe.
First, select the type of content that will activate the recipe by clicking on the Post Type dropdown. You can choose from post, page, media, or any other post type.
Since we want to share on Instagram whenever a new blog is published, you should select ‘Post.’
At this stage, you can configure Uncanny Automator to run this recipe only for posts that belong to a specific category or tag. For instance, you might want to automatically share only those blogs that have the ‘announcement’ tag.
This allows you to have precise control over what gets shared on your Instagram account, while still enjoying the efficiency of an automated process.
To restrict this recipe to a specific tag or category, open the ‘Taxonomy’ dropdown. You can choose either ‘Category’ or ‘Tag’ here.
After that, click on the ‘Taxonomy term’ dropdown.
You can now select any of the categories or tags to include them in your recipe.
Once you are satisfied with the details you’ve provided, click on ‘Save’ to apply your changes. Uncanny Automator will then display a summary of the action that will trigger your recipe.
The next step is to choose the action that will occur each time you publish a new WordPress post. Begin by clicking on the ‘Add action’ button.
Uncanny Automator will display all the WordPress plugins and applications available for your recipe.
Locate ‘Instagram’ and click on it.
Next, click on the ‘Search for actions’ field and begin typing ‘Publish a photo to an Instagram Business account.’
When the appropriate action appears, click to add it to your recipe.
You will now see a new set of controls.
First, we need to specify the image that Uncanny Automator will post to Instagram each time you publish a new WordPress post.
At times, you may want to use the same image for every post. For instance, you might have created a unique image using editing software to promote your website.
To use the same image consistently, either type or copy/paste the image’s URL into the ‘Image URL or Media library ID’ field.
To obtain an image’s URL, simply locate the image in your WordPress media library.
Then, copy the value found in the ‘File URL’ field, as shown in the following image.
Alternatively, you can choose to use a different image for each WordPress post, ensuring you don’t post the same image to Instagram repeatedly.
Whenever you publish a new blog post, Uncanny Automator can automatically share the featured image on Instagram. If you need assistance with adding featured images to your posts, check out our guide on how to include featured images or post thumbnails in WordPress.
To share the blog’s featured image on Instagram, click the asterisk button next to the ‘Image URL or Media Library ID’ field.
Next, click on the ‘Search token’ field and start typing ‘post featured image URL.’
When the appropriate token appears, click on it to add it to your recipe. Now, Uncanny Automator will automatically retrieve the post’s featured image and share it on Instagram.
The next step is to enter the caption that Uncanny Automator will use for the Instagram post.
One option is to simply type a message in the ‘Caption’ box, such as ‘We just published a new post. Check it out on our blog!’ Uncanny Automator will use this caption for every Instagram post.
Alternatively, you can incorporate tokens into the caption. Similar to dynamic text, Uncanny Automator will replace the token with a specific value from the blog post, like the post’s title or URL.
This enables you to craft more engaging and unique captions, rather than repeating the same message for every post.
Click the asterisk button to view all available tokens.
In the dropdown menu, locate ‘A user publishes…’ and click the arrow next to it.
Find the token you wish to include in your caption and click on it.
For more engaging and informative captions, consider combining plain text with tokens, as illustrated in the image below.
Once you’re satisfied with your recipe, click the ‘Save’ button.
The last step is to activate the recipe so it can automatically publish from WordPress to Instagram.
To publish your automated workflow, go to the ‘Recipe’ section on the right side of the screen and toggle the slider from ‘Draft’ to ‘Live.’
Now, whenever someone publishes a new blog post on your WordPress site, Uncanny Automator will automatically create a new Instagram post.
Bonus Tip:Maximizing Your Instagram Feed
Automatically sharing your blog posts on Instagram is an excellent way to keep your content fresh and engaging.
To enhance visibility for their Instagram accounts, many professional bloggers and online store owners choose to embed their Instagram feed directly on their websites.
This feature enhances your site’s credibility, encourages visitors to stay longer, boosts engagement, and can lead to increased sales.
The simplest way to integrate Instagram feeds into your WordPress site is by using the Smash Balloon Instagram Feed plugin, which automatically adds Instagram content to your website.
There is a free version of the Instagram plugin that is currently used by over 1 million websites.
With Smash Balloon, you can customize the appearance of your Instagram feed on your website and choose the content it displays.
You can sort feeds by Instagram hashtags, display likes and comments, create a personalized Instagram photo feed in WordPress, and more with its user-friendly editor.
Once you’ve created your feed, you can easily add it to any page, post, or widget-ready area using the Instagram Feed block.
For further information, check out our guide on how to effortlessly embed Instagram in WordPress.
Frequently Asked Questions: How to Automatically Publish from WordPress to Instagram
If you still have questions about linking your WordPress site to Instagram, here are some common FAQs to assist you in optimizing your automation setup.
Is an Instagram Business account required for this to function?
To use the method outlined in this guide, you need a free Instagram Business account. According to Instagram’s policies, only Business accounts can connect to third-party tools for automated posting. Additionally, your Business account must be linked to a Facebook Page.
Is it possible to automatically share videos from WordPress to Instagram?
The automation methods discussed mainly focus on publishing photos, like your featured image. Automatically posting videos is more complicated due to Instagram’s API restrictions, but some advanced configurations using tools like Uncanny Automator may make it possible.
For consistent results, we recommend concentrating on image automation.
What is the best way to showcase my new Instagram posts on my WordPress site?
This is an excellent strategy to enhance engagement and build social proof. The simplest solution is to use the Smash Balloon Instagram Feed plugin, which allows you to embed a live, customizable feed of your Instagram content anywhere on your WordPress site.
Explore More Social Media Guides to Enhance Your WordPress Website
We hope this article has helped you understand how to automatically share content from WordPress to Instagram. If you found this information useful, you may also want to check out our other guides on:
- How to Showcase Instagram Photos in a WordPress Sidebar Widget
- A Comprehensive Guide to Adding the Facebook Like Button in WordPress
- Step-by-Step Instructions to Embed Facebook Albums in WordPress
- How to Launch a Viral TikTok Giveaway Using WordPress
- Essential Twitter Hacks and Plugins for Your WordPress Site
- Integrating Your Social Media Feeds into WordPress: A How-To Guide
- How to Incorporate Social Share Buttons in Your WordPress Site
- Displaying Social Media Follower Counts in WordPress: A Guide
- Top Social Media Plugins to Enhance Your WordPress Experience
- Your Ultimate Social Media Cheat Sheet for WordPress
If you enjoyed this article, consider subscribing to our YouTube Channel for WordPress tutorials. You can also connect with us on Twitter and Facebook.