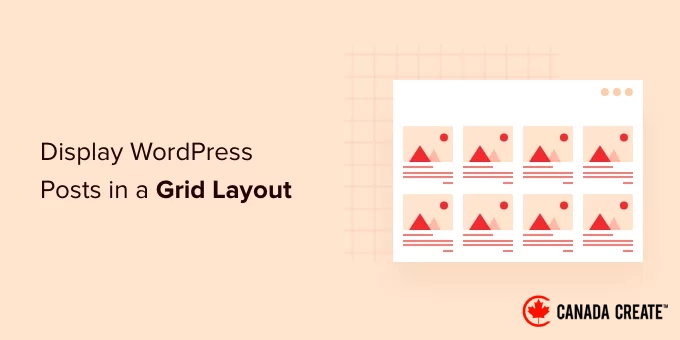
Are you looking to showcase your WordPress posts in a visually appealing grid layout?
A grid layout offers greater flexibility for presenting your posts in WordPress, making it ideal for creating custom pages.
In this guide, we will demonstrate how to effortlessly display your WordPress posts in a grid layout anywhere on your website.
When Should You Consider a Grid Layout for WordPress?
While every WordPress theme typically supports a standard vertical layout for blog posts, this format can consume a lot of space, particularly if you have numerous posts.
If you’re designing a custom homepage for your website, utilizing a grid layout to showcase your latest posts can be beneficial.
This approach allows for more room to incorporate additional elements on your homepage.
Moreover, a post grid emphasizes your featured images, making it both visually attractive and engaging. You can also leverage the post grid to highlight your creative portfolio and other unique content.
Many magazine and photography themes already implement a grid-based layout for displaying posts. However, if your theme lacks this feature, you will need to add it manually.
Let’s explore how to showcase your WordPress posts in an attractive grid layout. Use the quick links below to navigate directly to your preferred method.
- Design a grid layout using the WordPress block editor
- Build a grid layout with the Post Grid plugin
- Create a grid layout with the SeedProd page builder
- Implement a grid layout by adding custom code to WordPress
If you prefer written guidance, continue reading below.
Method 1: Create a WordPress Post Grid Layout with the Block Editor
This method allows you to easily display your posts and thumbnails in a grid format using the WordPress block editor, which includes a built-in post grid block for customization.
To get started, open the page you wish to edit, click the ‘Plus’ button to add a block, search for ‘Query Loop’, and then select the block to add it to your page.
This block will insert your post loop onto the page.
Next, click the ‘Start Blank’ option at the top of the block to set up your post grid.
This provides several options based on the type of content you want to display in your post grid.
We’ll choose the ‘Image, Date, & Title’ option, but feel free to select any option that suits your needs.
Next, hover over the image and choose the ‘Grid View’ option.
This will transform your list into a visually appealing post grid.
You can now customize the details you wish to display.
First, let’s remove the pagination at the bottom of the block. Click on it, then select the ‘Three Dots’ options menu.
After that, click on ‘Remove Pagination’.
This action will automatically eliminate the pagination element from the block.
You can also remove the post dates in the same manner, or choose to keep additional post information for your audience.
Next, we’ll add clickable links to both the post thumbnail and the post title.
Simply click on your post thumbnail and enable the ‘Link to Post’ toggle in the options panel on the right.
Then, repeat this step for your post title.
Once you’re done, click the ‘Update’ or ‘Publish’ button to make your post grid visible to visitors.
Now, you can visit your WordPress website to view your newly created post grid.
You can add this block to any page or post. If you want to use it as your blog archive page, check out our guide on creating a separate page for blog posts in WordPress.
Method 2: Create a WordPress Post Grid Layout Using the Post Grid Plugin.
This method provides an easy way to incorporate a customizable post grid that can be placed anywhere on your website.
The first step is to install and activate the Post Grid plugin. For detailed instructions, refer to our guide on how to install a WordPress plugin.
After activation, navigate toPost Grid » Add Newto set up your first post grid.
Next, assign a title to your post grid. This title will not be displayed on your page; it is simply for your reference.
Below this, you will see the post grid settings organized into various sections with multiple tabs.
First, click on the ‘Query Post’ tab. Here, you will specify the post types you wish to display in the ‘Post types’ box.
By default, it will show only posts, but you can also include pages and custom post types.
Next, click on the ‘Layouts’ tab.
Then, click the ‘Create layout’ button, which will open in a new window.
You will need to name your layout. After that, click on the ‘General’ option to reveal a list of tags.
These tags represent the information that will be displayed in your post grid.
We will choose the ‘Thumbnail with link’ option and the ‘Post title with link’ option.
Click on ‘Publish’ or ‘Update’ to save your new layout.
Return to the original post grid editor in the previous tab, where you’ll find a new layout option ready for selection.
Select the new layout from the ‘Item layouts’ section located at the bottom of the screen.
Next, navigate to the ‘Item style’ tab to adjust the size of your grid.
The default settings should suit most websites, but feel free to customize them if needed.
Once you’ve completed your adjustments, click the ‘Publish’ button at the top of the page to make your grid available for your WordPress blog.
Now, click on the ‘Shortcode’ tab and copy the shortcode found in the ‘Post Grid Shortcode’ box.
Open the page where you want to showcase your post list and click the ‘Plus’ button to add a block.
Search for ‘Shortcode’ and choose the ‘Shortcode’ block from the options.
Paste the previously copied shortcode into the designated box.
Then, click the ‘Update’ or ‘Publish’ button to save your changes.
You can now view your page to see the live layout of your WordPress post grid.
Method 3: Create a WordPress Post Grid Layout Using the SeedProd Page Builder Plugin
One effective method for creating a post grid layout is by utilizing the SeedProd page builder plugin, which is the leading drag-and-drop WordPress page builder, trusted by over 1 million websites.
SeedProd allows you to effortlessly design custom pages and even fully personalized WordPress themes without any coding knowledge. You can use this plugin to create various types of pages, including 404 error pages, coming soon pages, landing pages, and more.
For further details, check out our comprehensive guide on creating a custom page in WordPress.
Within the SeedProd builder, while customizing your page, simply click the plus ‘Add Section’ button located anywhere on the page.
This action will display an option to insert a new block.
Next, drag the ‘Posts’ block onto your page, and it will automatically generate a list of posts.
You can now personalize this block using the options panel on the left side.
First, navigate to the ‘Layout’ section. Here, you can determine the number of columns for your blog post grid and enable the ‘Show Feature Image’ and ‘Show Title’ options.
Then, locate the ‘Show Excerpt’ and ‘Show Read More’ toggles and turn them off to achieve a clean blog post grid layout.
To customize the color scheme, text, and other elements, click on the ‘Advanced’ tab located at the top of the left-hand column.
Next, select the ‘Text’ dropdown menu to make your desired changes.
Feel free to continue personalizing your page and blog post grid layout as much as you wish.
When you’re finished, click the ‘Save’ button and choose the ‘Publish’ dropdown at the top of the page to make your changes live.
You can now view your newly created post grid on your website.
Method 4: Create a WordPress Post Grid Layout by Adding Custom Code
This method requires a basic understanding of how to add code to WordPress. If you’re unfamiliar with this process, please refer to our guide on copying and pasting code in WordPress.
Before adding any code, you need to create a new image size that will be used for your post grid. For more information, check our guide on creating additional image sizes in WordPress.
Next, locate the appropriate WordPress theme file where you will insert the code snippet. For instance, you can add it to your single.php file to have it appear at the bottom of all your posts.
Alternatively, you can create a custom page template to display your blog post grid layout along with thumbnails.
For more information, check out our cheat sheet on WordPress template hierarchy to help you identify the appropriate theme template file.
After that, you can begin integrating code into your WordPress site. Since the code snippet is lengthy, we will divide it into manageable sections.
First, insert the following code snippet into your theme’s template file.
<?php
$counter = 1; // Initialize counter
$grids = 2; // Number of grids per row
global $query_string; // Required for pagination to function correctly

/* Setting up our custom query (This configuration displays 12 posts per page and excludes all sticky posts) */
query_posts($query_string . '&caller_get_posts=1&posts_per_page=12');

if (have_posts()) :
    while (have_posts()) :
        the_post();
?>
This code snippet establishes the post loop query. You can modify the ‘posts_per_page’ variable to display a greater number of posts per page if desired.
Next, insert the following code snippet into your theme’s template file.
<?php
// Display the left column
if ( $counter == 1 ) :
?>
<div class="griditemleft">
    <div class="postimage">
        <a title="<?php the_title_attribute(); ?>" href="<?php the_permalink(); ?>"><?php the_post_thumbnail( 'category-thumbnail' ); ?></a>
    </div>
    <h2>
        <a title="<?php the_title_attribute(); ?>" href="<?php the_permalink(); ?>"><?php the_title(); ?></a>
    </h2>
</div>

<?php
// Display the right column
elseif ( $counter == $grids ) :
?>
<div class="griditemright">
    <div class="postimage">
        <a title="<?php the_title_attribute(); ?>" href="<?php the_permalink(); ?>"><?php the_post_thumbnail( 'category-thumbnail' ); ?></a>
    </div>
    <h2>
        <a title="<?php the_title_attribute(); ?>" href="<?php the_permalink(); ?>"><?php the_title(); ?></a>
    </h2>
</div>
<div class="clear"></div>

<?php
    $counter = 0;
endif;
?>
This code snippet generates two columns for displaying posts, showcasing both the title and the featured image. It also creates a CSS class that we will guide you on how to style later.
It also refers to ‘postimage’, so ensure to update this to the name of the image size you defined previously.
Next, insert the following code snippet at the bottom.
<?php
$counter++;
endwhile;

// Insert Post Navigation code here

endif;
?>
This code snippet effectively closes the loop and provides an option for post navigation. However, many website owners prefer to use a different plugin for navigation to prevent code conflicts, so we have omitted it.
Here’s the complete code snippet for your reference.
<div id="gridcontainer">

    <div class="griditemleft">
        <div class="postimage">
            <a title="<?php the_title_attribute(); ?>" href="<?php the_permalink(); ?>"><?php the_post_thumbnail( 'category-thumbnail' ); ?></a>
        </div>
        <h2>
            <a title="<?php the_title_attribute(); ?>" href="<?php the_permalink(); ?>"><?php the_title(); ?></a>
        </h2>
    </div>

    <?php // Display the right column elseif ( $counter == $grids ) : ?>

    <div class="griditemright">
        <div class="postimage">
            <a title="<?php the_title_attribute(); ?>" href="<?php the_permalink(); ?>"><?php the_post_thumbnail( 'category-thumbnail' ); ?></a>
        </div>
        <h2>
            <a title="<?php the_title_attribute(); ?>" href="<?php the_permalink(); ?>"><?php the_title(); ?></a>
        </h2>
    </div>

    <div class="clear"></div>

    <?php
    $counter = 0;
    endif;

    $counter++;
    endwhile;

    // Pagination can be added here if desired.

    endif;
    ?>

</div>
To ensure your post grid looks great, please add the following CSS to your website.
If you’re new to this, check out our guide on how to effortlessly add custom CSS to your WordPress site.
#gridcontainer{ margin: 20px 0; width: 100%; }
#gridcontainer h2 a{ color: #77787a; font-size: 13px;
}
#gridcontainer .griditemleft{ float: left; width: 278px; margin: 0 40px 40px 0;
}
#gridcontainer .griditemright{ float: left; width: 278px;
}
#gridcontainer .postimage{ margin: 0 0 10px 0;
}
Feel free to adjust the various CSS selectors to see how they affect different elements of your post loop.
We hope this article has helped you learn how to showcase your WordPress posts in a beautiful grid layout. You might also want to check out our guide on selecting the best web design software and our recommendations for the top live chat software for small businesses.
If you enjoyed this article, please subscribe to our YouTube Channel for WordPress video tutorials. You can also connect with us on Twitter and Facebook.