After dedicating countless hours to crafting high-quality content for your WordPress site, it’s disappointing to see visitors confronted with an outdated default password form when they attempt to access your protected pages.
It’s disheartening to watch potential customers leave because the page fails to represent your brand effectively or establish trust.
We understand how even minor details in WordPress can significantly influence your business’s success.
Based on our experience with managing membership sites, even small tweaks to the password page can enhance user experience and boost conversion rates.
That’s why we’ve created this comprehensive guide. Let’s explore how to design a password-protected page in WordPress that is visually appealing, aligns with your brand, and keeps your visitors engaged.
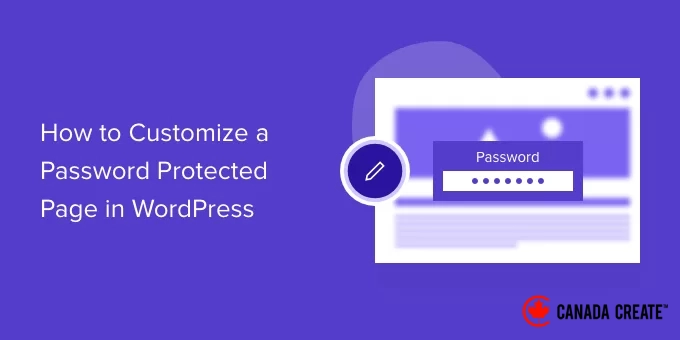
The Importance of Customizing Password-Protected Pages in WordPress
Simply put, the standard design of the password page appears outdated and unprofessional, which can negatively affect trust and user engagement.
If you wish to create a post or page on your WordPress blog that is exclusively accessible to select clients or members, you can secure it using the password protection feature.
Likewise, if you’re launching a new WordPress website and prefer to restrict access to it, utilizing a password-protected page is a sensible choice.
The standard design for password-protected pages in WordPress is quite simple and lacks visual appeal. Here’s a glimpse of its appearance:
By customizing your password-protected page, you can enhance its design and layout. This not only makes your page more visually appealing but also allows you to align it with your brand, resulting in a more polished look and improved user experience.
In the upcoming sections, we will guide you on how to enable password protection in WordPress. We will also explore various methods to customize individual pages, your entire site, and specific sections.
Here’s a brief summary of the topics we will discuss:
- How to Secure a Page with a Password in WordPress
- Method 1: Enhance the Default Password-Protected Design Using CSS Hero
- Method 2: Personalize a Specific Password-Protected Page with SeedProd
- Bonus Tips: Additional Use Cases for Custom Password-Protected Pages
- Frequently Asked Questions: Customizing Password-Protected Pages in WordPress
- Further Resources on Content Protection and Website Security
Are you ready to transform the design of your password-protected page? Let’s dive in!
How to Secure a Page with a Password in WordPress
Before we demonstrate how to customize a WordPress page, it’s important to note that WordPress includes built-in features for password-protecting your pages and posts.
To get started, either edit an existing page or create a new one.
In the WordPress content editor, click on the ‘Public’ option located under ‘Status & visibility’ in the settings panel on the right.
You will then see various options for ‘Post Visibility’.
Select the ‘Password Protected’ option and enter a password for your page.
After that, click ‘Update’ or ‘Publish’ to save your changes.
You can now visit your website to view the password-protected page in action.
Next, let’s explore how to customize your default password-protected page.
Method 1: Customize the Default Design of Password-Protected Pages Using CSS Hero
When you enable password protection in the WordPress content editor, the page inherits the styling from your site’s theme.
To personalize the appearance of the page, you can use a tool like CSS Hero.
This tool allows you to modify the design and layout of your page without needing to write any code. We have thoroughly tested it, and you can find all the details in our CSS Hero review.
First, you’ll need to install and activate the CSS Hero plugin. For more information, please refer to our guide on how to install a WordPress plugin.
After activating the plugin, you’ll find the CSS Hero option in the WordPress admin bar at the top. Click on ‘Customize with CSS Hero’ to proceed.
This will open the CSS Hero visual builder, allowing you to edit and personalize your page.
To begin, simply click on any element on your page.
From the left panel, you can modify background colors, add a background image, select a different font, adjust spacing, and more.
For instance, navigate to the ‘Background’ tab to apply a gradient background color. You can also change the color of the password input box and the ‘Enter’ button.
Additionally, you can add a border around the main heading by accessing the Borders tab.
Just select your desired border width, color, style, and any other modifications you wish to make.
Once you’ve completed your customizations, don’t forget to click the ‘Save & Publish’ button at the bottom.
Now, you can visit your website to view the newly customized default password-protected page.
One limitation of using CSS Hero is that it lacks the flexibility and advanced customization features available in a dedicated landing page builder.
For example, you cannot add elements such as contact forms, social media buttons, opt-in forms, or countdown timers.
Now, let’s explore how to use a landing page builder to tailor specific password-protected pages in WordPress.
Method 2: Tailor a Specific Password-Protected Page with SeedProd
The easiest way to customize a specific password-protected page is by using SeedProd, the leading website and page builder for WordPress.
We have personally used SeedProd to create custom landing pages and even complete themes, and we highly recommend it. To learn more about its capabilities, check out our comprehensive SeedProd review.
First, let’s install and activate the SeedProd plugin. If you need assistance, refer to our guide on how to install a WordPress plugin.
📝Important Note: For this tutorial, we will be using the SeedProd Pro version, as it offers premium templates and additional customization options. However, you can start with the free SeedProd Lite version to create a coming-soon page.
Once activated, you will see SeedProd’s welcome screen in your WordPress dashboard.
From there, enter your license key and click the ‘Verify Key’ button to activate SeedProd Pro. You can find your license key in your SeedProd account area.
Next, let’s navigate to SeedProd » Landing PagesAccess your WordPress dashboard and create a new custom landing page that is protected by a password.
In this article, we will guide you on how to select which pages should be password-protected. You have the option to secure your entire site or just specific pages.
We will demonstrate using a coming soon page as an example, but these customization methods can be applied to any password-protected content on your WordPress site.
To begin, click the ‘Set up a Coming Soon Page’ button.
On the following screen, SeedProd will display various page templates for you to easily customize.
Hover over any template you wish to use and click the orange checkmark button.
Once you select a template, SeedProd will present a popup window titled ‘Enter your new page details.’
You will need to choose a page name and URL slug, then click the ‘Save and Start Editing the Page’ button.
This will open the SeedProd drag-and-drop page builder.
Here, you can personalize your password-protected landing page and incorporate various elements such as text, images, buttons, and more.
SeedProd also provides advanced blocks including an opt-in form, contact form, countdown timer, progress bar, social sharing options, and additional features.
To add an element, simply drag any block from the menu on the left and drop it onto the template on the right. You can then customize the element by clicking on it and adjusting the available options.
This method allows SeedProd to add a password form to the front end of your page, ensuring your content is protected.
Start by adding a ‘Custom HTML’ block in the SeedProd builder. Just drag and drop the Custom HTML block onto your template.
Next, click on the ‘Custom HTML’ block to proceed.
Here, enter the [seed_bypass_form] shortcode in the ‘Custom Code’ field.
Remember to click the ‘Save’ button when you’re finished. That’s all there is to it!
SeedProd also offers integration with various email marketing services.
You can include a contact form on your landing page and link it to an email marketing tool to grow your email list and maintain communication with users.
Simply navigate to the ‘Connect’ tab in the landing page builder and choose your email marketing service.
How to Set Up Password Protection for Specific Pages in SeedProd
After creating a custom coming soon page that incorporates the [seed_bypass_form] shortcode, the next step is to establish password protection for specific pages using SeedProd.
Begin by navigating to the ‘Page Settings’ tab in the SeedProd builder and selecting the ‘Access Control’ settings.
Next, enter a password in the ‘Bypass URL’ field that users can utilize to access your restricted content.
Keep in mind that the text you input in the ‘Bypass URL’ field will serve as both the password and a link for clients and team members to bypass the password protection and access the page.
SeedProd allows you to exclude certain URLs from your site, including admin, login, dashboard, and account pages, ensuring that site owners remain accessible to their sites.
Now, select the URLs that you want to protect with a password.
Scroll down to the ‘Include/Exclude URLs’ section within the ‘Access Control’ settings. Then, choose the ‘Include URLs’ option and enter the specific pages you wish to restrict.
Once you’re finished, click the ‘Save’ button at the top.
Next, go to the ‘General’ settings under the ‘Page Settings’ tab and change the Page Status from ‘Draft’ to ‘Publish.’
After that, exit the landing page builder and navigate toSeedProd » Landing Pagesfrom your WordPress admin dashboard.
To get started, click the toggle under ‘Coming Soon Mode’ to enable your custom password-protected page.
That’s it!
You have successfully created a custom password-protected landing page that will appear only on designated pages in WordPress.
Simply navigate to those pages on your website to see your customized password-protected page in action.
Bonus Tips: Additional Use Cases for Custom Password-Protected Pages
Interested in discovering more ways to implement password protection on your WordPress site? Here are two tips to enhance your site’s password-protected pages.
Tip 1: Set Up a Custom Password-Protected Page for Your Entire Website
With SeedProd, you can display your password-protected page across all pages of your website, requiring users to enter a password to access any of your content.
First, navigate to SeedProd » Landing Pages in your WordPress dashboard. Then, click the ‘Edit Page’ button in the ‘Coming Soon Mode’ section.
Next, go to the ‘Page Settings’ tab at the top and select ‘Access Control’ settings.
After that, scroll down to the ‘Include/Exclude URLs’ section and choose the ‘Show on the Entire Website’ option.
After making your changes, click the ‘Save’ button at the top. SeedProd will then display the customized password-protected page across your entire website.
Tip 2: Set Up a Custom Password-Protected Area in WordPress
You can also password-protect various sections of your WordPress site for different user groups. This feature is especially useful for membership websites where you want to manage access to your content, plugins, applications, and downloadable files.
The most effective way to restrict access to different areas of your website is by using MemberPress, the top WordPress membership plugin. It allows you to create multiple membership tiers to secure your content.
We even use it for our video membership platform, so we can personally attest to its effectiveness. For more details about the tool, check out our comprehensive MemberPress review.
MemberPress enables you to establish various rules so that users can access content based on their membership tier. For further information, please refer to our guide on setting up a WordPress membership site.
To get started, you need to first add memberships to your website. Navigate to
MemberPress » Membershipsin your WordPress dashboard and click the ‘Add New’ button. from your WordPress dashboard and click the ‘Add New’ button.
You can start by naming your membership level, providing a description, and setting a price.
Additionally, you can modify the billing type to be either one-time or recurring, and you have the option to set the membership duration as lifetime or limited to a specific period. A free trial can also be offered.
Remember to click the ‘Publish’ button once you have completed your changes.
Next, navigate to MemberPress » Rules in your WordPress dashboard and select the ‘Add New’ button.
Here, you can select the dropdown menu under the ‘Protected Content’ section.
MemberPress provides numerous options to secure your content, whether it’s a single page or all pages on your WordPress site. In this tutorial, we’ll focus on password-protecting a single page.
Let’s select the ‘A Single Page’ option from the dropdown menu and input the title of the page.
Next, you will need to establish the Access Conditions to determine who can access the restricted page. MemberPress allows you to protect content based on membership levels, WordPress user roles, capabilities, and individual users.
For this tutorial, select ‘Premium’ from the membership dropdown menu. This ensures that only premium members can access the page. You can also set additional conditions to allow multiple membership levels to view the content.
Once you have completed your changes, remember to click the ‘Save Rule’ button to apply them.
You can then navigate to your website to see the password-protected page in action. Members will need to log in to their accounts to access the page’s content.
Looking to expand your options? Here are some exciting use cases you can implement with MemberPress:
- Establishing passwords for your video content or providing group memberships for corporate teams.
- Creating a password that grants subscribers access to a paid newsletter and more.
- Implementing a password for your WordPress forms.
Frequently Asked Questions: Customizing Password-Protected Pages in WordPress
Do you have more questions about customizing password-protected pages in WordPress? Here are some frequently asked questions along with straightforward answers to assist you.
What is the difference between a password-protected page and a private page?
A password-protected page can be accessed by anyone who has the correct password, while a private page is only visible to logged-in users on your site, such as Administrators and Editors.
For more information, check out our guide explaining the differences between public, private, and password-protected posts.
Will customizing the password page affect my site’s performance?
Using a well-designed plugin like SeedProd should not noticeably slow down your site’s performance, as SeedProd is optimized for speed.
However, be cautious about adding large, unoptimized images or complex scripts, as these can negatively impact loading times. Always adhere to best practices for web image optimization.
Can search engines index my password-protected content?
No, search engine crawlers cannot access content behind a password, meaning it won’t be indexed or appear in search results.
Can I use the same password for multiple pages?
Yes, you can set the same password for multiple pages in WordPress. However, for enhanced security and easier management, consider using a plugin like MemberPress to control access to different content groups.
Additional Resources on Content Protection and Website Security
We hope this article has helped you learn how to customize a password-protected page in WordPress. If you’re interested in discovering more ways to enhance your website’s security, you may find these additional guides useful:
- How to Conceal Password-Protected Posts in the WordPress Loop
- How to Display Excerpts from Password-Protected Posts in WordPress
- Effective Methods for Protecting Content in WordPress
- How to Set Up a Temporary Login for Your WordPress Site
- How to Integrate Security Questions on the WordPress Login Page
- Step-by-Step Guide to Creating a Paywall in WordPress (with Preview Features)
- Top WordPress Plugins for Content Protection
- Comprehensive Guide to WordPress Security
If you enjoyed this article, consider subscribing to our YouTube Channel for WordPress tutorials. Connect with us on Twitter and Facebook as well.