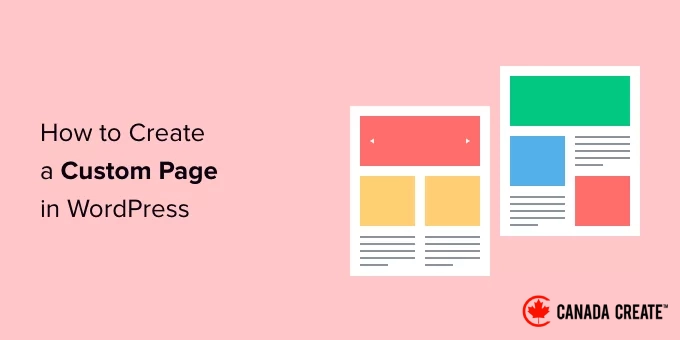
A custom page allows you to implement a unique layout that differs from the standard design of your website. Many WordPress sites utilize custom page layouts for purposes such as sales pages, landing pages, webinar pages, and more.
Over the years, we have developed numerous custom pages on Canada Create™ for various objectives. These pages have showcased different promotions on plugins and hosting services, provided Pro services to assist users with WordPress, displayed a variety of products, and much more.
Based on our experience, there are several methods to create custom pages. For some of our projects, we have utilized page builders like SeedProd. Additionally, you can use the block editor or full site editors to incorporate custom pages into your site.
In this article, we will guide you through the simple process of creating a custom page in WordPress.
What Are the Benefits of Creating a Custom Page in WordPress?
Whenever you create a new page, your WordPress theme determines its appearance through a template file.
The page.php template influences the design of all individual pages you create in WordPress. However, you might not want to apply the same design to every page.
Landing pages typically feature distinct content compared to standard pages, such as a prominent hero image or a call to action (CTA). As a result, they often have a completely different appearance from the rest of your website.
Creating unique designs with the standard page template can be time-consuming and restrictive. The limitations of the page.php template may prevent you from achieving your desired design, which can hinder your results. For instance, if you’re developing a sales page, an ineffective design could lead to low conversion rates.
Now, let’s explore how to create a custom page in WordPress that meets your specific design, layout, and content requirements. Use the quick links below to navigate directly to your preferred method.
- Method 1: Create a Custom Page in WordPress Using the Block Editor (No Plugin Required)
- Method 2: Create a Custom Page Using the Full-Site Editor (For Block-Based Themes Only)
- Method 3: Create a Custom Page in WordPress with SeedProd (Recommended)
- Method 4: Create a Custom Page in WordPress Using Thrive Architect
Method 1: How to Create a Custom Page in WordPress Using the Block Editor (No Plugin Required)
The block editor simplifies the process of designing your own templates with familiar tools.
This option is ideal if you intend to maintain a consistent design across several pages, as you can easily apply the same template. For a completely unique design, consider creating the page normally and then modifying its layout using the full-site editor, which we will discuss in Method 2.
Please note that these methods are compatible only with block-based themes like ThemeIsle Hestia Pro or Twenty Twenty-Three. If your theme is not block-based, we suggest using a page builder instead.
To begin, open any page or post. Then, navigate to the ‘Page’ tab in the right-hand menu and click on the text next to ‘Template.’
The options available may differ based on your WordPress theme, but you will typically see options like ‘Page,’ ‘Default template,’ or something similar.
In the popup that appears, click on the ‘Add Template’ icon.
In the popup, enter a name for your template and then click ‘Create.’
The name is for your reference, so feel free to choose anything you like.
This opens the template editor, which functions similarly to the WordPress content editor.
To add blocks to your custom page design, simply click the blue ‘+’ button. You can then drag and drop to include blocks.
You can easily add content to a block or modify its formatting using the familiar WordPress post editing tools. For instance, you can enter text into a ‘Heading’ block, apply bold formatting, or change the heading level from H2 to H3.
Additionally, you can create a custom page using patterns. Patterns are groups of blocks that are commonly used together, such as an event list, an image with a caption, or a pricing table.
The available patterns may vary based on your WordPress theme, but you can view the options by clicking on the ‘Patterns’ tab.
You can drag and drop a block pattern into your layout or click on the pattern to add it to the bottom of your template. Once you are satisfied with the appearance of your template, click the ‘Publish’ button and then select ‘Save.’
You can now apply this template to any page. Simply open the desired page in the editor and click on the text next to ‘Template.’
In the popup that appears, choose the template you just created.
Once that’s done, you can add content to the page just like you would with any other WordPress page.
Method 2.How to Create a Custom PageUsing the Full-Site Editor (Applicable for Block-Based Themes Only)
If you’re using a block-based theme, you can create a custom page using the full-site editor. This feature allows you to modify the layout of a specific page without needing to create a custom template.
This option is ideal for crafting a completely unique design that won’t be replicated on any other page.
To begin, create the page as you normally would by navigating to Pages »Add New. Here, you can enter a title, assign categories and tags, upload a featured image, and make any other desired adjustments.
Once you’re satisfied with the basic setup of the page, save your changes and proceed to Appearance »Editor.
By default, the full site editor displays your theme’s homepage template.
In the left-hand menu, select ‘Pages.’
You will now see a list of all the pages you’ve created on your WordPress site.
Locate the page you wish to redesign and click on it.
WordPress will now present a preview of the design.
To edit this template, click on the small pencil icon.
You can now modify the layout of your page using the full-site editor tools. For instance, click the blue ‘+’ button to add new blocks or select any block you wish to customize.
Once you’re satisfied with the changes you’ve made, click the ‘Save’ button.
Now, when you visit this page on your website, you’ll see the new design in action.
Step 3.Create a Custom Page in WordPress with SeedProd (Highly Recommended)
Previously, creating a custom page required coding, which was not very beginner-friendly. Mistakes in your HTML, CSS, or PHP could lead to common WordPress errors or even crash your site.
Considering this, we suggest using a page builder instead.
SeedProd is the top drag-and-drop page builder for WordPress. It offers over 350 templates, enabling you to design custom pages without any coding.
If you’re using a custom page to boost conversions, SeedProd integrates with many popular third-party tools you might already be using, including leading email marketing services, WooCommerce, Google Analytics, and more.
First, install and activate SeedProd. For detailed instructions, refer to our step-by-step guide on how to install a WordPress plugin.
Important Note: SeedProd offers a free version that enables you to create custom pages regardless of your budget. However, for this guide, we will be using SeedProd Pro, which provides a wider selection of templates and seamless integration with top email marketing services.
After you activate the plugin, SeedProd will prompt you to enter your license key.
You can find your license key in your account on the SeedProd website. Once you enter the key, click the ‘Verify Key’ button.
Select a Custom Page Template
After that, navigate to SeedProd » Landing Pages and click the ‘Add New Landing Page’ button.
You can now select a template for your custom page.
SeedProd’s templates are categorized by different campaign types such as ‘lead,’ ‘squeeze,’ and ‘coming soon.’ Use the tabs at the top of the screen to filter templates according to your campaign type.
If you prefer to create a page from scratch, SeedProd also provides a blank template for your use.
To preview any design, simply hover over the template and click the magnifying glass icon.
When you find a design you like, click on ‘Choose This Template.’ We are using the ‘Course Sales Page’ template in all our examples, but feel free to select any template that suits your needs.
Next, enter a name for your custom page. SeedProd will automatically generate a URL based on the page title, but you have the option to modify this URL as desired.
Creating a descriptive URL will assist search engines in understanding the content of your page, helping them to present it to the appropriate audience and enhance your WordPress SEO.
To optimize your custom page for relevant search results, consider adding any missing keywords to the URL. For further guidance, please refer to our keyword research guide.
Once you are satisfied with the information provided, click on the ‘Save and Start Editing the Page’ button.
Design Your Custom Page
SeedProd will now display your selected template in its intuitive drag-and-drop editor. You will see a live preview of your page on the right and block settings on the left.
To customize a block, simply click on it in the page editor. The left-hand toolbar will then display all the settings available for that block.
In the following image, we will demonstrate how to modify the text within a ‘Headline’ block.
Utilize the options in the left-hand menu to format your text, adjust its alignment, add hyperlinks, and more.
Editing images with the SeedProd page builder is straightforward. Click on any ‘Image’ block, and use the settings to add alt text, upload a new image, or make other adjustments.
To remove a block from your custom page, simply click to select the desired block.
Next, click the trash can icon located in the mini toolbar.
To incorporate new blocks into your design, locate a block in the left-hand menu and drag it into the editor.
You can then select the block and make any necessary adjustments using the options in the left-hand menu.
SeedProd includes ‘Sections,’ which are pre-designed rows and block templates that allow you to quickly create a custom page. For instance, when designing a Google Ad landing page, you might choose from SeedProd’s ready-made Hero, Call To Action, or Features sections.
To view all available sections, simply click on the ‘Sections’ tab.
To examine a section more closely, hover your mouse over it and click the magnifying glass icon.
When you discover a section you wish to add to your design, simply hover over it and click the small ‘+’ icon.
This section will be added to the bottom of your page. You can easily rearrange sections and blocks in your design using a simple drag-and-drop feature.
If you make an error or decide to change something, don’t worry. You can quickly undo your last action by clicking the ‘Undo’ button located at the bottom of the left-hand toolbar.
Additionally, you’ll find options for redo, revision history, layout navigation, and global settings.
These additional buttons simplify the process of creating a custom page in WordPress.
At the bottom of the toolbar, there’s a mobile preview button that lets you see how the custom page will appear on mobile devices.
This feature ensures that your custom page looks great on both mobile devices and desktop computers.
Once you’re satisfied with your custom page, it’s time to publish it. Click the dropdown arrow next to ‘Save’ and select the ‘Publish’ option.
Your custom page will now be live on your WordPress blog.
If you wish to edit the custom page at any time, simply navigate to SeedProd » Landing Pages in your WordPress dashboard. Here, you can locate the page you want to modify and click on its ‘Edit’ link.
This action will open the design in SeedProd’s editor, allowing you to make the necessary changes.
Method 4: Creating a Custom Page in WordPress with Thrive Architect
You can create a custom page using Thrive Architect, a widely-used drag-and-drop page builder for WordPress.
Thrive Architect offers over 300 professionally-designed templates aimed at boosting your conversion rates.
First, install and activate the Thrive Architect plugin. For detailed instructions, refer to our comprehensive guide on installing a WordPress plugin.
After activation, navigate toPages » Add Newin your WordPress admin dashboard to start creating a custom page. Then, click the ‘Launch Thrive Architect’ button.
Next, choose whether to create a standard page or a pre-built landing page.
We recommend selecting ‘Pre-built Landing Page’ to access all Thrive landing page templates. These templates are fully customizable, allowing you to adjust them to fit your WordPress site.
When you find a template set you like, simply click to select it.
In the next image, we are selecting the ‘Smart Landing Page Sets.’
On the following screen, choose a specific template from the set.
Select a template by clicking on it, then click the ‘Apply Template’ button.
This action will launch the Thrive Architect Editor, allowing you to effortlessly personalize the page template to align with your blog, website, or online store.
For instance, you can modify the ‘Heading’ by clicking on it and entering your unique message.
You will now have access to a variety of customization options in the left-hand menu, where you can adjust typography, font size, color, formatting, and more.
In the left-hand panel, you can also modify additional settings for your custom page, including layout, background style, borders, animations, and scrolling behavior, among others.
Like SeedProd’s blocks, Thrive Architect offers numerous pre-designed elements that you can incorporate into your custom page.
To introduce a new element to the page, click on the ‘Add Element (+)’ button located on the right side of the screen.
You can now select from various elements, such as images, buttons, lead generation forms, pricing tables, countdown timers, and more.
To add an element, simply drag it from the right-hand menu and drop it onto your page.
You can edit any of the new elements you add to your page by clicking on them.
When you’re satisfied with the appearance of your page, click the arrow (^) button next to the ‘Save Work’ button. Then, select the ‘Save and Return to Post Editor’ option.
You can choose to save the page as a draft or publish it to make it visible on your WordPress website.
After publishing your custom page, visit your site to see it live in action.
We hope this article has guided you in creating a custom page in WordPress. You may also want to check out our guide on creating a landing page with WordPress and how to split post or page titles in WordPress.
If you enjoyed this article, please subscribe to our YouTube Channel for WordPress video tutorials. You can also connect with us on Twitter and Facebook.