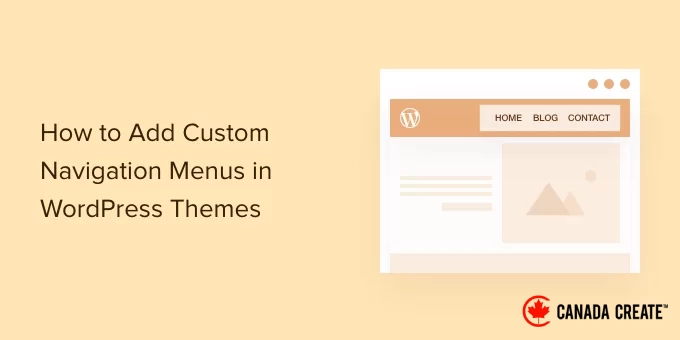
At Canada Create™, we have assisted numerous readers in personalizing their WordPress websites to enhance user experience, strengthen branding, and increase conversions. We have observed that a well-crafted navigation menu can significantly boost engagement and encourage visitors to spend more time on your site.
The challenge is that every WordPress theme has predefined locations for displaying navigation menus, making modifications a bit tricky. This can be particularly challenging for beginners, as altering theme files requires careful handling.
If you’re utilizing a block theme, you can make changes using the Full Site Editor. However, based on our experience, there are more effective options that are compatible with all types of themes.
For example, if you seek advanced customization options, consider using a robust page builder like SeedProd. Alternatively, if you prefer a straightforward method to implement custom code, WPCode is the top choice.
In this article, we will guide you through the process of adding a custom navigation menu to any section of your WordPress theme. We will present three different methods so you can select the tutorial that best suits your needs.
What Are the Benefits of Adding Custom Navigation Menus in WordPress Themes?
A navigation menu is a collection of links that direct visitors to key sections of your website. These menus enhance user experience by making it easier for visitors to discover engaging content, which can lead to increased pageviews and a lower bounce rate in WordPress.
The specific placement of your menu will depend on your WordPress theme. Most themes offer multiple options, allowing you to create various menus and position them in different areas.
To find out where you can display menus in your current WordPress theme, simply navigate to Appearance » Menus and check the ‘Display location’ section.
The image below illustrates the menu locations supported by the Astra WordPress theme.
At times, you might want to place a menu in a location that isn’t listed as a ‘Display location’ in your theme.
With that in mind, let’s explore how to add a custom navigation menu to any section of your WordPress theme. You can use the quick links below to jump to your preferred method:
- Method 1: Utilizing the Full Site Editor (Applicable for Block-Based Themes Only)
- Method 2: Employing a Page Builder Plugin (Compatible with All Themes)
- Method 3: Creating a Custom Navigation Menu in WordPress Using Code (For Advanced Users)
Method 1: Utilizing the Full Site Editor (Applicable for Block-Based Themes Only)
If you’re utilizing a block theme like ThemeIsle Hestia Pro, you can easily add a custom navigation menu through Full Site Editing (FSE) and the block editor.
For further information, check out our article on the top WordPress full-site editing themes.
This approach may not be compatible with all themes, and it limits your ability to customize every aspect of the menu. For a fully customized menu on any WordPress theme, we suggest using a page builder plugin.
If you’re working with a block-based theme, navigate to Appearance » Editor.
By default, the full site editor displays your theme’s home template, but you can add a navigation menu to any section.
To view all available options, simply select ‘Templates,’ ‘Patterns,’ or ‘Pages.’
You can now click on the template, template part, or page where you’d like to insert a custom navigation menu.
WordPress will display a preview of the design. To modify this template, click on the small pencil icon.
The next step is to add a Navigation block in the area where you want your menu to appear.
In the top-left corner, click the blue ‘+’ button.
Now, type ‘Navigation’ into the search bar.
To add a ‘Navigation’ block, drag and drop it into your layout.
Next, select the Navigation block by clicking on it.
If you have already created the desired menu, select the Navigation block. Then, click the three-dot icon next to ‘Menu’ in the right-hand settings panel.
From the dropdown menu, you can choose the menu you wish to display.
Alternatively, you can create a menu directly in the full-site editor by adding pages, posts, custom links, and more. To include items in your new menu, click the ‘+’ icon.
This will open a popup where you can add any post or page and choose whether the links should open in a new tab.
You can also incorporate a search bar, social media icons, and additional elements into your WordPress menu. In the popup, type the name of the block you want to add and select the appropriate option when it appears.
You can configure this block using the settings in the mini toolbar and the right-hand panel. Repeat these steps to add more items to your menu.
Once you are satisfied with the appearance of your menu, click the ‘Save’ button.
Your site will now utilize the new template, allowing visitors to engage with your custom navigation menu.
Method 2: Utilizing a Page Builder Plugin (Compatible With All Themes)
The full site editor enables you to add menus to block-based themes. However, to incorporate an advanced and fully customizable menu into any WordPress theme, you will need a page builder plugin.
SeedProd is the leading WordPress page builder plugin available, allowing you to tailor every aspect of your navigation menu.
We have extensive experience utilizing this tool to create custom navigation menus, landing pages, and more. For further information, please refer to our comprehensive SeedProd review.
SeedProd offers over 350 professionally designed templates for your pages, which you can use as a foundation. Once you select a template, you can easily add a custom navigation menu to your site using SeedProd’s pre-built Nav Menu block.
First, install and activate the SeedProd plugin. For detailed instructions, refer to our step-by-step guide on how to install a WordPress plugin.
Note:There is also a free version of SeedProd that enables you to create custom navigation menus without any coding. However, this guide will focus on SeedProd Pro, as it includes the Nav Menu block along with additional templates and advanced features.
After activating the plugin, SeedProd will prompt you to enter your license key.
You can access this information in your SeedProd account. After entering the key, click the ‘Verify Key’ button.
Next, navigate to SeedProd » Landing Pages and click the ‘Add New Landing Page’ button.
Now, you can select a template for your custom page.
To help you find the perfect design, SeedProd’s templates are categorized by different campaign types, including ‘coming soon’ and ‘lead squeeze’ campaigns. You can also use SeedProd templates to enhance your 404 error page.
To preview any design, simply hover over the template and click the magnifying glass icon.
When you find a design you like, click ‘Choose This Template.’
We are using the ‘Black Friday Sales Page’ template for all our images, but feel free to choose any template you prefer.
After selecting a template, enter a name for your custom page. SeedProd will automatically generate a URL based on the page title, but you can modify this URL as needed.
For instance, you may want to include relevant keywords to help search engines understand the page’s content. This can enhance your WordPress SEO and increase the chances of your page being displayed to users searching for similar content.
Once you have filled in the required information, click the ‘Save and Start Editing the Page’ button.
Most templates come with pre-existing blocks, which serve as the fundamental elements of all SeedProd page layouts.
To modify a block, simply click on it to select it within the page editor.
The left-hand toolbar will display all the settings available for that block. For instance, in the image below, we are updating the text in a ‘Headline’ block.
You can format the text, adjust its alignment, add hyperlinks, and more using the options in the left-hand menu.
By selecting the ‘Advanced’ tab, you gain access to additional settings. For example, you can enhance the block’s appearance by adding box shadows and CSS animations.
To incorporate new blocks into your design, simply locate any block in the left-hand menu and drag it onto the page. To remove a block, select it and click the trash can icon.
To create a custom navigation menu, drag a ‘Nav Menu’ block onto the page.
This action will generate a navigation menu featuring a single default item labeled ‘About.’
You can either create a new menu using the SeedProd editor or select an existing menu from the WordPress dashboard.
To display a previously created menu, click on the ‘WordPress Menu’ button. Then, open the ‘Menus’ dropdown to select any option from the list.
Next, you can adjust the font size, text alignment, and other settings using the options in the left-hand menu.
If you prefer to create a new menu within SeedProd, simply click the ‘Simple’ button.
Then, expand the default ‘About’ item that SeedProd generates.
This will reveal controls that allow you to modify the text and input the URL for the menu item.
By default, the link will be set to ‘dofollow’ and will open in the same browser window. You can modify these options using the checkboxes in the ‘URL Link’ section.
In the image below, we are setting up a ‘nofollow’ link that will open in a new window. For additional information, please refer to our beginner’s guide on nofollow links.
To include more items in the menu, just click the ‘Add New Item’ button.
You can customize each of these items by following the same steps outlined above.
The left-hand menu also provides options to adjust the font size and text alignment.
You can even create a divider that will appear between each item in the menu.
Next, navigate to the ‘Advanced’ tab where you can customize the menu’s colors, spacing, typography, and various other advanced settings.
As you adjust the settings, the live preview will refresh automatically, allowing you to experiment with different options to find the best fit for your design.
By default, SeedProd displays the same menu for both mobile and desktop users. However, mobile screens are generally much smaller than those of desktop computers.
Considering this, you might want to create a distinct menu specifically for mobile devices. For instance, a vertical layout can be beneficial, preventing mobile users from having to scroll horizontally. Additionally, you may opt to display fewer links on smartphones and tablets.
To set up a mobile-friendly menu, follow the same design process outlined earlier. After that, go to the ‘Advanced’ tab and expand the ‘Device Visibility’ section.
You can now activate the ‘Hide on Desktop’ toggle.
With this setting enabled, SeedProd will only display this menu to mobile users.
Once you are satisfied with the appearance of your custom menu, it’s time to publish it.
Simply click the dropdown arrow next to ‘Save’ and select ‘Publish.’
Now, when you visit your WordPress blog, you will see your custom navigation menu in action.
Method 3: Adding a Custom Navigation Menu in WordPress Using Code (Advanced)
If you prefer not to use a page builder plugin, you can manually add a custom navigation menu using code. Many guides provide instructions on how to insert custom code snippets into your theme’s functions.php file.
However, we advise against this method, as even a minor error in your code could lead to common WordPress issues or potentially crash your site. Additionally, any custom code will be lost when you update your WordPress theme.
That’s why we suggest using WPCode. It is the simplest and safest way to incorporate custom code into WordPress without modifying any core files.
Note: There are numerous ways to use WPCode to securely customize your WordPress site. It features a built-in library of code snippets and supports all major WordPress languages, including PHP, JavaScript, CSS, and HTML. For more details about the plugin, check out our comprehensive WPCode review.
The first step is to install and activate the free WPCode plugin. For detailed instructions, refer to our step-by-step guide on installing a WordPress plugin.
Once activated, navigate to Code Snippets »Add Snippet in your WordPress dashboard.
In this section, you will find a variety of pre-made snippets that can enhance your site. These snippets include options to completely disable comments, upload unsupported file types, disable attachment pages, and more.
To create your own snippet, hover over ‘Add Your Custom Code (New Snippet)’ and click the ‘+ Add Custom Snippet’ button.
Next, select a code type from the available options on the screen. For this tutorial, choose ‘PHP Snippet’ as your code type.
You will now be taken to the Create Custom Snippet page.
Begin by entering a title for your custom code snippet. This title should be something that helps you recognize the snippet in your WordPress dashboard.
After that, simply paste the following snippet into the code editor:
function wpb_custom_new_menu() { register_nav_menu('my-custom-menu',__( 'My Custom Menu' ));
}
add_action( 'init', 'wpb_custom_new_menu' );
This will create a new menu location in your theme named ‘My Custom Menu.’ If you prefer a different name, simply modify the code snippet.
To add multiple custom navigation menus to your theme, simply include an additional line in the code snippet.
In this example, we are introducing two new menu locations in our theme, named ‘My Custom Menu’ and ‘Extra Menu.’
function wpb_custom_new_menu() { register_nav_menus( array( 'my-custom-menu' => __( 'My Custom Menu' ), 'extra-menu' => __( 'Extra Menu' ) ) );
}
add_action( 'init', 'wpb_custom_new_menu' );
Next, navigate to the ‘Insertion’ options. If ‘Auto Insert’ is not already selected, choose this method to ensure WPCode adds the snippet throughout your entire site.
Then, open the ‘Location’ dropdown and select ‘Run Everywhere.’
Now, scroll to the top of the screen and toggle the ‘Inactive’ switch to ‘Active.’
Finally, click ‘Save’ to activate this snippet.
After that, proceed to Appearance » Menus and check the ‘Display location’ section.
You should now see a new option labeled ‘My Custom Menu.’
You can now proceed to add menu items to the new location. For detailed instructions, please refer to our beginner-friendly guide on adding navigation menus.
Once you are satisfied with your menu, the next step is to integrate it into your WordPress theme.
Most websites display the navigation menu directly beneath the header section, making it one of the first elements visitors notice, alongside the site logo or title.
You can place the custom navigation menu in any location by inserting code into your theme’s template file.
In your WordPress dashboard, navigate toAppearance » Theme File Editor.
In the right-hand menu, select the template where you want to add the menu. For instance, if you wish to display the custom navigation menu in your website’s header, you will typically choose theheader.php file.
For assistance in locating the correct template file, please consult our guide on identifying which files to edit in your WordPress theme.
After selecting the file, you will need to insert awp_nav_menu function and specify the name of your custom menu.
For instance, the following code snippet demonstrates how to add ‘My Custom Menu’ to the header of your theme:
wp_nav_menu( array( 'theme_location'=>'my-custom-menu', 'container_class'=>'custom-menu-class' ) );
After inserting the code, click the ‘Update File’ button to save your modifications.
Now, when you visit your site, you will see the custom menu in action.
Initially, your menu will display as a simple bulleted list.
You can enhance the custom navigation menu to align better with your WordPress theme or brand identity by adding custom CSS to your site.
To begin, navigate to Appearance » Customize.
In the WordPress theme customizer, select ‘Additional CSS.’
This will open a small code editor where you can enter your CSS.
You can now style your menu using the CSS class you incorporated into your theme template. In this example, it is .custom_menu_class.
In the following code, we will add margins and padding, set the text color to black, and arrange the menu items horizontally:
div.custom-menu-class ul { margin: 20px 0; list-style: none; text-align: right; display: inline-block;
}
div.custom-menu-class li { padding: 0 20px; display: inline-block;
}
div.custom-menu-class a { color: #000;
}
The WordPress customizer will refresh automatically.
You will now see a preview of the menu with the new style applied.
If you’re satisfied with the menu’s appearance, click ‘Publish’ to apply your changes.
For additional details, please refer to our guide on styling WordPress navigation menus.
Expert Guides: Enhance Your WordPress Navigation Menus
With WordPress, you can create various useful and engaging menus. Here are some expert guides to help you maximize the potential of your navigation menus:
- How to Add Image Icons to Navigation Menus in WordPress
- How to Implement Conditional Logic in Menus in WordPress (Step by Step)
- How to Include Menu Descriptions in Your WordPress Themes
- How to Create a Fullscreen Responsive Menu in WordPress
- How to Set Up a Mega Menu on Your WordPress Site (Step by Step)
We trust that this comprehensive guide has equipped you with the knowledge to add a custom navigation menu in WordPress. You might also find our tutorials on adding a button to your WordPress header menu and highlighting a menu item in WordPress helpful.
If you enjoyed this article, consider subscribing to our YouTube Channel for WordPress video tutorials. You can also connect with us on Twitter and Facebook.