After collaborating with numerous store owners, we’ve discovered that the post-purchase experience is just as crucial as the sale itself.
Through our partnerships, we’ve observed how savvy businesses transform thank you pages into effective tools for fostering loyalty, enhancing customer lifetime value, and generating additional sales.
Rather than settling for a generic ‘Order Received’ message, successful store owners create post-purchase experiences that inspire social sharing, promote cross-selling, and deepen customer relationships.
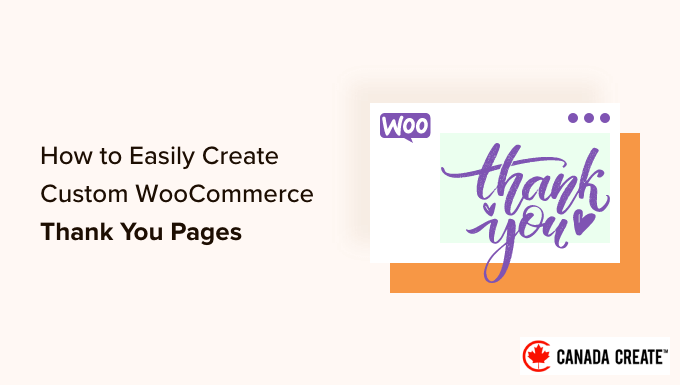
That’s why we developed this comprehensive guide to creating custom WooCommerce thank you pages. We’ll demonstrate how to convert a standard confirmation screen into a strategic asset that keeps your customers engaged and encourages repeat visits.
💡 Quick Tip: Two Effective Ways to Personalize Your Thank You Page
In this guide, we’ll explore the two most effective methods to customize the default WooCommerce thank you page:
- Using FunnelKit:This all-in-one plugin allows you to import professionally designed templates and customize them easily in the block editor. It’s the quickest way to get started.
- Using SeedProd:This approach utilizes a robust drag-and-drop page builder, offering you maximum design flexibility. You will visually create your page and then connect it to WooCommerce using a free helper plugin.
What Are the Benefits of Customizing a WooCommerce Thank You Page in WordPress?
A personalized WooCommerce thank you page transforms a standard order confirmation into an effective marketing asset. It enables you to engage with customers immediately after their purchase.
The default thank you page is not designed for ongoing customer engagement. A customized page allows you to incorporate strategic features such as targeted product upsells, exclusive coupon codes for future purchases, and invitations to follow your social media accounts.
You can also leverage this important space to collect customer feedback through a brief survey, while still providing essential information like order totals, shipping details, and download links for digital products.
With this in mind, we will guide you through the process of creating a custom WooCommerce thank you page step-by-step. Use the links below to navigate directly to the method you prefer:
- Method 1: Create a Custom WooCommerce Thank You Page with FunnelKit
- Method 2: Create a Custom WooCommerce Thank You Page with a Page Builder
- Bonus Tip: Utilize Your New Thank You Page to Promote a Holiday Sale
- Common Questions About Customizing WooCommerce Thank You Pages
Let’s get started!
Step 1: Create a Custom WooCommerce Thank You Page with FunnelKit
The simplest way to design a custom WooCommerce thank you page is by using FunnelKit Funnel Builder, previously known as WooFunnels. This powerful WordPress sales funnel and automation plugin offers pre-designed Thank You templates that can be easily integrated into your online store.
This enables you to craft professionally designed and informative thank-you pages without needing any coding skills.
After extensive testing, we found the plugin to be user-friendly and highly scalable.
Step 1: Install and Activate the FunnelKit Plugin
Important Note:There is also a FunnelKit Pro version that includes additional ‘thank you’ templates. However, we will be utilizing the free version of FunnelKit, which provides all the essential features needed to customize the default WooCommerce thank you page.
To begin, install and activate the plugin. For detailed instructions, refer to our comprehensive guide on how to install a WordPress plugin.
Once activated, navigate to FunnelKit » Templates and click the ‘Checkout’ button.
FunnelKit organizes thank you pages alongside checkout pages within its funnel templates, making the selection of ‘Checkout’ the ideal initial step to access both types of designs.
Step 2: Select a Thank You Page Template
You can choose from FunnelKit’s collection of pre-designed templates or opt for ‘Start from scratch.’ We suggest using a template to quickly create a professionally designed Thank You page.
To view any template in detail, simply hover your mouse over it and click the ‘Preview’ button that appears.
By default, FunnelKit displays a preview of the checkout page.
To view the thank you page design instead, select ‘Thank You Page’ from the menu on the left.
When you find a template you wish to use, click on ‘Import This Funnel.’
We are showcasing the Livewire template in all our images, but feel free to choose any design that suits your needs.
At this stage, FunnelKit may prompt you to install additional plugins, such as SlingBlocks. We recommend proceeding with this, as this free companion plugin enhances the WordPress editor with more powerful design blocks and creative options.
If you encounter this message, click ‘Activate’ to obtain the necessary plugins.
First, enter a name for your custom thank you page. This name is for your reference, so choose something that will help you easily identify the page in your WordPress dashboard.
Once you’ve done that, click the ‘Add’ button.
Step 3: Personalize Your WooCommerce Thank You Page
You will now see all the steps included in the template.
As you are using the free version of FunnelKit, the template comes with a thank you page and a custom WooCommerce checkout page, which you will need to configure separately. For detailed instructions, please refer to our guide on customizing the WooCommerce checkout page.
To modify the thank you page, click the ‘Edit’ link.
You can now select ‘Edit Template’ to open the template in the WordPress block editor.
Important Note:If you are using a page builder plugin, FunnelKit may open the template in a different editor. In that case, click on ‘Switch to WordPress editor’ instead of ‘Edit Template.’
You can now customize the template just like you would any WordPress page. Simply click on any block and adjust it using the settings in the right-hand menu and the mini toolbar.
To start, replace the placeholder logo with your own by selecting the Image block and clicking ‘Replace’ in the mini toolbar.
Next, either choose ‘Open Media Library’ to pick an image from your WordPress media library or click ‘Upload’ to select a file from your computer.
If you don’t have a custom logo yet, you can easily create one using web design tools like Canva.
Once you’ve selected an image, you can add alt text, adjust the width, apply rounded corners, and more through the settings in the right-hand menu.
Don’t forget to replace the placeholder text with details about your online marketplace. Simply click on any text block and enter your custom message.
You can also modify the text styling using the options in the right-hand menu. For instance, you can add borders and box shadows, change the font family, or adjust the text color in WordPress.
Make sure not to alter any text within the [ ] brackets, as these tags enable FunnelKit to display personalized content, like the customer’s name.
Step 4: Personalize the Order Details Widget
Next, navigate to the ‘Order Details’ section and click on it. FunnelKit offers a specialized widget that displays the customer’s order information.
This widget is ready to use immediately, but you might want to personalize its appearance and the details it presents.
To begin, you can modify the section title by entering text into the ‘Heading’ field.
You also have the option to display the product image for each item in the customer’s order by adjusting the ‘Show Image’ slider.
If you offer subscriptions for a membership site, online courses, or similar services, consider displaying details about the customer’s subscription, including the price and the date of their next payment.
To include this section, click to expand ‘Subscription’ in the right-hand menu and then toggle on the ‘Show Subscription Preview’ option.
In this section, you can also customize the default ‘Subscription’ text by entering your own message in the ‘Heading’ field.
If you provide digital downloads, you can add a ‘Downloads’ section to the thank you page. This section will include important information such as the filename, the remaining download count, and the expiration date.
Enhance the customer experience by adding a download button on your custom thank you page, allowing shoppers to easily access their purchases.
To include this section, simply expand the ‘Downloads’ option in the right-hand menu. You can easily add or remove information using the toggles provided.
Feel free to customize the default heading and button text with your own personalized messages.
Once you are satisfied with the setup of the Order Details, you can customize its appearance by clicking on the ‘Style’ tab.
In this section, you can modify the heading and background colors for the entire order area or highlight specific elements within the ‘Download’ or ‘Subscription’ sections.
Step 5: Customize the Customer Details Widget
Next, focus on the ‘Customer Details’ widget, another unique feature offered by FunnelKit.
Select the ‘Customer Details’ section and make your desired changes in the right-hand menu. For instance, you can update the default headline by entering your own text in the ‘Heading’ field.
You can also choose between a multi-column or single-column layout using the ‘Layout’ dropdown menu.
After that, click on the ‘Style’ tab to adjust fonts, text sizes, colors, and more.
Step 6: Enhance Your Custom Thank You Page with Additional Blocks
Once you are satisfied with the template modifications, consider adding personalized content. This can enhance the customer experience, boost sales, and promote your brand effectively.
To add blocks, just click the ‘+’ icon in the top right corner and drag your chosen block onto the design. FunnelKit, WooCommerce, and WordPress provide a variety of blocks, so let’s explore a few examples.
1. Showcase Your Other WooCommerce Products
Although the thank you page marks the end of the purchasing process, it can also serve as an opportunity. Use this page to suggest additional products that the customer might be interested in, which can help increase sales and highlight your other fantastic offerings.
To explore available blocks, navigate to the ‘WooCommerce’ section in the left-hand menu. Here, you will find options like ‘Best-Selling Products,’ ‘Newest Products,’ ‘On Sale Products,’ and more.
Simply locate the desired block and drag it into your design.
Once added, click on the block to select it, and customize it using the settings available in the right-hand menu.
2. Increase Your Social Media Followers
Social media platforms like X (Twitter) and Facebook are excellent for promoting your products, so aim to increase your follower count. Consider including social media links on your custom thank you page to achieve this.
Since these customers have already made a purchase from your store, they are more likely to follow you on Instagram, Snapchat, YouTube, and other social media channels.
To begin, simply drag a ‘Social Icons’ block onto your page. Then, click the ‘+’ icon to select the social media icon you wish to add.
Once you’ve made your selection, click on the newly added icon in the ‘Social Icons’ block.
In the mini toolbar that appears, enter the URL of the profile you want to link to.
Repeat these steps to add all your social media accounts to the block.
3. Offer Customers Exclusive Coupon Codes
A coupon code can motivate customers to make another purchase. Therefore, consider adding a coupon code to your thank you page, such as a discount for free shipping on their next order.
You can create a coupon code using WooCommerce’s built-in coupon feature or by utilizing a coupon code plugin.
After generating a coupon, simply insert a Text block into the thank you page. You can then enter the coupon code in this block, along with any additional messages you wish to include.
This is a solid starting point, but you might want to display different coupon codes to various customers. For instance, you could provide first-time buyers with a significant discount on their next purchase to foster customer loyalty.
The most effective way to achieve this is by upgrading to FunnelKit Builder Pro. This premium plugin features a robust rules-based engine that enables you to present different coupons to customers based on criteria such as order total, item quantity, the WooCommerce payment method used, and more.
Step 7: Publish Your Custom WooCommerce Thank You Page
Once you are satisfied with the setup of the thank you page, click on ‘Update’ to save your changes. Then, click on ‘Back To Thank You Page.’
You can now click on the ‘Draft’ button next to ‘Thank You Page’ and select ‘Publish’ to make it live.
This action will make the thank you page accessible on your WordPress website.
Method 2: Create a Custom WooCommerce Thank You Page Using a Page Builder
You can also design a custom WooCommerce thank you page using SeedProd.
This process consists of two main steps: first, you’ll create your page using SeedProd’s intuitive drag-and-drop builder. Next, you’ll utilize a straightforward free plugin to designate that page as your new WooCommerce thank you page.
This method is ideal if you find the WordPress block editor too limiting. SeedProd offers over 350 professionally designed templates and pre-made WooCommerce blocks that you can easily drag into your layouts.
Our partner brands have successfully utilized this tool to craft their thank you pages and have achieved outstanding results. To discover more, check out our SeedProd review.
Step 1: Install and Activate the SeedProd Plugin
The first step is to install and activate the plugin. For detailed instructions, refer to our comprehensive guide on how to install a WordPress plugin.
After activation, navigate to SeedProd » Settings and input your license key.
You can locate this information in your account on the SeedProd website. Once you’ve entered the license, click the ‘Verify Key’ button.
Note: There is a free version of SeedProd available, but for this guide, we will be using the Pro version, as it includes the essential WooCommerce blocks we require. It also integrates seamlessly with the email marketing services you may already be using to promote your online store.
Step 2: Select a Template for Your Thank You Page
Next, navigate to SeedProd » Landing Pages and click on ‘Add New Landing Page.’
Now, choose a template for your thank you page.
SeedProd offers various templates categorized by campaign types, including coming soon and 404 pages. Since you are designing a custom WooCommerce thank you page, click on the ‘Thank You’ tab.
For this tutorial, we will use the ‘Order Completed Thank You Page’ template.
Simply hover over this template and click the checkmark icon.
Next, enter a name for your custom WooCommerce thank you page. SeedProd will automatically generate a URL based on this name, but you can modify the URL if desired.
Once you’re satisfied with the details you’ve provided, click on the ‘Save and Start Editing the Page’ button.
This will open the SeedProd editor, displaying a live preview of the page on the right and settings on the left.
To customize a block, click to select it in the page builder, then adjust the settings in the left-hand menu.
The left-hand menu also contains blocks that you can drag onto the order confirmation template.
Step 3: Increase Sales by Adding an Upsell Section
Using upselling techniques on the thank you page is an effective strategy for boosting sales. One way to implement this is by creating an upsell section with SeedProd’s pre-designed blocks.
Sections consist of pre-arranged blocks that are frequently used together, allowing you to quickly design visually appealing pages.
To get started, click on the ‘Sections’ tab, then select ‘Hero’ from the left-hand menu. Hover over ‘Hero 2’ and click the ‘+’ icon when it appears.
This action will add the hero section to your page.
Next, click to select the section’s ‘Image’ block. In the left-hand menu, choose ‘Use Your Own Image’ to access the media library.
You can now upload an image for the product you wish to upsell.
After uploading the image, click on the ‘Headline’ block and enter the product title.
Then, select the ‘Text’ block and type in the product description.
Encourage customers to add this item to their cart by replacing the default call to action button with an ‘Add To Cart’ button.
To do this, select the ‘Call To Action’ block and click on the ‘Delete Block’ icon.
Now, locate the ‘Add To Cart’ block in the menu.
Easily place this block in the empty area of your ‘Hero 2’ section.
Next, connect this button to the appropriate WooCommerce product.
To find the product ID, navigate to Products » All Productsin your WordPress dashboard. Hover over the product to reveal its ID.
In the SeedProd page editor, select the ‘Add To Cart’ block and enter the product ID in the ‘Product ID’ field.
You can also activate the ‘Direct to Checkout’ option. This enhances the customer experience by bypassing the shopping cart and directing the shopper straight to checkout, making it quicker and simpler to purchase the upsell product.
Now, customize the button’s appearance using the settings in the left-hand menu. You can adjust its color scheme, text, alignment, and more.
It’s beneficial to include a heading that highlights your upsell product. Consider phrases like ‘You may also like’ or ‘This is the perfect addition to your order.’
Drag a ‘Headline’ block into your layout.
You can then enter the desired messaging.
Step 4: Showcase Your Top-Selling WooCommerce Products
Consider adding a section for best-selling products on your thank you page. Since these items are already popular, there’s a high likelihood that the customer may be interested in purchasing them as well.
In the left-hand menu, locate the ‘Best Selling Products’ block and drag it into your layout.
You can also include various types of product grids, such as those for sale items, top-rated products, recent additions, and more.
For additional details, please refer to our guide on displaying popular products in WooCommerce.
Step 5: Publish Your Custom WooCommerce Thank You Page
Once you are satisfied with the appearance of your WooCommerce thank you page, it’s time to publish it. Click the dropdown arrow next to ‘Save’ and select ‘Publish.’
After publishing the page, you will need to update the WooCommerce settings to redirect customers to your new thank you page.
The simplest way to accomplish this is by using the Thank You Page for WooCommerce plugin. This plugin enables you to redirect customers to any URL after they complete a purchase.
First, install and activate the plugin. For more information, check out our step-by-step guide on how to install a WordPress plugin.
After activation, enter the URL of your custom thank you page.
To find this information, navigate toSeedProd»Landing Pagesand locate the thank you page you just created. Its link will be listed in the ‘URL’ column.
Once you have this link, go toWooCommerce » Thank You Page.
Here, check the box for ‘Enable Global Thank You Page’.
You can then enter the link in the ‘Thank You Page URL’ field.
After that, click ‘Save Changes’ to apply your settings.
Now, WooCommerce will redirect customers to your custom thank you page after they complete their orders.
Bonus Tip: Use Your New Thank You Page to Promote a Holiday Sale
Planning a holiday sale for your WooCommerce store is an excellent strategy to attract new customers and boost revenue, especially with Christmas and New Year’s approaching.
Offering coupons or shipping discounts directly on your thank you page can increase traffic to your site and encourage immediate repeat purchases.
A well-planned sale not only enhances immediate sales but also improves brand visibility and encourages repeat orders from existing customers.
For more information, check out our comprehensive guide on planning a holiday sale for your WooCommerce store.
Common Questions About Customizing WooCommerce Thank You Pages
Here are some commonly asked questions from our readers regarding the customization of WooCommerce thank you pages:
What steps do I need to follow to customize a WooCommerce thank you page?
The most effective way to customize a WooCommerce thank you page is by utilizing a WordPress plugin. Solutions like FunnelKit provide ready-made templates for editing, while page builders such as SeedProd allow you to have complete design flexibility with an intuitive drag-and-drop interface.
What is the process for creating a thank you page in WordPress?
To create a standard thank you page, go to Pages » Add New in your WordPress dashboard. You can then design your page using the block editor and set it as the confirmation page within your form or eCommerce plugin settings.
What are the best practices for designing a thank you page?
An effective thank you page should start by confirming the purchase or submission. It should also provide key information such as an order summary and guide the customer with a clear call to action, like offering a discount code or suggesting related products.
What methods can I use to customize WooCommerce pages?
The simplest way to personalize WooCommerce pages such as the shop, cart, and checkout is by using a theme builder plugin like SeedProd. This plugin features a user-friendly drag-and-drop interface and pre-designed blocks, allowing you to customize every aspect of your store without any coding skills.
To begin, check out our tutorial on how to modify WooCommerce pages.
We hope this article has assisted you in creating personalized WooCommerce thank you pages. Next, you might also want to explore our compilation of the top WooCommerce plugins for your store, as well as our guide on enhancing the customer journey in WooCommerce stores.
If you enjoyed this article, please consider subscribing to our YouTube Channel for WordPress video tutorials. You can also connect with us on Twitter and Facebook.