Building an online community on your WordPress site can be challenging, especially when it comes to maintaining engagement. Initially, some users may join and share a few updates, but soon after, activity tends to decline, leaving the community inactive.
The problem isn’t with your content or concept; it’s about the user experience. Many users prefer not to constantly open a web browser just to check for updates or respond to messages.
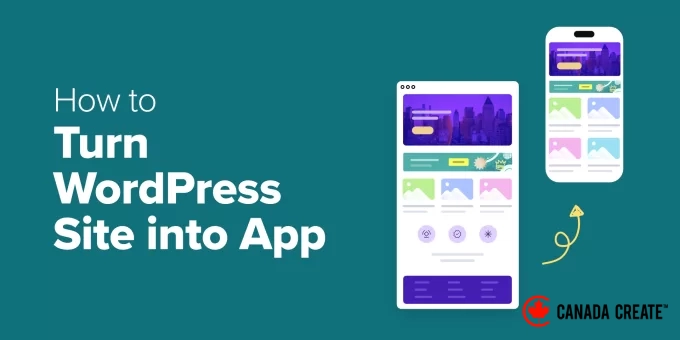
To address this issue, I decided to exploreBuddyBoss, a solution that transforms any WordPress site into a mobile application.
In just about an hour, I was able to fully set up the app and prepare it for submission to the app stores. It included features like push notifications, instant messaging, and all the functionalities that users truly value.
The increase in engagement was immediate and significant. After witnessing its effectiveness, I am confident it can yield better results for you as well.
In this guide, I will provide a step-by-step process on how to convert your WordPress website into a mobile app, requiring no coding or technical expertise.
Important Note:The technical setup outlined in this guide takes approximately one hour. Please remember that launching your app will require approval from both Apple and Google, which can take several days. It’s wise to factor in this waiting period when planning.
💡 Quick Overview: Essential Steps to Convert Your WordPress Site into a Mobile App
Short on time? Here’s a quick list of what you’ll need:
- A WordPress community website (such as a forum or membership platform).
- The BuddyBoss App, which transforms your site into native iOS and Android applications without requiring coding or a developer.
You can also consider alternatives like Progressive Web Apps (PWAs) or custom app development, but these options typically require more time and investment.
For the majority of WordPress users, BuddyBoss offers the quickest and most user-friendly approach.
Why Convert Your WordPress Community Website into a Mobile App?
Transforming your WordPress community website into a mobile app can significantly enhance user engagement and encourage members to return.
Mobile apps facilitate easier connections for users, particularly on their smartphones, where most online interactions occur today.
A mobile app provides advantages over a standard website, including:
- 🔔 Push notifications that allow you to instantly communicate updates or messages to members.
- 📶 Offline access enabling users to browse or read certain content without an internet connection.
- 📤 Simple content sharing features that promote increased interaction and visibility.
- 🎯 Customized in-app experiences that enhance community engagement
Let’s explore the differences between a mobile app and a traditional website, and understand their significant impact:
| Feature | Website | Mobile App | Advantages of an App |
|---|---|---|---|
| Access | Browser-based | Installed on mobile devices | Always accessible from the home screen. |
| Offline Use | ❌ | ✅ (Limited) | Users can access content anytime. |
| Push Notifications | ✅ | ✅ | App notifications are more effective, appearing on the user’s lock screen without needing a web browser. |
| Engagement | Moderate | High | Fosters loyalty and enhances user retention. |
| Setup Cost | 💲 | 💲💲 | Apps require initial setup but provide a higher return on investment. |
Key takeaway:If your website lacks activity, converting it into a mobile app can boost user engagement, enhance retention, and strengthen loyalty within your community, social network, or eLearning platform.
Various Methods to Create a WordPress App (and the Most Effective One)
There are various methods to convert your WordPress site into a mobile app, but not all options are suitable for beginners or worth the investment.
After exploring different approaches, I discovered that the BuddyBoss App provides the ideal combination of ease of use, features, and effective results.
Here’s a brief overview of your choices and what you can anticipate from each one:
| Method | Difficulty | Cost | Trade-Off | Best For |
|---|---|---|---|---|
| BuddyBoss App | Easy | 💲💲 | Requires a subscription | Communities, memberships, eLearning |
| PWA (Progressive Web App) | Easy | 💲 | Limited availability in app stores and fewer features | Blogs, portfolios |
| Native App Development | Advanced | 💲💲💲💲 | Requires developers and can be costly | Custom projects |
Why I Recommend BuddyBoss App
BuddyBoss is the most robust community platform for WordPress. It is designed for building membership sites, social networks, and online learning platforms, all in one convenient location.
The BuddyBoss App allows you to convert your WordPress site into a native mobile application for both iOS and Android platforms without any coding skills. It seamlessly synchronizes all your users, content, courses, and private messages between your website and the app.
Here are the standout features:
- No coding necessary: The BuddyBoss team will manage the entire app development process for you.
- Real-time syncing:Ensures your WordPress content, users, and features are always up to date.
- Integrated community features:Offers messaging, course integrations, and push notifications.
- Simple customization: Utilize the drag-and-drop builder to create your app’s design and layout.
In summary, the BuddyBoss App provides all the advantages of a custom mobile application without the expense, complexity, or coding challenges.
✅Preparation Steps: Setup Checklist and Costs
Before I guide you on how to transform your WordPress community into a mobile app, it’s essential to ensure you’re fully prepared. I’ve compiled a checklist and a clear overview of the primary costs so you know what to anticipate before you start.
Here’s what you’ll need before you begin:
- Dependable WordPress hosting. I highly recommend Rapyd Hosting as it is specifically tailored for online community websites.
- A WordPress community site developed using BuddyBoss.
- An active subscription to the BuddyBoss App.
- Apple Developer Account for app publishing.
- Google Play Developer Account for app publishing.
💰 Cost Overview: What is the Expense of Creating a BuddyBoss Community App?
| Expense Category | Details | Cost |
|---|---|---|
| BuddyBoss Platform | License fee for building your WordPress community site (one-time or annual) | $299 per year |
| Rapyd Hosting | Robust hosting service. Perfect for BuddyBoss. | $29 per month |
| BuddyBoss App Subscription | Provides access to the app builder and publishing features. | $79 per month |
| Apple Developer Account | Necessary for publishing your iOS application. | $99 per year |
| Google Play Developer Account | Necessary for publishing your Android application. | $25 one-time registration fee |
If you haven’t created your community site yet, check out our comprehensive tutorial on how to establish your own private community in WordPress.
If you already have a community website, your main new expenses will be the BuddyBoss App subscription and developer accounts.
While the BuddyBoss App subscription represents a significant investment, it’s essential to consider that hiring a developer to create an app can be very costly.thousands of dollars.For most business owners, utilizing a platform like BuddyBoss is a much quicker and more cost-effective solution for obtaining a professional mobile app.
How to Build a Mobile App with BuddyBoss
Now that you have everything set up, let’s explore the precise method I tested for transforming a WordPress website into a community app.
Step 1: Install and Connect the BuddyBoss App Plugin
Before your community can go mobile, you need to connect your WordPress site to the BuddyBoss App. This process integrates your website and mobile app for seamless functionality.
📌 Important:
You must have a BuddyBoss-powered community website established before you begin. If you haven’t created one yet, refer to our guide on building a community website in WordPress.To accomplish this, install and activate the BuddyBoss App plugin. Remember, you can only access this tool after purchasing your BuddyBoss App subscription. You need a BuddyBoss-powered community website set up before starting. If you haven’t built one yet, check out our guide on how to create a community website in WordPress.
To do this, install and activate the BuddyBoss App plugin. Keep in mind that you can only access this tool after you purchase your BuddyBoss App subscription.
To obtain the BuddyBoss App, log into your BuddyBoss account and navigate to the ‘Downloads’ tab located in the left sidebar. Then, click the ‘Download’ button next to the plugin.
After downloading, you can install it on your WordPress site just like any other plugin. For more information, refer to our tutorial on how to install WordPress plugins.
Once the plugin is activated, go to the BuddyBoss App » Connect section in your WordPress dashboard.
In this section, you will need to input your BuddyBoss App ID and App Key to establish a connection between the platforms.
To locate these details, return to your BuddyBoss account and switch to the ‘Apps’ tab.
Next, click the ‘Manage’ button next to the BuddyBoss App you just downloaded.
This will display a prompt containing your App ID and App Key.
Simply copy these credentials and paste them into your WordPress dashboard to finalize the connection.
Once completed, navigate to the ‘Configure’ tab at the top.
Here, you can specify a name for your app in the ‘App Icon Name’ field. This title will be displayed alongside your app icon in both the Apple App Store and Google Play Store.
Select a name that is relevant, memorable, and easily recognizable to your target audience.
Step 2: Configure iOS Settings (Apple Developer Account)
After linking your WordPress site to the BuddyBoss App, it’s essential to configure your iOS settings. This step is crucial for ensuring your community app is available on the Apple App Store.
Important:Remember, you’ll be generating specific codes known as API keys, IDs, and secrets. Don’t worry; it’s simpler than it seems.
These codes act as unique digital keys that enable secure communication between your BuddyBoss app, your WordPress site, and the Apple App Store.
If you’re only developing an Android app, you can skip this step.
1. Set Up an Apple Developer Account
To start, you need to create an Apple Developer Account. This account allows you to publish apps, manage updates, and utilize Apple’s development tools.
I had to register myself when trying this method, and it was quite simple. Just follow the on-screen instructions to provide your personal and contact information. Keep in mind that the approval process may take one to two days.
2. Link Your Apple Developer Account to BuddyBoss
Next, you will connect your Apple Developer account to BuddyBoss. To do this, navigate to theBuddyBoss App » Configure»iOSpage within your WordPress dashboard.
In this step, you will enter your Issuer ID, Key ID, and upload the API key generated in Apple’s App Store Connect.
To obtain these details, log into your Apple Developer account and navigate to the ‘App Store Connect’ tab in the left sidebar.
This action will redirect you to a new screen where you need to click on ‘Users and Access.’
On the following page, switch to the ‘Keys’ tab.
You will now see a list of active keys. Click the + icon to create a new key.
A popup will appear on your screen, prompting you to name your API key. I recommend using a recognizable title like “BuddyBoss” or your app’s name for easy identification in the future.
Next, select ‘App Manager’ from the ‘Access’ dropdown menu and click the ‘Generate’ button.
Once generated, the API key will appear in the list of active keys. Click the ‘Download API Key’ button to save it.
Then, copy the Key ID from the same row. You can also find the Issuer ID at the top of this page.
Now, return to your WordPress dashboard and paste the Issuer ID and Key ID into the appropriate fields.
Afterward, upload the API key file and click the ‘Connect Account’ button. This will link your iOS account to your BuddyBoss App.
3. Set Up Your Bundle ID, Signing Certificates, and Provisioning Profiles
Next, you need to configure your Bundle ID, signing certificates, and provisioning profiles. While these terms may seem complex, here’s a straightforward explanation:
- Bundle IDserves as your app’s unique identifier, much like a passport.
- Signing certificatesfunction as your digital signature, confirming that you are the app’s creator.
- Provisioning profilesact like access permissions, indicating which devices are authorized to install or test your app.
Fortunately, BuddyBoss makes this process easier by offering a video tutorial right in your dashboard, guiding you step by step through the information you need to provide.
I found this extremely useful while setting up my app, as it clearly shows where to click and what details to input.
4. Register Your App in App Store Connect
After that, you’ll need to enter your app details. Log into your Apple developer account and navigate to the App Store Connect » My Appssection.
Once on the new page, click the + icon to create a new app.
A popup will appear where you need to input the app name, select iOS as the platform, choose a primary language, and enter your Bundle ID.
Next, set user access to Full Access and click the ‘Create’ button.
5. Enter App ID and Shared Secret in BuddyBoss
After creating your app, click on it to access its settings page.
From there, navigate to the ‘App Information’ tab and copy your App ID.
Then, go to the ‘Manager’ tab in the left column.
Click the ‘App-Specific Shared Secret’ button to open a prompt that allows you to generate and copy the key easily.
Afterward, paste your App ID and App-Specific Shared Secret into your WordPress dashboard and click ‘Save Changes.’
6. Register Your iOS Device for Testing
Once that is complete, it’s time to add your iOS device.
This step is crucial because registering your iPhone or iPad with Apple enables you to test the app on a real device before it launches.
Without this, you won’t be able to ensure everything functions correctly for your community members.
Simply navigate to the ‘iOS Devices’ tab in your BuddyBoss dashboard and register your iOS device in your Apple Developer account.
BuddyBoss simplifies the process by offering a comprehensive video tutorial directly in your dashboard.
Follow this guide to register your device and ensure proper setup for testing.
Step 3: Configure Android Settings in Google Play Console
To make your app available on the Google Play Store, configure your Android app settings in BuddyBoss by selecting the ‘Android Settings’ tab at the top of your dashboard.
Upload your Service Account key here. This key connects your Google Developer account to BuddyBoss, allowing your app to sync properly.
1. Create Your App in the Google Play Console
Visit your Google Play Developer Account dashboard to get started.
Click the ‘Create app’ button to begin building your app.
You will be directed to a new screen where you need to enter a name for your app—this title will be displayed on Google Play, so choose something clear and memorable.
Next, select the default language for your app and set it to ‘Free’ to allow everyone to download it. You can adjust these settings later if you decide to monetize your app.
After checking the required declaration boxes, click ‘Create App.’
After successfully creating your app, navigate to theSettings » API Accesssection in the left sidebar and click on the ‘Create New Project’ button.
Next, click the ‘Link Project’ button located at the bottom of the page.
2. Set Up Your Service Account in Google Cloud Platform
To create the service account, first log into your Google Cloud Platform dashboard. Once there, switch to the ‘Service Accounts’ tab in the left sidebar.
Click on the ‘+ Create Service Account’ button.
On the new page, provide a name for your account (using your app name is recommended) and optionally add a description.
Then, click the ‘Create’ button.
In the following step, you need to select the user roles that will have access to this service account.
Simply choose Owner, then click Continue. Finally, click the ‘Done’ button.
3. Create and Download the JSON API Key
Your account will be created and displayed in a row on the Service Accounts page. Now it’s time to generate an API key for it.
To do this, click the three-dot icon under Actions and select ‘Manage Keys.’
This will direct you to a new screen where you need to click the ‘Add Key’ button.
When prompted, select ‘JSON’ as your key type and click the ‘Create’ button. Your JSON key will automatically download to your computer after creation.
4. Link JSON Key with BuddyBoss
Return to your WordPress dashboard and upload the JSON key into the Service Account Key field.
This will seamlessly connect your Google Developer Account with BuddyBoss.
5. Enter Application ID
After successfully connecting, scroll down to input your Application ID. This serves as a unique identifier for your app, similar to its official ID in the Google Play Store.
You will need to enter it manually, and it should adhere to a standard ‘reverse domain name’ format. Typically, this looks likecom.yourcompany.yourappname.
For instance, if your company is ‘My Awesome Community’, you might usecom.myawesomecommunity.app.
Make sure your app meets the guidelines specified in the app configuration section to ensure Google Play recognizes it accurately.
6. Create KeyStore and Finalize Setup
Next, you will provide your KeyStore information. This acts as a digital certificate for your app, verifying your ownership and ensuring that any future updates are recognized as being from you.
Without this, your app will not be eligible for updates on Google Play.
BuddyBoss simplifies the process of adding your KeyStore information. Just click the ‘Generate KeyStore’ button located in the Import section.
You will be taken to a new page where you need to scroll down to find the ‘Certificate Information’ section.
Enter your first and last name, your organization (you can use the name of your app), and any other required details. Then click ‘Generate’.
After creating your KeyStore, download the file to your computer.
Return to the KeyStore section in BuddyBoss, upload the file, and click the ‘Save Changes’ button. Your Android developer account is now successfully linked with BuddyBoss.
Step 4: Set Up Firebase to Send Push Notifications for Your App
One of the most effective ways to encourage users to return to your app is through push notifications. These are the small alerts that inform your community about new posts, messages, or events.
To enable this feature on both iOS and Android, you will need to integrate your BuddyBoss app with Google Firebase. This is a free service from Google that manages real-time push notifications.
Begin by navigating to the Google Firebase tab in your BuddyBoss dashboard. You will need to enter your Firebase Server Key to establish a connection with your BuddyBoss App.
1. Set Up Your Firebase Project
To obtain the key, visit the Firebase Console and create a free account.
After creating your account, click the ‘Get started by setting up a Firebase project’ button.
Firebase will prompt you to name your project. I suggest using the name of your app for easy identification later. Then, click ‘Continue.’
Next, Firebase will ask if you want to enable Google Analytics for your project. This feature can be useful for tracking app usage.
2. Navigate to Firebase Cloud Messaging Settings
Once your project is established, open it and click the gear icon in the top left corner to access the settings. Then, select the ‘Cloud Messaging’ tab.
Here, you will find your Server Key. Simply copy it and paste it into your BuddyBoss settings page to connect the two platforms.
3. Register Your Mobile Applications in Firebase
Next, return to your Firebase Project Overview and open the ‘General’ tab. Scroll down to the ‘Your Apps’ section to register your mobile applications.
You will need to create a total of four apps: one main app and one test version for both Android and iOS. Ensure that the bundle IDs and package names correspond with those used in your BuddyBoss and developer account settings.
You will see platform icons displayed here. Click on the ‘Android’ icon to add your Android app and the ‘iOS’ icon to set up your Apple app.
4. Create Entries for iOS and Android Apps
If you are setting up a Firebase iOS app, provide your iOS Bundle ID, App Nickname, and App Store ID (these can be found in your Apple Developer account).
Next, click the ‘Register App’ button.
Firebase will prompt you to download a configuration file. Save this file to your computer.
You will then repeat this process to create another iOS app, but this time append .test to the end of the Bundle ID (for example: com.yourappname.test). Be sure to register and download this app as well.
Follow the same procedure for your two Android apps—one for production and one for testing—and download both configuration files.
5. Add iOS APN Authentication Key
After creating all four apps, return to the ‘Cloud Messaging’ tab in Firebase. Your iOS apps will now be listed under the server key section.
To enable push notifications on Apple devices, you need to upload your APN authentication key. This key can be downloaded from your Apple Developer account and then uploaded to Firebase.
💡 Pro Tip:Before proceeding, ensure that your Bundle IDs for iOS and Package IDs for Android match exactly. Mismatched IDs will result in errors in Firebase, preventing your push notifications from functioning.
6. Upload Firebase Configuration Files to BuddyBoss
Next, return to your WordPress dashboard and upload all the iOS and Android configuration and test files you downloaded earlier. Then, click ‘Save Changes.’
That’s it! Firebase is now successfully connected, and your BuddyBoss app is ready to send push notifications to users on both iOS and Android devices.
Step 5: Customize Your App Settings and Notifications
After setting up push notifications with Firebase, it’s time to modify some key app settings within your BuddyBoss dashboard.
Navigate to the BuddyBoss App »Settings page. Scroll down and check the ‘Enable Registration’ box to allow non-members to create new accounts directly from the app.
Select your registration page from the dropdown menu. If you haven’t created a registration page with BuddyBoss yet, you can view the tutorial linked there.
Next, check the box to send a confirmation email to users after they register successfully.
Then, enable the ‘Privacy’ option to restrict app access to only logged-in members. This ensures that only registered users can view your community.
Now, navigate to the ‘Feedback’ tab. If you want users to provide feedback directly through the app, enable the ‘Send Us Feedback’ option.
Also, be sure to enter the email address where you would like to receive these feedback messages.
You can activate a ‘Report a Bug’ feature so users can easily report any issues they encounter.
I recommend including a ‘Rate This App’ option for both iOS and Android users.
Then, go to the ‘Smart Banner’ tab. When this feature is enabled, visitors to your website on mobile devices will see a small banner promoting your app.
You can enable this for both iOS and Android. If you prefer, you can restrict the banner to only show for logged-in members. Remember to click ‘Save Changes’ when you’re finished.
Next, navigate to the ‘Push Notifications’ section. Here, you can select the actions that will trigger notifications.
For instance, notifications can be sent when a member is tagged in a post, invited to a group, or receives a reply. Simply check the boxes for the notifications you wish to activate and click ‘Save Changes’ once more.
Step 6: Personalize the Branding and Design of Your App
It’s time to ensure your community app reflects your brand identity. To do this, head to the BuddyBoss App » Branding section in your WordPress dashboard.
BuddyBoss allows you to customize the appearance of your app on mobile devices. You can upload logos for your home screen, login screen, launch screen, and more.
I suggest using the same logo or icon from your website, so your community members can easily recognize your brand when they open the app.
For the login screen, you also have the option to upload a custom background image.
Select an image that embodies your brand’s colors and style — this small detail can enhance your app’s memorability and professionalism.
Next, click on the ‘Colors’ tab located at the top.
You can customize your app’s background, alternate background, button, and accent colors. Additionally, personalize the colors for your navigation menu, top bar, buttons, and text to align with your brand’s color scheme.
Next, navigate to the ‘Typography’ tab. Here, you can select different fonts for your body text, headings, top bar, and menus.
You can also modify the default font size to enhance readability. Once you’re finished, remember to click ‘Save Changes’ to implement your design.
After that, go to the ‘Top Bar’ page. This is the primary navigation bar that appears at the top of your app.
I suggest including your most essential pages here, such as Home, Profile, or Account.
Then, select ‘More Screen Structure’ from the dropdown menu. Here, you can add additional pages such as Blog, Notifications, Activity, and Forums. These will be accessible when users click the More icon in your app.
You can organize your app’s navigation similarly to how you would create a menu in WordPress. If you need assistance, refer to our tutorial on creating a navigation menu in WordPress for support.
Step 7: Build Pages for Your App
Once your branding is finalized, it’s time to begin constructing the actual pages of your app.
Navigate to the BuddyBoss App – App PagesAccess your WordPress dashboard and click the ‘Add New’ button.
This will launch the familiar WordPress block editor, allowing you to easily drag and drop blocks from the left column to create your mobile app page.
Scroll down to discover special BuddyBoss blocks for features such as Courses, Discussions, Forums, Groups, Members, Activity, Notifications, and Quick Links.
For instance, if your community site has an active forum, you can simply add the ‘Forum’ block to display it within your app.
You can also utilize any standard WordPress blocks, embed videos, add images, or include text—just like you would when creating a regular page.
Once you are satisfied with the design, click the ‘Publish’ or ‘Update’ button to save your changes. You can repeat this process to create as many app pages as you desire.
Step 8: Build and Test Your Mobile App
You are now prepared to build your app.
Navigate to theBuddyBoss App – Buildpage in your WordPress dashboard and click the ‘Request Build’ button.
This will take you to a new screen where you need to select iOS and Android as your target platforms.
Select ‘Release App’ and ‘Test App’ as your build types. This instructs BuddyBoss to create four versions of your app: a test and a release version for both iOS and Android.
The test app version can be quickly installed on your mobile device using a QR code. This allows you to preview how your app appears and functions before submitting it to the app stores.
The release version is the one you will upload to the Apple App Store and Google Play Store.
Once you are finished, click the ‘Next Step’ button.
Next, BuddyBoss will display a summary of your app’s information.
Carefully review the details to ensure everything is correct, then click the ‘Send Build Request’ button.
Your submission will be sent to the BuddyBoss team, who will utilize their specialized system to generate your app builds. Once the process is complete, the status on this page will change to ‘Completed.’
When this occurs, click the ‘Install Test App’ button. A popup will appear with a QR code that you can scan on your device to install and test your app immediately.
🔍 Essential Checks for Your Test App Before Submitting to App Stores
After installing the test version of the app on your device, here are some key checks to ensure everything functions correctly:
- Can you successfully log in and create a new account?
- Are essential community features such as the activity feed, forums, groups, and courses loading properly?
- Are push notifications working? You can verify this by sending a message from another account or device.
- Does the app’s branding align with your settings? Check your logo, color scheme, and app icon to ensure they look exactly as you intended.
- Is the navigation seamless, with no broken links or missing icons?
Ensuring these elements function correctly will help you avoid rejections during the app store submission process.
Step 9: Submit Your App to the App Stores
Now that your app is developed and tested, it’s time to submit it to the Apple App Store and Google Play Store.
To proceed, navigate to the ‘Publish’ tab at the top of your Build page. Then, select the Apple App Store and choose the release version of your app from the dropdown menu.
Click the ‘Upload Build’ button to initiate the submission process.
You can follow the same procedure for Android by switching to the ‘Google Play Store’ tab.
Before submitting your app, ensure that you have prepared all necessary materials required by the app stores, including your app description, screenshots, and keywords.
These elements will appear on your app’s public listing and play a crucial role in helping users find your app through search.
In the Google Play Console, you can input this information by accessing your dashboard, selecting your app, and navigating to the ‘Store Listing’ section.
From this section, you can upload screenshots, craft your app description, and add keywords in the app details fields.
If you are using the Apple App Store, you will enter this information in App Store Connect. Simply go to ‘My Apps’ and select your app.
Here, you can upload your screenshots, provide your app description, and include relevant keywords to enhance visibility in App Store search results.
After submission, your app will undergo a review process that typically takes between 2 to 7 days, although this can vary based on the store’s review queue and the complexity of your app.
If your app is not approved on the first attempt, don’t be discouraged. It is common for new developers to receive feedback or requests for minor adjustments. Both Apple and Google offer clear guidance on what needs to be corrected, allowing you to update your app and resubmit it.
Once your app is approved, it will be launched and accessible for everyone to download.
💡 Pro Tip: Regularly Update Your App
Publishing your app is an ongoing process. Similar to your WordPress site, your app requires continuous maintenance to remain compatible, secure, and user-friendly.
With BuddyBoss, any minor updates you make on your WordPress site, including content changes, new posts, course updates, or community interactions, will automatically sync to the app. You won’t need to republish your app for these updates.
However, if you implement structural changes that impact the app’s functionality, such as activating new BuddyBoss features, updating APIs, altering your app’s branding, or adding new plugins that work with the app,
you will need to create a new build and resubmit it to both the Apple App Store and Google Play Store.
This process guarantees that your users always have access to the latest version and prevents the app from malfunctioning due to unsupported changes.
Frequently Asked Questions About Converting a WordPress Website into a Mobile App
Now that you understand the entire process of transforming a community website into a mobile app, here are some common questions I frequently receive from beginners like you:
What is the typical timeframe for building an app?
Setting up and configuring an app from your WordPress site using BuddyBoss takes approximately one hour. However, the complete process, including the review and approval by Apple and Google, may take several days.
Is it possible to use the BuddyBoss App with any WordPress theme?
Yes, while you can use other WordPress themes, the BuddyBoss App is optimized for the BuddyBoss Theme. This theme is specifically designed to seamlessly integrate your community features, courses, and content with the app. Using a different theme may lead to missing features or functionality issues.
What are the consequences of canceling my BuddyBoss App subscription?
Upon cancellation, your app will no longer receive updates, and you will be unable to publish new versions. Existing installations of the app will continue to function, but you will not have access to new features, bug fixes, or store integrations.
How are updates to content managed in my WordPress app?
Content updates made on your WordPress site automatically sync with your BuddyBoss App. This includes updates to posts, pages, courses, forums, and community activities, ensuring your app remains current without any additional effort.
Is coding knowledge required to build a mobile app for my WordPress site?
No coding skills are necessary. BuddyBoss takes care of the technical aspects, allowing you to set up your app through the dashboard, adjust iOS and Android configurations, and personalize your branding. This makes it user-friendly for everyone, including beginners.
I hope this article has shown you how to effortlessly convert your WordPress site into a mobile app. You might also want to check out our beginner’s guide on implementing a private messaging system in WordPress, as well as our comparison of BuddyBoss, Circle, and Mighty Networks.
If you enjoyed this article, please subscribe to our YouTube Channel for WordPress video tutorials. You can also connect with us on Twitter and Facebook.