
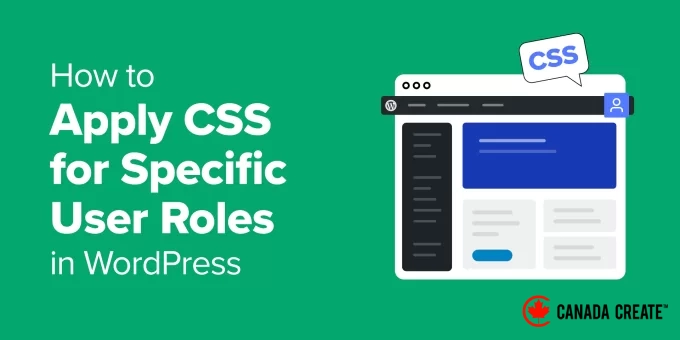
We have developed numerous WordPress sites where users require tailored experiences. Members, customers, authors, and clients all benefit from layouts that cater to their specific roles.
However, WordPress lacks a built-in feature to style elements based on user roles. Modifying theme files can be risky, particularly for those without development experience.
We’ve witnessed users getting stuck or even damaging their sites by inserting incorrect code. Therefore, we always suggest a safer and simpler approach to manage this.
In this guide, we will demonstrate how to implement custom CSS for specific user roles using an easy-to-use tool. This method is what we employ on our own sites for quick and secure solutions.
Here’s a brief overview of the topics we will discuss in this guide:
- Understanding the Importance of Applying CSS for Specific User Roles in WordPress
- How to Apply Custom CSS for Specific User Roles in WordPress
- Adding Custom CSS for Specific User Roles in the WordPress Admin Area
- Implementing Custom CSS for Specific User Roles in Other Areas
- Common Questions and Answers
- Additional Tips and Tricks
Understanding the Importance of Applying CSS for Specific User Roles in WordPress
We operate multiple websites that require user login, and we often need to customize their appearance based on different user roles.
Through our split testing on these sites, we have found that personalized experiences significantly improve user satisfaction, leading to higher conversion rates and increased sales.
Whether you are a website owner, developer, or designer, having the ability to customize your site’s appearance for various users is incredibly beneficial.
Here are some typical scenarios:
- Membership Sites:You can implement custom CSS to provide unique experiences for premium members.
- eCommerce Stores:You can emphasize shopping carts, offer discounts to returning customers, and showcase other features specifically for logged-in users.
- Multi-Author Blogs:Managing a blog with several authors can become complicated. Custom CSS allows you to design a streamlined interface for editors while keeping it straightforward for contributors and subscribers.
- Client Sites:You can simplify the admin interface for clients by hiding specific elements using custom CSS.
The challenge is determining how to instruct WordPress to load specific CSS code for different user roles.
Implementing Custom CSS for Different User Roles in WordPress
The simplest way to manage custom code, including CSS, in WordPress is by using WPCode. This is the top code snippets plugin for WordPress, allowing you to efficiently manage your custom CSS all in one location.
Important Note:A free version of WPCode is available, but we recommend upgrading to a paid plan to access additional features.
Reasons to Choose WPCode:
- It enables you to safely add any custom code, including CSS, without risking your website’s functionality. If a code snippet doesn’t work, you can easily disable it.
- It offers robust code insertion and conditional logic tools, allowing you to execute a snippet only when necessary.
- You gain access to a vast library of useful code snippets, which saves you from the hassle of installing multiple separate plugins.
Now, let’s proceed to add some custom CSS and apply it to specific user roles.
How to Add Custom CSS in WPCode
First, install and activate the WPCode plugin. For detailed instructions, refer to our tutorial on how to install a WordPress plugin.
After activation, navigate to the Code Snippets » + Add Snippet page, where you’ll find numerous helpful snippets for various tasks.
To begin adding custom CSS code, click on ‘+ Add Custom Snippet’ located under the ‘Add Your Custom Code (New Snippet)’ section.
Next, choose ‘CSS Snippet’ from the list of code type options displayed on your screen.
This action will take you to the code editor.
Start by entering a title for your snippet that helps you remember its purpose.
You can now insert your custom CSS code into the ‘Code Preview’ box.
For this tutorial, we will use a code snippet that highlights the ‘Posts’ menu in the admin area by changing its background color. Feel free to replace it with your own CSS code:
li#menu-posts { background-color: #bf0505;
}
Select User Role Conditional Logic
Scroll down to the ‘Smart Conditional Logic’ section and toggle the ‘Enable Logic’ option to activate it.
Then, select the desired ‘Condition’ (Show or Hide) and click on ‘Add new group’.
Click on the first box in the Rule to expand it, revealing a list of available rules.
For example, you can choose based on login status, user role, device type, and more.
Choose ‘User Role’ to apply this custom CSS code specifically for a designated user role.
Next, select the specific user role you wish to target with this CSS.
Important Note:You can create multiple conditional logic rules by clicking the ‘+ Add new group’ button.
When you finish, click ‘Save Snippet’ in the top right corner and then set it to ‘Active.’
WPCode will now apply your custom CSS to the selected user roles in WordPress.
Add Custom CSS for Specific User Roles in the WordPress Admin Area
If you want your custom CSS to be active only in the WordPress admin area, WPCode simplifies this process.
On the code editing screen, scroll down to the ‘Location’ option. Expand the dropdown menu to view various locations for automatically loading the CSS.
Simply select the ‘Admin header’ or ‘Admin footer’ option to apply your CSS code within the WordPress admin area.
Add Custom CSS for Specific User Roles in Other Areas
Customizing design on eCommerce sites enhances user experience and has been shown to reduce cart abandonment rates.
If you operate a WooCommerce store, offer online courses, or sell digital products, implementing custom CSS for logged-in customers can enhance their experience.
WPCode provides options for adding custom code to your eCommerce website. Navigate to the Location settings and select the ‘eCommerce’ tab.
You can insert your custom CSS in various locations, including before the cart, prior to the checkout form, on product pages, and more.
WPCode is compatible with WooCommerce, Easy Digital Downloads, and MemberPress.
Frequently Asked Questions
Below are answers to common questions regarding the customization of WordPress for various user roles.
Is it possible to apply CSS to custom user roles in WordPress?
Yes, WPCode enables you to target any user role, including those created by membership plugins, learning management systems, or custom code. Just ensure the custom role is available in the conditional logic options.
What should I do if the CSS changes are not visible to some users?
This issue may arise if your website employs aggressive caching or a Content Delivery Network (CDN). Clear your cache and ensure that the WPCode snippet is active and correctly targeting the intended location and user role.
Can I preview CSS changes before they go live?
While WPCode lacks a visual preview, you can keep your code snippet inactive while testing it in your browser’s developer tools. Once you’re satisfied with the design, simply paste it into WPCode and activate it.
Is it safe to use WPCode instead of modifying theme files?
Definitely. At CanadaCreate, we prefer WPCode because it keeps all our custom code separate from theme files, ensuring that changes remain intact during updates. It also simplifies the management of snippets by consolidating them in one location.
Additional Tips
Here are some extra resources to assist you in creating tailored user experiences in WordPress. You don’t even need to learn CSS for some of these options:
- How to Display Personalized Content for Different Users in WordPress
- How to Change Colors on Your WordPress Website
- How to Customize and Style Your WordPress Forms (Two Simple Methods)
- How to Build a Custom Home Page in WordPress (Three Approaches)
We hope this article has helped you understand how to implement CSS for specific user roles in WordPress. You might also want to explore our beginner-friendly WordPress generated CSS cheat sheet or check out these plugins and tips to enhance the WordPress admin area.
If you found this article helpful, consider subscribing to our YouTube Channel for WordPress video tutorials. You can also connect with us on Twitter and Facebook.


