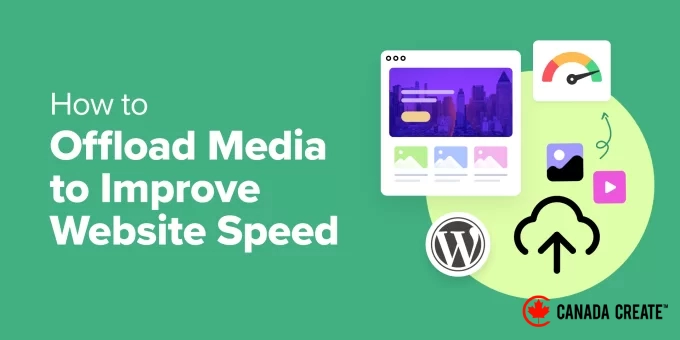
Many WordPress users overlook a crucial factor affecting their site speed: media files. Images, videos, and documents can consume significant bandwidth and strain your hosting server, particularly as your website expands.
With over a decade of experience managing WordPress sites, we discovered that offloading media is one of the most effective strategies. By transferring your media files to dedicated storage services, you can significantly reduce loading times and enhance the user experience.
At Canada Create™, we have experienced substantial improvements in speed by utilizing a Content Delivery Network (CDN).
Whether you operate a personal blog or a high-traffic business website, we will guide you through the effective techniques we implement to offload WordPress media and maintain optimal site performance.
The Benefits of Offloading WordPress Media for Enhanced Website Speed
Consider offloading WordPress media as a way to declutter your home by relocating heavy boxes. Instead of overloading your hosting server with images, videos, PDFs, and other large files, you can store them on external servers specifically optimized for media delivery.
When visitors access your website, your web server can efficiently manage the delivery of large media files, allowing it to prioritize loading essential content and features. As a result, pages load much faster, providing a seamless experience for your users.
Through our management of WordPress sites, we have observed that offloading media consistently leads to significant speed enhancements. Your hosting server operates more efficiently, bandwidth consumption decreases, and your site can accommodate more visitors without compromising performance.
Here are several effective methods to offload your media:
- Cloud storage servicessuch as Amazon S3 or Google Cloud Storage, allow you to store your files on robust external servers.
- Content Delivery Networks (CDNs)distribute your media across a network of global servers, ensuring rapid delivery.
- Video platformslike YouTube or Vimeo manage your video content, enabling you to easily embed them on your site.
At Canada Create™, we utilize Cloudflare CDN. Our media files are automatically stored on numerous servers worldwide, significantly reducing load times and enhancing WordPress performance for visitors, no matter where they are located.
Remember, media offloading is most effective when integrated into a complete website speed optimization plan. We suggest pairing it with high-speed hosting, routine WordPress maintenance, and additional performance strategies for the best results.
Are you ready to begin? Let’s dive into the most effective ways to offload your WordPress media and enhance your website speed:
- Offload WordPress Media with Envira CDN (The Easiest and Most Recommended Option)
- Offload WordPress Media with WP Offload Media (Free Version)
- Offload WordPress Media with WP Media Folder (Premium Option)
- Offload WordPress Videos Using a Streaming Service
- Offload WordPress Media with Cloudflare CDN
- Bonus: Enhance Your Images Before Offloading for Optimal Performance
- Common Questions About Offloading WordPress Media
Offload WordPress Media with Envira CDN (The Easiest and Most Recommended Option)
For the most user-friendly method to offload your media, we highly recommend Envira CDN.
While many methods involve complex technical procedures like setting up cloud storage or adjusting nameserver configurations, Envira CDN simplifies the entire process significantly.
It allows you to offload your images to a global network with just one click, directly from your WordPress dashboard, without needing any technical expertise.
This powerful CDN plugin was developed by the creators of the well-known Envira Gallery plugin. It is compatible with any WordPress site, optimizing all images in your Media Library, not just those utilized in Envira galleries.
How to Install the Envira CDN Plugin
Begin by visiting the Envira Gallery website, selecting ‘Envira CDN’ from the top menu, and clicking the ‘Get Envira CDN Now’ button.
Next, choose a plan that fits your needs and complete the purchase process.
Once your purchase is finalized, you will be able to download the plugin file and retrieve your license key from your account area.
Now, install and activate the Envira CDN plugin on your WordPress site. If you need assistance, refer to our guide on how to install a WordPress plugin.
Activating the CDN and Offloading Images
After activation, go to the Envira CDN section in your WordPress dashboard. Once there, click on the ‘License’ tab.
Enter your license key in the provided box and click the ‘Verify Key’ button.
Once your license key is verified, you can configure Envira CDN to offload your images and enhance your site speed.
To do this, click on the ‘Settings’ tab and simply toggle the ‘Enable CDN’ switch to the ON position.
Next, you will see a ‘Bulk Offload Images’ button.
Click this button to transfer all the images currently stored in your WordPress Media Library to the CDN.
Please be aware that this process may take a little time, especially if your media library is extensive.
That’s all! Envira CDN is now fully operational. All your existing images have been successfully offloaded, and any new media you upload will be automatically delivered from Envira’s fast global network, which spans over 335 locations.
Offload WordPress Media Using WP Offload Media (Free)
WP Offload Media is a widely-used free WordPress plugin that automatically transfers your images, videos, documents, and other media to your chosen cloud storage provider.
The plugin is compatible with Amazon S3, Google Cloud Storage, and DigitalOcean Spaces for cloud storage. You will need to create and configure your cloud storage account carefully, as well as install, activate, and set up the plugin.
Setting Up Your Cloud Storage Account
If you don’t have a cloud storage service yet, your first step is to select one and create an account.
The WP Offload Media website provides comprehensive documentation to help you get started with various cloud storage options. In this tutorial, we will guide you on how to transfer your WordPress media files to Amazon S3 cloud storage.
You can create a free account on the Amazon Web Services website. Although the account is free, you will need to provide your credit card information during the setup process.
If you already have an account, simply click the ‘Sign in to an existing AWS account’ button and enter your credentials.
Next, you will need to create a User to obtain access keys. Navigate to the Amazon Web Services Users page and click the ‘Create user’ button.
On the following screen, you can input the user details. Enter a name in the User field. We suggest using the format yourdomain-offloadwordpressmedia.
This naming convention will help you identify the website associated with the account and its specific function if you decide to create additional users for other websites in the future.
Ensure that you do not check the ‘Provide user access to the AWS Management Console’ box, and then click the ‘Next’ button to proceed.
Next, grant the new user permission to access Amazon S3 storage for offloading your WordPress media files.
At the top of the page, choose the ‘Attach policies directly’ option to view a list of permission policies for selection.
You can filter the policies by entering ‘s3fullaccess’ in the search box.
This allows you to easily find and select the ‘AmazonS3FullAccess’ policy. After that, click the ‘Next’ button to proceed.
The next page will allow you to add optional tags, which are generally unnecessary for most websites. However, if you have many AWS users, you might have established a tagging system for management.
Now, click the ‘Create user’ button to complete the new user setup.
Next, you will need to generate access keys for the new user.
To begin, click on the username of the new user.
Then, click on the ‘Security credentials’ tab and scroll down to the ‘Access keys’ section.
Once there, click the ‘Create access key’ button.
This will direct you to the ‘Access key best practices & alternatives’ page.
Simply select the ‘Application running outside AWS’ option and then click the ‘Next’ button.
On the next page, you can enter an optional description tag. For this tutorial, we will leave this field empty.
Once you are finished, click the ‘Create access key’ button.
You will see the security credentials for the user, which include an Access Key ID and a Secret Access Key.
Amazon will not display these credentials again, so make sure to download the .csv file immediately and keep it in a secure location.
Important:It is crucial to store your access keys securely. If you lose them, you will need to repeat the steps above to generate a new one.
Next, you need to add your AWS access keys to your WordPress site so that the WP Offload Media plugin can utilize them to transfer your media files to Amazon S3 storage.
The safest method to do this is by adding them to your WordPress wp-config.php file. For instructions on how to edit this file securely, refer to our guide on modifying wp-config.php in WordPress.
Now, copy the following code snippet:
define( 'AS3CF_SETTINGS', serialize( array( 'provider' => 'aws', 'access-key-id' => '********************', 'secret-access-key' => '**************************************', ) ) );
You need to insert this into your wp-config.php file.
Ensure you copy the code snippet between the two lines below; otherwise, WP Offload Media won’t be able to read it.
/* Add any custom values between this line and the "stop editing" line. */
/* That's all, stop editing! Happy publishing. */
Finally, replace the asterisks with the access key ID and secret access key from the .csv file you downloaded earlier.
Remember to save the wp-config.php file to apply your settings.
Installing the WP Offload Media Plugin
The next step is to install and activate the free WP Offload Media Lite plugin. If you need assistance, please refer to our beginner’s guide on how to install a WordPress plugin.
After activation, go to the Settings » WP Offload Media page in your WordPress dashboard to configure the plugin.
Make sure to select the ‘Create New Bucket’ option and name the bucket, for example, media.example.com. You can also choose the region closest to most of your WordPress visitors.
To get started, click the ‘Create New Bucket’ button located at the bottom of the screen.
Great job! WP Offload Media is now configured to automatically transfer newly uploaded media to your Amazon S3 cloud storage bucket with the recommended settings.
If you wish to offload your existing media files as well, you can find this option available in the premium version of the plugin.
Efficiently Offload WordPress Media with WP Media Folder (Premium)
WP Media Folder is a premium plugin designed to help you manage and organize your WordPress media library while syncing with external cloud storage services.
It seamlessly integrates with cloud storage services like Google Drive and OneDrive through the WP Media Folder Cloud addon, allowing you to upload specific files to the cloud instead of your web server.
WP Media Folder is an excellent option for organizing your media files into folders or creating custom image galleries, and it’s simpler to set up compared to other methods.
After extensive testing, we found this plugin to be an outstanding solution for WordPress blogs with a large number of media files, including photography portfolios and digital art stores. You can learn more in our comprehensive WP Media Folder review.
This tutorial will guide you on how to efficiently offload your WordPress media files to Google Drive using the WP Media Folder plugin.
How to Install the WP Media Folder Plugin
To begin, you need to purchase the WP Media Folder plugin. During this process, you will create a JoomUnited account. Remember your username and password, as you will need them later in this tutorial.
Next, install and activate the WP Media Folder plugin. For detailed instructions, refer to our comprehensive guide on installing a WordPress plugin.
Once activated, the setup wizard will launch automatically. Click the ‘Continue to environment check’ button to proceed.
The WP Media Folder plugin will take a few moments to check your WordPress environment, including your PHP version, extensions, and settings, ensuring compatibility.
If all items show a green checkmark, click the ‘Continue’ button to advance to the next step of the wizard. If there are any issues, please reach out to your hosting provider for assistance.
On the following page, you can decide whether to enable WP Media Folder’s gallery and lightbox features, which allow you to create, edit, and delete folders directly within the WordPress Media Library.
We recommend keeping these options enabled for most websites and then clicking the ‘Continue’ button.
The next step provides an overview of additional features available in WP Media Folder.
The default settings are suitable for most WordPress sites. Enable any extra features you wish to use, and then click the ‘Continue’ button.
After a brief wait, a success message will appear.
You can complete the setup wizard by clicking the ‘Go to Media Library’ button.
Installing the WP Media Folder Cloud Addon
To offload your media files to Google Drive, you need to install and activate the WP Media Folder Cloud addon, just like you would with any WordPress plugin.
Next, navigate toSettings » Generalto connect Google Drive with your WordPress media library. Simply scroll down to the ‘Joomunited live updates’ section and click ‘Link my Joomunited account.’
In the popup that appears, enter your JoomUnited username and password, then click ‘Log In.’
Make sure to use the email address and password you used to purchase the WP Media Folder plugin earlier.
You are now ready to connect Google Drive to your website and offload your WordPress media files.
Start by navigating toSettings » WP Media Folderto begin the process.
From the menu on the left side, go toCloud » Google Drive.
Select the ‘Automatic’ option to connect to Google Drive, then click the ‘Connect Google Drive’ button located at the top right of the screen. You will need to log in to the Google account you intend to use.
Congratulations, your Google Drive is now linked to your WordPress site. While your media files will still reside on your web server, you can conveniently access Google Drive as an additional storage location for your media.
When you incorporate media files from Google Drive into your posts and pages, they will be delivered from Google Drive, which helps conserve server resources and enhances your WordPress performance.
You can find detailed instructions on how to do this, along with tips on using WP Media Folder to organize your Google Drive images, in our comprehensive guide on connecting Google Drive to your WordPress media library.
Streamline WordPress Video Storage with a Streaming Service
Based on our experience, videos consume significant storage space and bandwidth, making it costly and slow to store them directly in WordPress or on cloud storage.
We highly recommend avoiding the upload of videos directly to your WordPress Media Library. Instead, opt for a video streaming service that is specifically designed for optimal online video viewing.
When you upload videos to platforms like YouTube or Vimeo, they enhance each video for a superior web experience. This allows viewers to select HD quality or lower resolutions to conserve data usage.
These video platforms automatically detect the user’s device and internet connection, ensuring that the video plays in the best possible quality for each individual viewer.
After uploading your video to the streaming service, you can easily embed it in your WordPress site, allowing your visitors to watch it directly on your website.
Additionally, users who may not be familiar with your website can discover your video on the streaming platform, potentially increasing traffic to your site.
For instance, our Canada Create™ YouTube channel boasts over 1 million subscribers and attracts tens of thousands of new views each week.
To learn more about this topic, check out our guide on the reasons to avoid uploading videos directly to WordPress.
Enhance Your WordPress Media Management with Cloudflare CDN
Another effective method to offload your WordPress media files is by utilizing a Content Delivery Network (CDN), which is the approach we employ at Canada Create™.
Content Delivery Networks (CDNs) distribute copies of your website’s media files across a network of servers worldwide. This means that when a visitor accesses your site, the CDN delivers the media from the nearest server, resulting in faster loading times.
This approach is effective for us at Canada Create™, as we have a global audience. We utilize Cloudflare as our CDN, but there are many other excellent WordPress CDN options available.
How to Create a Cloudflare Account
To begin, visit the Cloudflare website and click the ‘Sign Up’ button.
A new page will appear where you can create your Cloudflare account by entering your email address and selecting a password.
After entering your details, click the ‘Sign Up’ button to proceed.
Once completed, you will see a confirmation message saying ‘Thank you for choosing Cloudflare,’ indicating that your account has been successfully created.
You can now add your website to Cloudflare by clicking the button labeled ‘Add a Website or Application.’
On the following page, enter your website in the ‘Enter your site’ field.
You only need to input your site’s domain name, without any additional characters, such asexample.com.
The following screen displays the various plans available from Cloudflare. After choosing a plan, click the ‘Continue’ button.
For this tutorial, we will utilize the free plan.
Next, Cloudflare will present your website’s DNS records. You need to select which records should be routed through Cloudflare to enhance your site’s performance.
Ensure you enable your primary domain, such as example.com, so that it is active and indicated by an orange cloud.
After activating the desired DNS records to route through Cloudflare, be sure to click the ‘Continue’ button at the bottom.
Updating Your Website’s Nameservers
In the next step, Cloudflare will inform you that you need to update your nameservers.
You can accomplish this by logging into your domain registrar account, such as Network Solutions. Alternatively, if you received a free domain from Bluehost or another web hosting service, you will need to access your hosting account.
Let’s go through the process step-by-step using Bluehost. If you’re using a different hosting provider or domain registrar, the steps will be similar, and you can contact them for assistance or refer to their online documentation.
Log in to your Bluehost account and navigate to the ‘Domains’ section on the dashboard. Then, click the ‘Settings’ button next to your domain name.
On the following page, scroll down to ‘Advanced Tools’ and expand the section by clicking the arrow on the right side of the screen. Here, you will find your website’s DNS settings, including the nameservers.
Next, click the ‘Manage’ button next to ‘Nameservers (DNS)’.
A warning message will appear, indicating that only advanced users should modify their nameservers.
Click the ‘Continue’ button to acknowledge the warning and proceed.
You can now carefully enter the settings for Nameserver 1 and Nameserver 2 as provided by Cloudflare.
After entering the settings, click the ‘Save’ button to apply the new configurations.
Important:Changing nameservers may take some time to propagate across the internet. During this period, some users may find your website temporarily inaccessible.
With your nameservers updated, return to the Cloudflare setup page.
There, complete the setup by clicking the blue button labeled ‘Done, check nameservers’.
You will need to wait a few minutes for your nameservers to be verified and for Cloudflare to be activated.
Once activated, you’ll see a success notification in your Cloudflare dashboard.
Setting Up Cloudflare
To enhance your website’s performance, you’ll need to configure Cloudflare. Fortunately, the Quick Start Guide will automatically launch and guide you through the necessary settings.
For more information, please refer to our tutorial on setting up Cloudflare Free CDN for WordPress.
Tip: Optimize Your Images Before Offloading for Enhanced Performance
Prior to offloading your media files, ensure that you optimize and compress them to achieve additional speed enhancements.
You can utilize plugins like WP Smush and others to optimize your WordPress images by decreasing their size without sacrificing quality. This will reduce the amount of data that needs to be offloaded.
An optimized image can be up to 80% smaller than the original while maintaining quality. For instance, the image mentioned above is 52% smaller.
For comprehensive instructions, check out our guide on optimizing images for web performance without compromising quality.
Common Questions About Offloading WordPress Media
Here are some quick responses to the most frequently asked questions regarding offloading WordPress media.
What does it mean to ‘offload’ WordPress media?
Offloading your media library involves storing images, videos, and other media files on a separate server, such as a cloud storage service, rather than on your website’s primary hosting server.
What are the benefits of offloading my WordPress media?
Offloading your media decreases the strain on your web server, resulting in quicker page load times, enhanced website performance, and an improved user experience. It can also increase your site’s scalability and lower hosting expenses.
What are the most effective methods for offloading media?
The most common techniques include utilizing cloud storage services like Amazon S3 or Google Cloud Storage, as well as employing a Content Delivery Network (CDN).
How do cloud storage and CDN differ when offloading media?
Cloud storage transfers your media files to a separate server, while a CDN replicates your media files across multiple servers globally to deliver them more quickly to users based on their location. These solutions can often be combined for optimal results.
Do I need technical expertise to offload my media?
Although some technical knowledge may be beneficial, many plugins streamline the process, making it accessible for users of all skill levels to offload their media.
Will offloading affect my existing image links?
When done correctly, offloading your media will not disrupt your image links. Certain plugins can automatically update the image URLs to ensure they display correctly. Other plugins may only offload newly uploaded images, leaving your existing images untouched.
What should I do with large video files? Is offloading necessary for them as well?
For large video files, it’s advisable to use a video streaming service like YouTube or Vimeo and embed the videos on your site instead of directly offloading them.
Can offloading enhance my website’s SEO?
Absolutely, offloading can positively impact SEO by boosting your website’s speed, which is a crucial ranking factor for search engines like Google.
Is offloading the sole solution for speeding up my website?
While offloading is a key optimization technique, it works best when paired with other performance enhancements, such as implementing WordPress caching and selecting a reliable, fast web host.
We hope this tutorial has guided you on how to offload WordPress media to enhance your website’s speed. You may also find our guide on conducting a proper website speed test or our expert recommendations for the best WordPress caching plugins helpful in further speeding up your site.
If you found this article helpful, consider subscribing to our YouTube Channel for insightful WordPress video tutorials. You can also connect with us on Twitter and Facebook.