 Skip to content
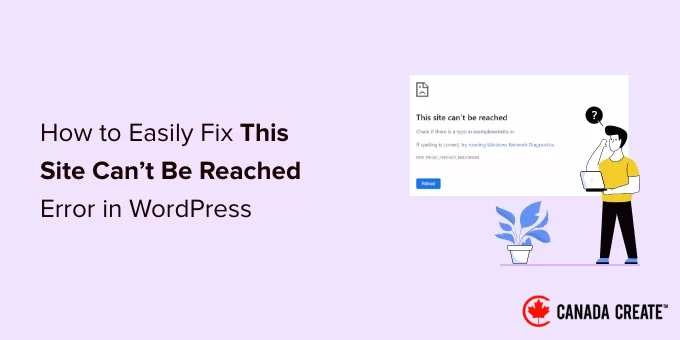
If you operate a WordPress website, you may encounter the ‘This site can’t be reached’ error. This issue can prevent you from accessing your own site, hindering your ability to test your blog or business website.
Additionally, this error can render the WordPress dashboard unreachable, stopping you from installing updates, publishing new posts, or carrying out other essential administrative tasks.
Through our experience over the years, we’ve faced this error on our own websites. Based on our insights, you can resolve it by checking your internet connection, clearing your browser cache, disabling your firewall, adjusting DNS settings, and more.
In this article, we will guide you through the steps to effectively resolve the ‘This site can’t be reached’ error.
What Does the ‘This Site Can’t Be Reached’ Error Mean in WordPress?
While there are many common errors in WordPress, the ‘This site can’t be reached’ error is particularly frustrating due to its vague message, which offers no clear guidance on how to proceed.
In the worst-case scenario, this error can render your website completely inaccessible, making it challenging to test your WordPress site, add new content, install security updates, and implement other crucial changes.
This error typically indicates that there is an issue preventing your browser from reaching the specified website. Possible causes include a weak internet connection, incorrect network configuration, or problems with your DNS settings.
In this comprehensive guide, we will explore effective troubleshooting techniques to resolve the ‘This site can’t be reached’ error in WordPress.
This error is significant, so it’s important to address it promptly. If you’re uncertain about the cause, we suggest starting with the first step, as it is the simplest, and then progressing through the guide.
Alternatively, you can use the links below to navigate directly to the specific solution you wish to implement.
- Verify Your Internet Connection
- Clear Your Browser’s Cache
- Temporarily Disable Your Firewall or Antivirus Software
- Reset Your VPN Connection
- Disable Your Proxy Server Settings
- Flush Your DNS Cache
- Change Your DNS Server Settings
- Reset TCP/IP Configuration
- FAQs: Simple Solutions to Fix the ‘This Site Can’t Be Reached’ Error in WordPress
1. Verify Your Internet Connection
When facing an error, it’s wise to start with the most straightforward solution, so ensure that you are connected to the internet.
If you don’t see any obvious issues with your connection, try restarting your internet. Just like rebooting a computer, this simple step can resolve various minor issues and help you get back online.
For optimal results, we suggest unplugging your router from the power source and waiting at least one minute before plugging it back in.
2. Clear Your Browser Cache
Downloading files from a WordPress hosting server may take some time.
To address this, most modern web browsers save files, data, and other content from the websites you visit. This allows the browser to load the cached content from your local device instead of downloading it again from a remote server.
This caching process speeds up website loading times, but it can occasionally lead to issues. For instance, cached content may become outdated or corrupted over time.
Fortunately, clearing your browser cache is a straightforward process. If you’re using Google Chrome, click on the three-dot menu icon in the upper-right corner.
Next, select ‘More Tools’ and then choose ‘Clear Browsing Data…’.
In the popup window that appears, check the box next to ‘Cached images and files.’
By default, Google Chrome will clear the entire cache.
Consider selecting a specific time range from the ‘Time Range’ dropdown in Chrome to clear only the cached content from that period.
You can also choose to check or uncheck additional options.
For instance, the ‘Browsing History’ option is checked by default, but you can uncheck it if you prefer to retain your browsing history.
Once you are ready, click on ‘Clear data.’
Google Chrome will clear the browser cache. After it’s done, try accessing the website again to check if the ‘This site can’t be reached’ error persists.
If you are using a different web browser, refer to our beginner’s guide on how to clear the browser cache in any browser.
3.Temporarily Disable Your Firewall or Antivirus Software
While antivirus and firewall plugins provide essential protection, they can sometimes block access to safe websites.
This issue often arises when your security settings are overly strict or when a website’s configuration triggers these security measures.
For example, if you are still in the process of building your WordPress site, you may not yet have an SSL certificate. Many firewalls will prevent access to sites lacking a valid certificate, which could be the source of the error.
To determine if a firewall or antivirus software is preventing the connection, temporarily disable the program. If the website loads successfully afterward, it indicates that the firewall or antivirus was causing the issue.
In such cases, we advise against completely disabling your security software.
Instead, it’s advisable to review the software’s settings to see if you can add the specific website to a whitelist. This allows you to resolve the error while still safeguarding against hackers, viruses, and other online threats.
If you’re unsure where to locate these settings, consult the software’s official documentation, forums, or social media channels for guidance. Depending on your software license, you might also reach out to customer support or the developer for assistance.
For further information on this subject, please refer to our guide on how to effectively request support and obtain it.
For additional advice on safeguarding yourself from hackers without encountering the ‘This site can’t be reached’ error, check out our comprehensive WordPress security guide.
4. Reset Your Virtual Private Network
A Virtual Private Network (VPN) can enhance your privacy, secure your data, and enable access to websites that are restricted or censored in your area.
If you’re using a VPN, your connection may drop or the VPN might not recognize your current IP address. While some VPNs can automatically reconnect when an issue arises, you may need to reconnect manually in some cases.
If you encounter the ‘site can’t be reached’ error while using a VPN, we suggest checking your VPN provider’s website or documentation for guidance on how to reset your VPN connection.
5. Disable Your Proxy Server
A proxy server acts as an intermediary between your device and the websites you want to visit. Many users employ these servers for added security or to cache data.
If your proxy server fails to connect to a website, you may see the ‘This site can’t be reached’ error. This error can also occur if you’re unable to connect to the proxy server itself.
In this situation, you can easily disable the proxy server. If you’re using a Mac, click the ‘Apple’ icon in the menu bar.
Next, select ‘System Preferences…’
In the window that appears, click on ‘Network.’
From the left-hand menu, choose the network for which you want to disable the proxy settings.
After that, click on the ‘Advanced…’ button.
In the new window, simply select the ‘Proxies’ tab.
You can now deselect all the protocols listed under ‘Select a protocol to configure.’
Finally, click the ‘OK’ button to save your changes. You can now attempt to visit the website to check if the error persists.
6. Clear Your DNS Cache
Similar to browser cache, your computer keeps a record of the IP addresses of all the websites you visit. This allows websites to load more quickly since the browser doesn’t need to look up the same IP address repeatedly.
However, the cached DNS information can become outdated. This can lead to a ‘site can’t be reached’ error, especially if the site has changed to a new domain name or if you’ve migrated WordPress to a different host.
By clearing your DNS cache, you’ll obtain the most current information about a website, including any new domain name or address.
To assist you, we’ve put together a comprehensive guide on how to clear your DNS cache for Mac, Windows, and Google Chrome.
7. Switch Your DNS Server
DNS functions like the internet’s phone book. Instead of listing people’s names and phone numbers, it lists domain names along with their corresponding IP addresses.
Your internet service provider automatically assigns you a DNS server. However, there are times when this server may be unavailable or may contain incorrect information.
When your browser cannot find the correct address for a website, you will encounter a ‘This site can’t be reached’ error.
You can resolve this issue by switching to a different public DNS server, like Google Public DNS. While you can choose any public server, keep in mind that the DNS provider can track all the websites you visit.
Many DNS providers also gather personal information, including your business email, name, and phone number.
Therefore, it’s wise to thoroughly research your DNS provider before making a decision.
Once you have identified the DNS server you wish to use, you can switch to it. On a Mac, click the ‘Apple’ icon in the toolbar and select ‘System Preferences…’.
In the window that appears, choose ‘Network’ and then click on the ‘Advanced…’ button.
Next, navigate to the ‘DNS’ tab.
In the bottom-left corner, click the ‘+’ button.
This will add a new DNS server entry with the address 0.0.0.0.
You can now enter the IP address of the public DNS server you want to use.
After entering the address, click the ‘OK’ button to save your changes.
This will return you to the previous window.
To activate your new DNS server, click the ‘Apply’ button.
Now, you can visit the website to check if the error message has been resolved.
8. Reset TCP/IP Settings
Transmission Control Protocol/Internet Protocol (TCP/IP) is a collection of protocols that govern how data is transmitted and received over the internet.
If there is an issue with your internet connection settings, renewing your TCP and IP protocols will restore them to their default configurations, potentially resolving the issue.
To reset TCP/IP settings on a Mac, click the ‘Apple’ icon in the menu bar, then select ‘System Preferences…’
In the window that appears, choose ‘Network’ and then click the ‘Advanced…’ button. Next, navigate to the ‘TCP/IP’ tab.
On this page, click the ‘Renew DHCP Lease’ button.
That’s all! You can now try accessing the website or blog to see if the ‘site can’t be reached’ error persists.
FAQs: Simple Solutions to Fix the ‘This Site Can’t Be Reached’ Error in WordPress
In this guide, we covered various methods to resolve the ‘This site can’t be reached’ error in WordPress. If you have further questions, this section addresses the most frequently asked questions regarding the ‘site can’t be reached’ error.
Why is my site displaying the message ‘This site can’t be reached’?
There are several reasons you might encounter this error message, but the code accompanying it can help you identify the underlying issue.
Let’s examine these codes in detail and understand their implications for your WordPress site.
1. ERR_CONNECTION_RESET
If you see the ERR_CONNECTION_RESET code alongside the ‘site can’t be reached’ error, it usually indicates a problem with your internet connection.
The most common issue is an internet outage, but various software and settings can also disrupt the connection and trigger an ERR_CONNECTION_RESET. For instance, VPNs and proxy servers may sometimes lead to this error code.
2. DNS_PROBE_FINISHED_NXDOMAIN
The Domain Name System (DNS) allows you to access websites by linking a user-friendly domain name, like www.CanadaCreate.com, to the server’s ID where the site is hosted.
You will encounter this error code if Google Chrome is unable to resolve the domain name or address of the website you are trying to visit.
Since it cannot establish a connection, the browser concludes that the domain name does not exist, displaying a DNS_PROBE_FINISHED_NXDOMAIN error code, where ‘NXDOMAIN’ signifies ‘non-existent domain.’
Seeing this error message alongside ‘site can’t be reached’ typically indicates an issue with your DNS configuration.
For more information on this error, check out our comprehensive guide on resolving the DNS_PROBE_FINISHED_NXDOMAIN issue.
How Can I Resolve the ‘This Site Can’t Be Reached’ Error in WordPress?
We suggest starting with simple and quick solutions, such as restarting your internet connection and clearing your browser and DNS cache.
If you have a firewall, antivirus software, VPN, or proxy server, it’s advisable to review their settings, as these can cause the error. You might also try disabling these services temporarily to see if that resolves the issue.
Some users have successfully fixed the problem by changing their DNS server settings and resetting their TCP/IP configurations.
We hope this article has helped you understand how to fix the ‘this site can’t be reached’ error in WordPress. Additionally, you can explore our guides on resolving WordPress RSS feed issues and fixing critical errors in WordPress.
If you found this article helpful, please consider subscribing to our YouTube Channel for WordPress video tutorials. You can also connect with us on Twitter and Facebook.


