A sluggish or intricate checkout experience can negatively impact your WooCommerce store’s revenue. I’ve frequently observed customers adding items to their cart, proceeding to checkout, and then abandoning the purchase.
Minor delays or distractions during checkout can significantly contribute to lost sales. The upside is that resolving this issue doesn’t demand extensive effort.
I’ve assisted numerous WooCommerce store owners in implementing straightforward adjustments that resulted in expedited checkouts and enhanced performance, including increased completed orders, improved conversion rates, and more satisfied clientele.
This guide will provide simple techniques to accelerate your WooCommerce checkout. These tried-and-true suggestions do not necessitate any coding expertise and can significantly improve the overall functionality of your store.
Why Improving the Checkout Process Speed Can Improve Revenue
Nobody appreciates a lengthy checkout. Similar to the annoyance of waiting in a lengthy queue at a physical store, a cumbersome or perplexing online checkout can deter prospective purchasers.
If you operate a WooCommerce store, accelerating your checkout process isn’t merely advantageous; it’s among the most straightforward methods to minimize cart abandonment and augment sales.
Here’s the rationale:
- Expedited checkout = improved customer satisfaction:Online consumers anticipate swift transactions. Streamlining the procedure prevents customer frustration and reduces the likelihood of them seeking alternative stores.
- Fewer actions translate to fewer abandonments:Each additional click or form field presents shoppers with an opportunity to exit. By accelerating the procedure – such as reducing form fields, enabling guest checkout, or implementing a one-page checkout – you eliminate obstacles to purchase completion.
- A smooth checkout process is especially important for mobile users.Lengthy checkouts are difficult on smaller screens. A quick, mobile-optimized checkout allows smartphone users to complete purchases without frustration.
- It also increases customer confidence:A slow or problematic checkout process can raise doubts about site security. A fast, reliable checkout enhances trust in your online store.
Regardless of your product type—physical goods, digital downloads, or services—optimizing your checkout can boost revenue.
Fortunately, there are several proven strategies to accelerate your WooCommerce checkout and decrease cart abandonment.
Use these links to navigate directly to specific tips:
- Tip 1: Review Your Existing WooCommerce Checkout Process
- Tip 2: Choose Fast WooCommerce Hosting and Plugins
- Tip 3: Minimize Checkout Form Fields and Steps
- Tip 4: Provide a Guest Checkout Option
- Tip 5: Implement a Slide-Out Side Cart
- Tip 6: Enable One-Click Checkout
- Tip 7: Allow Customers to Securely Store Credit Card Information
- Tip 8: Ensure a Mobile-Optimized Checkout Experience
- Tip 9: Test and Optimize Your WooCommerce Checkout
- ✨Bonus Tips: Quick Wins for a Lightning-Fast Checkout
- Frequently Asked Questions About Speeding Up WooCommerce Checkout
Tip 1: Audit Your Current WooCommerce Checkout
Before implementing changes, evaluate your current WooCommerce checkout. Identify any slow or malfunctioning elements.
The optimal approach involves personally simulating a first-time customer’s experience through testing.
Initiate this by putting a product into your cart and proceeding through the complete checkout. Note the number of steps, simplicity of the layout, and presence of needless fields.
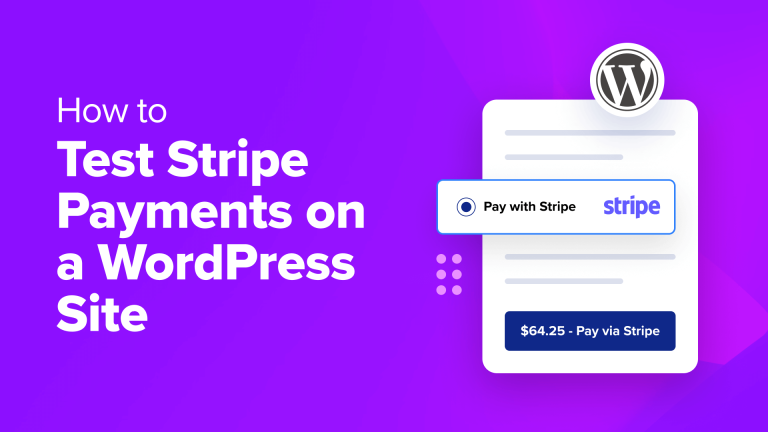
💡 Expert Tip: See our guide on how to test Stripe payments on a WordPress site.
Trying the process on both desktop and mobile is advisable. Given the prevalence of mobile shopping, ensure a seamless mobile checkout.
Browser diversity (Chrome, Safari, etc.) in testing is beneficial; alternatively, solicit feedback from another person. Fresh eyes often reveal overlooked issues.
Document any points of friction encountered during testing, such as slow page loads, excessive required fields, confusing design, or poor mobile adaptation.
These identified friction points represent key areas for enhancement, facilitating a quicker, more intuitive checkout.
Evaluating the speed and effectiveness of your checkout is smart. Utilize tools such as Google PageSpeed Insights to examine load times and pinpoint potential delays.
If you don’t know how to do that, just see our article on how to properly run a website speed test.
Should issues surface, our comprehensive guide on improving WooCommerce speed and performance offers solutions.
While direct user testing reveals obvious issues, analytics provide insights into specific points of customer drop-off.
I suggest using MonsterInsights, a robust WordPress analytics plugin featuring built-in eCommerce tracking. It simplifies intricate Google Analytics data, presenting it as easily digestible reports directly within your WordPress dashboard.
Refer to our beginner’s guide for comprehensive instructions on installing Google Analytics in WordPress.
Using MonsterInsights’ funnel reports, you can track the number of users adding items to their cart, progressing to checkout, and successfully completing their purchase.
This simplifies identifying areas that perform well and those requiring enhancement.
Follow our eCommerce tracking guide for setup instructions; it only takes a few minutes to implement on your store.
Tip 2: Choose Fast WooCommerce Hosting and Plugins
Before optimizing your checkout process, examine your site’s underlying infrastructure. Your hosting provider and plugins significantly impact the loading speed of your entire store, including the checkout page.
If your web hosting is slow, then your whole store—including the checkout—will load slowly. That’s why I recommend choosing a provider that offers WooCommerce-optimized hosting.
SiteGround and Hostinger are both great choices. They are designed to keep WooCommerce stores running smoothly with features such as server-level caching, optimized databases, and excellent uptime guarantees.
We use SiteGround for our own website. You can review our study explaining CanadaCreate’s transition to SiteGround.
Remember that the ideal hosting solution varies based on your store’s size, traffic volume, and financial resources. For additional options, see our guide featuring top WooCommerce hosting providers.
Exercise caution regarding plugin selection, as numerous online stores experience performance degradation due to resource-intensive or poorly developed plugins, which significantly impacts checkout speed.
Therefore, I advise using lightweight, dependable plugins that address specific issues without introducing unnecessary bloat.
For instance, FunnelKit facilitates quicker checkouts, while OptinMonster can retrieve abandoning visitors without compromising site speed. These plugins feature efficient code, regular updates, and a focus on speed.
Our comprehensive list of the best WooCommerce plugins and extensions offers more reliable choices.
Tip 3: Reduce Payment Form Fields and Checkout Steps
Each additional field in your checkout form presents another opportunity for customer frustration and cart abandonment. Streamlining your checkout form can substantially improve your store’s conversion rates and accelerate the checkout procedure.
At the very least, retain only the essential fields required for order completion. These typically encompass:
- Name
- Email address
- Shipping address (for physical products)
- Payment details
If you currently gather details like company names, phone numbers, or order comments, evaluate their necessity before keeping them.
The number of screens directly impacts checkout speed. One-page checkouts streamline the process by consolidating everything onto a single screen, eliminating multi-step navigation.
Merchant is an excellent tool for implementing this. It provides a fast, conversion-focused, mobile-optimized one-page checkout template specifically for WooCommerce.
This plugin also includes a visual builder for full customization of your checkout page. You can modify the layout, include your logo, and precisely control the displayed form fields, ensuring brand consistency.
FunnelKit Builder presents another solid option. This free plugin facilitates the creation of elegant, efficient checkout pages featuring trust seals, product guarantees, customer testimonials, and other elements.
Consult our tutorial on WooCommerce checkout page customization for guidance.
Offering express checkout is also strongly advised. This allows customers to bypass lengthy forms and complete payments with a single tap using services like Apple Pay, Google Pay, or PayPal.
It’s a simple method for accelerating the checkout and boosting your conversion rate.
Refer to our detailed guide on adding express checkout buttons in WooCommerce for quick setup instructions.
Tip 4: Offer Guest Checkout
Many customers are unwilling to create accounts for single purchases; requiring account creation often results in abandoned carts.
Enabling guest checkout removes a significant obstacle. Fewer steps translate to a quicker experience for first-time visitors seeking to finalize their purchases promptly.
To activate guest checkout, navigate to theWooCommerce » Settings » Accounts & Privacyarea within your WordPress admin panel and select the ‘Guest checkout’ option.
Consider keeping the subsequent option enabled to allow account creation post-purchase, ensuring it’s optional, not mandatory.
Tip 5: Add a Slide-In Side Cart
Implementing a slide-in side cart offers a subtle yet effective method to accelerate the buying process.
Rather than directing shoppers to a dedicated cart page, it enables them to view and modify their selections without navigating away from their current screen. This streamlines the process, maintaining a swift and direct route to checkout.
I suggest using the Merchant plugin for this, as it provides an integrated slide-in cart functionality.
Upon product addition, the cart smoothly appears from the side, showcasing the order details and offering immediate options to adjust quantities or remove products—all without requiring a complete page refresh. Additionally, users can promptly proceed to checkout by clicking the ‘Checkout’ button.
This strategy maintains customer engagement and simplifies their journey to checkout, minimizing clicks and reducing potential obstacles.
For a more tailored solution, explore the FunnelKit Cart plugin, which also features a slide-in cart. This enables you to customize the cart’s appearance to align with your brand, incorporate upselling strategies, and configure triggers to determine its display timing and location.
For further guidance, consult our guide on implementing a sliding side cart in WooCommerce.
Tip 6: Enable One-Click Checkout
One-click checkout allows customers to finalize a purchase with a single click, streamlining the process for returning and logged-in users who have previously stored payment details.
Its effectiveness stems from eliminating unnecessary steps that can hinder the purchasing process.
The easiest way to enable one-click checkout in WooCommerce is by using FunnelKit Cart.
It provides a robust solution for developing a simplified checkout process, performing optimally on both desktop and mobile devices.
FunnelKit Cart integrates with popular payment platforms like Google Pay and Apple Pay, ideal for facilitating one-click transactions within your online store.
Refer to our detailed guide on setting up one-click checkout in WordPress for precise instructions.
Tip 7: Allow Customers to Save Credit Card Details
Enabling customers to save their credit card information expedites future purchases, preventing them from repeatedly entering payment details for each transaction.
This function integrates smoothly with well-known payment gateways such as Stripe or PayPal, both of which provide secure storage options for customer credit card information for subsequent transactions.
While saving credit card information is practical, ensuring its security is crucial. To maintain the safety of customer data, consider the following:
- PCI Compliance:Confirm your payment processor’s PCI-DSS compliance. These regulations protect credit card data during transactions. Stripe and PayPal both comply, eliminating on-site card storage.
- SSL Encryption: SSL encrypts sensitive transaction data, including credit card numbers. Verify your site has an SSL certificate installed.
The FunnelKit Stripe plugin lets customers securely save payment information with Stripe.
This plugin integrates Stripe with WooCommerce, enabling customers to securely store payment details for quicker future checkouts.
Navigate to theWooCommerce » Settings » Payments » Stripe Gateway page and check the ‘Enable Payment via Saved Cards’ box.
Once you do that, click the ‘Save Changes’ button.
When customers select Stripe, their data is securely stored within Stripe’s system; the plugin manages PCI compliance.
Tip 8: Optimize Checkout for Mobile Devices
Given the prevalence of mobile shopping, prioritize a fast WooCommerce checkout on phones and tablets.
Begin creating a mobile-friendly checkout by using a responsive WooCommerce theme. These themes adapt to screen sizes for easier checkout.
Themes such as Botiga and Neve feature mobile-optimized designs, making them strong contenders for your online storefront. Refer to our list of top WooCommerce themes for further alternatives.
Using large, easily tappable buttons and maintaining a streamlined, well-organized checkout design is highly recommended. This greatly simplifies the purchase process for your clientele, particularly on mobile devices.
If you’re using the FunnelKit Builder or Merchant to customize your checkout page, you’re already a step ahead.
These plugins are inherently optimized for mobile platforms, ensuring your checkout form appears visually appealing and operates flawlessly across all screen dimensions.
Be cautious of popups and other potential distractions that might disrupt the checkout flow. These can be especially irritating on smaller screens.
If you’re leveraging OptinMonster for popup creation, you’re in an advantageous position. It provides robust display rules and conditional logic.
This empowers you to configure your popups to be hidden on mobile devices or during the checkout phase, thereby preserving a seamless and concentrated user journey.
Consult our comprehensive guide on creating a mobile-friendly WordPress site for further guidance.
Tip 9: Test and Optimize Your WooCommerce Checkout
After implementing adjustments to your WooCommerce checkout, it’s crucial to fine-tune and assess the effectiveness of the enhancements.
Conducting A/B tests is advisable for contrasting various iterations of your checkout page. Consider testing modifications such as altered button text, rearranged form fields, or a simplified overall structure.
A simple method involves Nelio AB Testing, a free, user-friendly plugin that facilitates split testing directly within WordPress.
Consult our guide on performing A/B split testing in WordPress for detailed instructions.
To assess the effectiveness of your modifications, monitoring user behavior on your checkout page is essential.
I advise utilizing MonsterInsights, the tool highlighted in Tip 1, for this purpose.
It offers insights into vital eCommerce metrics—cart abandonment, conversion rates—straight from your WordPress dashboard. Track data over time to evaluate the tangible impact of alterations.
Refer to my comprehensive tutorial on activating customer tracking in WooCommerce for complete details.
Checkout optimization is a continuous effort. Persistent testing and monitoring lead to gradual enhancements in your store’s performance.
✨Bonus Tips: Swift Solutions for an Ultra-Fast Checkout
If you’ve already implemented the primary recommendations outlined in this article, congratulations! Let’s further refine the process.
These rapid enhancements can further accelerate your WooCommerce checkout, enhancing the experience for shoppers and boosting profitability.
- Use a Content Delivery Network: A CDN caches static site elements—images, scripts—across a global server network. This accelerates checkout page loading times for international buyers. Cloudflare is a recommended CDN option. We use it on all our websites, too!
- Install a Caching Plugin: Caching saves page versions, so returning visitors see instant loads. Be sure to exclude cart/checkout pages to prevent problems. WP Rocket and similar plugins simplify this.
- Clean Up Unused Plugins: Excess plugins add bloat, slowing checkout. Take time to deactivate and remove plugins you don’t actively use.
- Optimize Product Images: Large, uncompressed images can drag your checkout page down. Use image optimization tools like Adobe Photoshop or Optimole to compress images without losing quality.
Even minor adjustments such as these can significantly improve your store’s checkout speed, leading to more completed sales and more satisfied shoppers.
For additional performance advice, see our guide on speeding up your WordPress website.
Frequently Asked Questions About Speeding Up WooCommerce Checkout
CanadaCreate often receives inquiries from readers about accelerating WooCommerce stores. Here are answers to the most common questions.
How do I speed up my WooCommerce checkout page?
You can speed up your WooCommerce checkout by reducing unnecessary form fields, enabling guest checkout, and using a one-page layout. Express checkout options like Apple Pay or Google Pay also allow returning users to skip typing and complete purchases faster.
Your hosting choice significantly impacts speed; select a provider optimized for WooCommerce and use streamlined plugins. Solutions such as Merchant and FunnelKit offer integrated features like quick checkout templates and a side cart that slides into view.
Is it possible to accelerate WooCommerce checkout without making accounts mandatory?
Indeed! Allowing guest checkout is a simple way to smooth the path to purchase. Many customers avoid creating accounts for single purchases, and requiring one can cause them to abandon their carts.
Activating guest checkout requires only a few clicks within your WooCommerce settings.
How can you determine if your WooCommerce checkout process is too slow?
Begin by personally testing the checkout on desktop and mobile devices, noting the number of required steps and the page load times. You could also use tools such as Google PageSpeed Insights to evaluate performance.
For more thorough analysis, consider using MonsterInsights to monitor cart abandonment. This will reveal precisely where customers leave the process, highlighting potential problems that may not be apparent from manual testing.
I hope this article helped you learn how to create a faster checkout in WooCommerce. You may also want to see our tutorial on how to offer shipment tracking in WooCommerce and our guide on WooCommerce SEO made easy.
If you liked this article, then please subscribe to our YouTube Channel for WordPress video tutorials. You can also find us on Twitter and Facebook.